There’s something magical about the first green vegetables of spring. After months of stews and root vegetables, the sight of leeks, asparagus, and peas at the market feels like a deep breath of fresh air. It’s the culinary equivalent of throwing off a heavy winter blanket and stepping into the sunshine. This Primavera Orzotto is my celebration of that moment—bright, comforting, and full of life. It’s a riff on spring risotto, but with a laid-back twist: orzo. Unlike risotto, which demands constant stirring and your full attention, orzo is much more forgiving, letting you ease into spring with a dish that’s as relaxed as the season should be.
Watch how this vibrant, cozy dish comes together—no constant stirring required.
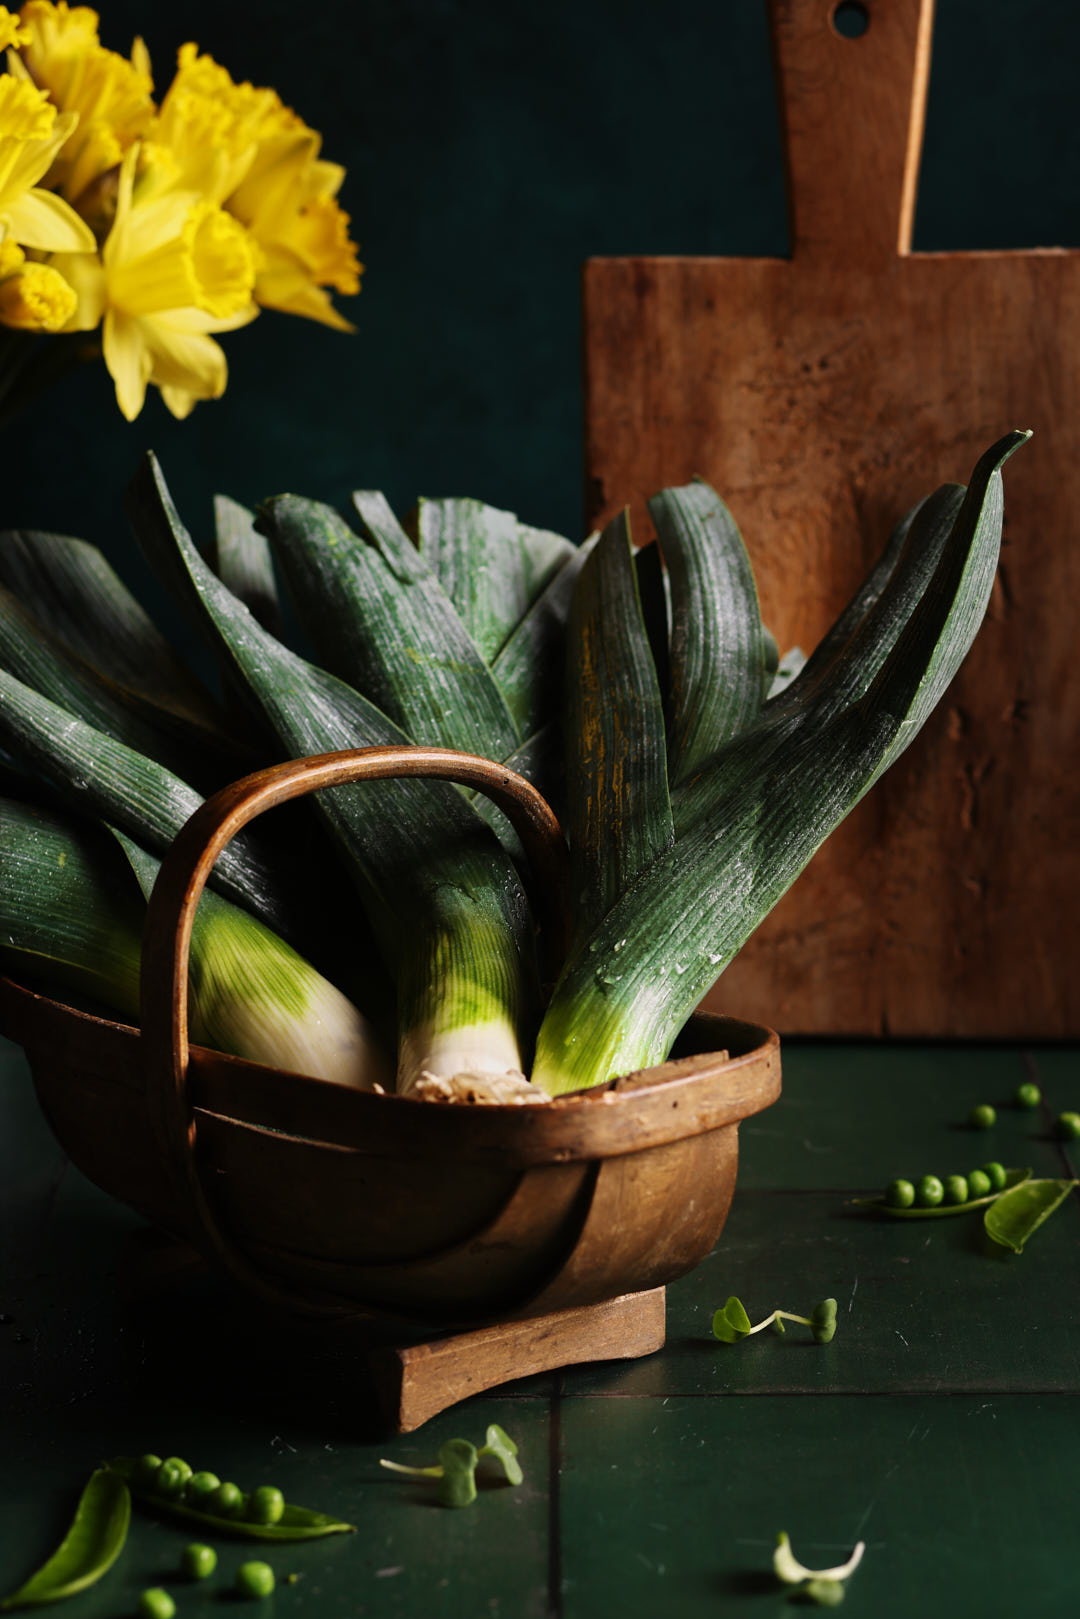
Why I Love Leeks (and How to Clean Them)
There’s something so elegant about leeks—their deep green tops fading into pale, creamy stems, still glistening with dew. They’re one of the first signs of spring in the market, and one of my favourite ingredients to cook with this time of year.
Leeks have a gentle, sweet onion flavour that turns beautifully mellow when sautéed. They’re the quiet hero of this dish, forming a rich, savoury base without overpowering the other vegetables.
But as gorgeous as they are, leeks are notorious for hiding grit and sand between their tightly packed layers. To clean them properly, I slice them into rounds, then submerge them in a big bowl of cold water. Swish them around with your hands to loosen any trapped dirt, then let them sit for a moment. The grit will sink to the bottom—just be sure to lift the clean leeks out with your hands or a slotted spoon. Don’t drain the bowl, or you risk pouring the sand right back over them.
A little extra care at the beginning goes a long way—and ensures every bite of this Primavera Orzotto is silky, clean, and full of spring flavour.
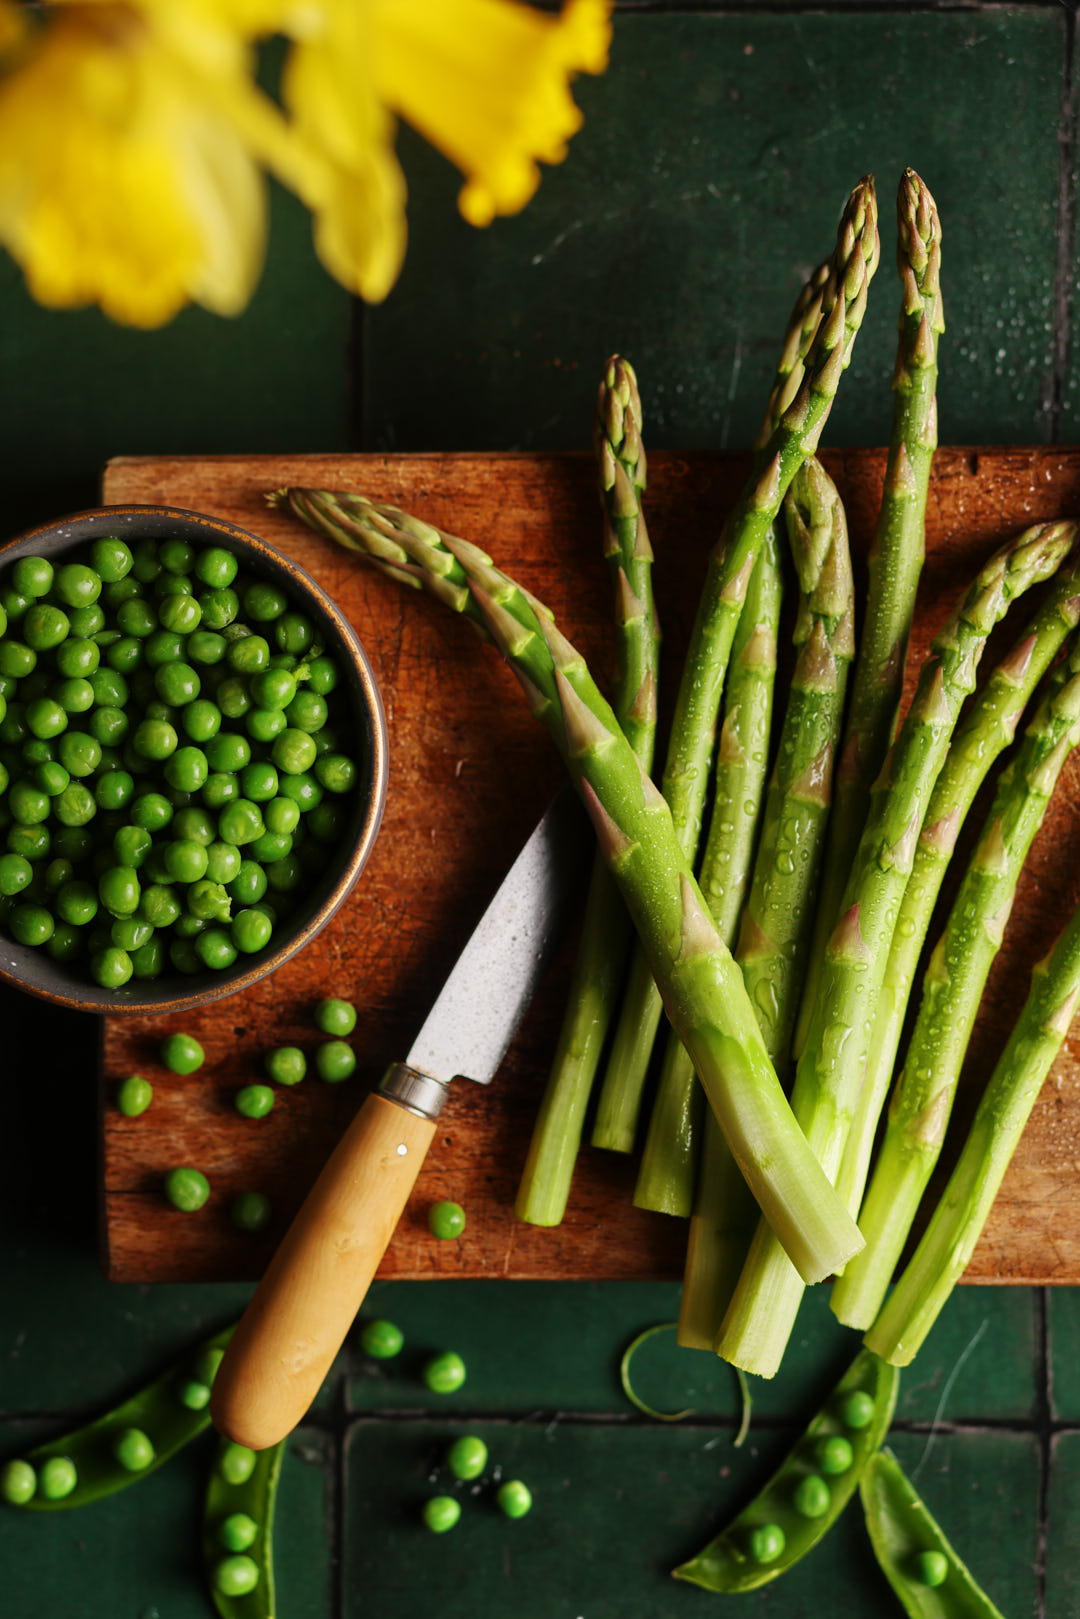
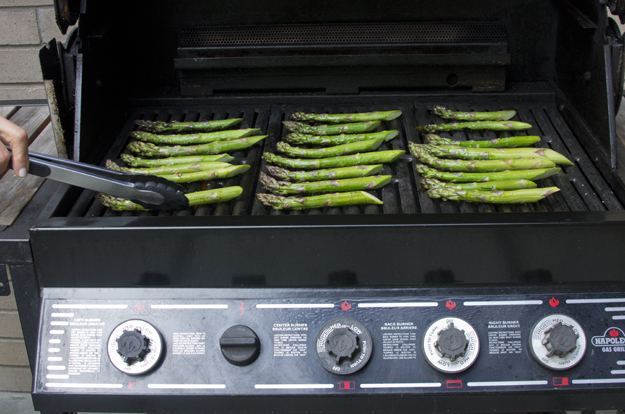
Choosing Asparagus (Yes, Size Matters)
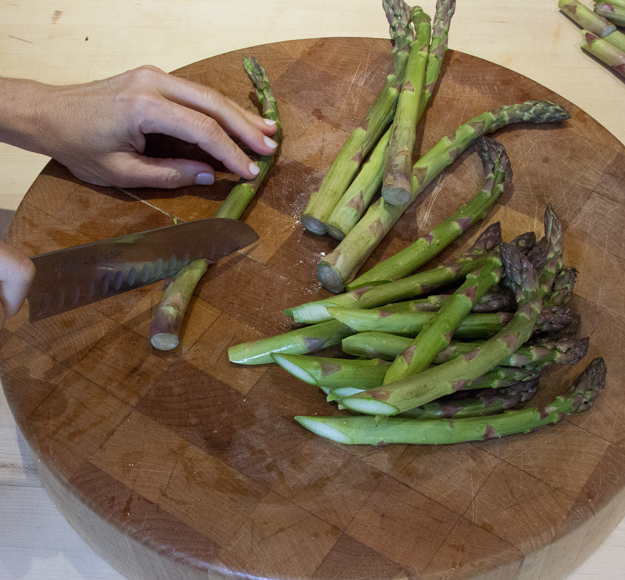
I have some pretty strong opinions about asparagus—especially in spring. I never rush to buy the first pencil-thin stalks that show up early in the season. They might look dainty, but they’re often grassy and underwhelming in flavour. I wait patiently for the thicker spears to appear. They’re sweeter, more tender, and have a lovely meaty texture that stands up beautifully in a dish like this.
If I’m not cooking them the same day, I store the bunch upright in a jar or glass with a couple inches of cold water in the bottom—just like a bouquet. I loosely drape a plastic bag over the top and pop it in the fridge. This keeps the ends from drying out and helps the asparagus stay crisp and fresh for a few extra days.
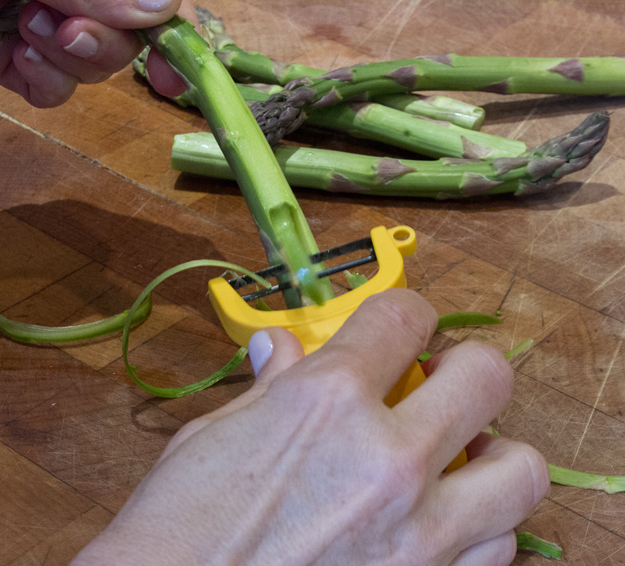
One more tip: I always peel the bottom inch or two of each spear with a vegetable peeler. It’s a small step, but it makes a big difference in tenderness—and gives the asparagus a polished look that feels just a little extra special.
Fresh or Frozen Peas? Here’s the Deal
Unless you’re at the farmers’ market buying freshly shelled peas that were picked that morning (or maybe the day before)… don’t bother. Truly fresh peas are a delight—but they’re rare and fleeting.
For this recipe (and most recipes, honestly), frozen peas are the way to go. They’re flash-frozen at peak ripeness, which means they keep their bright colour, sweet flavour, and that perfect little pop. Best of all, you don’t even need to thaw them—just stir them in at the very end, and they’ll warm through in seconds.
Keys to Success for Primavera Orzotto
Start with a flavourful stock. Since the orzo absorbs so much liquid, the broth you use will make or break the dish. Homemade or high-quality store-bought stock is ideal—chicken or veggie both work beautifully.
Add asparagus later. To keep it tender and bright green (not mushy or dull), stir in chopped asparagus partway through cooking, not at the beginning.
Save the peas for last. Whether fresh or frozen, peas only need a minute or two of heat to warm through. Add them at the very end to preserve their sweet flavour and signature pop.
Frozen peas are perfect. Don’t stress about shelling fresh ones—frozen peas are harvested at peak ripeness and flash-frozen. They thaw in seconds and keep their lovely texture.
Let orzo do the work. Unlike traditional risotto, which needs near-constant stirring, orzo is much more hands-off. Stir occasionally and enjoy the relaxed pace.
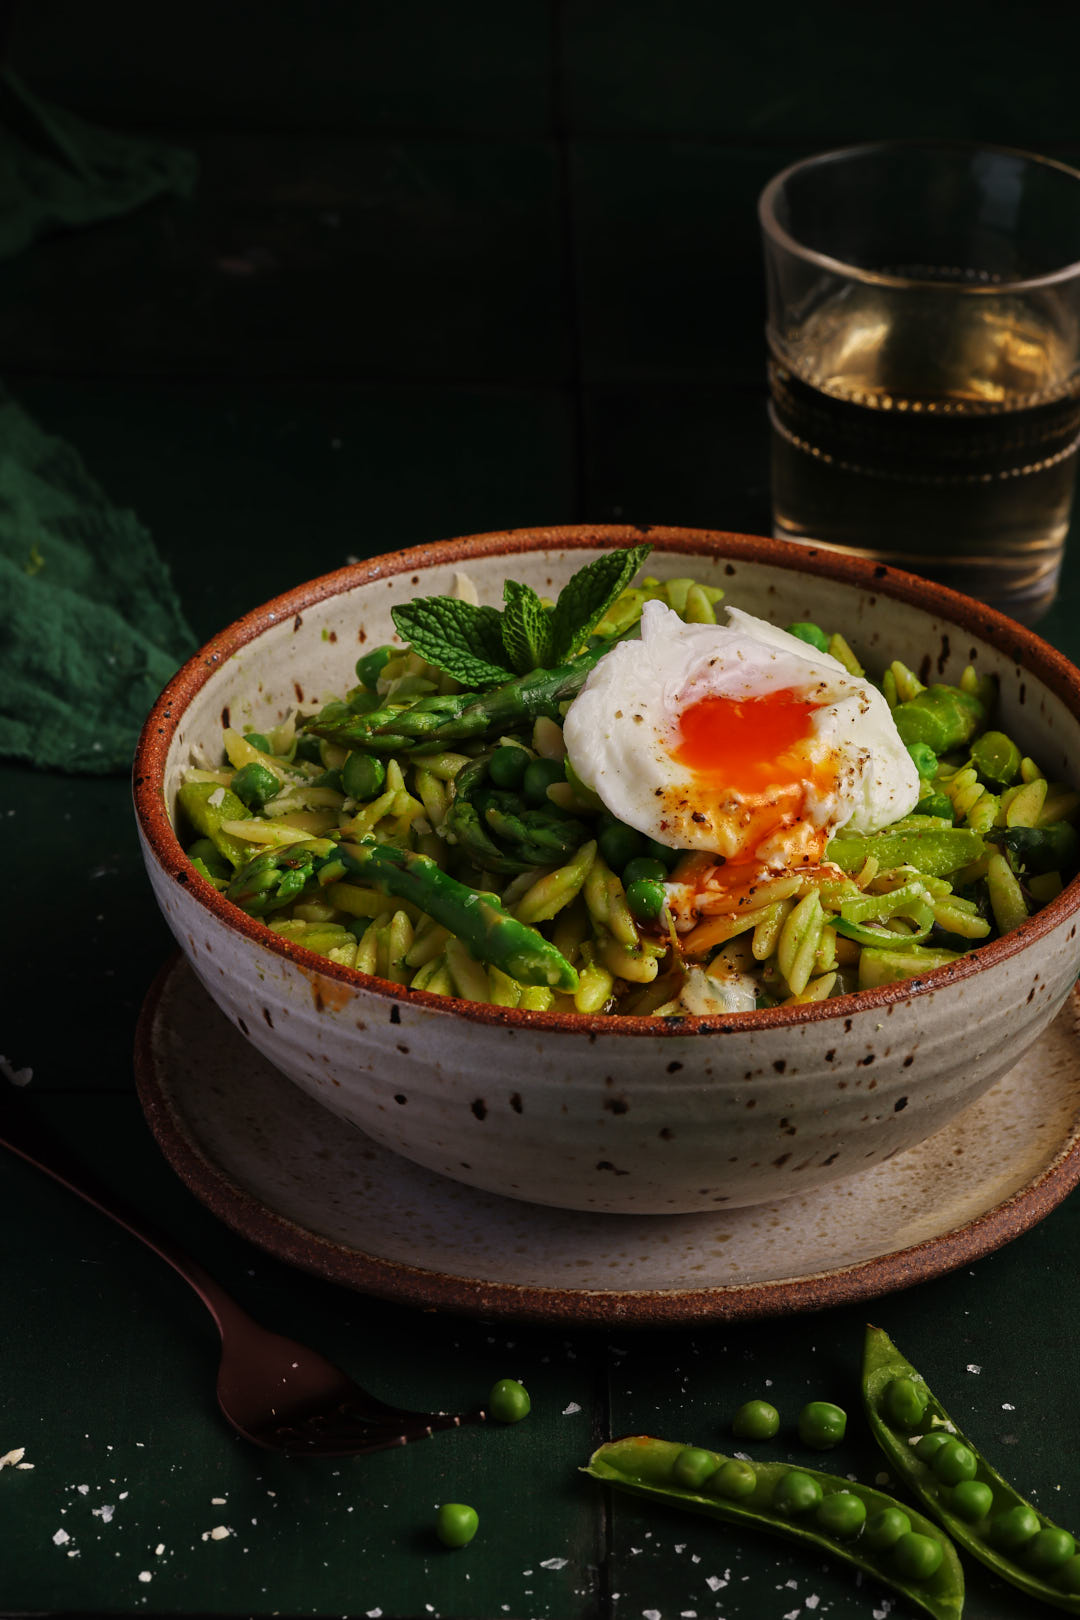
Primavera Orzotto
Welcome spring with a bowl of Primavera Orzotto—where velvety orzo takes the place of rice in this light yet creamy twist on risotto.
170gramsfrozen green peas,about 1 cup, no need to thaw
1tablespoon lemon juice
113gramschicken or vegetable stock,about 1/2 cup
1Tablespoon olive oil
Orzotto
1large leek, white and light green part, thinly sliced
1teaspoonunsalted butter
1 teaspoonolive oil
280gramsdried orzo, about 1 1/2 cups
450gramschicken or vegetable stockabout 2 cups
340gramsasparagus, trimmed and cut into 2 inch pieces,about 1 bunch
225gramschicken or vegetable stockabout 1 cup
170gramsthawed frozen peasabout 1 cup
Garnish
28gramsgrated Parmesan cheese
Instructions
Make Green Stock
Place parsley leaves, frozen peas, lemon juice, vegetable or chicken stock to blender. Puree until smooth. Stream in olive oil at very end of blending time. Set green stock aside.
Make Orzotto
Fill a medium sized bowl with cold water. Place sliced leeks into bowl and use your hands to swish the leeks around. Remove leeks from bowl and discard sandy water.
Heat a large, high sided skillet or pot over medium heat. Add butter and olive oil. Add leeks and saute over medium heat for 3-4 minutes. If they start to burn, add a few Tablespoons of water.
Add orzo and saute for 1 minute until all the grains are coated in oil. Add 2 cups of stock and reduce the heat to medium-low to maintain a gentle simmer. Cook, stirring occasionally so the orzo doesn’t stick to the bottom of the skillet, until most of the liquid is absorbed, about 6 minutes.
Add asparagus and an additional cup of stock and continue cooking for another 4 minutes, stirring every minute or so.
Add green stock and peas and continue cooking for another 2 minutes.
I have never understood the appeal of traditional couscous. It simply does not have enough texture or heft for me. Even when steamed and fluffed properly, so that the grains stay separate, it fails to satisfy me. I like my carbs with a bit of bite to them. Israeli couscous is more my jam. It is dense with a bouncy, chewy texture. I had always assumed that Israeli couscous was just bigger balls of regular couscous. I only recently learned the true difference.
Traditional couscous is actually tiny ground pasta made from semolina flour. It is made by rubbing semolina between wet hands until teeny-tiny balls are formed. The couscous is then dried and steamed. Israeli couscous is also made from semolina flour, but the similarities end there. Israeli couscous is made by mixing semolina flour with water, into a dough. The dough is then machine extruded through a round mould, about 1 millimetre in size. These tiny pearls are then toasted dry, which adds a nutty flavour.
Traditional couscous has been around, some believe, since the 9th century, but Israeli couscous is just a baby. It only came into existence in the 1950’s. Following the War of Independence in 1948, many immigrants arrived in the newly formed country from all over the Middle East. Most of them relied on rice as a staple in their cuisine, but there were rice shortages. Israel’s first Prime Minister, David Ben-Gurion, asked the Osem food company to develop something that they could substitute for their beloved rice. They created “Ptitim“. It was nicknamed Ben Gurion rice, since it was originally extruded in the shape of rice grains. They later introduced a round version which they called Israeli couscous.
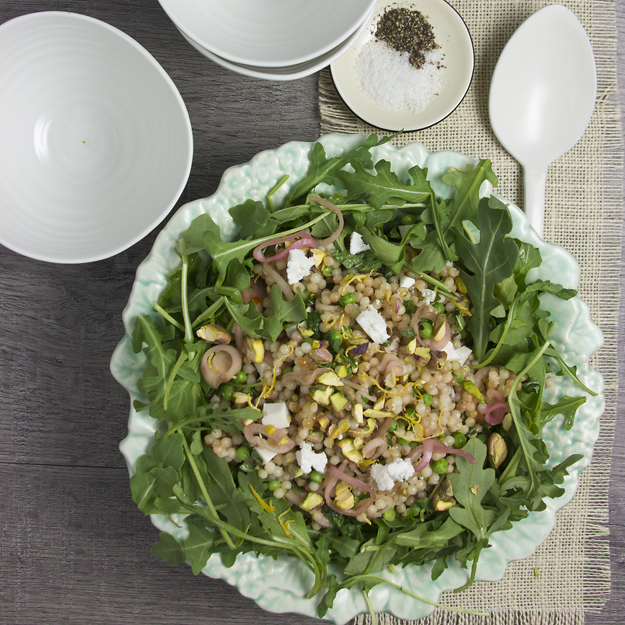
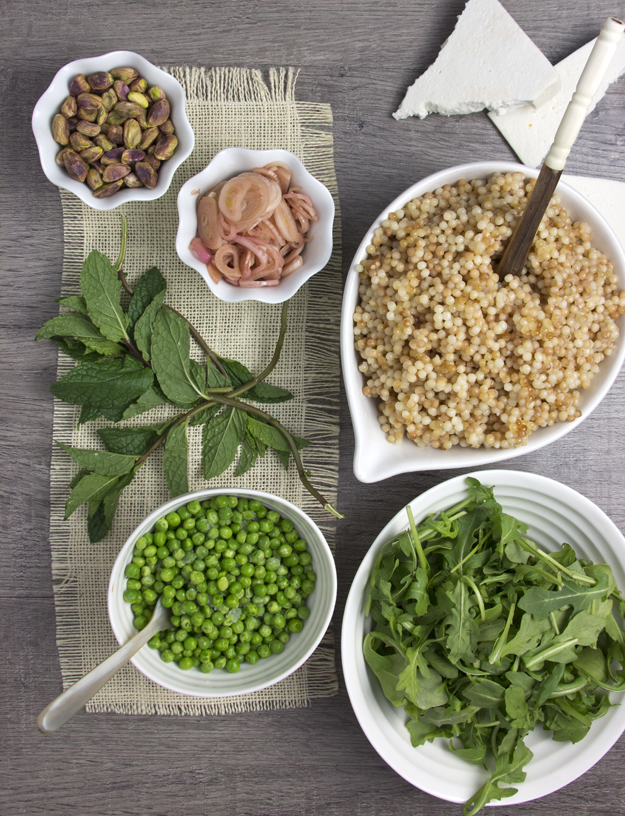
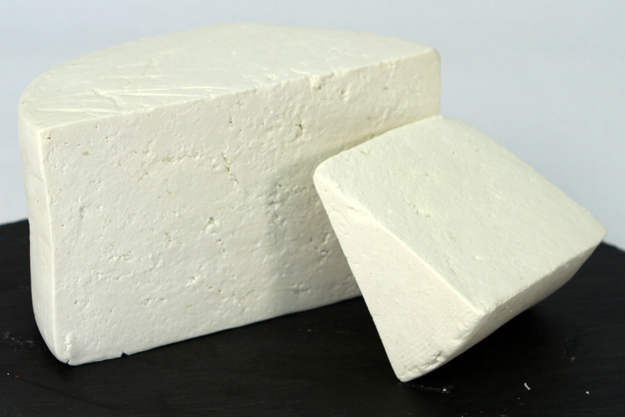
This delicious salad is my adaptation of a Cook’s Illustrated recipe. I have only made a slight change. I substituted ricotta salata for the feta cheese they suggested. I prefer the drier texture and less salty taste of ricotta salata. Many Italian grocers carry it. Feel free to use feta if you like, or even some crumbled goat cheese, if that’s your thing.
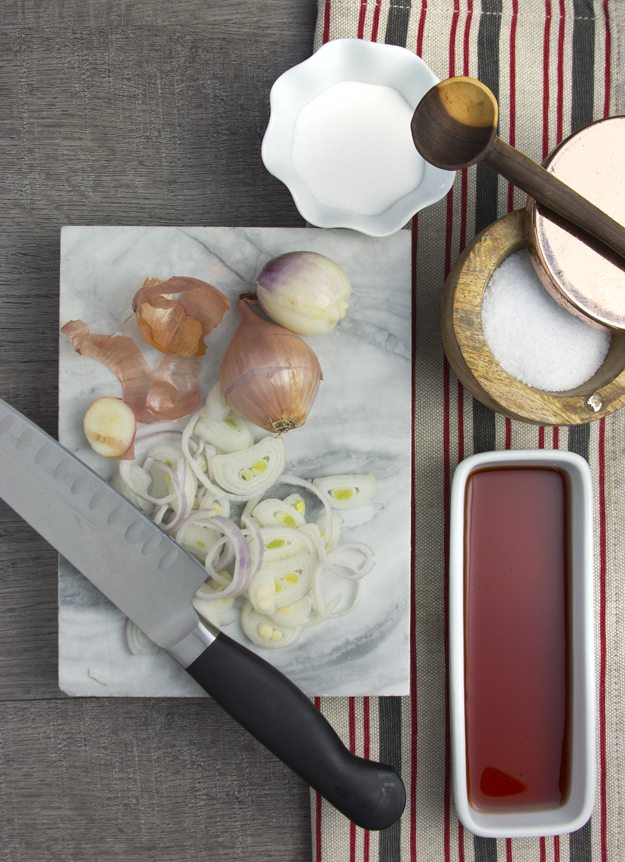
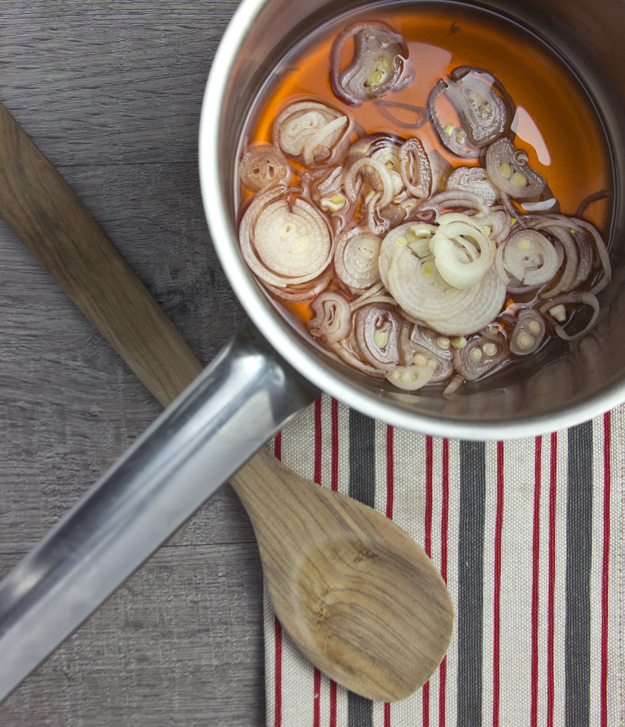
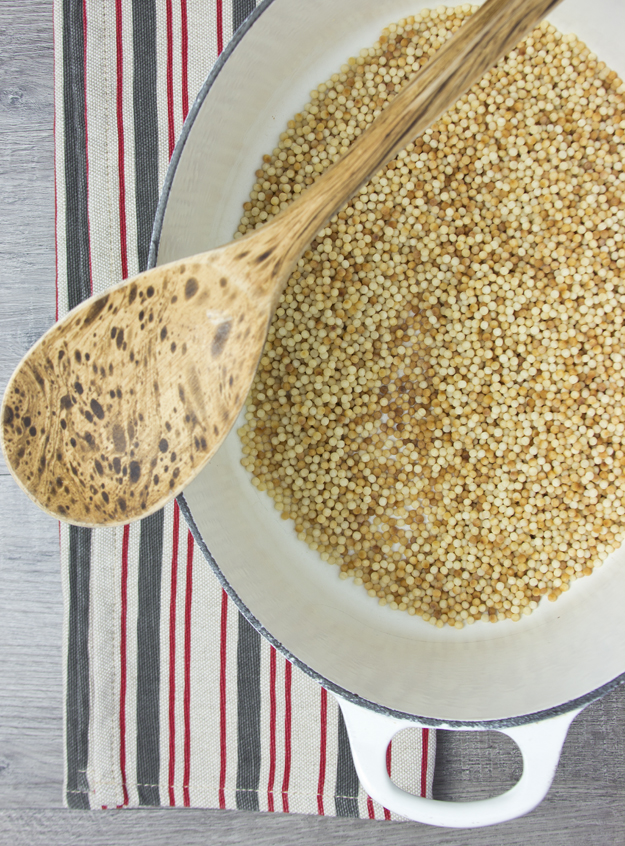
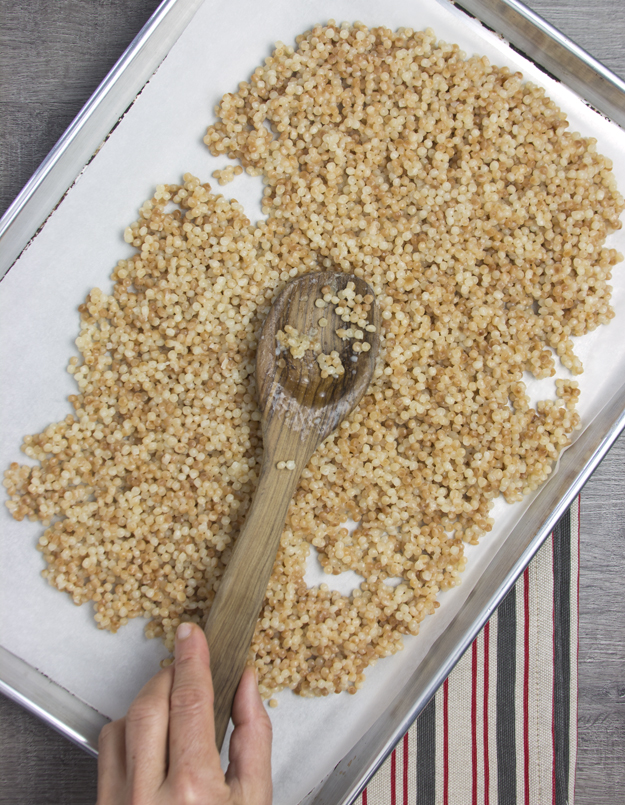
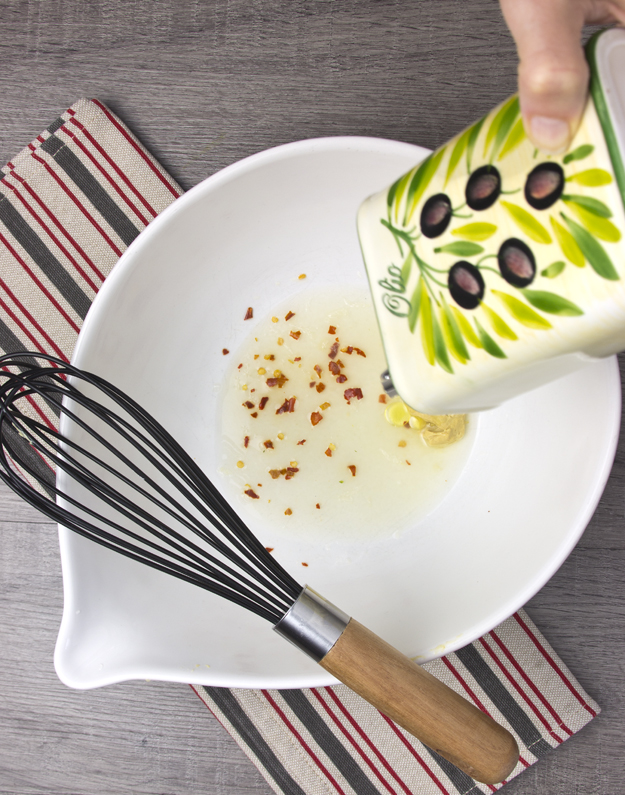
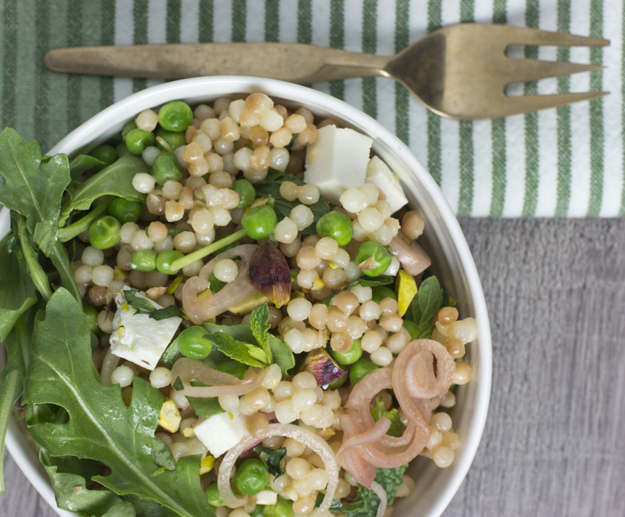
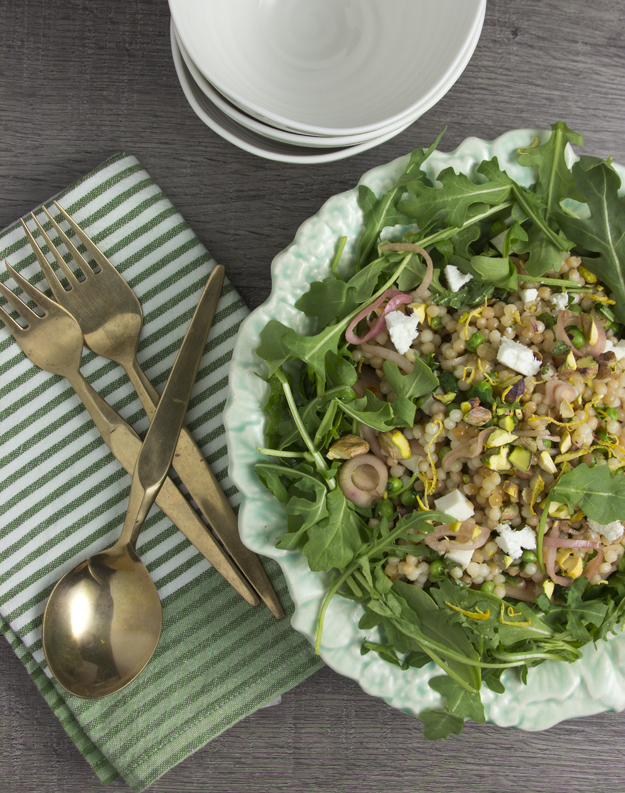
Begin with pickling the shallots. Nothing too complicated here. You will need red wine vinegar, sugar, a pinch of salt and some thinly sliced shallots. Simmer vinegar, sugar and salt until the sugar dissolves. Add shallots, turn off heat, cover pot and let macerate for 30 minutes. That’s it. I always thought pickling was so complicated. To properly cook Israeli couscous, begin by sauteeing in a bit of olive oil until about half the grains turn brown. Then add water and a pinch of salt and bring to a boil. Reduce to a simmer and cook covered for 12 minutes. The ratio of Israeli couscous to water is 1:1.25. (For every cup of couscous, add 1¼ cups water)Once cooked, spread couscous out on a baking sheet to allow it to cool before tossing with other salad ingredients. Prepare the dressing. The mild flavour of couscous can stand up to a bracing dressing of Dijon, lemon juice, red pepper flakes and olive oil.Then it’s simply a matter of assembly. I thawed some green peas (no cooking necessary), drained the pickled shallots, washed some baby arugula and mint, toasted and chopped pistachios and diced up the cheese. Sugar snap peas or asparagus would also be excellent friends with this salad. I loved the combination of all these ingredients. Chewy, nutty couscous, bitter arugula, sweet mint, crunchy pistachios, salty cheese and the zingy pickled shallots. Each bite had me craving more.
Just did a quick check and discovered that coconut has been featured 15 times on my blog. To the coconut haters out there, “I’m sorry”, and to the rest of you lovely folks I say, “you’re welcome”.
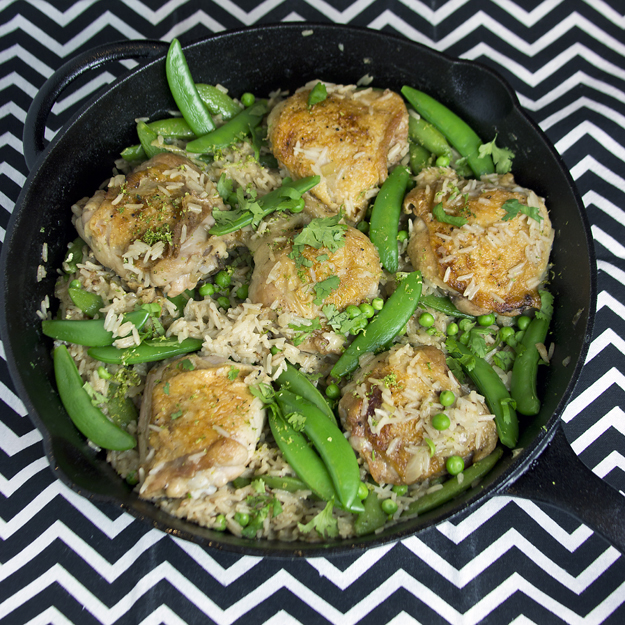
When I saw this dish on serious eats last month I bookmarked it immediately. This recipe checked all the boxes for me; one pot complete dinner, flavourful moist chicken thighs, coconut milk and jasmine rice. Since we are trying to limit our intake of white carbs, white rice has been scarce around here lately. But every so often, I get a craving for Basmati or Jasmine rice. The nutty, popcorny aroma that envelopes my kitchen makes me believe that all is right with the world and that I am very loved.
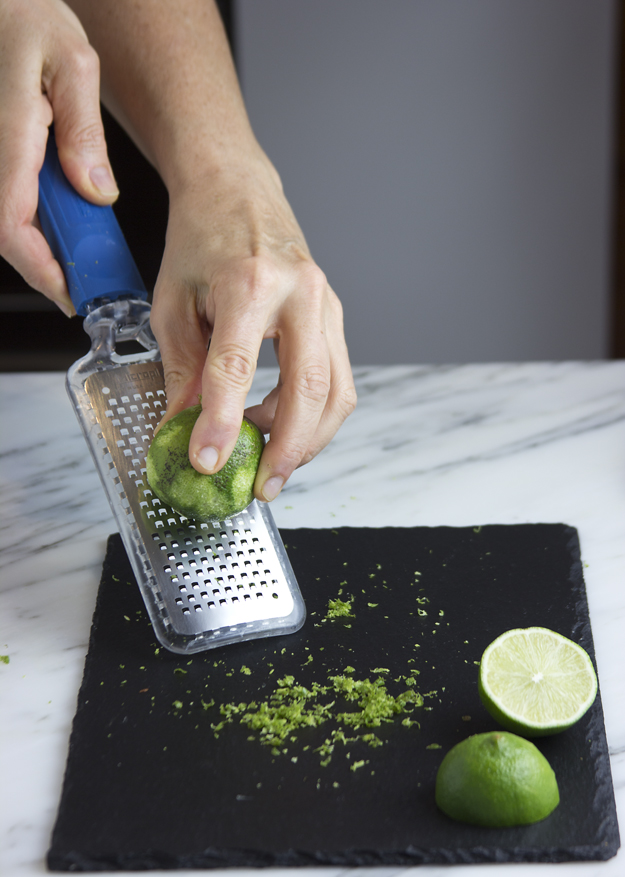
Yasmin Fahr, creator of this recipe asked “Why I don’t cook everything in coconut milk is beyond me.” Well Yasmin, in answer to your question, I would bathe in coconut milk if I could, but if I cooked everything in it, I would surely weigh 200 pounds. The sweet luxurious coconut milk in this recipe is saved from a cloying fate by the addition of cumin and a strong hint of cayenne. The finishing touches of lime and cilantro produces a dinner that packs a wallop of flavour.
You must exercise great patience when browning the chicken thighs. Put the pan on high, add the thighs, skin down and leave them alone for a good 8-10 minutes. The brown caramelized bits and pieces of chicken that get stuck to the pan, known in French as “fond” should not be thrown out. The chicken stock and coconut milk will help you to to scrape up all those flavourful dark bits. They will dissolve and become the foundation for the luxurious sauce that the chicken and rice are cooked in.
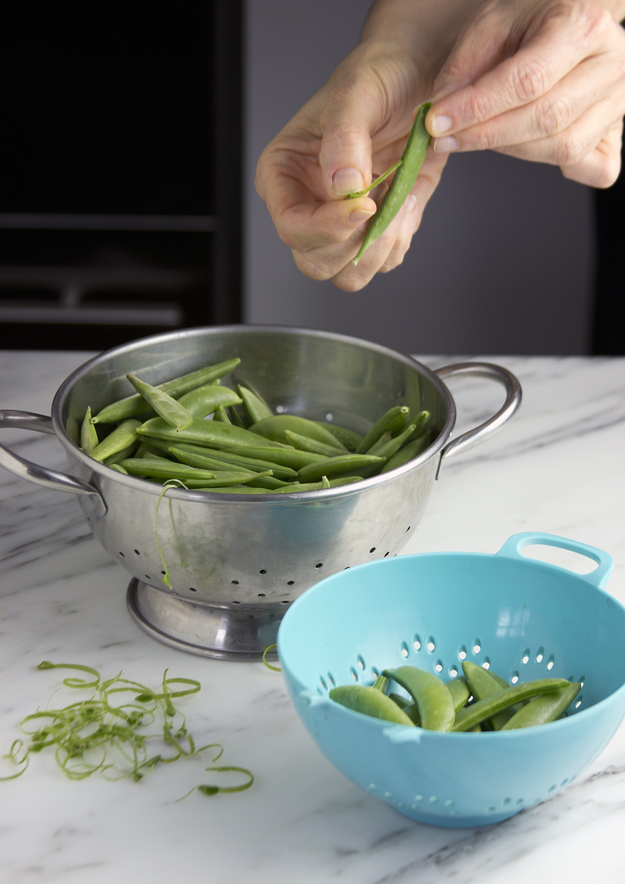
The original recipe called for adding snow peas during the last few minutes of cooking for some crunch and gorgeous colour. I went with a triple pea crunch and added snow peas, sugar snaps and some frozen green peas, because that’s how I was raised. I come from a home where more is better. When my mom made banana bread, if the recipe called for 3 bananas, my mom added 5. It produced a loaf with the heft of a brick, but heck, that’s just how mom rolled.
I promise that this asparagus post (unlike my previous one) will not offend anyone by mentioning any bodily functions, so feel safe to read on. This post is all about the unabashed joy of celebrating all things green this spring.
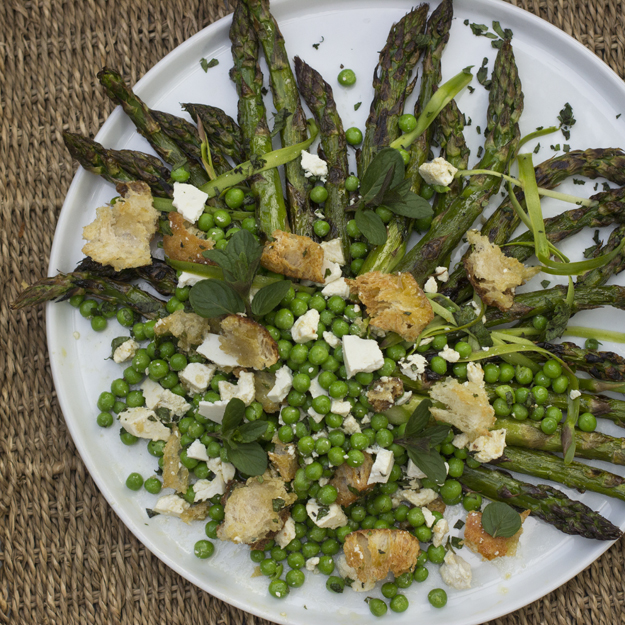
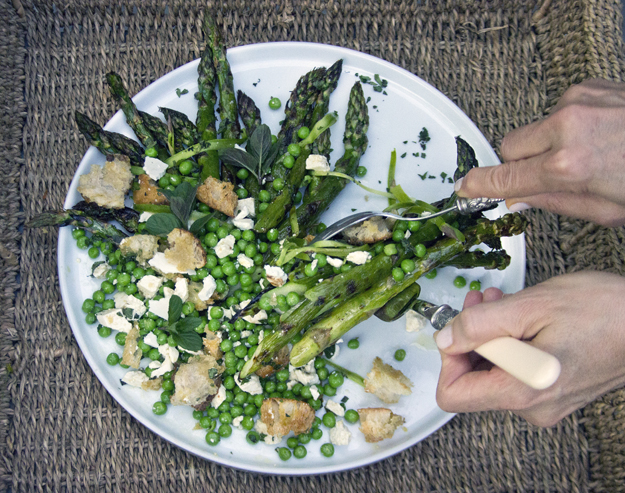
The classic panzanella salad originated in Tuscany. It was a way to use up stale bread and highlight tomatoes at the pinnacle of their summertime glory. Often onions, cucumber and basil are added. The texture of the bread in traditional panzanella is not supposed to be crunchy or chewy or crusty like croutons. If you have ever eaten this salad in Italy, you will recall that the bread is light, a bit wet, airy, just short of mushy. I was shocked when I had it a few years ago on the Amalfi Coast, and to be frank, was less than enthused. It sort of had the texture of fluffy torn-up matzoh balls. There is a very fine line between lightly moistened and unpleasantly soggy. Although I love the classics, in my panzanella salad, I want the bread to have a bit of chew and crunch.
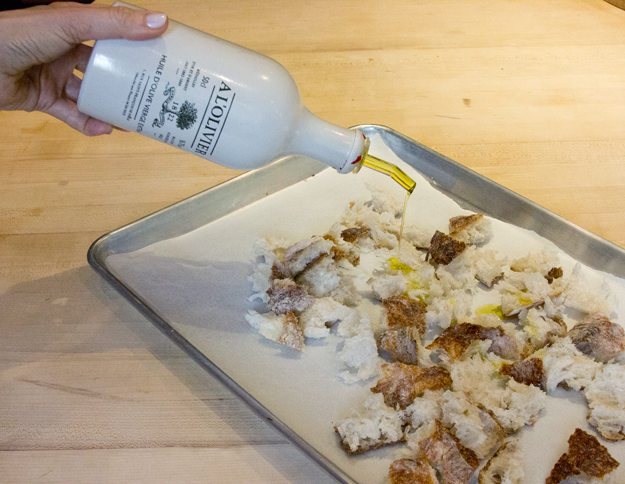
The inspiration for this spring panzanella came from Chef Michael Symon. Asparagus and green peas get top billing in this version of panzanella. Out of season tomatoes need not apply for entry into this salad. Like Michael, I grilled my asparagus, but I also shaved a few raw spears with my vegetable peeler to get some fresh crunch.I used a half a loaf of Ciabatta bread I had in the freezer. I thawed it and then tore it into chunks, rather than cutting it into neat cubes. Tearing it gives a more rustic appearance and all those craggy surfaces have a better chance of soaking up the flavourful dressing.
If fresh peas in a pod are available where you live, go ahead and indulge. I used frozen peas since we are at least a month away from fresh here. I really love frozen peas. It seems to be a family thing. My daughter used to eat frozen peas as her afternoon snack every day when she was about 4 years old. Peas are one of the few vegetables that are actually better frozen. Unless you have green-peas growing in your backyard or access to a Farmer’s Market, you really are better off buying frozen. Cook’s Illustrated explains why this is so:
“Fresh peas have very little stamina. They lose a substantial portion of their nutrients within 24 hours of being picked This rapid deterioration is the reason for the starchy, bland flavor of most “fresh” peas found at the grocery store. These not-so-fresh peas might be several days old, depending on where they came from and how long they were kept in the cooler. Frozen peas, on the other hand, are picked, cleaned, sorted, and frozen within several hours of harvest, which helps to preserve their delicate sugars and flavours “
I finished the salad off with some crumbled Ricotta Salata cheese (a firm ricotta). If you can’t find it, Feta would work just as well. Ricotta salata is a sheep’s milk cheese that has been pressed, dried and salted. It has a dense, slightly spongy texture and fresh milky flavour.
A quick dressing is made with garlic, dijon, sherry or red wine vinegar and olive oil. Fresh chopped mint gets sprinkled over the whole dish. This is a delicious addictive salad. I was home alone the day I made this and polished off the entire platter after photographing it. The contrast of the soft grilled asparagus was really wonderful against the crunch of the fresh shaved raw asparagus ribbons. The peas, barely cooked gave a great pop of green brightness. I mixed everything together and let the salad sit for at least 20 minutes. By the time I ate it the croutons had time to soak up the dressing and they were chewy but still just a bit crunchy. Perfect.
I had a glass of Sauvignon Blanc with this salad. Asparagus is quite difficult to pair with wine, as certain chemicals in asparagus can make your wine taste vegetal, grassy, or just plain rotten. A crisp and refreshing Sauvignon Blanc is a perfect match. I am currently crushing on New Zealand Dog Point Sauvignon Blanc. It has a juicy acidity and crisp finish that pairs perfectly with this salad.
If you are curious about learning more regarding food and wine pairings, check out Natalie MacLean’s Great Canadian Wine Match. Natalie is a certified sommelier and was named the World’s Best Wine Writer at the World Food Media Awards.
This is the first People’s Choice Competition for Canadian food and wine pairings. A real on-line battle of the bottles! The search for Canada’s best wine and food pairings launched on May 8. Wine drinkers from coast to coast are rallying behind their favourite Canadian pairings in this first grassroots, “bottoms up” competition.
Wine lovers can nominate and vote for their favourite Canadian wines as pairings in six Canadian food categories: cheese, chicken, beef, seafood, pizza and dessert. Voting ends May 20 when the top five wines in each category move to the showdown finalist phase. Wines from each region in Canada will vie to be named the best wine with a particular Canadian dish.
“This is a coast to coast toast to celebrate our own wine and food ,” says MacLean. “I think we can all drink to that.”
The other day I told my husband I was planning to make my own ricotta cheese. He looked at me like I was from another planet and said, “why?” As in why bother making it when you can buy it? I would have asked the same question 2 weeks ago, but recently, on a trip to South Beach with my daughter and two of her friends, I had dinner at Michael’s Genuine in Miami. One of the appetizers we ordered was homemade fresh ricotta cheese, served on toasted baguette slices with a dollop of blueberry jam. The slightly salty, creamy ricotta contrasted so beautifully with the sweetness of the blueberry jam. Since my first bite, I have become obsessed with learning how to make my own ricotta. Fresh ricotta has a rich and milky sweet taste and moist texture. Most ricotta from the supermarket is made with gums or stabilizers to prevent the ricotta from weeping. These additions often make for a gummy and grainy ricotta.
Unfortunately we gobbled it all up before I had a chance to take a picture of it. I did manage to take a picture of the tomato display and our wood fired oven pizza (caramelized onions and mushrooms). One of the chefs came over when he saw me shooting the tomatoes and told me very proudly that they were all local, from Homestead Florida. They are passionate about everything to do with food-from the growing and harvesting, to the preparation, serving, and eating. The menu changes daily because they start with what’s in season and arriving on their doorstep from local farmers, fishermen, ranchers, and artisans.
Once I got home, I looked up fresh ricotta on the Cook’s Illustrated web site and sure enough, there were detailed instructions showing me exactly what to do. All you need is whole milk, lemon juice and salt.
The milk is combined with the salt and then heated to 185ºF. Take it off the heat, stir in the lemon juice and let sit for 5 minutes. At that point you should see curds beginning to form. Let it sit for another 20 minutes and then spoon off the curds and discard the whey. Just like Little Miss Muffet. I am always so awed by chemical reactions like this. Basically the acid in the lemon juice and the heat cause the proteins in the milk to clump together forming curds that separate from liquid whey. I was quite blown away at how easy this was to make.
To print the recipe for Fresh Ricotta, click here.
There are a million different ways you can use up your ricotta. That night I sautéed some shallots and garlic and whisked in ricotta, milk and pecorino romano cheese. I mixed it with some whole wheat penne and green peas. It was quite yummy. It would be great on pizza, in lasagna, or even in cheesecake. Check out this chowhound link for lots of other great ideas.
To print the recipe for Penne with Ricotta and Peas, click here.
I had more of my ricotta for breakfast today, spread on rye toast, with a sprinkling of coarse salt and some Triple Berry Jam.