Tag Archives: Cookies

Espresso Macarons

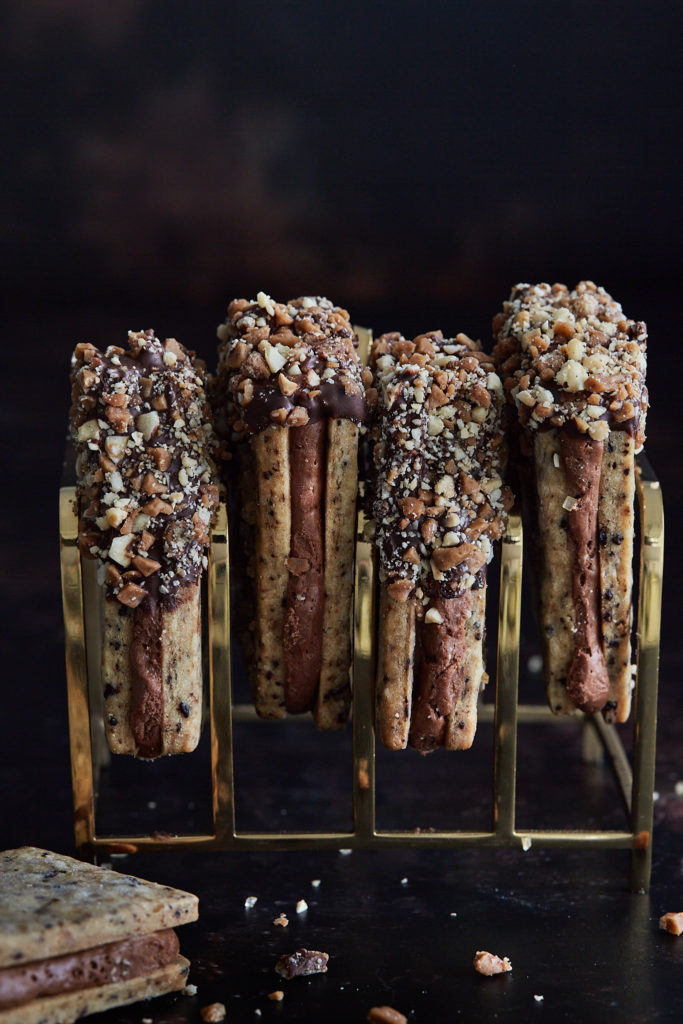
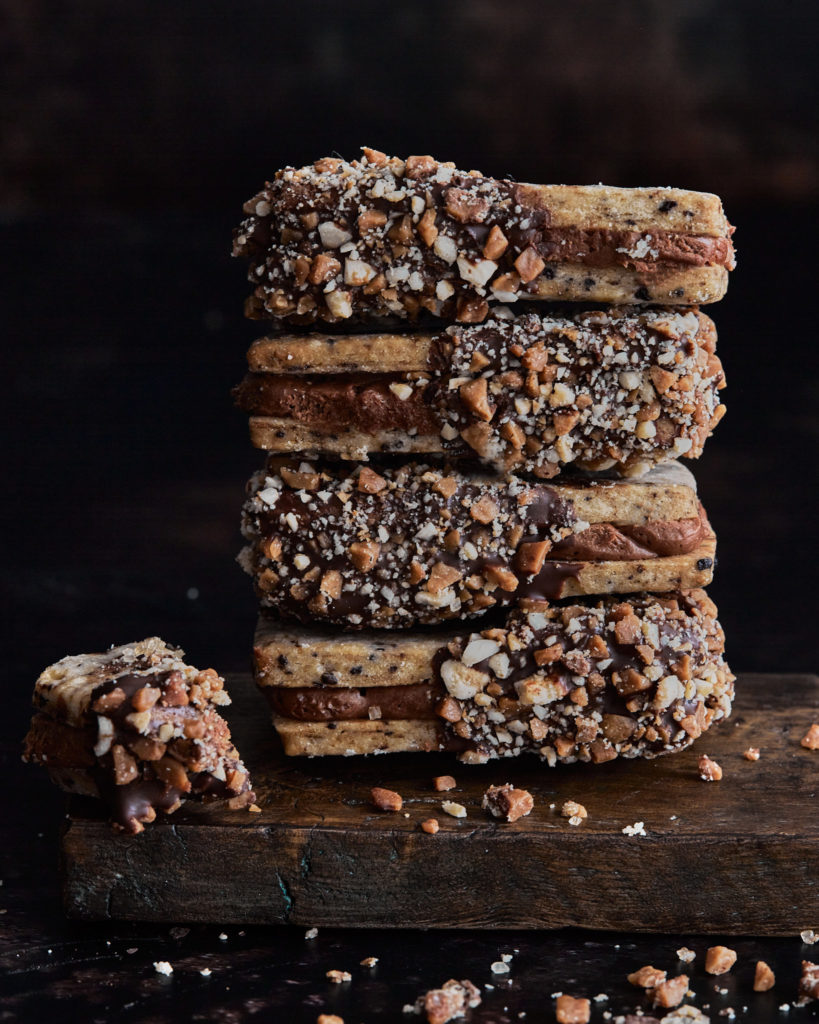
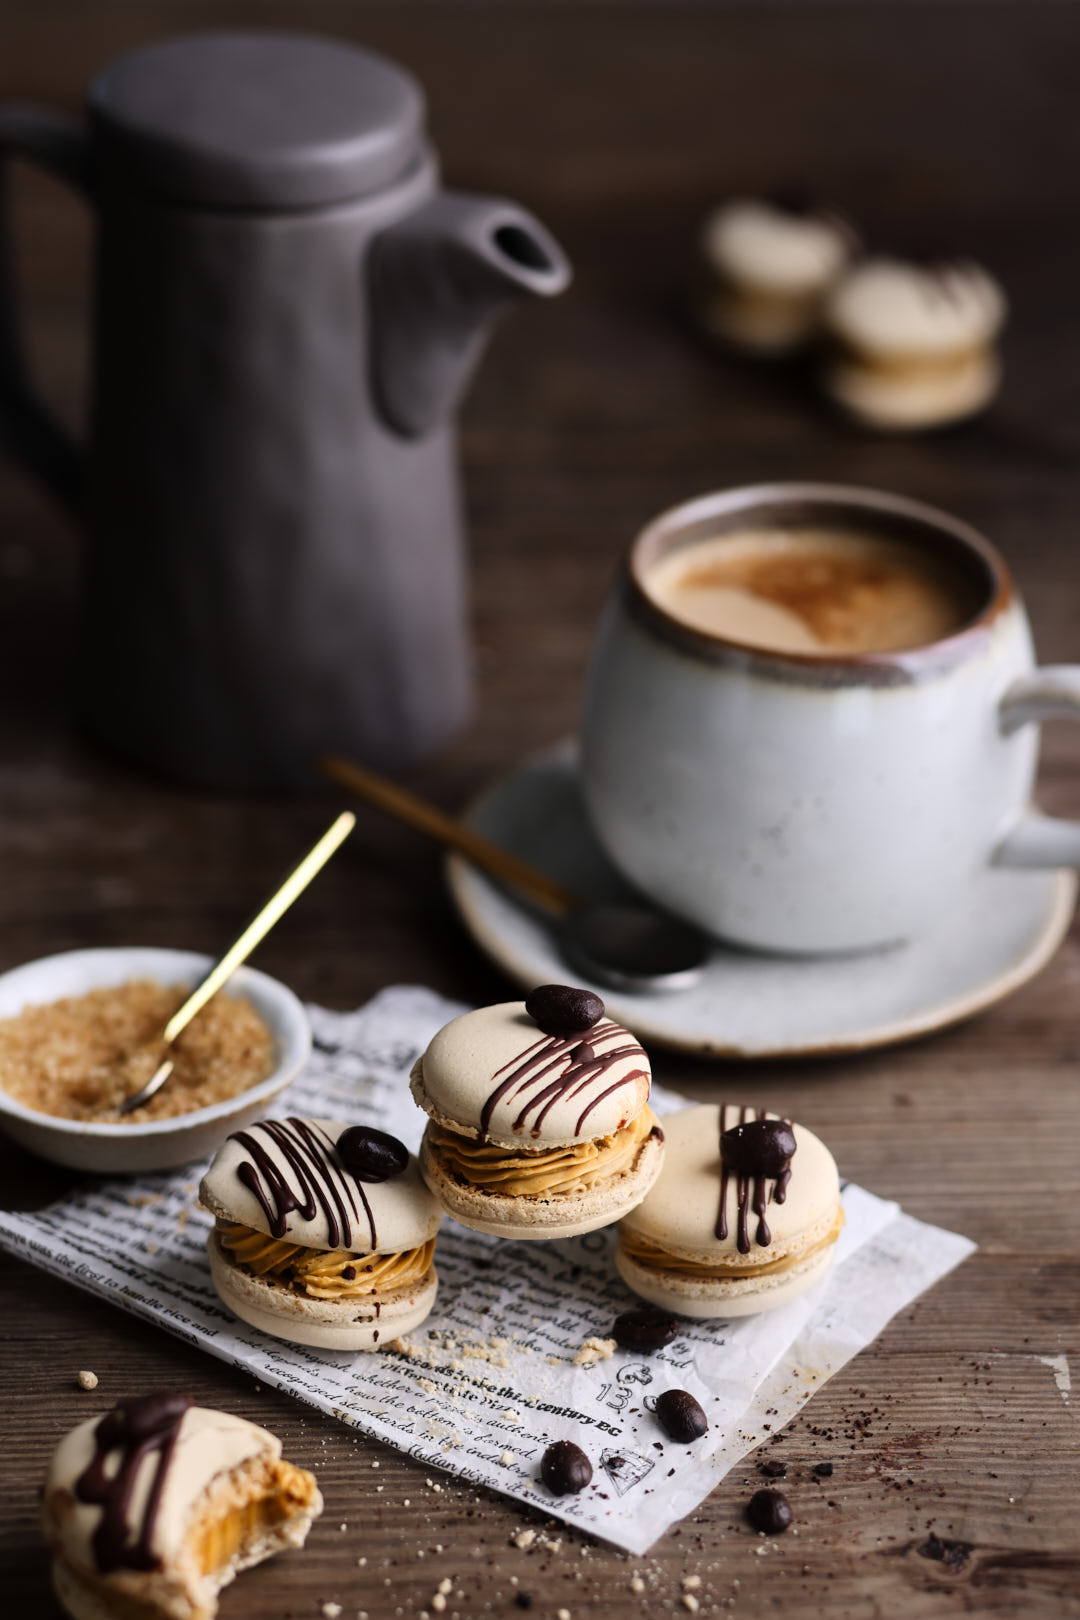
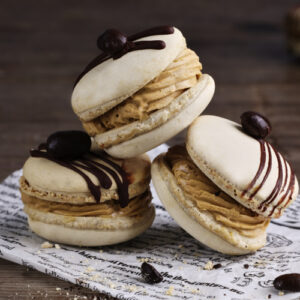
Espresso lovers, this one’s for you. These Espresso Macarons strike the perfect balance of crisp, chewy, and creamy. The delicate shells have that signature contrast—lightly crisp on the outside, irresistibly chewy in the center—sandwiched around a luscious, silky Espresso French Meringue Buttercream. Bold, rich, and undeniably sophisticated, these are macarons for grown-ups.

Macarons have a notorious reputation for being finicky—too much mixing, too little resting time, or the wrong oven temperature can throw them off completely. But don’t worry—I’ve perfected this recipe and will guide you through every step so you can achieve bakery-worthy results at home. Follow my method, trust the process, and soon you’ll be biting into the most luxurious homemade macarons you’ve ever had. And trust me, they’re worth the effort.

Keys to Success for Perfect Espresso Macarons

  • Precise Measurements Are Key – Macarons are all about precision. Weigh your ingredients for the best results—this isn’t the time for eyeballing!
  • Master the MacaronageMacaronage refers to the technique of mixing the batter. The key? Mix until the batter flows like lava—smooth but not runny. A good test is the figure 8 trick: when the batter ribbons off your spatula and forms a figure 8 without breaking, it’s just right. Over mixing or under mixing can ruin your shells!
  • Resting Time is Non-Negotiable – Once piped, let the shells sit for at least 30 minutes until a thin skin forms. This step is crucial for developing the signature macaron “foot”—that delicate frill at the base of each shell.
  • Oven Temperature is Everything – Macarons are sensitive to heat. If your shells crack or don’t rise, check your oven’s accuracy with a thermometer. Small temperature adjustments can make a big difference.
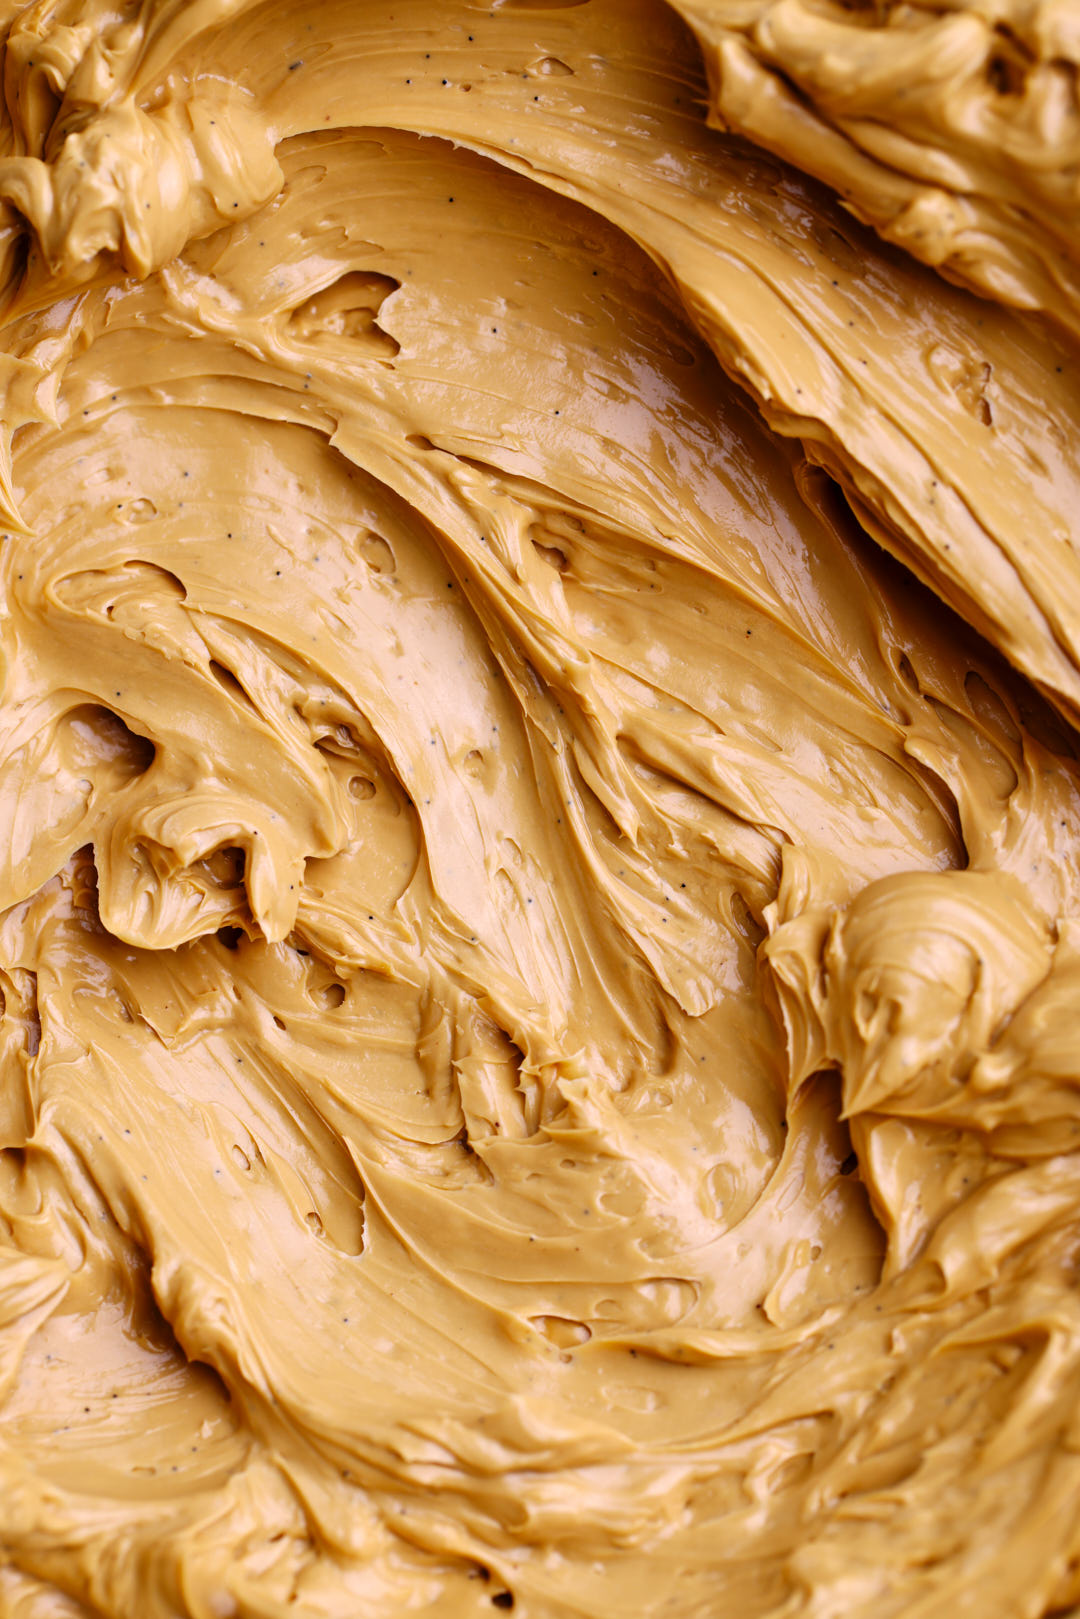
  • Flavour Starts with the Filling – A great macaron is all about balance. Using high-quality espresso powder in the buttercream brings out the best coffee notes without overpowering the delicate shell.
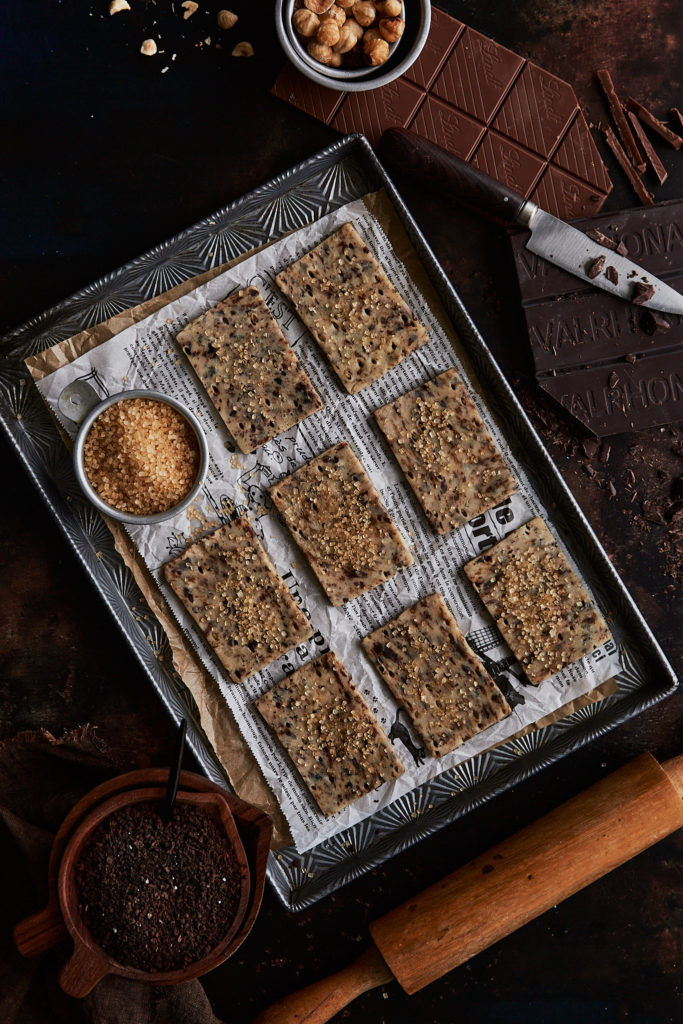
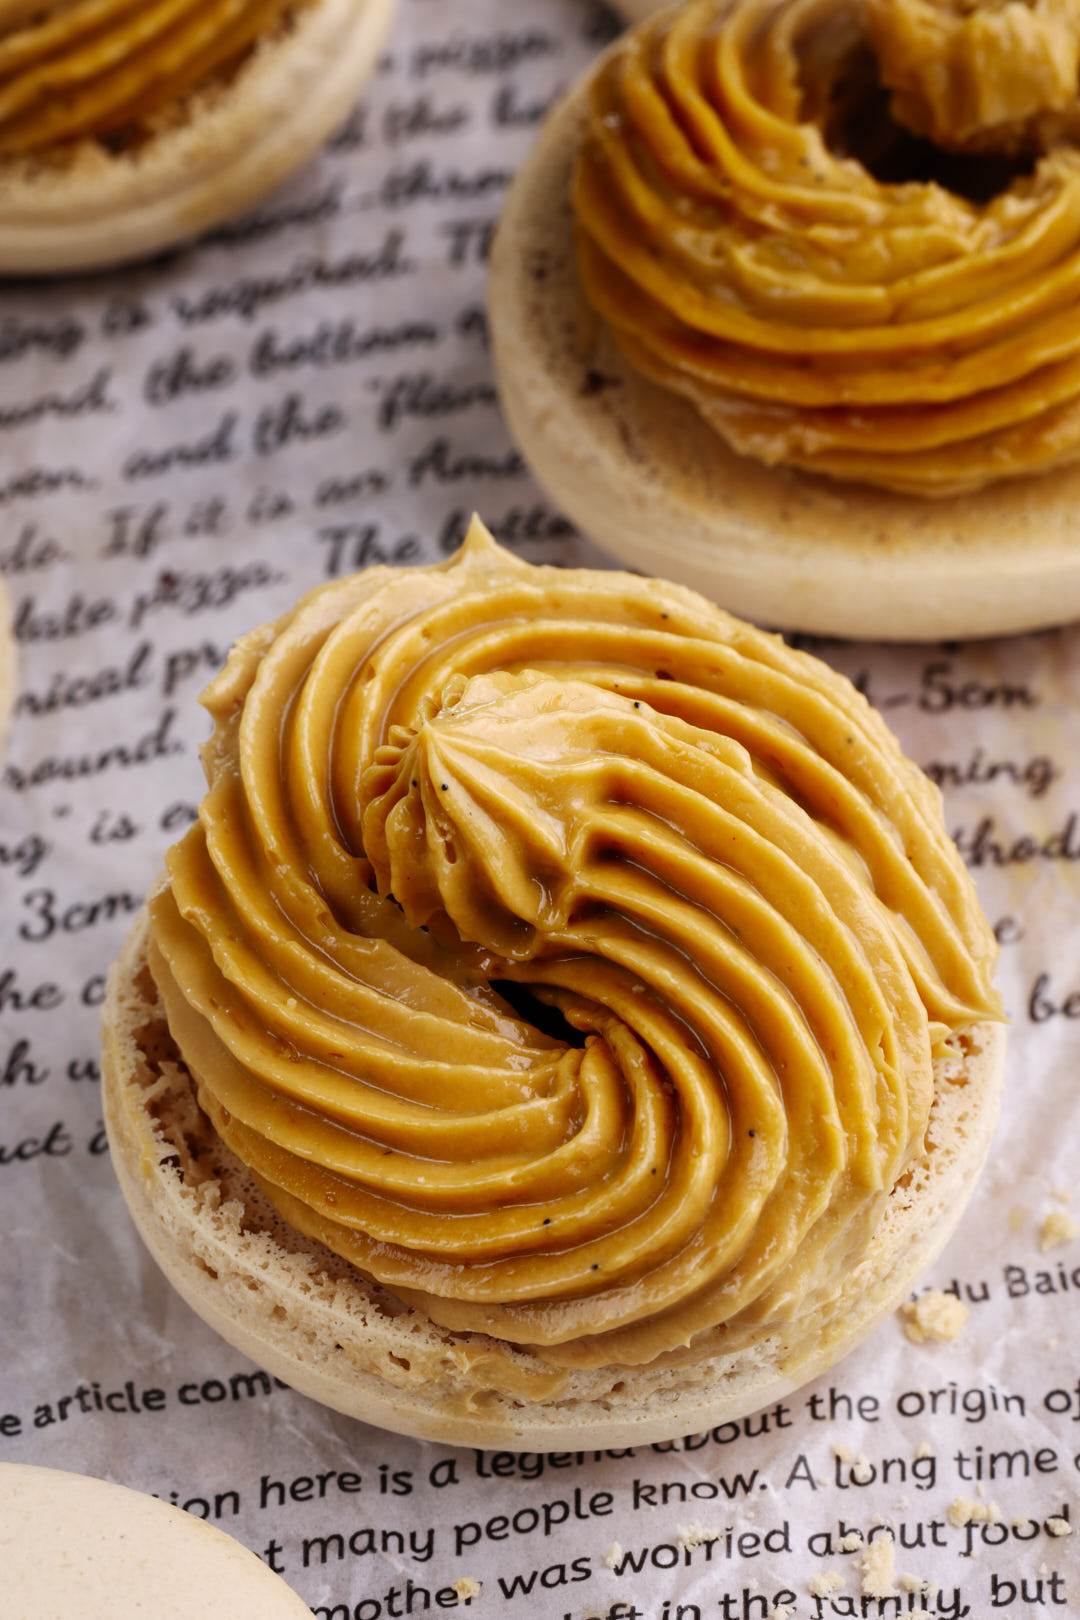
  • Finish with a Flavour Cue – A beautiful macaron deserves an elegant finish. I drizzled mine with dark chocolate and topped each one with a chocolate-covered espresso bean—a little hint of the flavour inside.

Serving and Storing Espresso Macarons

Macarons actually taste even better after resting for a day in the fridge—the flavours meld beautifully, and the texture reaches perfection. Store them in an airtight container for up to a week.

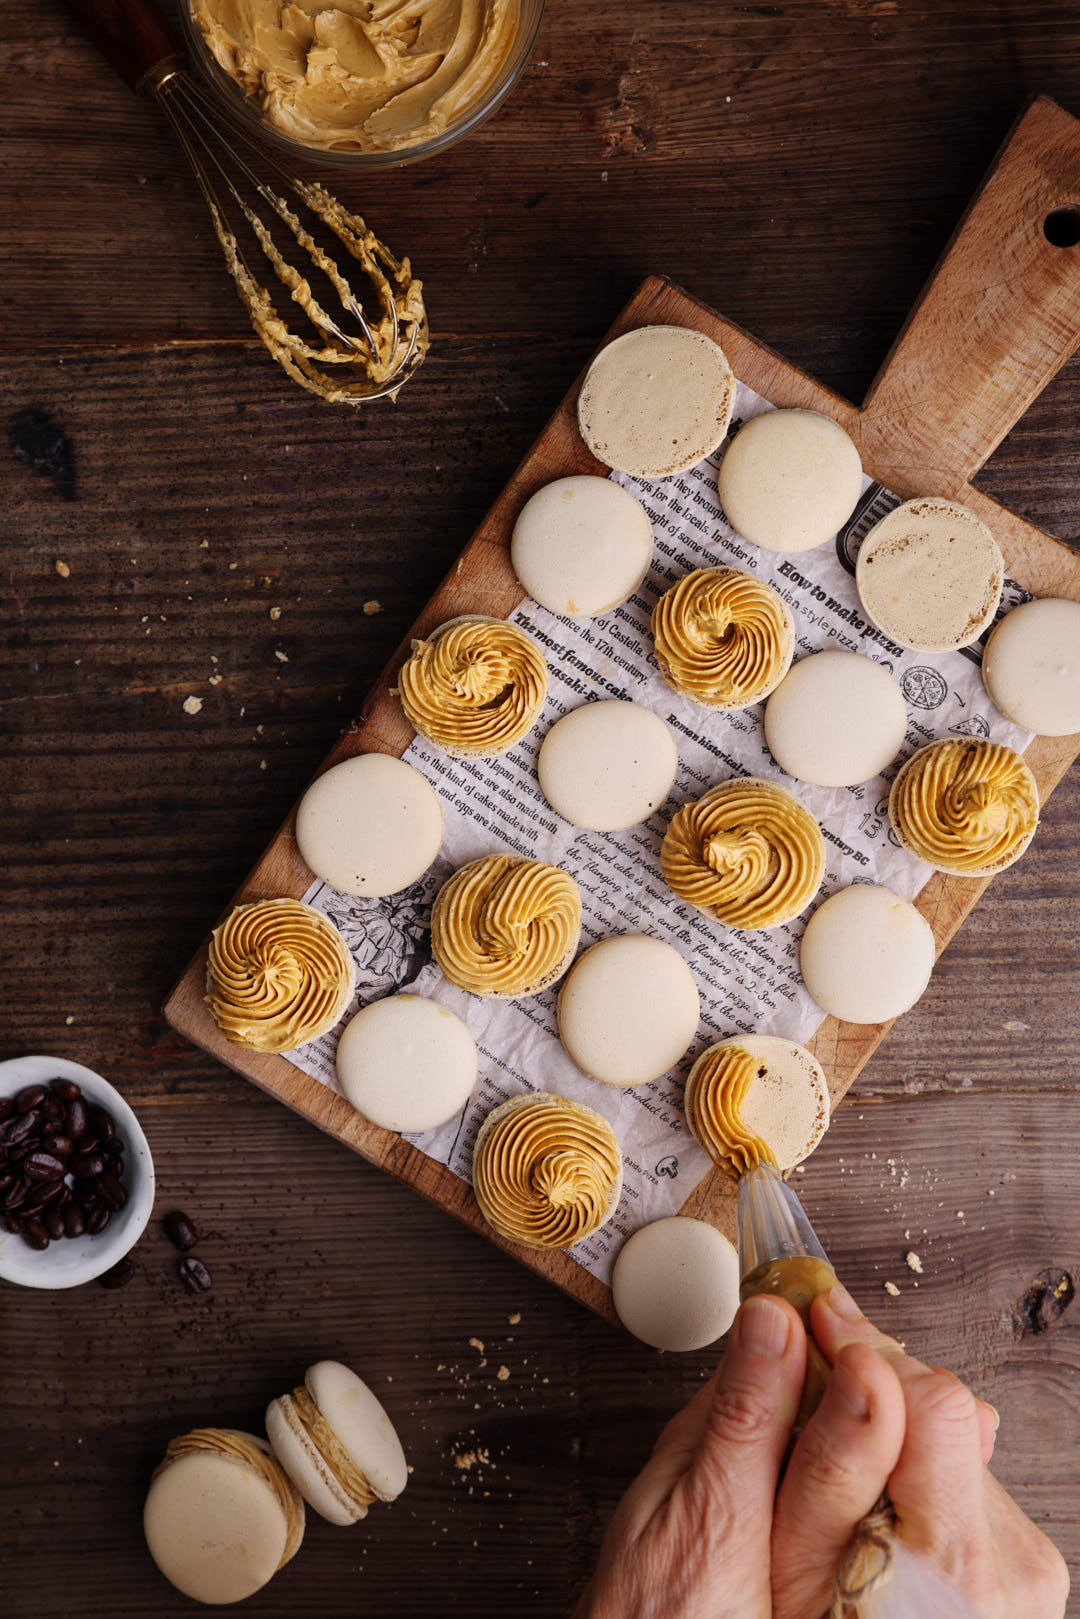
For a refined look, I used a French piping tip to pipe the filling, but a standard star tip works just as well. This adds a touch of elegance compared to a plain tip.

These Espresso Macarons pair beautifully with a latte for an afternoon treat or make an impressive dessert at your next dinner party. However you enjoy them, they’re sure to be a showstopper!

Espresso Macarons

These are for the coffee lovers in your life. Chewy espresso macaron shells sandwiched together with a luxurious espresso french buttercream.
The macaron recipe for the shells is very slightly adapted from the book,“Secrets of Macarons”. (JoséMaréchal). The method for making them is a compilation of tips and tricks from Erin at cloudykitchen, Stella at seriouseats and Natalie at loveandmacarons.
The French Espresso Buttercream recipe is from atsloanestable.com.
Servings 36 macaron sandwich cookies
Calories 160 kcal

Equipment

  • 1 food processor
  • 1 candy thermometer
  • 1 plain 1/2 inch piping tip
  • 1 star piping tip
  • disposable pastry bags

Ingredients
  

Macaron Shells

  • 200 grams almond flour, I like Bob's Redmill or King Arthur
  • 200 grams icing sugar
  • 2 teaspoons Instant espresso powder
  • 80 grams egg whites, room temperature
  • 175 grams finely ground, granulated sugar
  • 75 grams water room temperature
  • 25 grams finely ground granulated sugar
  • 80 grams egg whites, room temperature

Coffee Buttercream

  • 6 large egg yolks, room temperature
  • 100 grams granulated sugar
  • 45 grams water, 3 Tablespoons
  • 227 grams unsalted butter, room temperature, cut into 1/2 inch cubes
  • 1 teaspoon vanilla bean paste or vanilla extract
  • 2 teaspoons espresso powder

Decoration

  • 36 chocolate covered espresso bean candies
  • 125 grams semi-sweet or bittersweet chocolate, coarsely chopped

Instructions
 

Macaron Shells

  • Prepare templates for macaron cookies so that your shells will all be the exact same size. You can download a template from http://barbarabakes.com/wp-content/upLoads/2010/12/macarontemplate.pdf   Print out enough templates to line a 13x18inch baking sheet. Lay templates on baking sheet and cover with a plain piece of parchment paper.
  • Fit a large pastry bag with a plain ½ inch diameter round tip, and place in a large drinking glass or pitcher. Fold the cuff of the pastry bag over the rim of the glass or pitcher. This will make filling the pastry bag quite easy.
  • In the food processor, grind almond flour and icing sugar for about 2 minutes until it resembles a finely ground powder. Add espresso powder and pulse for 1-2 seconds to evenly distribute it. Transfer ground almond mixture to a sieve with medium sized mesh holes, set over a large bowl and using a rubber spatula or the back of a spoon, push the mixture though the sieve into the bowl. This process ensures a smooth and shiny macaron shell. Add 80 grams of egg whites and stir until all the dry ingredients have become incorporated into the egg whites. Cover with plastic wrap and set aside.
  • Place 175 grams granulated sugar and water in a small saucepan. Clip a candy thermometer to the side of the pan. Turn heat to high and cook, without stirring, until you reach a temperature of 240°F. You can swirl the pan, to even out the melting sugar, but don’t put a spoon in it and stir.
     
  • While sugar is cooking, place 80 grams egg whites into stand mixer with whisk attachment. Whisk on high speed until egg whites become bubbly. Add 25 grams sugar and whisk until soft peaks form. If soft peaks form before the sugar and water reach 240°F, turn mixer to low speed.
  • When the sugar reaches 240°F, the mixer to low and carefully pour the sugar syrup, in a thin stream into the mixer. Aim for the side of the bowl, rather than the whisk. Turn up the speed of the mixer to high and beat until the bowl of the mixer is warm to the touch, body temperature.  
  • Add 1/3 of the meringue to the almond flour mixture. Fold meringue into the mixture to lighten it slightly. Add remaining meringue and fold it into the ground almond mixture. The best way to do this is to use both a folding motion and a pressing motion. Use a flexible rubber spatula to scoop the batter up from the bottom of the bowl and then press it against the side of the bowl to gently deflate. Keep turning bowl and repeating this folding and pressing motion until the batter flows like lava. If this is your first time making macarons, watch this video a few times. It will give you a great idea of the consistency you are looking for.
  • Spoon half the batter into the piping bag. Twist top of bag closed. Pipe batter onto prepared baking sheets, using circles as a guide. Most likely your piped macarons will have a little nipple or peak on them. Tap the tray on the countertop few times to slightly flatten them out. Repeat with the remaining batter on second and third cookie sheets if necessary. Remember to slide out the paper templates before baking.
  • Put rack in middle position in oven. Place an empty baking sheet on the middle rack to allow it to heat up. Preheat oven to 300ºF.
  • Let the macarons sit at room temperature for about 30-60 minutes so that the tops can dry out a bit before baking. This will help them rise a bit better. After 30 minutes, touch the top gently with your finger. If it does not stick to yourf finger, they are ready to bake.
  • Place one sheet of macarons in the oven, on top of the pan you left in there to preheat. The double pans help with insulation and more even baking. Bake for about 14-16 minutes, rotating the tray after 7 minutes for even baking. You will notice after about 5 minutes, little feet will start appearing as the macarons begin to rise. This is the mark of a well-made macaron.
  • While macarons are baking, take a clean kitchen towel, place it under the tap briefly to dampen it. Lay damp towel out on the counter.
  • After 14 minutes, check the macarons. Press down gently on the top of one of the macarons. If the foot wobbles it needs a little longer, if it is stable, then it is close to being done. Do a little test. Try to peel a macaron off the paper. If they are stable but cannot yet peel away cleanly, give them another minute or so.
  • Remove from oven and carefully slide parchment paper off the baking sheet onto the dampened towel.This creates a thermal shock that makes the macarons easier to get off the parchment paper. Let cool for a few minutes, then transfer macarons to a wire rack to finish cooling.

Espresso Buttercream

  • Place the egg yolks in a medium bowl or a bowl of a stand mixer fitted with a whisk attachment. Whisk on high speed until thick and foamy (about 3 minutes) while you heat the sugar and water.
  • Heat the granulated sugar and water in a small saucepan or frying pan over low heat, stirring constantly until the sugar dissolves. Increase the heat to medium and bring to a boil, or until it reaches 240 degrees F.
  • While the egg yolks are still whisking at medium speed. slowly add the sugar syrup into the bowl. Continue mixing until the mixture has cooled down to room temperature.
  • Add the butter to the mixture one cube at a time, allowing each piece to fully incorporate before adding another.
  • Add vanilla and the espresso powder. Continue mixing on low speed until the buttercream is completely smooth.
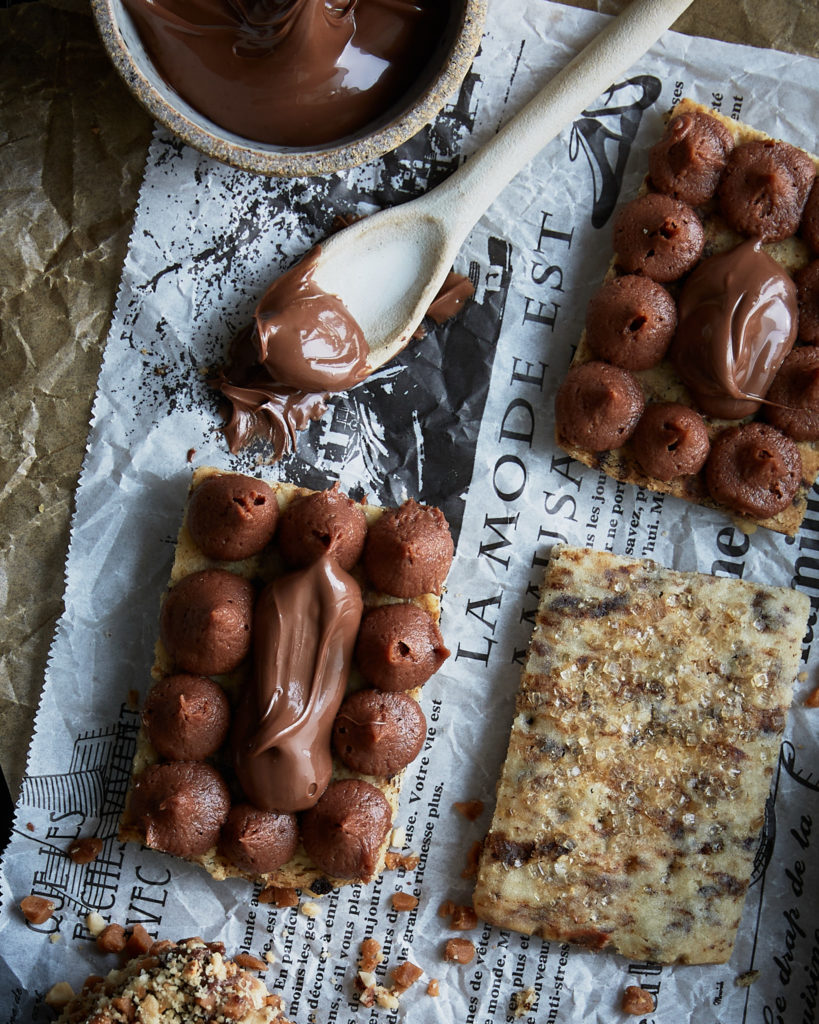
  • Transfer half the buttercream to a disposable piping bag fitted with a star tip. I used Ateco French tip #862. Pipe the filling onto a macaron and sandwich with another macaron. Repeat with all macarons.
  • Melt chocolate in glass bowl in microwave on medium power for 1 minute. Stir until completely melted. Transfer white chocolate to a disposable piping bag. Drizzle top of filled macarons with chocolate. While the chocolate is still wet, top each with a chocolate covered espresso bean.

Notes

  1. A scale is necessary for measuring out the ingredients. There is too much margin for error when scooping into measuring cups. Macarons are finicky!
  2. If you can’t find fine ground granulated sugar, just give regular granulated sugar a whiz in the food processor for 30 seconds.
  3. Filled macarons will keep refrigerated for about 4-5 days. If you want to make them ahead of time, freeze the shells only and then fill with ganache the day before you plan to serve them.

Nutrition

Calories: 160kcalCarbohydrates: 16gProtein: 2gFat: 10gSaturated Fat: 4gPolyunsaturated Fat: 0.4gMonounsaturated Fat: 2gTrans Fat: 0.2gCholesterol: 44mgSodium: 10mgPotassium: 36mgFiber: 1gSugar: 15gVitamin A: 200IUCalcium: 20mgIron: 1mg
Tried this recipe?Let us know how it was!

Pistachio Hamentashen (Viral Dubai Pistachio Chocolate Hamentashen)

These Pistachio Hamentashen take inspiration from the viral Dubai Pistachio Chocolate bar, blending rich Middle Eastern flavours with a modern twist on the classic Purim treat. The filling is a decadent mix of crispy buttered kataifi (shredded phyllo), velvety pistachio paste, and creamy melted white chocolate, creating a luscious contrast of textures. Encased in a delicate, lightly sweetened cookie dough, each hamentashen bakes up to golden perfection. A finishing dip into milk chocolate along with a sprinkle of toasted pistachios, adds an extra layer of indulgence. These aren’t just hamentashen—they’re an experience.

When I was growing up, hamentashen always came from a bakery. I never really thought twice about it—that’s just how it was. It wasn’t until I got married and was introduced to my husband’s Aunt Carol that I realized people actually baked their own hamentashen. What a revelation.

Aunt Carol didn’t just bake hamentashen—she made hundreds of them every year, carefully packaging and mailing them to all her nieces and nephews across North America. Her hamentashen were something special: tender cookie dough wrapped around a sweet golden raisin and prune filling, dipped in honey and chopped toasted pecans for the perfect crunch.

She passed away suddenly in 2018, and I miss her dearly. She taught me not only how to bake hamentashen but also so many other lessons that have stayed with me. Every year, I make her hamentashen, and my family is happy. But as a food blogger, I also love to experiment—honouring tradition while creating new flavours.

This year’s creation is inspired by the viral Dubai Pistachio Chocolate bar—an indulgent mix of crispy buttered kataifi, pistachio paste, and white chocolate, all wrapped in a delicate cookie dough. After baking, they’re dipped in milk chocolate and finished with toasted pistachios. A little nod to tradition, with a modern, luxurious twist.

See them come together.

Keys to Success for Pistachio Hamentashen

  • Kataifi can be tricky to find. This delicate shredded phyllo dough isn’t always stocked in regular grocery stores, but you might have luck at Middle Eastern or specialty markets. If not, Amazon to the rescue!
  • Pistachio Paste vs. Pistachio Butter or CreamPistachio paste is made from 100% pure pistachios, while pistachio butter or cream usually contains added sugar and other ingredients. For this recipe, you want pure pistachio paste to get the best flavour and texture. It can be tricky to find in stores, but you can easily order it online.
  •  Pinch the corners tightly! To keep the filling from leaking out, make sure to pinch the corners of your hamentashen firmly. Press them well where the edges meet, ensuring they hold their triangular shape while baking. Chilling the assembled hamentashen before baking also helps them keep their shape.
Pistachio hamentaashen, inspired by the viral Dubai chocolate bar.

Pistachio Hamentashen (Viral Dubai Pistachio Chocolate Hamentashen)

These hamentashen are inspired by the Viral Dubai Chocolate Bar. I stuffed my hamentashen with a filling crafted from pistachio paste, white chocolate and and crispy kataifi dough (shredded phyllo dough).
Servings 24 hamentashen
Calories 288 kcal

Ingredients
  

Pistachio Filling

  • 100 grams kataifi pastry (shredded phyllo dough)
  • 40 grams unsalted butter
  • 165 grams white chocolate, coarsely chopped
  • 165 grams pistachio paste
  • 12 grams vegetable oil
  • 20 grams icing sugar
  • 1/4 teaspoon Diamond Crystal Kosher salt, or 1/8 teaspoon Morton's Kosher salt

Hamentashen Dough

  • 170 grams unsalted butter, removed from fridge 30 minutes before starting to make dough
  • 133 grams granulated sugar
  • 1 teaspoon vanilla bean paste or vanilla extract
  • 1 large egg, room temperature
  • 1/2 teaspoon Diamond Crystal Kosher salt, or 1/4 teaspoon Morton's kosher salt
  • 320 grams all purpose flour
  • 1 Tablespoon water

Assembly and topping

  • 1 large egg white, well beaten
  • 150 grams milk chocolate
  • 100 grams shelled pistachios, toasted and finely chopped

Instructions
 

Pistachio Filling

  • Chop kataifi into small pieces, about 2 cm. in length. Use your fingertips to gently separate the strands and fluff the kataifi.
  • In a large skillet, melt butter. Add kataifi and toast over medium heat, stirring constantly, until it becomes golden brown. Set aside to let it cool.
  • Place white chocolate into a medium sized heatproof bowl. Microwave on 50% power for 30 seconds. Stir and continue heating in additional 10-15 second bursts, until completely melted. Stir in pistachio paste, vegetable oil, icing sugar and salt.
  • Pour white chocolate-pistachio paste mixture over browned kataifi. Using 2 forks or your hands, mix until all the kataifi is coated. Set aside.

Make dough

  • In a stand mixer fitted with paddle attachment, cream butter and sugar until light and fluffy, about 2 minutes. Scrape down sides of the bowl. With motor running, add vanilla and egg, then mix to incorporate. Add flour and salt and mix on low until all the flour is incorporated. Add 1 Tablespoons of water and continue mixing until dough comes together. Squeeze a handful of dough. It should hold together. If it’s still crumbly, add another Tablespoon of water.
  • Divide dough in half and roll each piece, between 2 sheets of parchment paper, to an ⅛” thickness. Chill rolled dough in fridge for one hour. (Dough will keep in fridge for 5 days or can be frozen for up to a month.)

Form Hamentashen:

  • Remove one dough sheet from the fridge and place on work surface. Peel off top parchment sheet and gently lay it back in place.  Flip the dough over; peel off and set top parchment layer aside.  Use a 3-inch round cookie cutter (or upside-down glass) to stamp out as many rounds as possible, leaving as little space between them as possible so that you do not have too many scraps. Place rounds on parchment lined baking sheet, setting them 1½ inches apart. Set scraps aside.
  • Brush the edge of the circles with water. Spoon about 1 Tablespoon of the pistachio filling into the center of each circle. Fold up three sides of the dough against the filling, forming a triangular shape. Pinch the edges and corners firmly so that the shape holds together.  Repeat with remaining filling and dough. Scraps can be rerolled and chilled for at least 30 minutes before cutting and baking more hamentashen
  • Preheat oven to 350°F. Chill unbaked hamentashen for about 30 minutes before baking. It will prevent the hamentashen from slumping and they will hold their shape much better. Brush chilled hamentashen with egg white.
  • Before baking, add a second baking sheet under chilled hamentashen. The double baking sheets will prevent the bottom of the hamentashen from getting too brown, before the tops and sides are done. Bake the hamentashen, rotating baking sheet halfway through, until golden, 16-18 minutes. Let cool completely.
  • Place milk chocolate into a medium sized heatproof bowl. Microwave on 50% power for 15 seconds. Stir and continue heating in additional 10-15 second bursts, until completely melted.
  • Dip hamentashen into melted milk chocolate. Sprinkle on some chopped pistachios. Chill until chocolate is firm. Hamentashen should be stored in an airtight container for 5 days or frozen for up to a month.

Notes

Note: If rolling dough to an even thickness is not a skill you excel at, do yourself a favour and buy some rolling pin guide ring spacer bands. They will make your life so much better.
Instead of dipping the hamentashen in milk chocolate, you could get extra fancy and drizzle them with white and dark chocolate as I did in the video. 

Nutrition

Calories: 288kcalCarbohydrates: 30gProtein: 5gFat: 18gSaturated Fat: 8gPolyunsaturated Fat: 2gMonounsaturated Fat: 6gTrans Fat: 0.3gCholesterol: 28mgSodium: 107mgPotassium: 176mgFiber: 2gSugar: 15gVitamin A: 278IUVitamin C: 1mgCalcium: 33mgIron: 1mg
Tried this recipe?Let us know how it was!

Pretzel Shortbread Cookies

Pomegranate Glazed Pretzel Shortbread Cookies are the perfect way to show your love.

I can’t help it—I have a deep love for all things beautiful. Some might call it a blessing; other times, it feels like a curse (hello, endless tweaking and reworking). And when it comes to cookies? They need to be just as delicious as they are stunning. These Pretzel Shortbread Cookies meet all the criteria.

Most decorated cookies look amazing but taste like… well, just sugar. Royal icing, while pretty, can be overly sweet and one-note. I wanted to create a cookie that actually delivers on flavour and looks

This pretzel shortbread recipe comes from Amy at @constellationinspiration, and it’s perfection. Buttery, crisp-edged, melt-in-your-mouth goodness with a salty crunch from finely ground pretzels. That little hit of salt balances the sweetness beautifully and makes these cookies completely addictive.

For the best results, I roll the dough between two sheets of parchment before chilling, then chill the cut shapes again before baking. This helps keep the edges nice and sharp—no wonky cookies here!

I bought a few sets of new heart cutters that I really love. Check out these deep v heart cookie cutters and these charming scalloped ones.

The Glaze

I’ve been obsessed with using freeze-dried fruit in icings for a while now. It adds such a vibrant, natural colour and brings real fruit flavour to the party.

Freeze dried strawberry powder packed a berry delicious punch to these Strawberry Glazed Chewy Brown Sugar Cookies . Freeze dried raspberry powder flavoured the buttercream in these stunning Raspberry Sandwich Cookies.

When I found freeze-dried pomegranate powder, I knew it had to become a glaze. This glaze is tangy, punchy, and perfectly balanced—made with icing sugar, freeze-dried pomegranate powder, a little pomegranate juice, and lemon juice to brighten everything up.

At first, I tried dipping the cookies, but the glaze dried unevenly, and the edges weren’t crisp. So I switched things up—piping a border with a thicker glaze and then flooding the inside with a thinner one, decorating just half of each heart. The result? A smooth, glossy finish that lets the natural pink colour shine.

For outlining, the glaze should be thick like toothpaste, holding its shape without running. For flooding, thin it to a honey-like consistency so it flows smoothly but doesn’t drip off the edges. Adjust with tiny amounts of liquid or powdered sugar until just right.

The Toppings

Since these were for Valentine’s Day, I went all in on the toppings. I wanted a mix of texture, colour, and a little sparkle:

Chopped pistachios – for crunch, flavour and that gorgeous pop of green.

Crushed rose petals – because they’re just so pretty.

Gold sprinkles – because, let’s be honest, gold makes everything better.

Pomegranate Glazed Pretzel Shortbread

Sweet, salty and tangy, these Pomegranate Glazed Shortbread Cookies combine buttery shortbread with the crunch of ground pretzels.
Servings 20 cookies
Calories 225 kcal

Equipment

  • 1 #2 piping tip
  • 4 disposable piping bags

Ingredients
  

Cookies

  • 150 grams pretzels
  • 132 grams all purpose flour
  • 227 grams unsalted butter, removed from fridge 30 minutes before making dough
  • 120 grams icing sugar, sifted
  • 1 teaspoon vanilla bean paste or vanilla extract

Pomegranate Glaze

  • 500 grams icing sugar, sifted
  • 1/4 cup freshly squeezed lemon juice
  • 1/4 cup Pomegranate juice
  • 1/4 cup Freeze Dried Pomegranate Powder
  • 1/2 teaspoon vanilla bean paste or vanilla extract
  • 1/2 teaspoon Diamond Crystal Kosher salt, or 1/4 teaspoon Morton's Kosher salt

Decorations

  • 2 Tablespoons edible dried rose petals, finely chopped in a spice grinder or by hand with sharp knife
  • 1/3 cup shelled pistachios, toasted and finely chopped
  • 2 Tablespoons gold sprinkles

Instructions
 

Cookies

  • In food processor or blender, pulse pretzels until the texture resembles flour. Transfer pretzel flour to a medium sized bowl, add all purpose flour to bowl and set aside.
  • In the bowl of a stand mixer fitted with the paddle attachment, beat the butter on medium speed until smooth, 1-2 minutes. Add powdered sugar and vanilla and mix until fully combined. Scrape down the sides of the bowl and mix on medium speed for another 2 – 3 minutes, until the colour lightens and the texture becomes fluffy and smooth.
  • Add pretzel flour mixture to the bowl and mix on low speed until just combined. Gather the dough into a ball. Using your palms, press dough into a rough rectangular shape and place between 2 sheets of parchment paper.
  • Using a rolling pin, roll out dough to a rough rectangle, about 9×12 inches. The dough should be 1/4 inch thick. I use these rolling pin guides to help me get an even thickness. Place dough, still between 2 sheets of parchment paper, on a baking sheet and chill in fridge for about 45 minutes.
  • Line 2 baking sheets with parchment paper. Remove dough sheet from the fridge and place on work surface.  Peel off top parchment sheet and gently lay it back in place. Flip the dough over; peel off and discard second parchment layer. 
  • Cut the dough, using cookie cutters of your choice. I used a variety of heart sizes and shapes. Transfer shapes to prepared baking sheets, using a wide metal spatula, spacing them 2 inches apart.  Chill cookies in freezer for about 15 minutes before baking. This will help prevent spreading and help cookies retain their shape.
  • Adjust the oven racks to the upper and lower middle positions and heat the oven to 350°F.
  • Bake cookies for 5 minutes. Rotate baking sheets from front to back and switch positions from top to bottom. Bake for a further 5 minutes until golden brown. Set cookie sheets on a wire rack and allow to fully cool.
  • Gently re-roll dough scraps between 2 sheets of parchment, chill and cut out more cookies. Transfer to cookie sheets and bake as above.

Glaze and Decorate

  • Place sifted icing sugar into large bowl. Add lemon juice, pomegranate juice, pomegranate powder, vanilla and salt whisk vigorously until smooth and no lumps remain.
  • In a small bowl, mix together finely ground rose petals, chopped pistachios and gold sprinkles.
  • Prepare border icing. Place about 1/4 cup of glaze into a small bowl. Fit one disposable piping bag with a #2 tip. This will be used for piping a border/outline of the cookie shape.
    Place about 1/2 a cup of glaze into a small bowl. For outlining, the glaze should be thick but pipeable, similar to toothpaste or soft frosting. It should hold its shape without spreading but still flow smoothly from a piping bag. When you lift a spoonful, it should ribbon off slowly and settle back into itself after several seconds. If it’s too thick, add a few drops of liquid (pomegranate juice or lemon juice) until it reaches the right consistency. If too thin, mix in a bit more powdered sugar to thicken.
    Transfer border icing to bag with piping tip. Cut a small hole in bottom of bag to allow tip to come halfway through. Twist top of bag and close with twist tie. Set aside.
  • Prepare flooding icing: Pour about 1 cup of glaze into a small bowl. For flooding, the glaze should be thin enough to flow smoothly but thick enough to hold a slight shape before settling—similar to honey or maple syrup. When you lift a spoonful, it should ribbon off easily and disappear back into the bowl within 10-15 seconds. It should spread evenly when piped but not be so runny that it drips off the edges. If it’s too thick, add tiny amounts of pomegranate or lemon juice; if too thin, mix in more powdered sugar until you reach the perfect balance.
    Transfer flooding icing to bag without piping tip. Twist top of bag and close with twist tie. Do not cut hole in bag until ready to flood icing.
  • Glaze cookies: Arrange about 4 cookies on baking sheet and outline cookies with border icing. I just outlined half the heart. Cut a small hole in flooding icing bag and flood the center of each cookie with the thinner glaze. Use a toothpick or wooden skewer to gently coax the icing to the edges of the border.
  • While the glaze is still wet, sprinkle with pistachio mixture. Repeat decorating the rest of the cookies. Let set for several hours until glaze has hardened.
  • Store cookies in airtight container, separating layers with parchment or waxed paper so they do not stick to each other. They will be fine at room temperature for a few days. For longer storage, freeze.

Notes

Pretzel shortbread cookie recipe created by Amy of Constellation Inspiration. The pomegranate glaze recipe was my addition. 

Nutrition

Calories: 225kcalCarbohydrates: 32gProtein: 2gFat: 10gSaturated Fat: 6gPolyunsaturated Fat: 1gMonounsaturated Fat: 3gTrans Fat: 0.4gCholesterol: 24mgSodium: 153mgPotassium: 58mgFiber: 1gSugar: 20gVitamin A: 297IUVitamin C: 1mgCalcium: 9mgIron: 1mg
Tried this recipe?Let us know how it was!

These cookies are proof that decorated cookies can be both stunning and packed with flavour.

Peppermint Bark Brownie Cookies

Peppermint Bark Brownie Cookies

If a brownie and a cookie had a love child, it would be this fudgy masterpiece. These Peppermint Bark Brownie Cookies are so rich and chocolaty, they’ll steal your heart. And let’s be honest—chocolate and peppermint isn’t just for December! It’s basically a love language, making it perfect for Valentine’s Day too.

Got leftover candy canes from the holidays? This is their moment to shine. No candy canes? No problem—peppermint candies work just as well. Pro tip: Place them in a Ziploc bag before crushing unless you enjoy finding rogue peppermint shards in your kitchen for days. (Ask me how I know.)

Fudgy Brownie Cookies topped with Peppermint Bark

Tips for Perfect Peppermint Bark Brownie Cookies:

Leave some peppermint pieces bigger for crunch. A mix of fine and chunky bits gives the best texture.

Use real white chocolate, not white baking chips. White chocolate (almost always sold in bar form) contains cocoa butter, while white baking chips don’t—meaning they won’t melt the same way. I recommend a good-quality white chocolate bar for the best flavor.

Start with good chocolate. This is not the time for supermarket chocolate chips. I used Lindt Excellence 70% Bittersweet Bars, but if you prefer a sweeter cookie, try Valrhona Manjari (64%) or Ghirardelli Baking Bars.

Use both brown sugar and granulated sugar. Brown sugar makes the cookies moist and fudgy, while white sugar helps create that signature crinkly top.

Whip the eggs and sugar for at least 3-4 minutes. This step is key—it incorporates air, which gives the cookies their perfect texture.

Sift your cocoa powder with the flour. Cocoa powder loves to clump, and sifting ensures a smooth batter.

  • Use a cookie scoop for even sizes, and right after baking, do the ‘cookie scoot’—it’s the secret to getting perfectly round cookies. A round cookie cutter, just slightly bigger than the cookie works perfectly to reshape a wonky cookie.

Don’t over bake! The cookies should be just set at the edges but still soft in the center when they come out of the oven. They’ll firm up as they cool.

Watch as they come together .

Peppermint Bark Brownie Cookies

Fudgy Chocolate Cookies topped with a Peppermint Bark heart
Servings 12 cookies
Calories 321 kcal

Equipment

  • small heart shaped cookie cutter, about 1 -2 inches wide

Ingredients
  

White Chocolate Peppermint Bark Hearts

  • 100 grams white chocolate
  • 8 mini candy canes or 4 full size candy canes

Cookies

  • 225 grams bittersweet chocolate, coarsely chopped
  • 85 grams unsalted butter
  • 2 large eggs, room temperature
  • 50 grams granulated sugar
  • 160 grams brown sugar
  • 1 teaspoon vanilla bean paste
  • 1/2 teaspoon peppermint extract
  • 105 grams all-purpose flour
  • 21 grams dutch process cocoa powder
  • 1/2 teaspoon Diamond Crystal Kosher salt, or 1/4 teaspoon Morton's Kosher salt

Instructions
 

White Chocolate Peppermint Bark

  • Place candy canes in a zip loc bag and seal well. Using a rolling pin, bottom of a heavy saucepan or the flat side of a meat tenderizer, coarsely crush candy. Set candy aside.
  • Line a small baking sheet with parchment paper and set aside. Place a heatproof glass or stainless steel bowl over a pot of simmering water, making sure the bottom of the bowl doesn’t touch the water. The bowl should sit snugly on top of the pot without sinking in. Add the chopped white chocolate to the bowl. Stir occasionally until smooth and melted.
  • Pour melted chocolate onto prepared baking sheet. Spread it into a rectangle, about 8×10 inches in size. Sprinkle crushed candy canes over the top. Chill in fridge for about 15 minutes, until firm.
  • Using a small heart shaped cookie cutter, about 1-2 inches wide, cut out hearts from the chilled peppermint bark. Store hearts in the fridge until ready to top the baked cookies.

Cookies

  • Place racks in upper and lower thirds of oven and preheat to 350°F. Line 2 baking sheets with parchment paper and set aside.
  • Melt bittersweet chocolate and butter. Place a heatproof glass or stainless steel bowl over a pot of simmering water, making sure the bottom of the bowl doesn’t touch the water. The bowl should sit snugly on top of the pot without sinking in. Add the chopped bittersweet chocolate and butter to the bowl, stirring occasionally until smooth and melted.
  • Place eggs, granulated sugar, brown sugar, vanilla bean paste and mint extract in bowl of stand mixer, fitted with whisk attachment. Beat on medium high speed for 3-4 minutes until mixture is very thick and pale. You can also use an electric hand mixer but I would not recommend trying to whisk by hand.
  • Once the eggs and sugar are light and pale, turn mixer down to low speed Slowly pour melted chocolate mixture into the bowl with the sugar and egg mixture. Mix until completely incorporated.
  • Sift flour, cocoa powder and salt. Add dry ingredients to mixer, and whisk on low speed until thoroughly combined.
  • Using a 2 Tablespoon cookie scooper, scoop dough and place on prepared baking sheets, 6 cookies per sheet. You can also use an 1/8 cup measuring cup to portion the dough. Just roll it between your palms to form a round ball before placing on baking sheet. Flatten each cookie slightly with your palm before baking.
  • Bake cookies, rotating pans top to bottom and front to back after 4 minutes of baking. Bake for a further 4-5 minutes, until the tops are crackled and edges are set. They will still be gooey in the center. Set cookie sheets on wire racks to cool.
  • Let cool for about 15 minutes. Place one peppermint bark heart in the center of each cookie, while cookies are still warm, but not hot. The warmth of the cookie will melt the bottom of the heart and help the heart to stick. Allow to cool completely before removing from baking sheet.

Notes

Cookies can be baked 3 days ahead and stored in an airtight container at room temperature. They can also be frozen for 2 months. Let thaw before serving, unless you are a member of my family and adore frozen cookies!

Nutrition

Calories: 321kcalCarbohydrates: 40gProtein: 4gFat: 17gSaturated Fat: 10gPolyunsaturated Fat: 1gMonounsaturated Fat: 5gTrans Fat: 0.3gCholesterol: 49mgSodium: 123mgPotassium: 197mgFiber: 2gSugar: 29gVitamin A: 234IUVitamin C: 0.04mgCalcium: 49mgIron: 2mg
Tried this recipe?Let us know how it was!

These cookies are chewy, fudgy, and loaded with peppermint bark goodness—everything you want in a Valentine’s Day treat. Because let’s face it: peppermint deserves more than just one month a year.

Malted Milk Chocolate Hamentashen

The Jewish holiday of Purim begins next week at sundown on Monday March 6. The traditional Purim treat are triangular shaped filled cookies known as Hamentashen. For those not familiar with this Jewish holiday, I present to you a basic primer, my version of Purim 101. Essentially, the Festival of Purim commemorates a time when the Jewish people living in ancient Persia were saved from extermination. As in every good story, you have your heroes and your villans.

The heroes of the story are Esther, a beautiful young Jewish woman living in Persia, and her cousin Mordecai, who raised her as if she were his daughter. Esther was taken to the house of Achashveirosh, King of Persia, to become part of his harem. King Achashveirosh loved Esther more than his other concubines, and made Esther his queen. Like all intelligent wives, she kept a thing or two about herself hidden from her husband. Upon advice from her cousin Mordecai, she kept her Jewish identity a secret from the King.

Our story’s villan is Haman, a rather arrogant, egotistical advisor to the King. The King appointed Haman as his Prime Minister. Haman despised Mordecai because Mordecai refused to bow down before Haman every time he passed by.  Rather than seeking to destroy Mordecai alone for this slight, Haman decided to take revenge on the entire Jewish population living in the Persian empire. The King gave Haman permission to do as he pleased. Haman’s plan was to exterminate all of the Jews. 

Nothing got past Queen Esther. She had her finger on the pulse on the kingdom. Somehow she overheard this plot to annihilate all the Jews. She consulted her cousin Mordecai and he persuaded Esther to speak to the king on behalf of the Jewish people. She told her husband, the king, of Haman’s plot against her people and somehow convinced him to save the Jewish people. We’re never told exactly how she convinced him, but there are rumours! The Jewish people were saved, and Haman and his ten sons were hung.

The holiday of Purim focuses on the pleasures of food and drink, more than any other Jewish holiday. It is a time for celebrating and letting go. The shape of hamentashen symbolically represent Haman’s three-cornered hat. Typically, hamentashen are filled with jam or a poppyseed filling.

I’m bucking tradition here and flavouring my hamentashen with Malted Milk Chocolate. Check out the video to see how they come together.

If you are not baking with malted milk powder, you’re missing out on a ton of flavour. Stella Parks called malted milk powder the umami bomb of the baking world. It adds a toasted creamy richness to your baked goods. Ovaltine is one brand readily available at the supermarket. It contains the addition of chocolate. For a more concentrated hit of malted flavour, without the chocolate, I love Hoosier Hills Farms malted milk powder.

These Malted Milk Chocolate hamentashen have a triple hit of malted milk. There is malted milk powder in both the dough and the filling and then I chopped up some malted milk balls to coat the dipped hamentashen in.

Milk chocolate really allows the malted flavour to shine through. Jesse Szewczyk inspired the filling for these hamentashen with her Malted Milk Chocolate Rugelach.

If you’re a Hamentashen novice, here are a few tips for success:

  • Roll dough between 2 sheets of parchment paper and chill before cutting into circles
  • Don’t overfill. You will regret it when they burst open in the oven.
  • Brush edges of dough with beaten egg white. it acts as an effective glue to hold them together.
  • Pinch edges and corners really well when shaping.
  • Freeze formed hamentashen for about 10 minutes before baking. They will hold their shape better.
  • Brush unbaked hamentashen with beaten egg white for some shine.

Click here to print recipe for Malted Milk Chocolate Hamentashen.

Pistachio Swirl Biscotti

If you’re looking for a one bowl mix and scoop cookie, you’ve landed on the wrong page. But if you’ve been following me for a while, you already know that. I am passionate about beautiful bakes that also taste delicious. Sometimes that requires a bit of work. These are the most beautiful biscotti I have ever baked. They are a powerhouse of pistachio flavour, jammed with both pistachio butter and chopped pistachios.

The inspiration for these biscotti came from the July/August issue of Bake From Scratch Magazine. They did a swirled biscotti filled with Nutella. I’m not a big Nutella fan, so I decided to try it with pistachio butter. Pistachio butter is simply pistachios ground into a paste. Nothing else added. Much like almond butter or natural peanut butter. It’s not readily available at the supermarket, so you’ll need to order it online.

In my first round of testing, I used the biscotti dough recipe from Bake from Scratch, but I found it too dry. I switched to my favourite biscotti dough recipe for round two and the dough was perfect.

These are a bit more work than regular biscotti, because you have to roll the dough out into a rectangle.

When you spread the pistachio butter, be careful to leave a border, or it will ooze out the sides when you roll it up.

Check out this video to see how they come together.

A little etymology for you. The word biscotti is derived from the Latin biscotus, meaning twice baked or cooked. The dough is formed into a log for the first bake. Then the logs are sliced and put back in the oven for a second bake, to finish the baking. Traditionally, most recipes instruct you to turn the biscotti halfway through the baking process. This is so they bake evenly and get crisp on both sides. They are still quite fragile halfway through the baking time, and I inevitably break a few while trying to flip them over.

Here’s a pro tip that will change your biscotti making game. Just position a wire cooling rack on your baking sheet. Then arrange the slices on top of the cooling rack. This way, the heat of the oven can circulate around the biscotti and there is no need to flip the slices.

Not sure if you noticed the stunning shade of green of these slivered pistachios. I have not enhanced them at all with editing. They actually come that way! I ordered them online from Ayoubs. Most shelled pistachios have a skin on them. These have been blanched and that outer skin has been removed to reveal a gorgeous emerald green shade. That requires a great deal of labour, so they are not cheap, but worth it in an application like this. Of course you can also use regular shelled pistachios and it will still taste delicious, but they won’t be as vibrant a green.

Click here to print recipe for Pistachio Swirl Biscotti.

Cookie Box

Today is International Cookie Day. I can think of no better way to celebrate than with a cookie box. It’s hard to choose my favourite cookie. It’s like asking a parent to choose a favourite child. It all depends on the day and mood.

Some of the cookies in this box are over the top decadent indulgences. The Raspberry Sandwich Cookies ,the Coffee Chocolate Hazelnut Sandwich Cookies and the Toblerone Shortbread fall into this category.

Some of the cookies have a quieter more humble flavour, like the Lemon Coconut Cookies and the Chewy Brown Sugar Cookies.

As in nature, no two of my snowflake cookies are exactly the same. I went with a pink and gold colour theme this year. Very glam. Even though we’re still mostly staying home, my cookies are dressed up and ready to party.

I make Chewy Gingerbread and Brown Sugar Snowflakes every year. This year I also added some reindeer to my collection. They are undeniably adorable and so much fun to decorate.

However you’re celebrating International Cookie day at your house, I hope it’s filled with lots of sweetness, butter and sugar.

Coffee Chocolate Hazelnut Sandwich Cookies

There are over 100 cookie recipes on my blog. To say that I am passionate about cookies would be an understatement. I think that cookies are the perfect way to end a meal. Just a small bite of something sweet. I’m always puzzled why more restaurants don’t put cookie plates on their dessert menus.

Of the more than one dozen cookie cookbooks on my shelf, the one I reach for more than any other is Cookie Love by Mindy Segal. If you’re looking for quick one-bowl, stir and scoop cookies, this is not the book for you. This book is filled with cookie projects. Multi-layered and textured cookies that are a labour of love and a work of art.

These are an intensely coffee flavoured cookie. The recipe calls for instant coffee crystals, like Folgers. It’s important to use instant coffee crystals and not powdered instant coffee You want those specs of coffee to be visible in the dough. Powdered coffee would just dissolve. The cookies are sprinkled with a touch of turbinado sugar before baking. They add a lovely crunch to the cookie.

The buttercream filling is made with a mix of dark and milk chocolate, butter and sour cream for a hint of tang to balance out all the chocolate richness. The buttercream gets piped around the border and the centre is filled with a dollop of Nutella.

Because we’re fancy around here, I dipped the end in melted chocolate and then studded them with chopped toffee bits and chopped toasted hazelnuts, for crunch. We are team texture here at saltandserenity.

Wedding Cake Cookies

One of the only silver linings of COVID is that weddings during this time have become more intimate. You’re forced to pare down your guest list to those that are truly nearest and dearest to you, and I think that makes for a very special day. Plus, with only 10 guests, a huge wedding cake is not needed!😉

My oldest son got married this past weekend and we were indeed an intimate group of 12, including the bride and groom. My son and daughter-in-law planned the entire day and it was perfect. They rented a charming stone coach house in rural Guelph Ontario. They held the wedding outside on the lush grounds surrounding the house. Everything was in bloom and it was an overcast day, which, if you’re a photography person, is ideal. Clouds are nature’s diffuser and make for the dreamiest, softest light.

As a family of mostly introverts, we were secretly (well maybe not so secretly) happy with the small guest list. I was thrilled that my 85 year old mom was able to attend. Of course she cried! It’s a standing joke in our family that it’s not a successful family gathering unless Moppy (that’s what her 14 grandchildren call her) cries. The groom is her very first grandchild and the first of the bunch to get married.

I did not volunteer to bake the wedding cake. I have made one wedding cake in my life and it was a very stressful experience that is best left to the professionals! I did offer to make wedding cake cookies as favours for the guests.

The cookies were my favourite chewy brown sugar cookie recipe. I filled them with blackberry buttercream and a dollop of tart blackberry jam. I used royal icing to stack the sandwich cookies and glue on the sugar flowers.

I packaged them up in these adorable clear little boxes and made labels to match.

They were really yummy, so delicious in fact that my daughter, who is getting married in August, asked if I could make them for her wedding guests. It will be my pleasure!

Sources for supplies

Poppyseed Fig and Walnut Hamentashen

Hamentashen are the traditional treat baked for the Jewish holiday of Purim, which, this year,  falls on Thursday February 25. Essentially, they are a triangular shaped cookie stuffed with a sweet filling.

The Festival of Purim commemorates a time when the Jewish people living in ancient (4th century BCE) Persia were saved from extermination. If you’re curious to learn a bit more about the holiday, check out this post I wrote a few years ago.

We’re all about texture here in the salt and serenity kitchen, so this year I added some poppyseeds to my hamentashen dough for added crunch. I have loved poppyseeds ever since I was a little girl. My paternal grandmother baked poppyseed cookies. We called them Bubbe Cookies. She lived in Philadelphia and a few times each year she would mail us cookies. She always packed them in a shoebox. When that package arrived, my sisters and I would get so excited. I suspect that is where my love of online shopping stems from. There is something so exhilarating about getting a package and opening it.

I filled the hamentashen with fig jam. My favourite is the Dalmatia brand. Don’t be tempted to overfill the hamentashen. A heaping teaspoon if perfect. Make sure you brush the edges with beaten egg white, to glue the seams closed. Pinch the corners firmly to really seal them. I like to put them in the freezer for about 15 minutes before baking. It helps them to hold their shape during baking.

Once they are cooled, I dipped one edge in honey and then into some crushed candied maple walnuts. Double crunch!