I love a good kitchen hack, and when it’s suggested by none other than Alton Brown, I can’t resist.
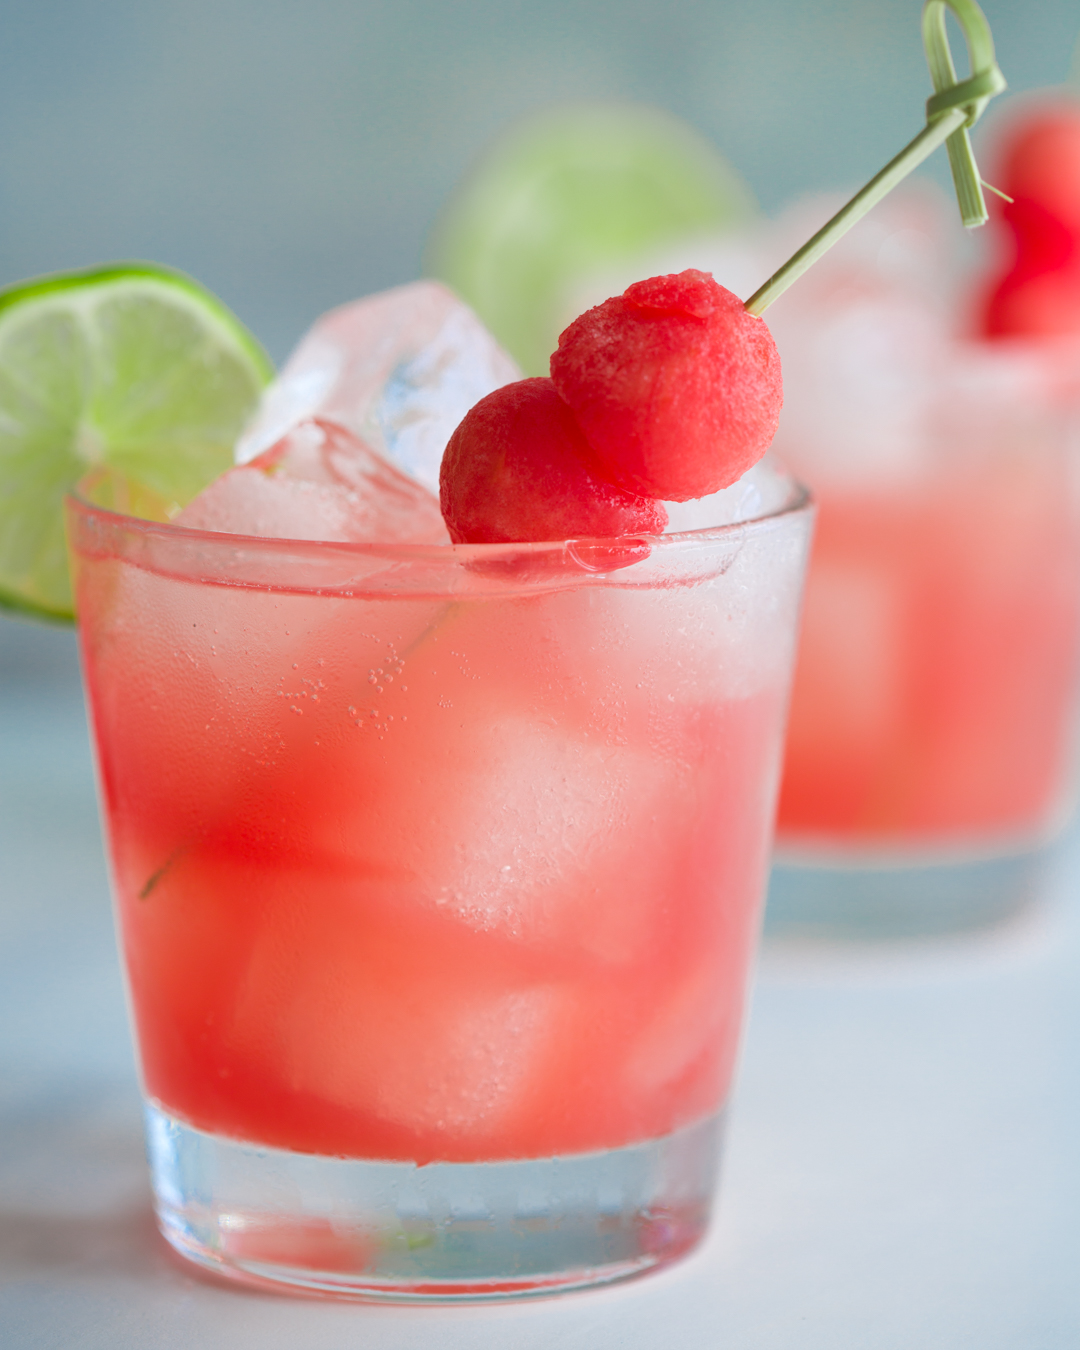
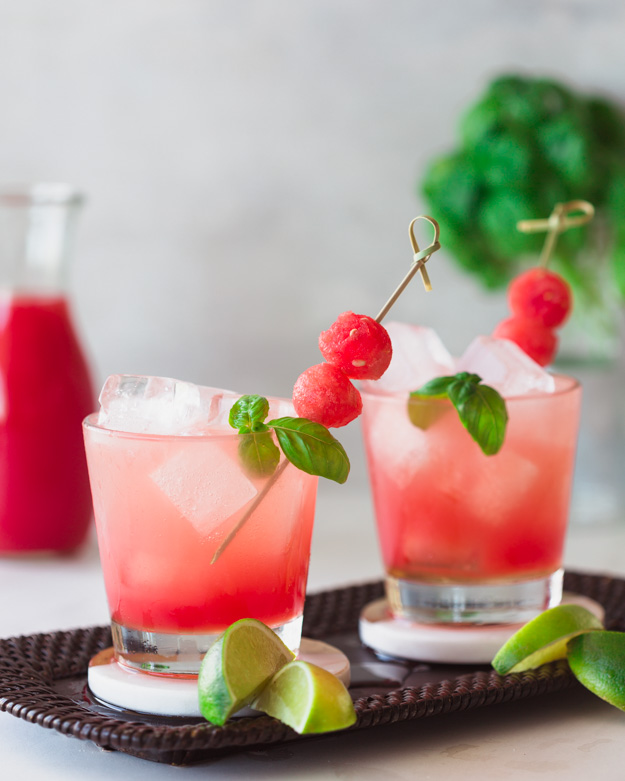
When I saw him make watermelon juice without first peeling and dicing the watermelon, I was riveted. We tried it at the cottage last weekend and it totally works. It’s also so much fun. We mixed the watermelon juice with vodka and lime juice and topped it up with some sparkling water.
You can of course cut up watermelon and puree it in the blender. Either way you choose to do it, I suggest pouring the juice through a sieve to remove the lumpy bits. You want a smooth juice.
This week I tinkered with the recipe we created on the weekend. Our watermelon wasn’t that sweet, so I made a simple syrup. I decided to flavour the syrup with basil, since watermelon and basil are a really delicious flavour pairing. The basil takes this cocktail from good to great.
This would be the perfect cocktail to celebrate Canada Day or the 4th of July!
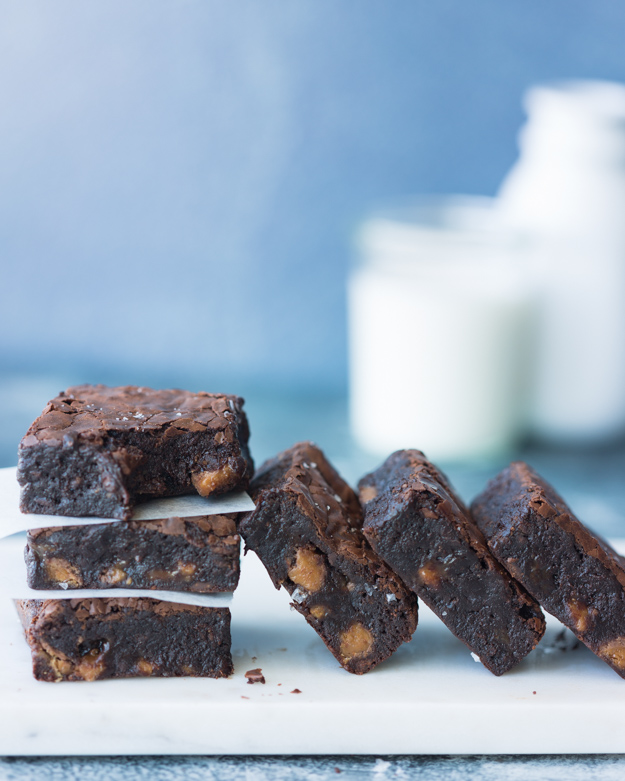
These brownies are the creation of Stella Parks. If you are a baker and don’t know who Stella is, make it your business to learn all about her. She will make you life so much sweeter. She is the resident pastry wizard over at seriouseats.com. She is also the author of the charming cookbook Bravetart; Iconic American Desserts.
Stella wanted to create a homemade boxed brownie mix, for those times when crisis strikes, and you need a brownie immediately, but don’t have time to make them from scratch. You know, like when you scrape your car on the wall of your parking garage, or when you find out that The Chew was cancelled, or you need something to snack on while binge-watching something this weekend.
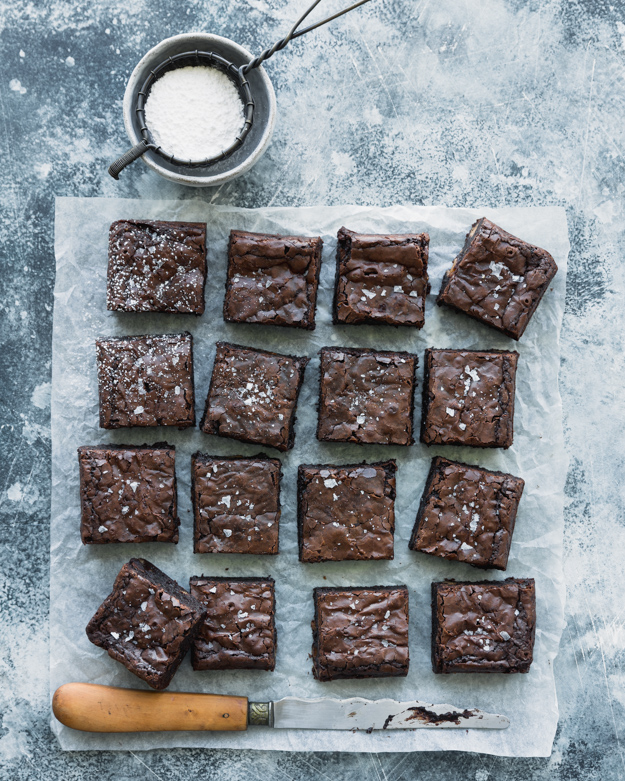
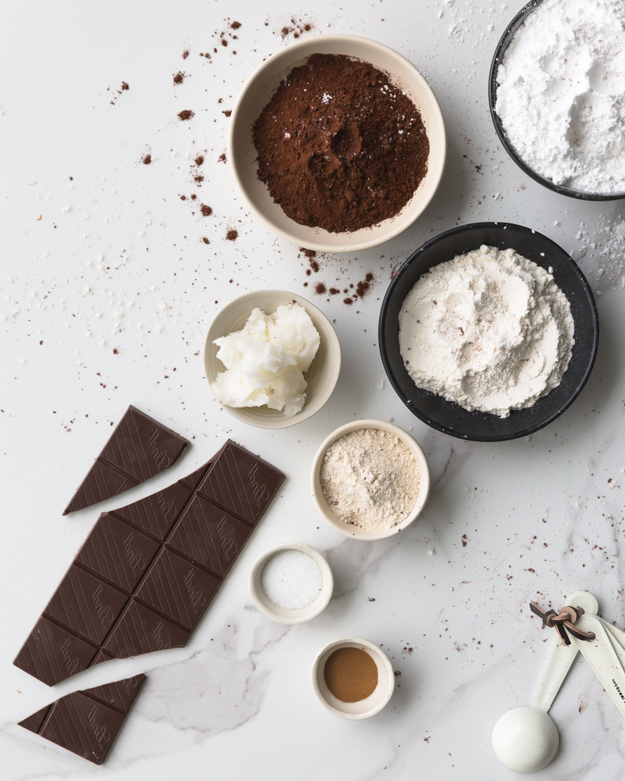
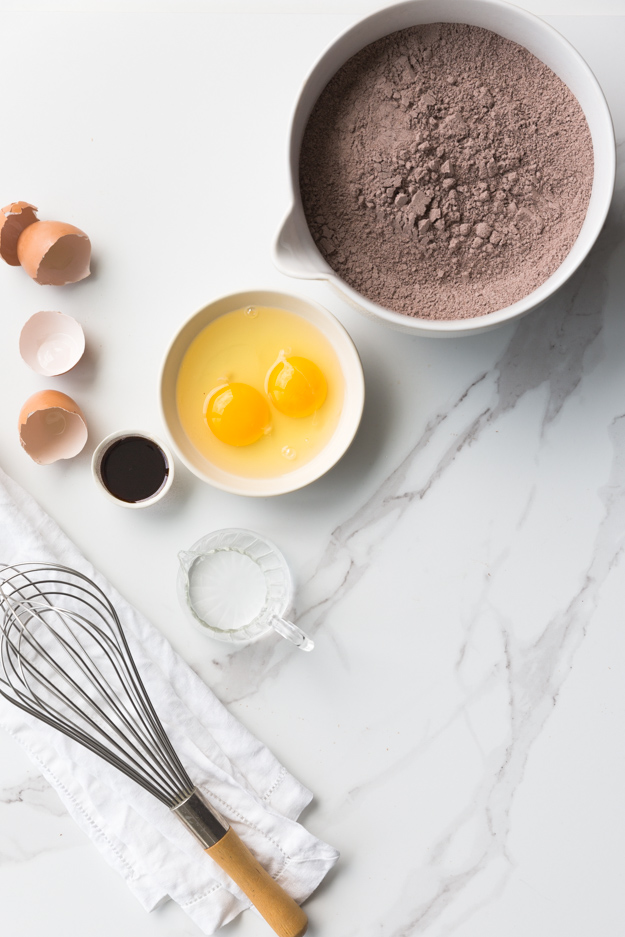
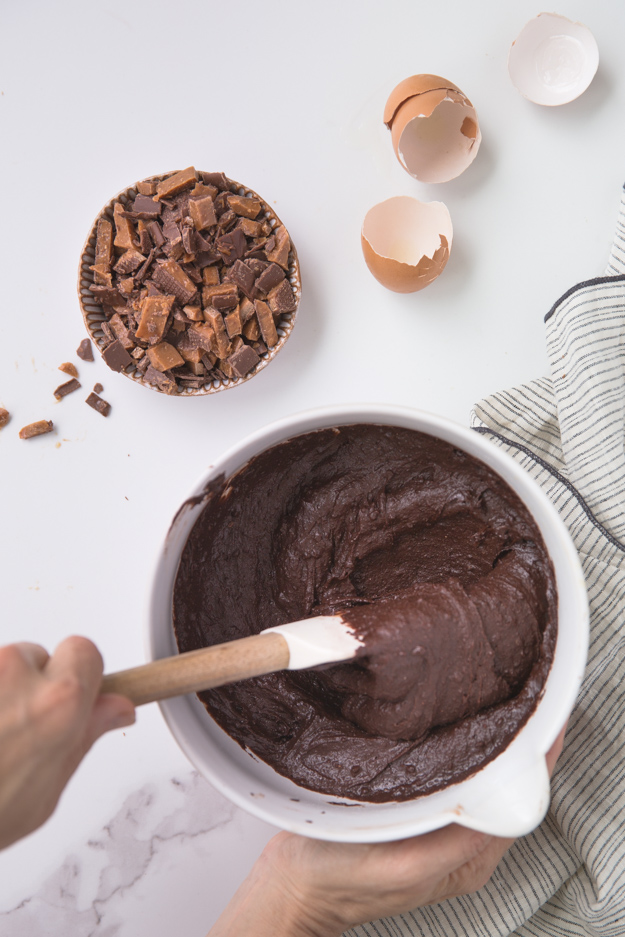
All the dry ingredients are mixed together in the food processor. Then you stash the mix in an airtight jar for emergencies. When crisis strikes, preheat oven to 350°F (if only most solutions to life problems could be solved by preheating to 350!), add coffee, 2 eggs, and some vanilla extract and the batter is ready.
A jar of this mix would be the perfect hostess gift to bring with you the next time you are invited to a cottage for the weekend. If you are feeling extra generous, bring along a new baking pan and some parchment paper and impress your friends with your ability to perfectly line the baking pan.
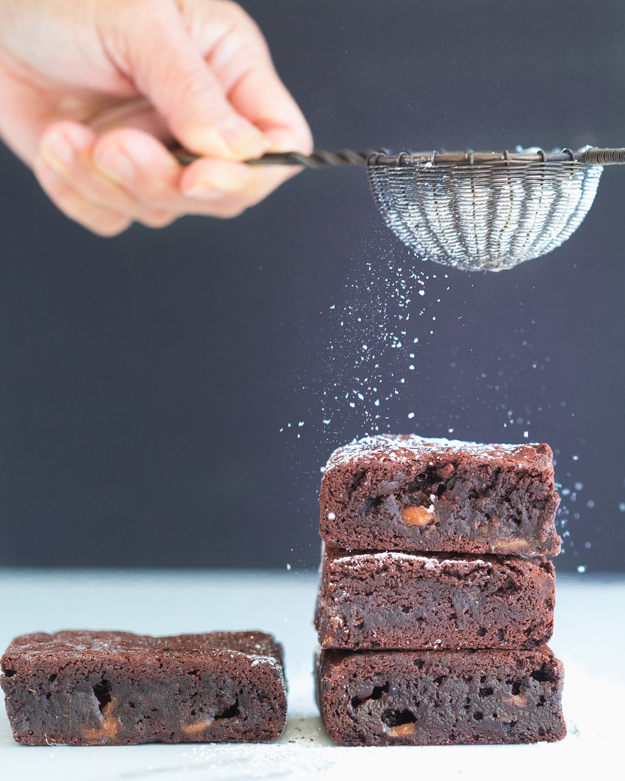
My favourite baking pan is made from light coloured aluminum. Pyrex or glass pans are poor heat conductors, which means that they are slow to heat up and to cool down. This can cause brownies to overbake, because the pan is stays so hot for so long after you take it out of the oven that it continues to bake the brownies.
Stella is insistent on top quality ingredients. Spring for the good dark chocolate, 70% bittersweet. Make sure your cocoa powder is Dutch process. It is darker and higher in fat. She recommends Cacao Barry Extra Brute, and I concur. The secret ingredient is malted milk powder. It is a flavour bomb. Ovaltine is available at most supermarkets, or you can buy Hoosier Hills Farms online. Stella suggests boosting the chocolate flavour with a little instant espresso powder in the dry mix. I used that the first time I made them. The second time, I didn’t have any left, so I substituted some strong coffee for the water she calls for in the wet ingredients. Score! The coffee really bumped up the chocolate notes. The second change I made to the recipe was to add some chopped up Skor bars, because toffee can soothe like no other flavour.
Most of the year I live a fairly hermit-like existence. Don’t feel badly for me, I like it that way. Sometimes it’s all about JOMO (the Joy Of Missing Out). But come summer, I try to cram in as much socializing as is possible. I am fortunate to be able to spend most of the summer on the lake, at our cottage. We have family and friends almost every weekend.
Although I love cooking, I don’t want to spend all my time in the kitchen, so I try to keep things simple. All my guests know that when they ask what they can bring, I ask them to be responsible for one meal. My friends and family are very skilled in the kitchen so it’s really nice to spend the afternoon on the hammock and be called to the deck for aperitivo and dinner.
I spend a day in the kitchen during the week doing meal prep, washing and chopping vegetables, making salad dressings and dips and baking some cookies or squares and stashing them in the freezer. That way, when the weekend rolls around I just have to thaw, assemble and grill.
Each summer I try to find a few new dishes that are big on flavour, look pretty and are able to be made in advance. Then I make them every weekend. The guests change and don’t realize it was served last weekend. This works until my husband and I are sick of eating it. That usually sets in by mid-August.
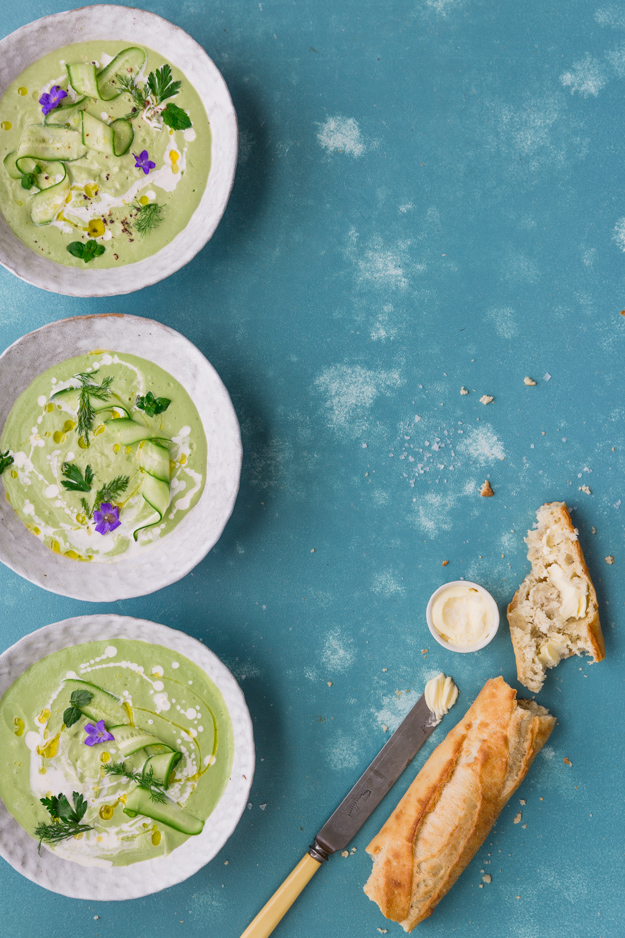
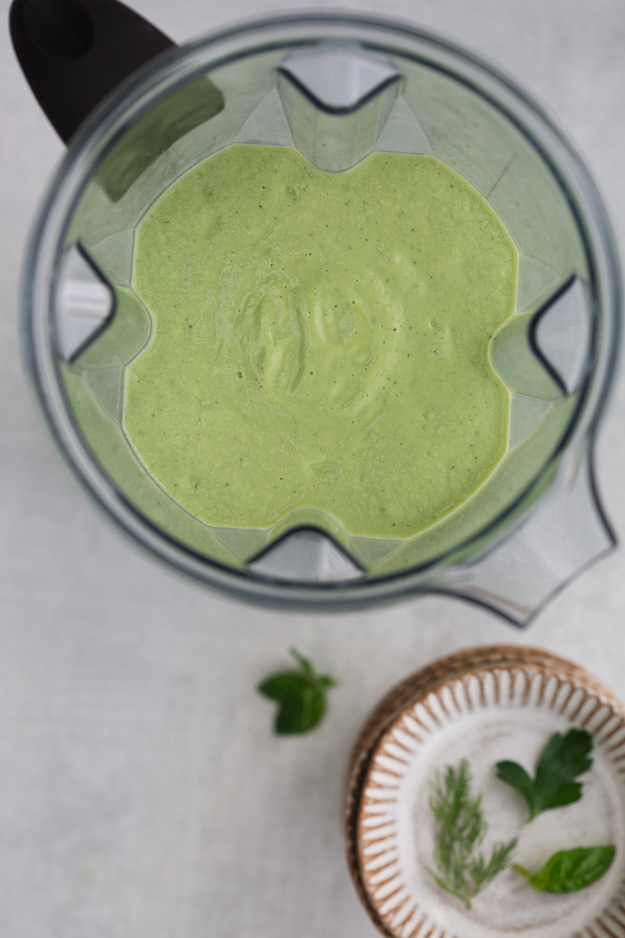
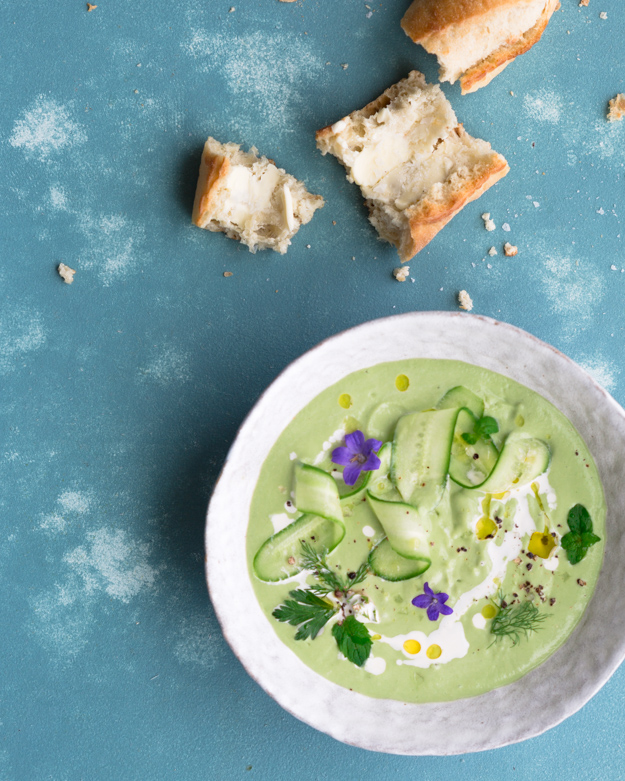
This chilled Green Goddess Soup is going on the summer rotation. I love it because everything is buzzed in the blender and it keeps in the fridge for 2 days. As the summer progresses you can garnish it with sweet corn niblets and diced vine ripened tomatoes. For now, some fresh herbs and cucumber ribbons look really fancy.
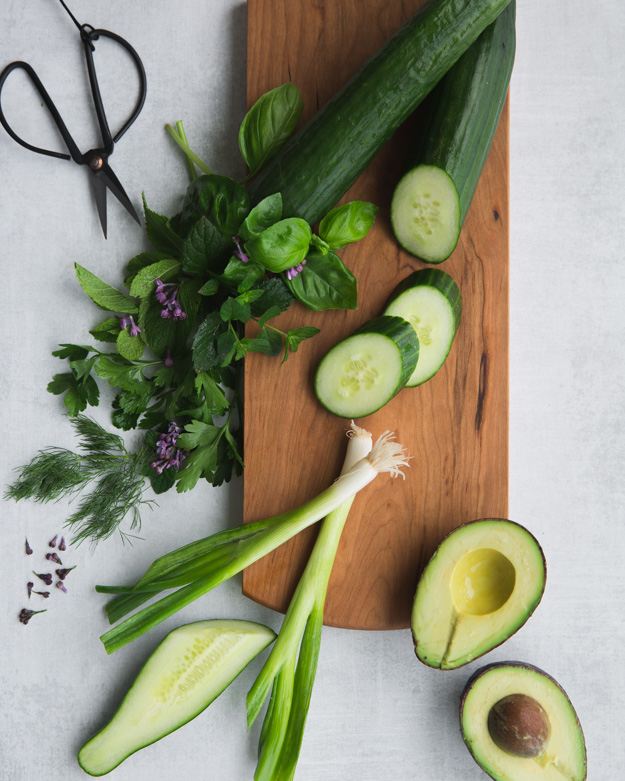
This soup was inspired by Melissa Clark’s Chilled Cucumber Soup over at NYT Cooking. I decided to play with the flavours of Green Goddess dressing and added an avocado to the mix for added richness. Cucumber is fairly bland, so it needs help from lots of herbs, a touch of garlic and a secret flavour bomb of an ingredient, anchovy paste. The soup will not taste fishy, but it adds a wonderful rich and deep flavour note.
I used basil, mint, Italian parsley and dill. For the liquid, I used Greek yogurt, thinned with a bit of water. A squeeze of lemon and a splash of sherry vinegar add a hit of acidic freshness.
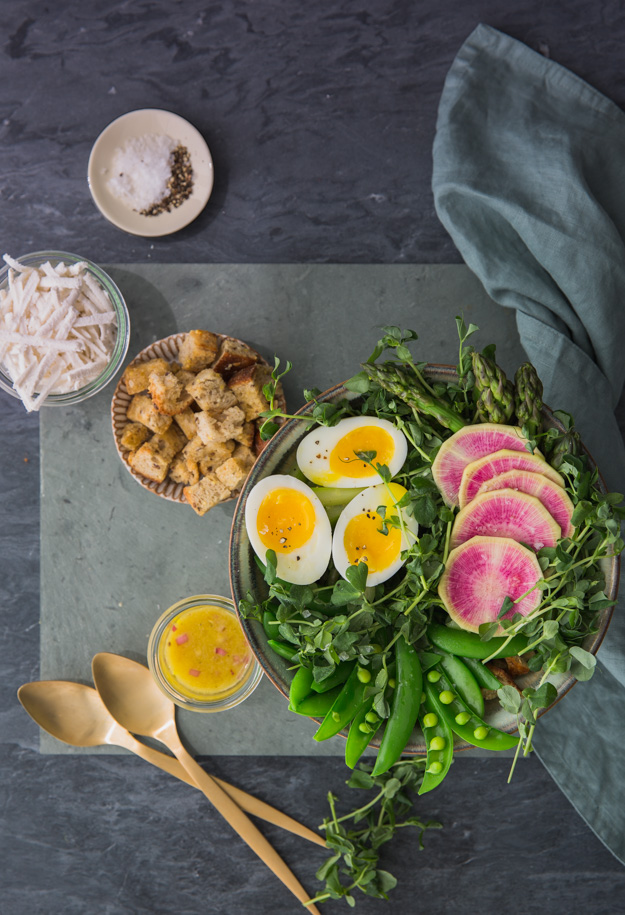
The Panzanella salad was created in Tuscany as a way to use up stale bread. The classic version is traditionally made in summer. It includes chunks of stale bread and tomatoes, sometimes, onions and basil, simply dressed with olive oil and vinegar.
It is customary to soak the bread, as I discovered on a trip to the Amalfi coast a few years ago. I also discovered that the time honoured panzanella salad is not my jam. I really dislike the texture of the soaked bread. I prefer my stale bread with a bit of crunch.
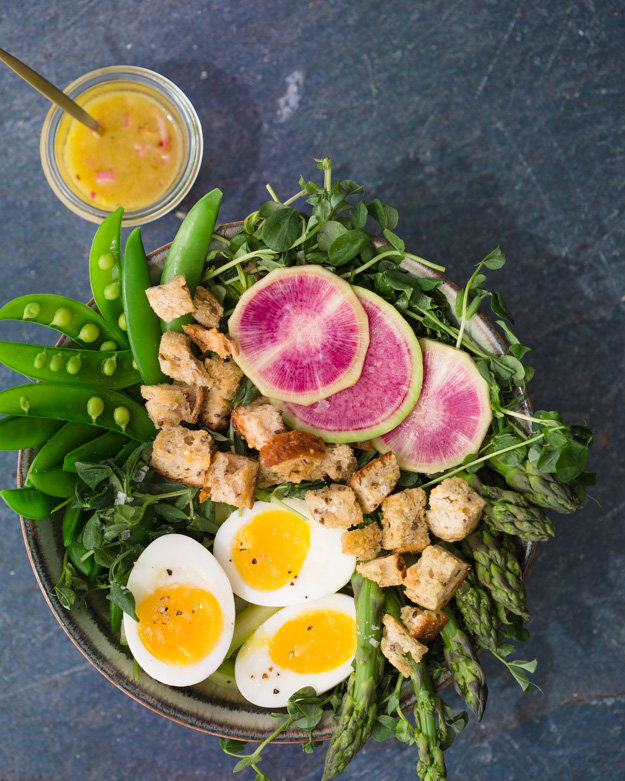
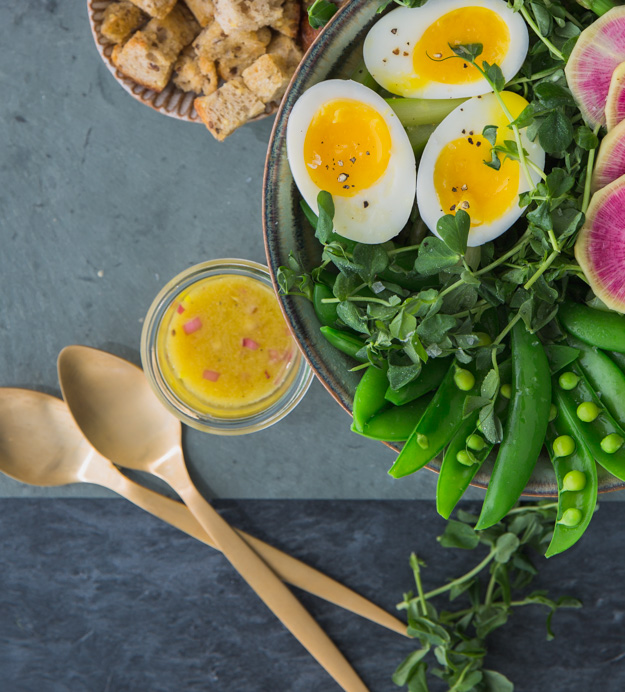
This is my springtime take on the typical panzanella salad. It’s not prime tomato time yet, so I focused on spring produce. I have included a recipe at the end of the post, but there are no rules. Feel free to improvise and use what looks good to you.
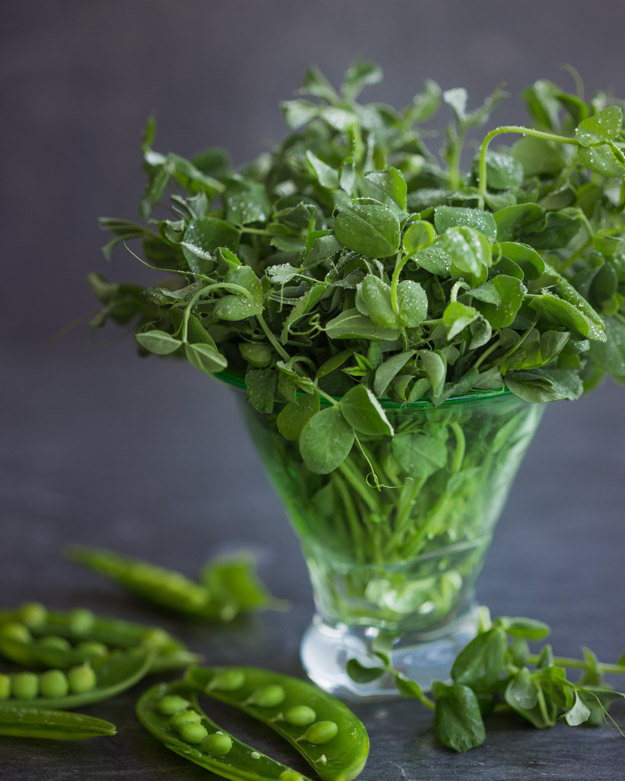
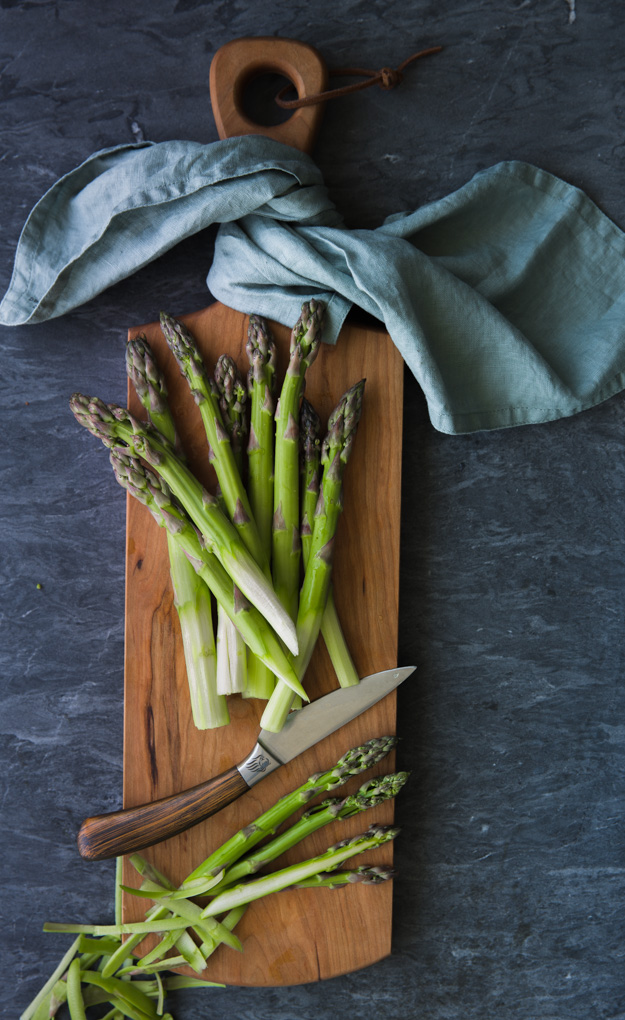
I started with one of the first signs of spring, pea shoots. These are the sweet, curly, tender leaves and stems of the pea plant. Pea shoots have a subtle pea flavor and a light and crunchy texture. They are becoming more readily available. if you can’t find them, arugula or watercress would be a good substitute. If you can find fresh peas, they would add a perfect pop to this salad. Sugar snap peas are a good alternative. Asparagus is a natural choice for this salad. Although I said there are no rules, I do have two fundamental edicts. Please don’t buy those flavourless skinny-ass pencil asparagus. And, please peel the bottom 2 inches of the stalk once you have trimmed the woody end off. It’s how I was trained. It’s a small detail that adds a bit of finesse and style to your salad.
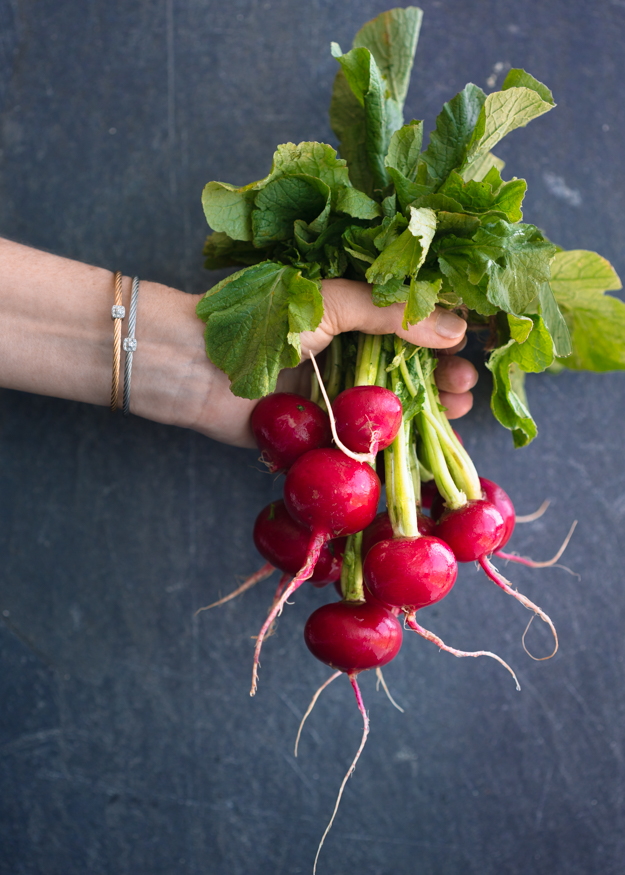
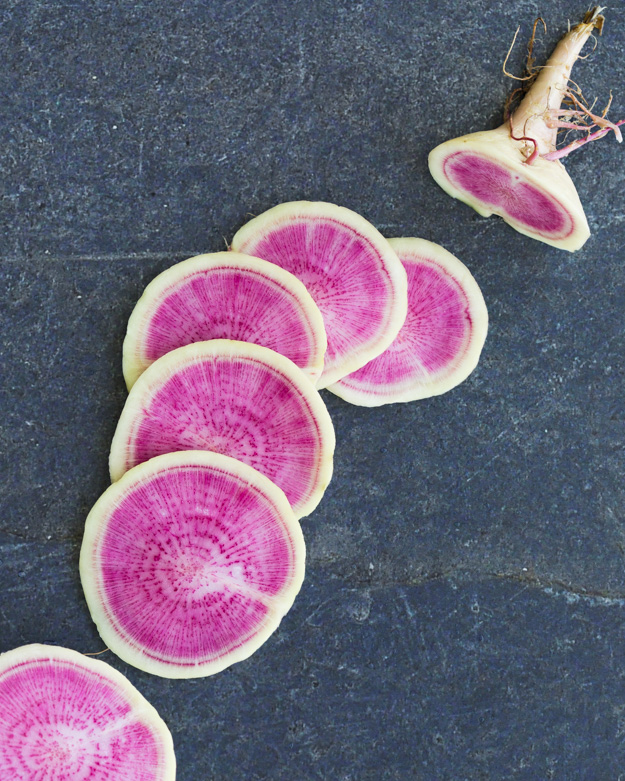
Up next are radishes. Regular radishes add a bit of heat to the salad.
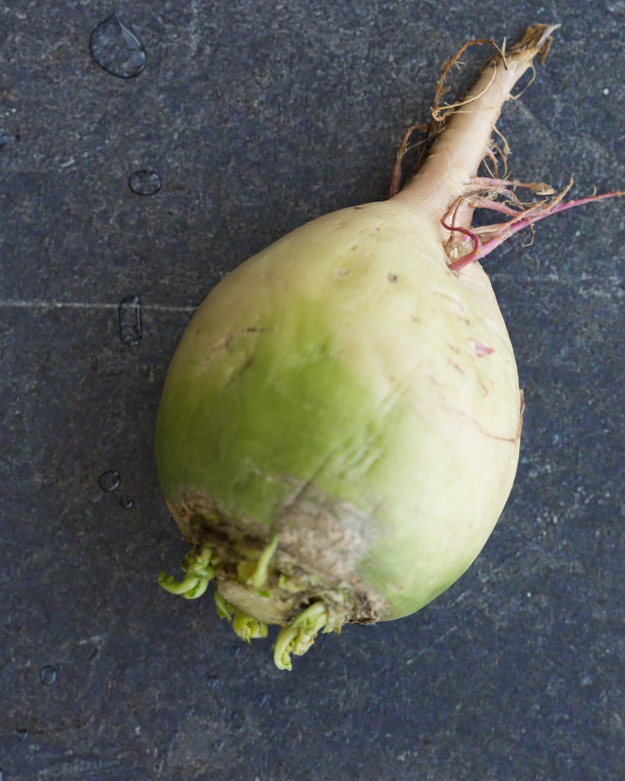
If you can find watermelon radishes, buy a few. They are larger than regular radishes and kind of gnarly looking on the outside.
But slice one open, and you will be smitten by that gorgeous magenta interior. They are milder than regular radishes and make any salad seem luxe. And, because I refuse to believe that #putaneggonit is over, top the salad with a jammy (seven minute) egg.
Pretty soon, we will be winging our way from rhubarb season straight into strawberry season. I am a little sad about it, my husband, less so! This pretty bundt cake was inspired by a brown butter strawberry-rhubarb glazed donut over at the charming blog, Adventures in Cooking. If you don’t know about Eva’s blog, you should check it out. It’s stunning.
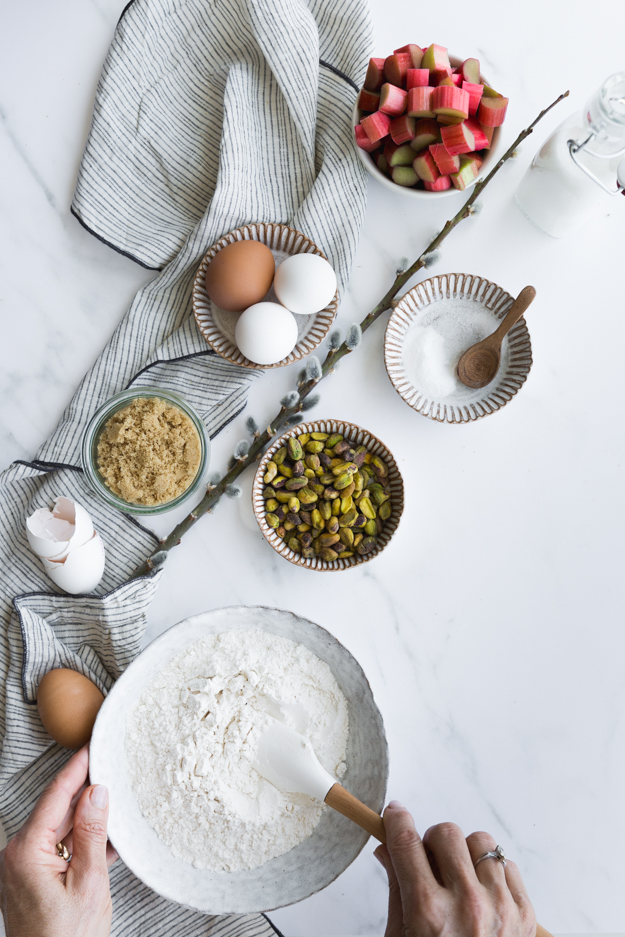
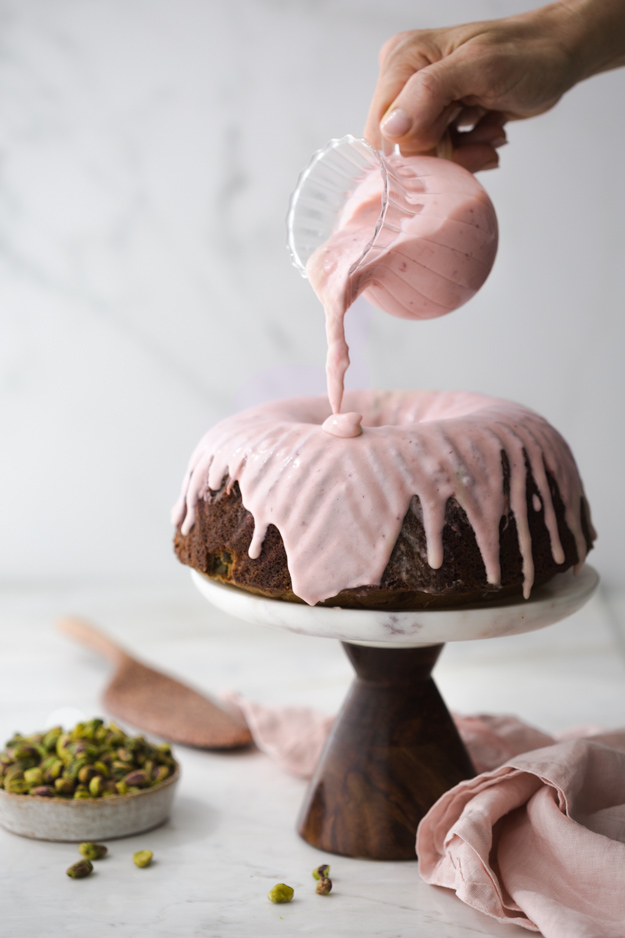
Eva baked buttermilk donuts and dipped them into a pretty pink glaze, concocted from brown butter and pureed strawberries and rhubarb. I adapted her glaze and put it on this amazing rhubarb-pistachio bundt cake. Truthfully, the cake was almost faster to put together than the glaze, but taking the time to brown butter and roast the berries and rhubarb is worth it.
The first time I made the glaze, (yes, I ended up making it twice!) and poured it onto the cake, it was too thick and a bit fibrous from the strawberry seeds and stringy rhubarb pulp. So on the second go-round I strained the glaze through a fine mesh strainer and got the perfect consistency.
Oh, I forgot to tell you, the glaze is enriched with a bit of melted white chocolate to give it that extra oomph! You could, of course, make the cake plain, without the glaze, but why would you want to?
Studded with tangy rhubarb and crunchy pistachios, this cake is not too sweet. A little slice is the perfect afternoon pick-me-up.
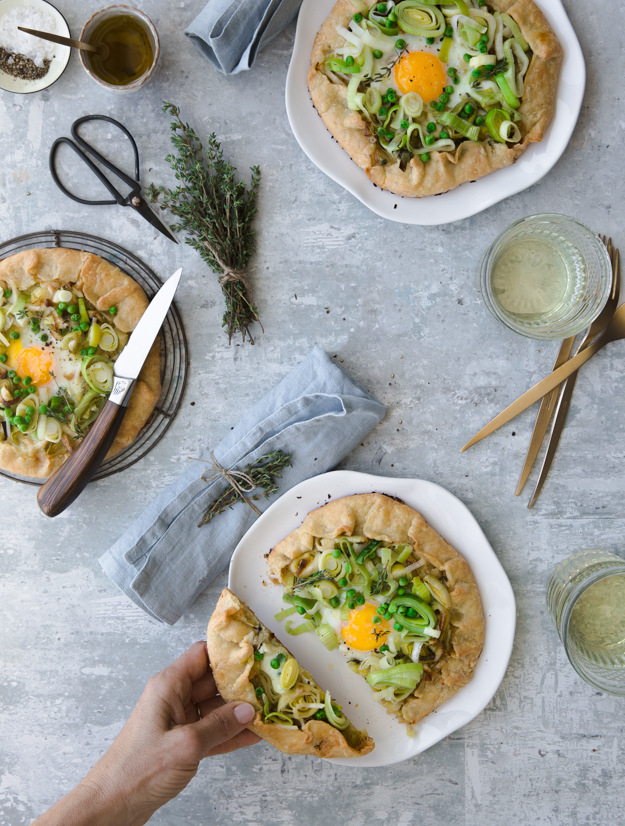
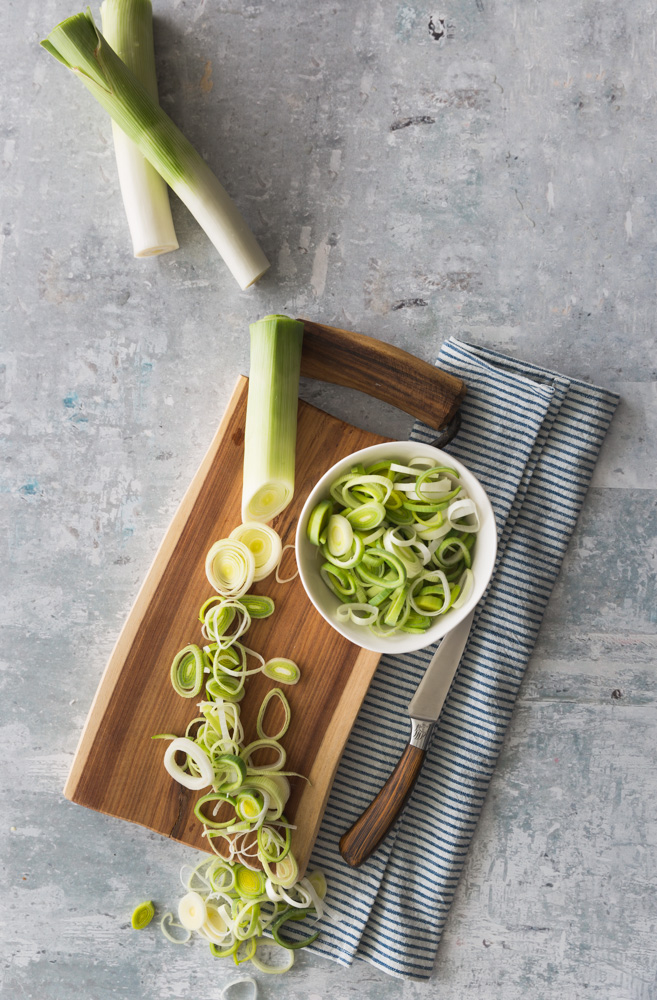
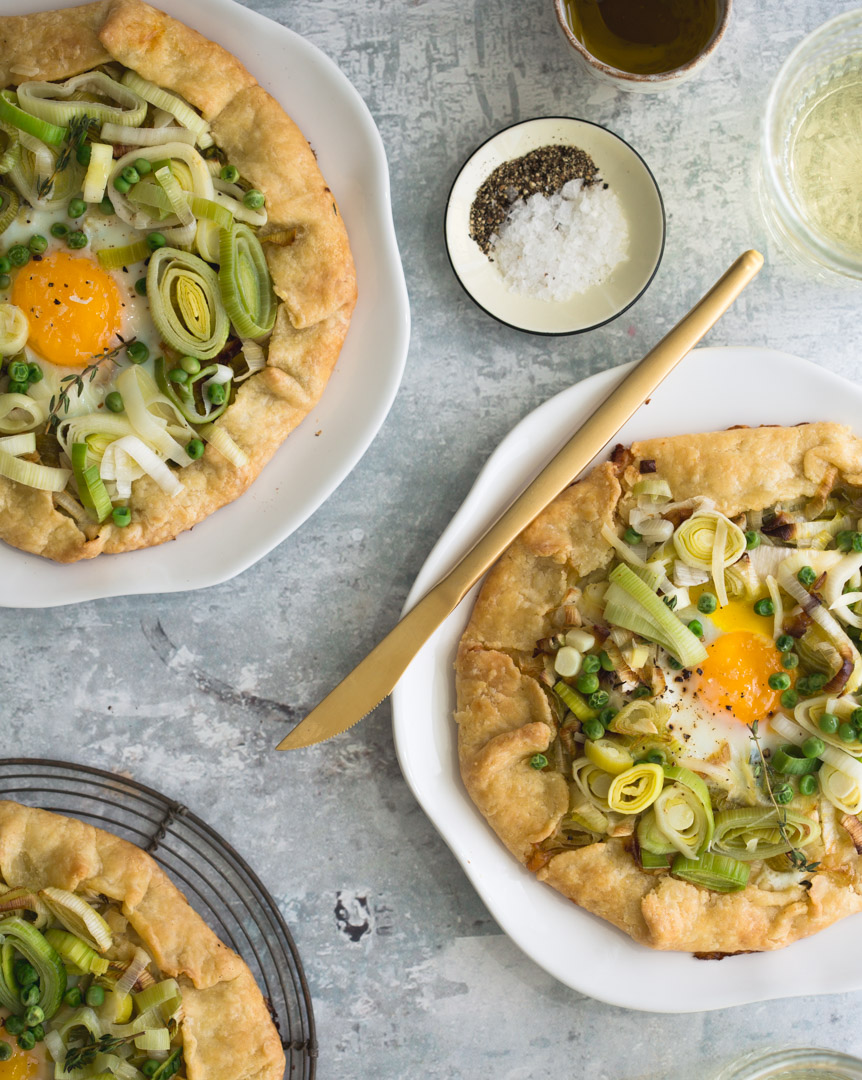
Leeks have never achieved the same popularity in North America as they have in Europe, and that’s a shame. Leeks are the shy cousin of the low-brow onion. Shyness in this case, is a good thing. Cutting them does not cause tears, and their delicate flavour is much sweeter than the common onion. Their natural flavour partner is peas. What better way to put leeks and peas together, than in a tart. No tart pan required, just simply fold the edges of dough in to form a free-form galette. If you are a regular reader of this blog, you may recall that I have posted about galettes before, here, and here, here, and here. Apparently I have a thing for galettes. In this version, I spread the dough with some dijon mustard for zing, scattered the mustard with Gruyere cheese because, cheese! After the leeks and peas I topped the galette with an egg because everything is better with an egg on top.
The first time I made them I added the egg just before I put the tart into the oven. The tart takes about 35 minutes, which totally dried out the egg. You want the white to be just set and the yolk a bit runny. On my second go-round I baked the tart without the egg for about 25 minutes and then topped it with the egg for the last 10 minutes of baking. Perfect!
What I love about this galette is that you can serve it hot, warm or room temperature. It’s great for lunch or a light dinner, or cut it into wedges and serve it with drinks. What are you waiting for? Make it today.
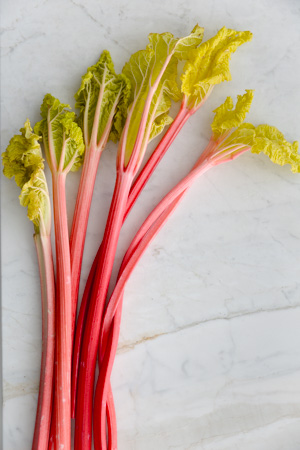
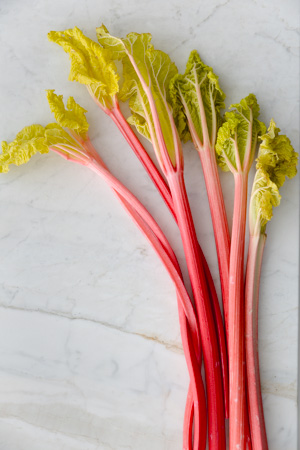
If you were at the McCrae Avenue Farm Boy store in Ottawa last Saturday afternoon, and heard a high pitched squeal, that was me. For the past month I have been watching my instagram feed blow up with images of rhubarb creations. I wanted in on the fun, but there no rhubarb anywhere in my neck of the woods.
To be clear, this was not local rhubarb. It’s still too early for that here. It was that pretty pink “forced” rhubarb, which I love way more, because of that gorgeous hue. If you follow me on instagram you may have caught my teaser video.
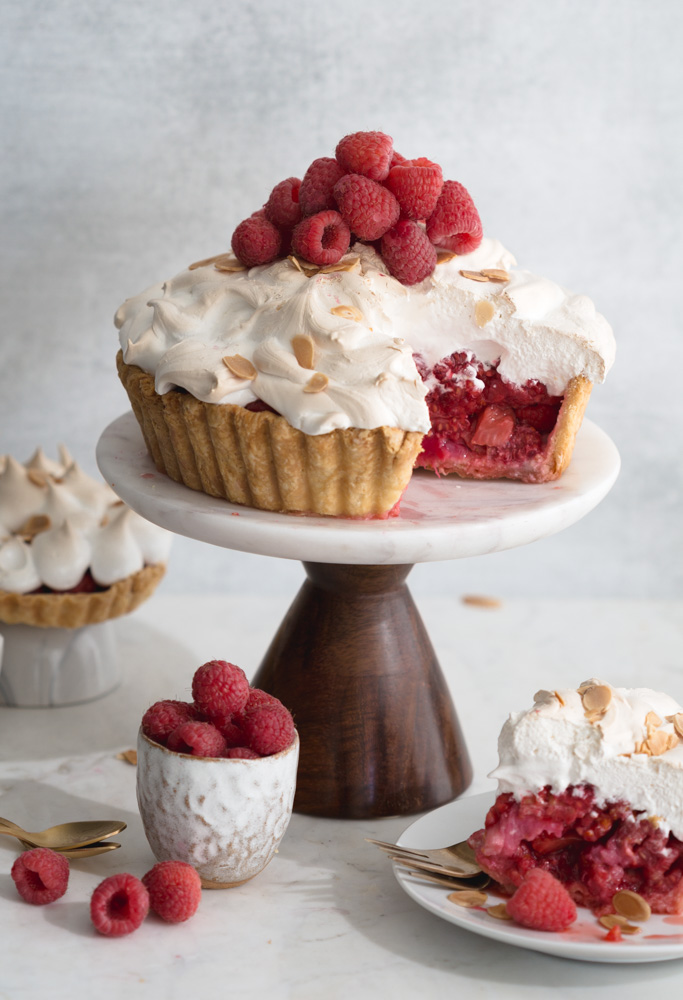
Cooked rhubarb can be a bit mushy in texture, so I like to combine it with another fruit. Strawberries are the classic pairing, but I went rogue and opted for raspberries.
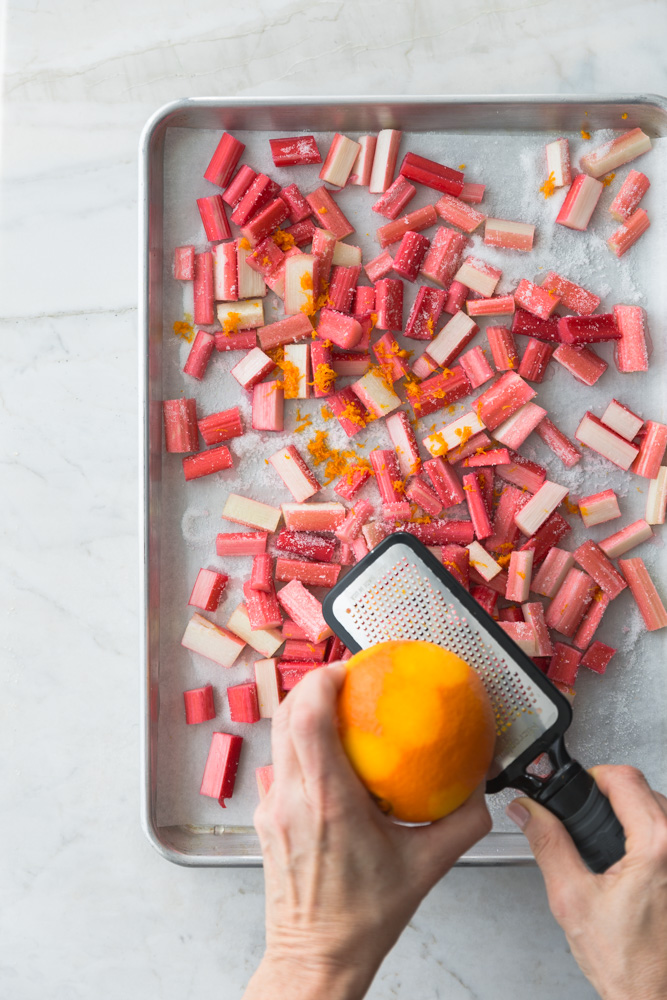
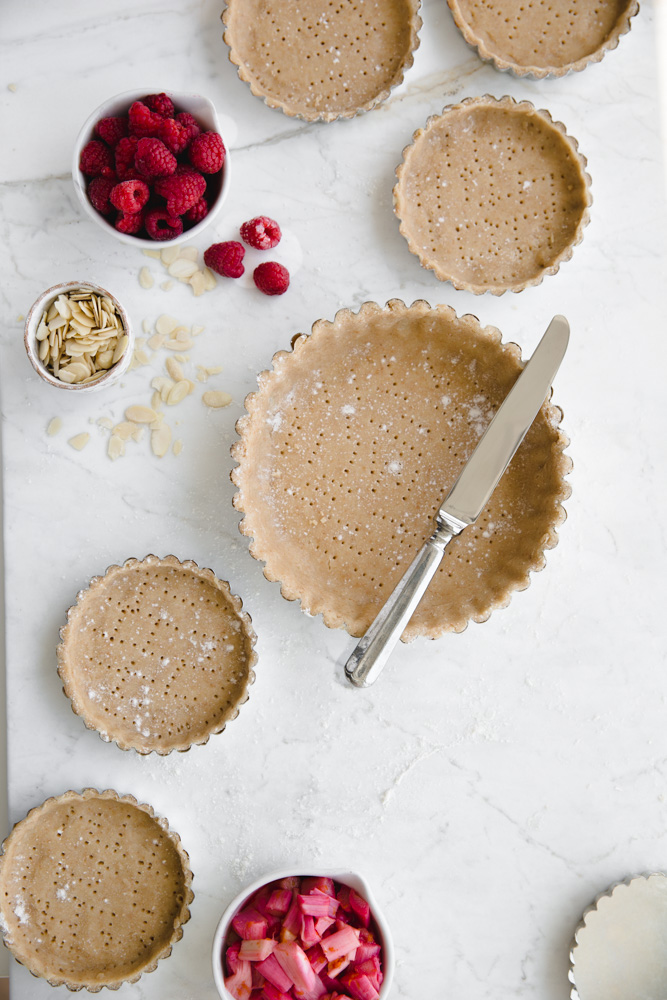
The rhubarb needs to be cooked before it can go into the tart. Roasting helps retain that pretty shade of pink. It needs sugar to tame the its astringency and some orange zest to enhance the flavour and aroma. I drained the roasted rhubarb to get rid of any excess liquid, so that my tart bottom would not get soggy. Mary Berry does not like soggy bottoms. The raspberries get mixed in after the rhubarb is roasted.
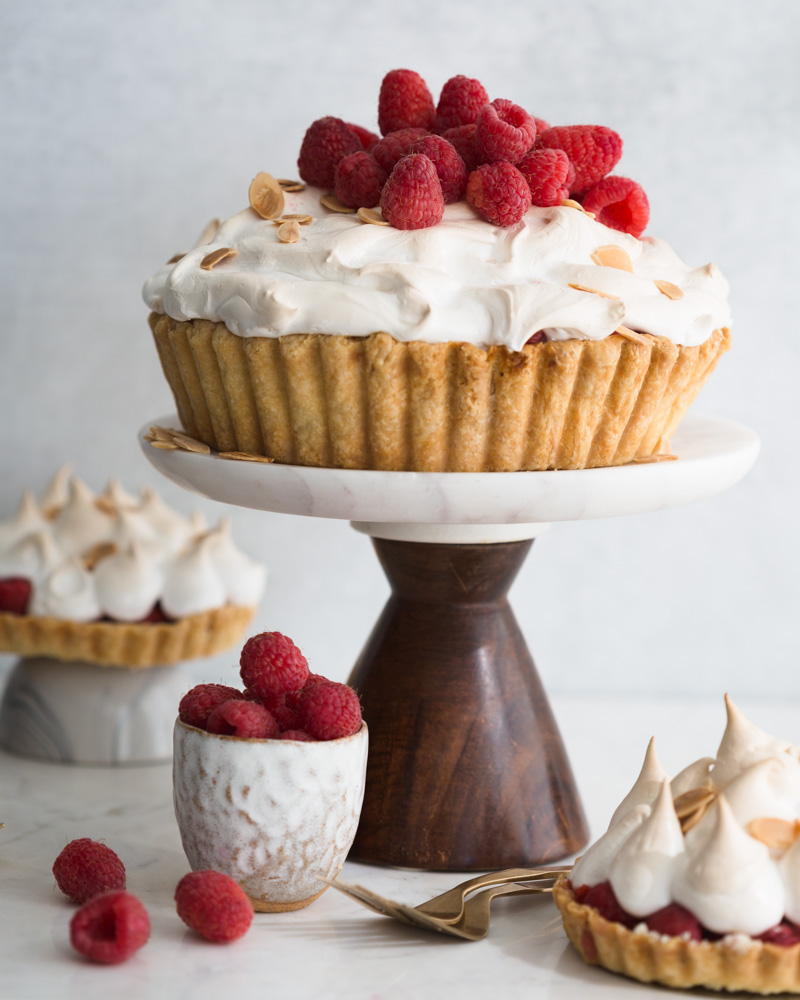
I used a deep dish 8 inch tart pan, with a removable bottom, for a dramatic presentation. You could also use a springform pan. For fun, because that’s what my life has come to, I doubled the recipe and also made 6 mini tarts.As has been the case lately, this recipe took more than one attempt to get it just right. But I am happy to report that I nailed it on the second try!
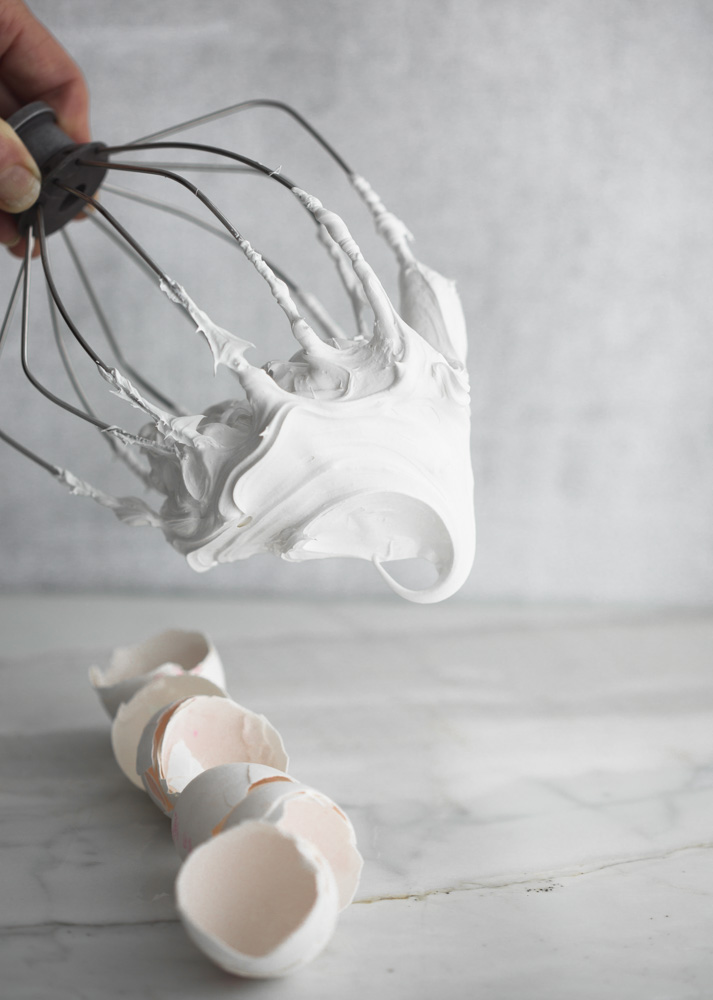
In my first attempt I pre-baked the crust for 20 minutes, added the filling, topped it with a simple French meringue and baked it for a further 30 minutes. The delicate raspberries turned to mush, the bottom crust was soggy and the meringue turned brown and was really tough and chewy.
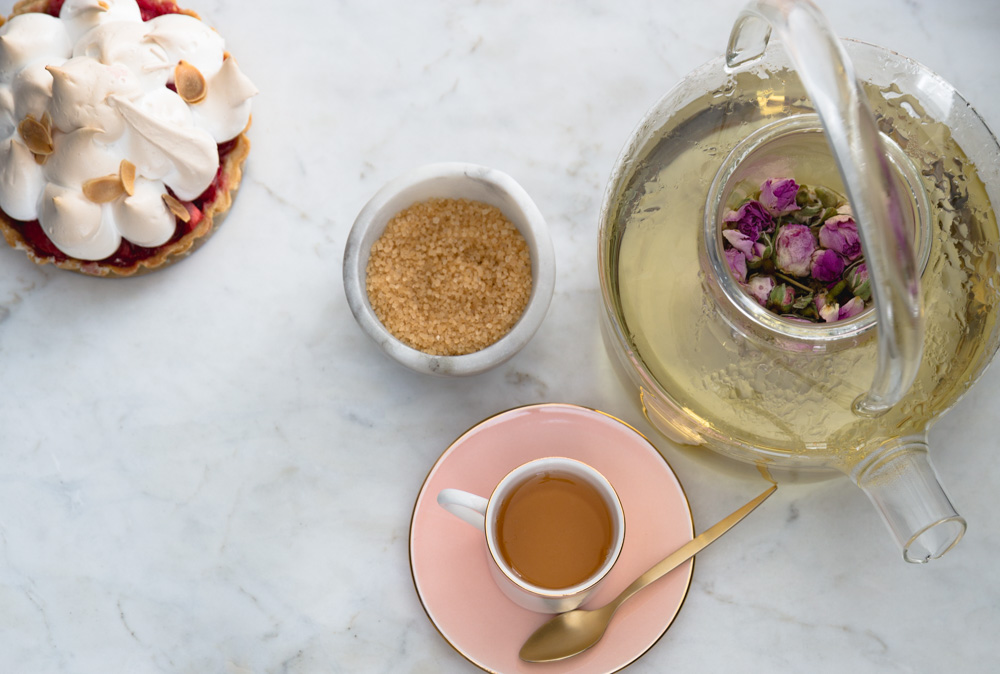
On the second attempt I pre-baked the crust for almost 35 minutes, so that it was totally golden brown and gorgeously flaky and crispy. To solve the meringue dilemma, I turned to pastry wizard “Bravetart ” (aka Stella Parks) and she pointed me in the direction of a Swiss meringue. The main difference between the two types of meringue is that in a Swiss meringue, you heat the egg whites and sugar first, before whipping them. In a French meringue, there is no pre-heating before whipping. A Swiss meringue whips up fluffier and more stable than its French cousin and it is safe to eat without additional cooking time. If you are curious and want to learn more, Stella wrote a great piece on Serious Eats about it. I topped the pre-baked tart shells with the rhubarb-raspberry filling, topped them with the Swiss meringue, and baked them for a brief 10 minutes just to give the meringue a golden kiss. The raspberries maintained their integrity and the meringue was pillowy soft, fluffy and SOOOOO delicious, like the very best homemade marshmallows. Perfect with a cup of tea!
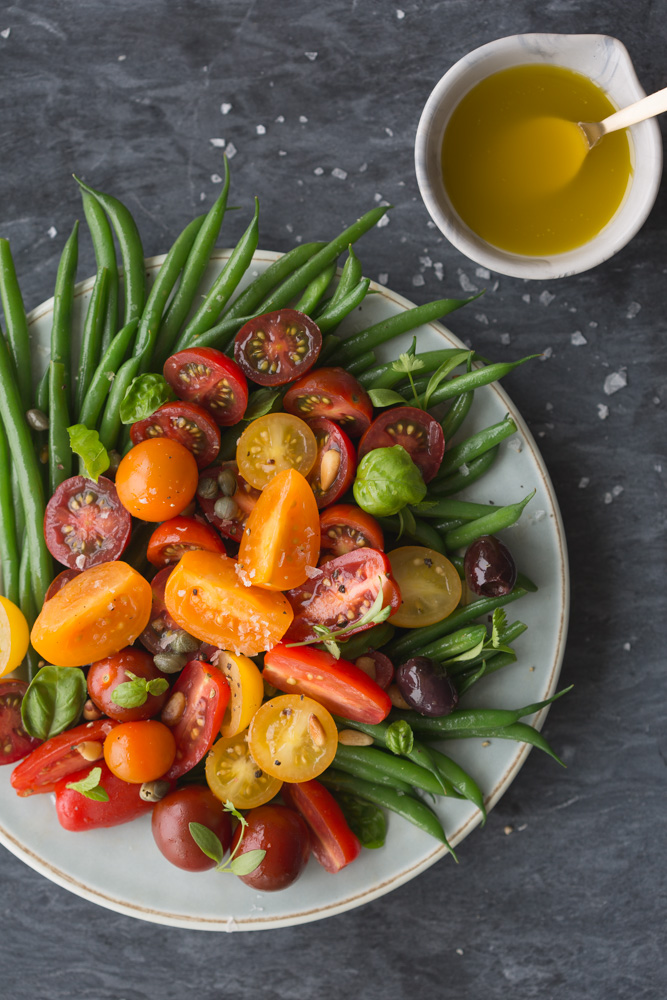
This is the quintessential summer salad. Tender crunchy green beans and sweet, sun-kissed tomatoes. Sadly, we are still several months away from those beans and tomatoes, but we can fake it.
Most of the year, green beans look so full of promise, all bright and green, but in truth, they are imposters. Once you cook them, they disappoint. If you try to cook them briefly, they never have that fresh snap of summer beans, they just come out tough and leathery. If you try to cook them longer, to get them tender, they just end up mushy. And let’s not even talk about winter tomatoes. Red cardboard, disguised as a tomato. Enough said.
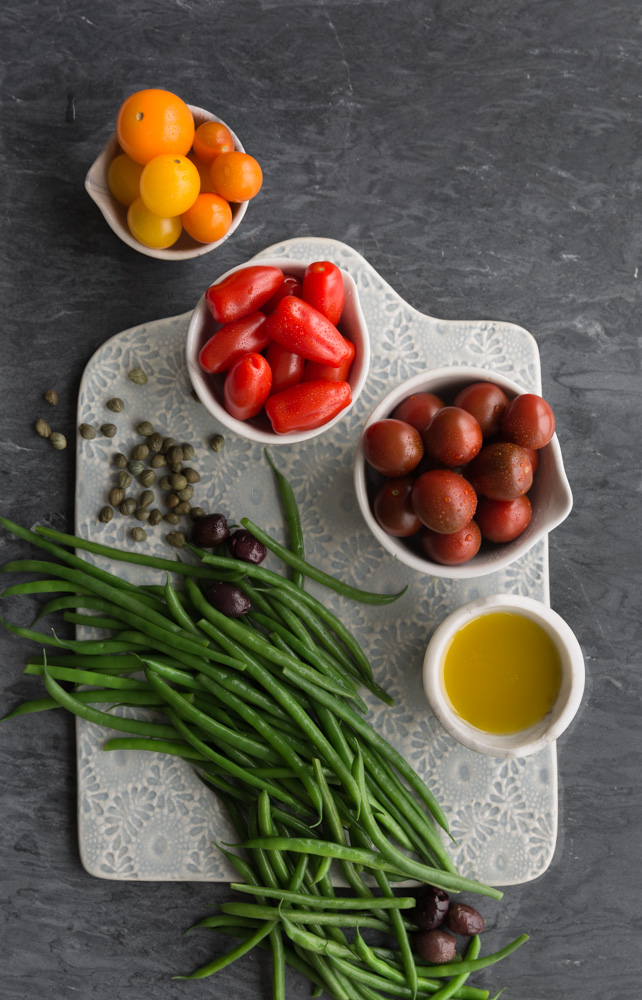
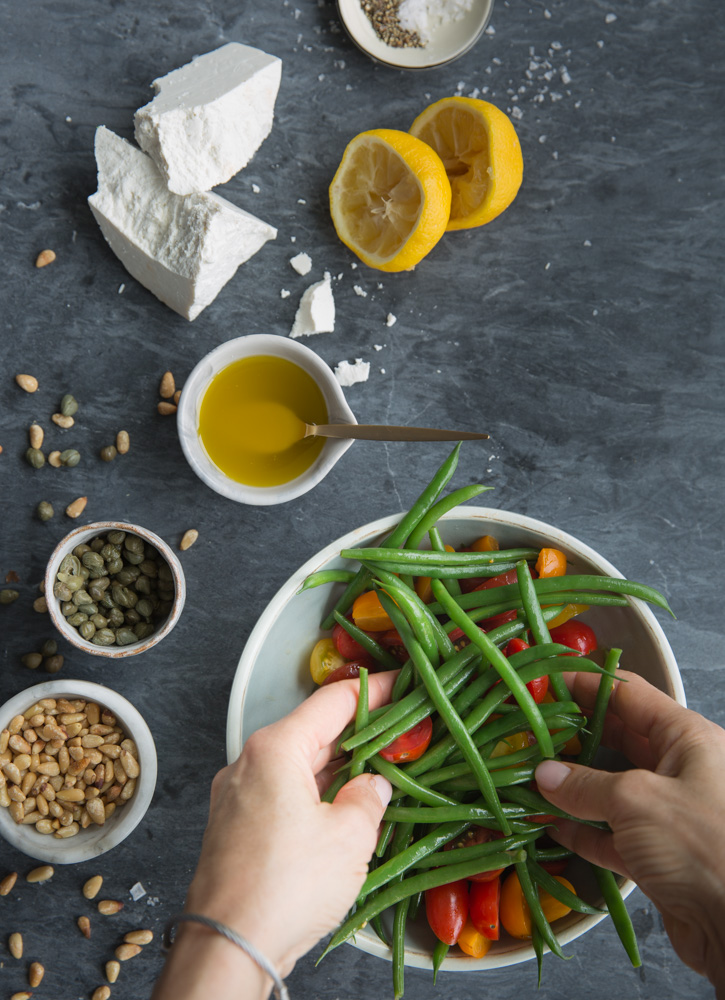
To satisfy my craving for verdant crunch, I bought haricots vert, those skinny pricey green beans. I’m sure my carbon footprint is huge, because they were probably from Kenya or Guatemala, but I wanted that tender crunch. Getting sweet tomatoes out of season is as simple as buying the little grape or cherry tomatoes. They have much better texture and flavour than their big sisters. Bonus points if you can find the rainbow baby tomatoes. With the addition of toasted pine nuts, olives, capers and some ricotta salata, this salad had a decidedly Sicilian bent. For the dressing I whisked together anchovy paste (please use it even if you don’t think you like anchovies, it adds a powerful umami punch without tasting fishy), dijon mustard, garlic, lemon juice, white wine vinegar and extra virgin olive oil. Don’t forget to garnish with fresh basil leaves.
I just got back from a long weekend trip to London, with my husband, and I am filled with so much inspiration. My god-daughter, who lived in London for a few years, sent me a list of some of her favourite restaurants. Our agenda included as many meals as we could fit in, as well as lots of walking to burn off all those calories. We ate at The Palomar, Yotam Ottolenghi’s Nopi,Dishoom, Bocca di Lupo, and Opso.
On Sunday, my husband went to a soccer match and I attended a workshop titled, “The Art of Food Stories”, put on by two of my favourite food photographers, Rachel Korinek and Bea Lubas. I will write another post about that experience next week, so stay tuned.
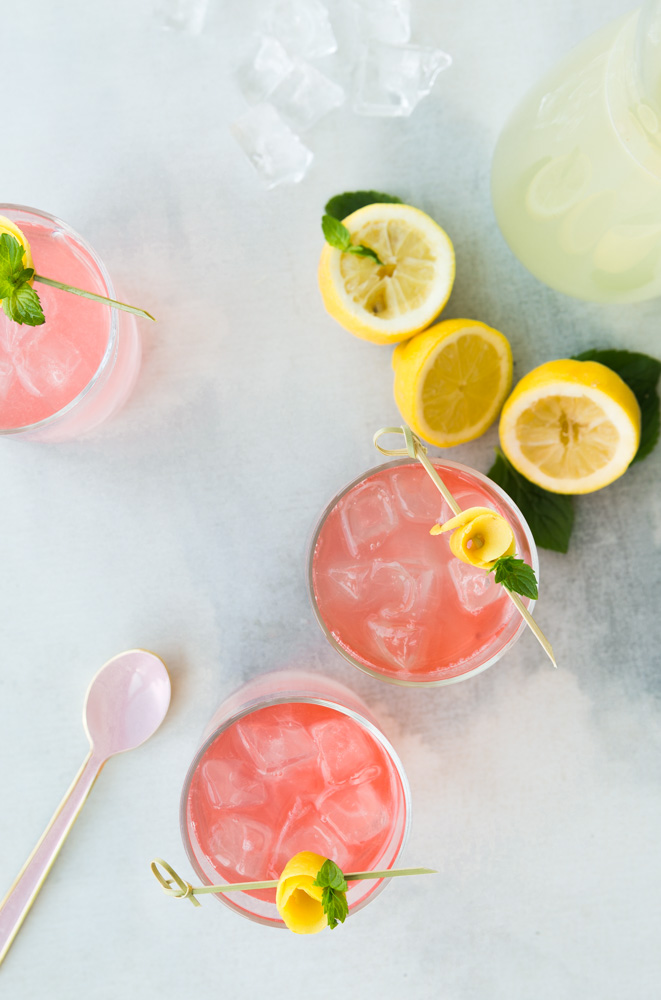
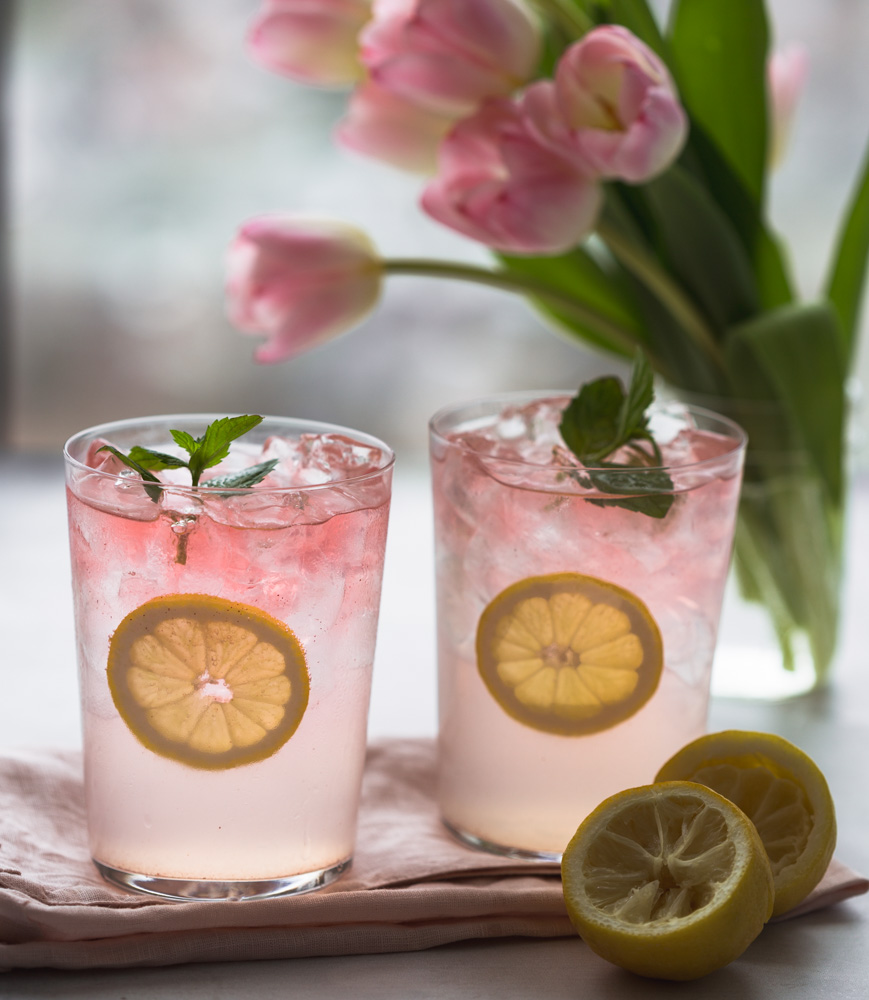
One of the most unique and delicious things I tasted was Sumac-Ade at The Palomar. Serving the food of modern day Jerusalem, the menu is strongly influenced by Southern Spain, North Africa and the Levant. (new term for me!!)
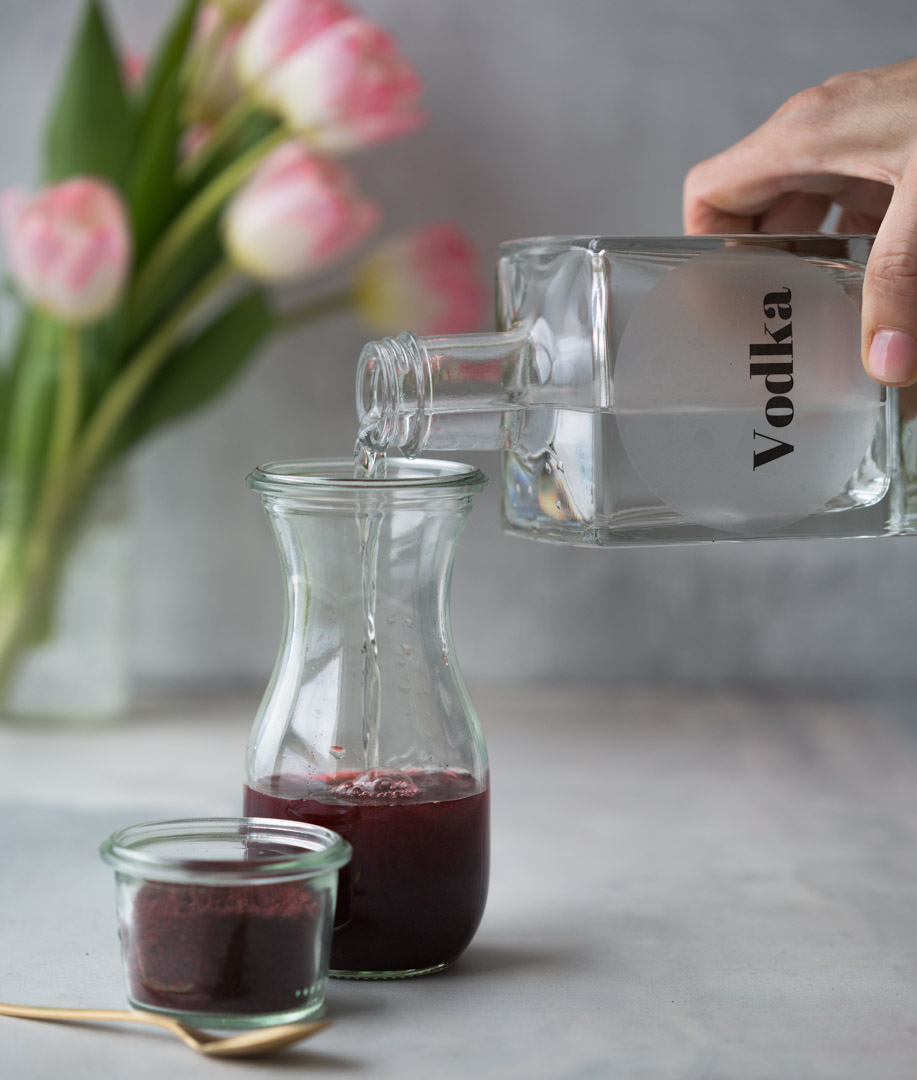
Sumac is a spice typically used in Middle East cooking. If you’ve ever had za’atar, then you know sumac. Mixing it into a cocktail is not a very common use of this spice but when you consider the flavour profile of this spice, it makes sense. It has a bright citrus flavour, and is used wherever you want a hit of fresh acidity.
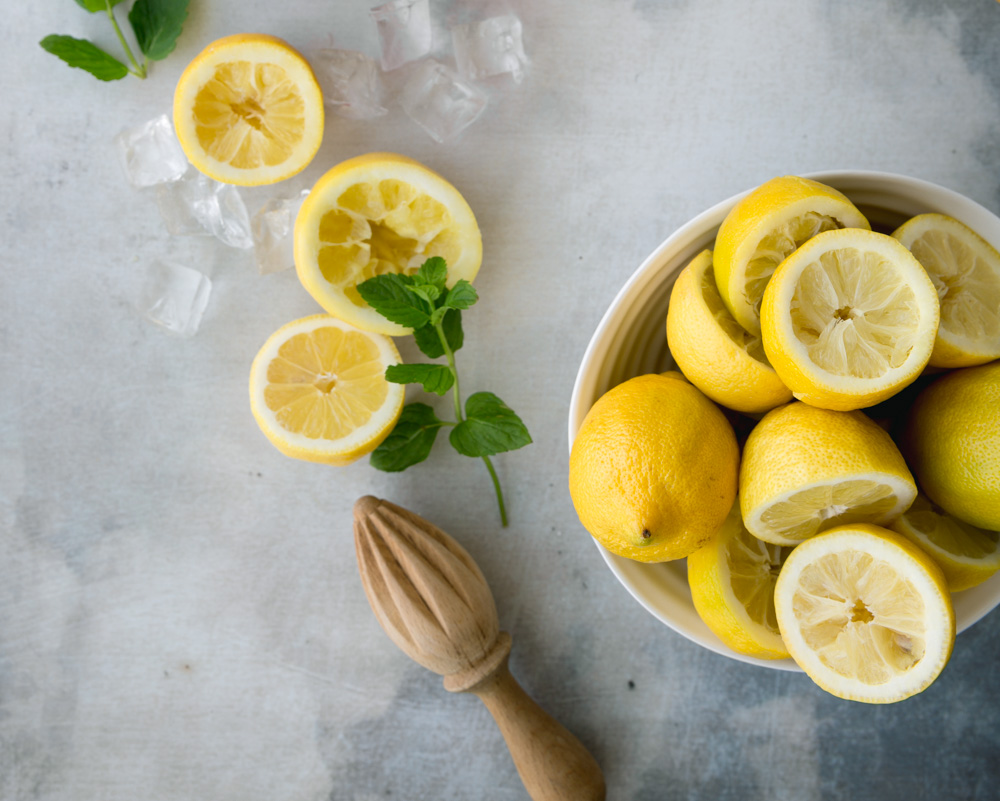
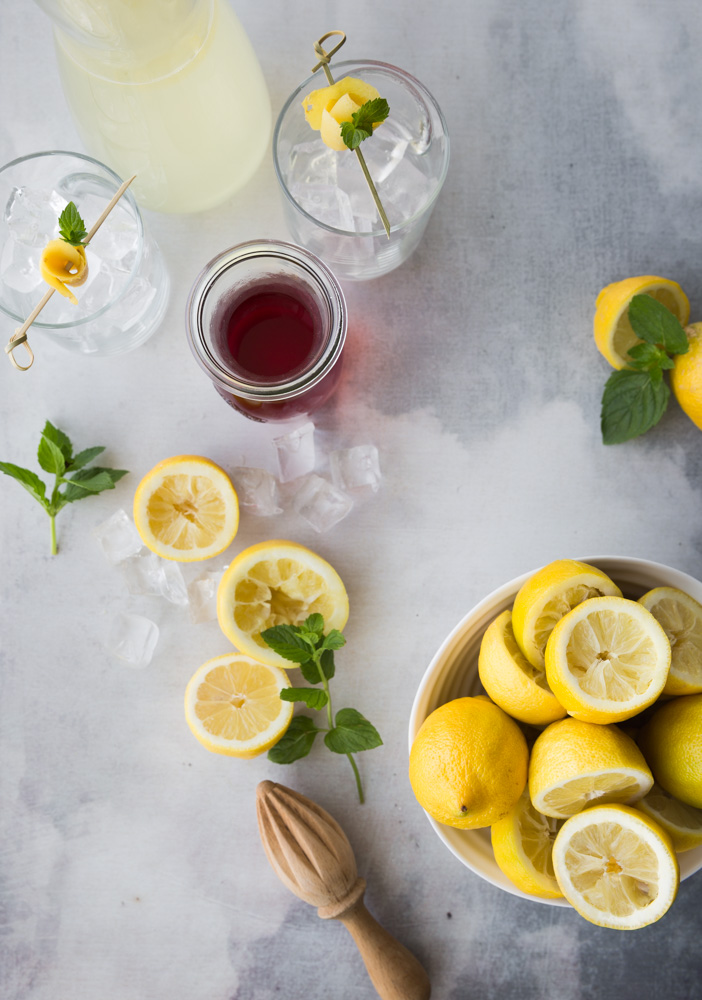
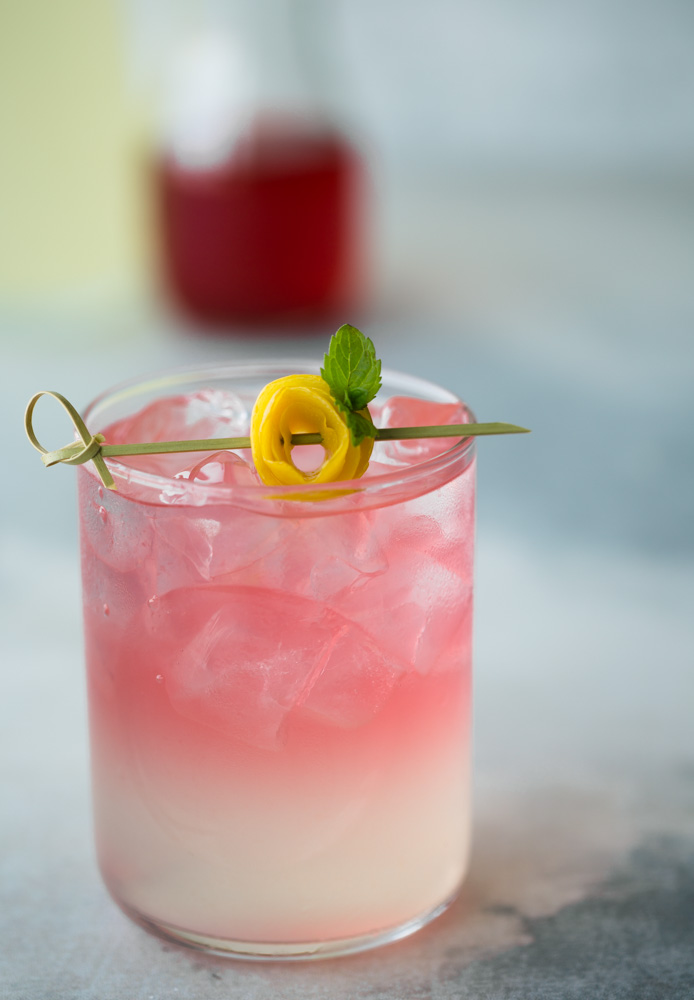
The waiter described it as sparkling lemonade flavoured with sumac. I had to try it. One sip and I was hooked. The tart acidity of the sumac really enhanced the lemonade. I sent the waiter off on a reconnaissance mission to find out how it was made. He came back after consulting with the resident mixologist and explained that she infuses sumac in vodka for 3 days. Then she strains it and adds a small spoonful of it to a large glass filled with ice and fresh lemonade. The drink gets topped off with a big splash of soda water. Although their version was essentially non-alcoholic (just a spoonful of sumac vodka), I decided to create an alcoholic version. While you could use store bought lemonade, it really is better with fresh. You’ll need lots of lemons!It takes a bit of advance planning, but once you make the sumac infusion and lemonade, it’s quick to put together. Fill a large glass with ice. Add lemonade, plain vodka, and a spoonful of the sumac infused vodka. Top with soda water, stir and watch that gorgeous pink colour appear.
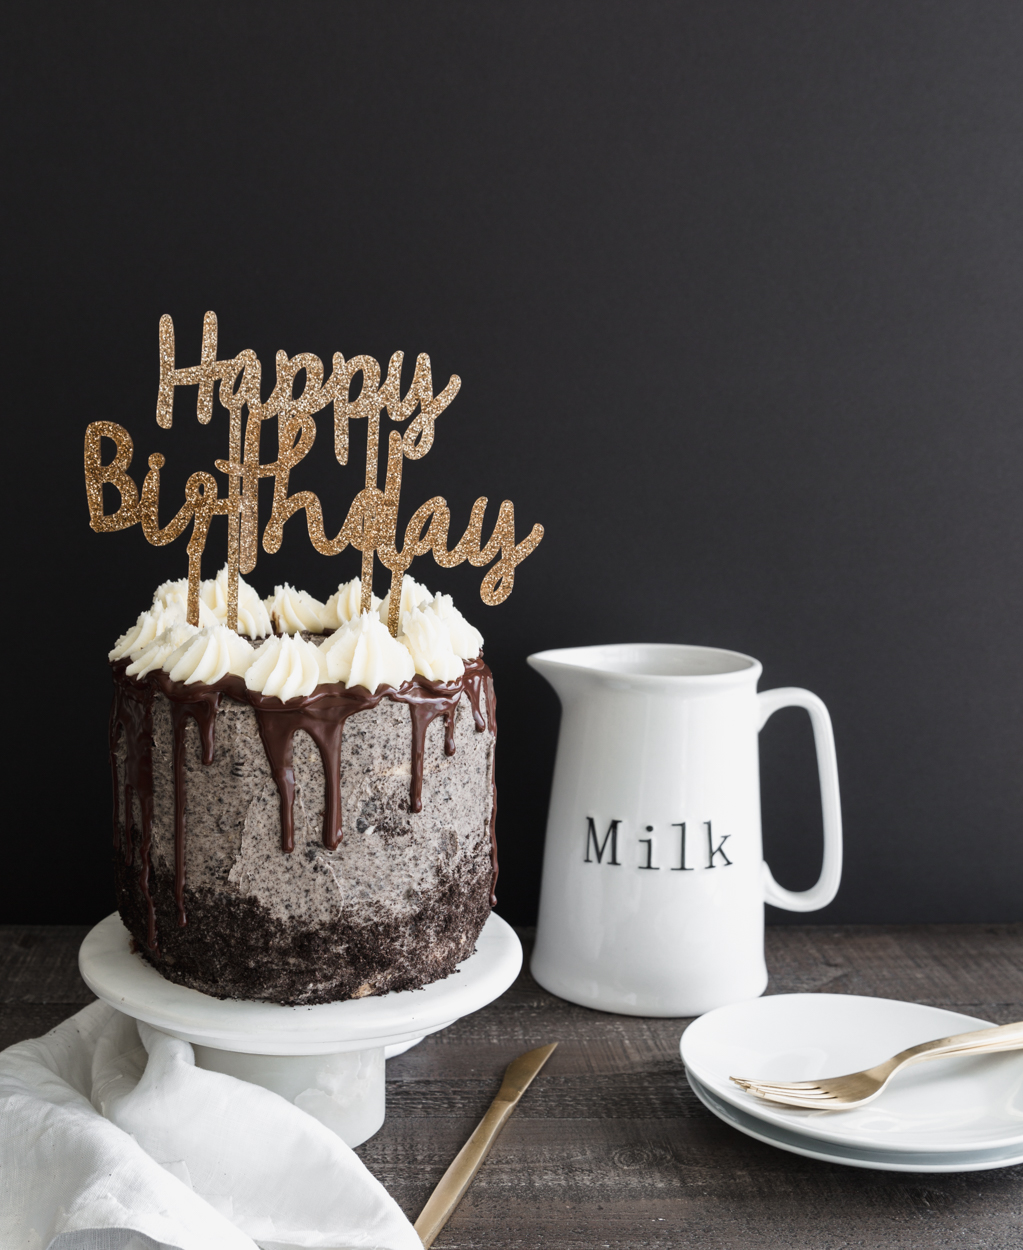
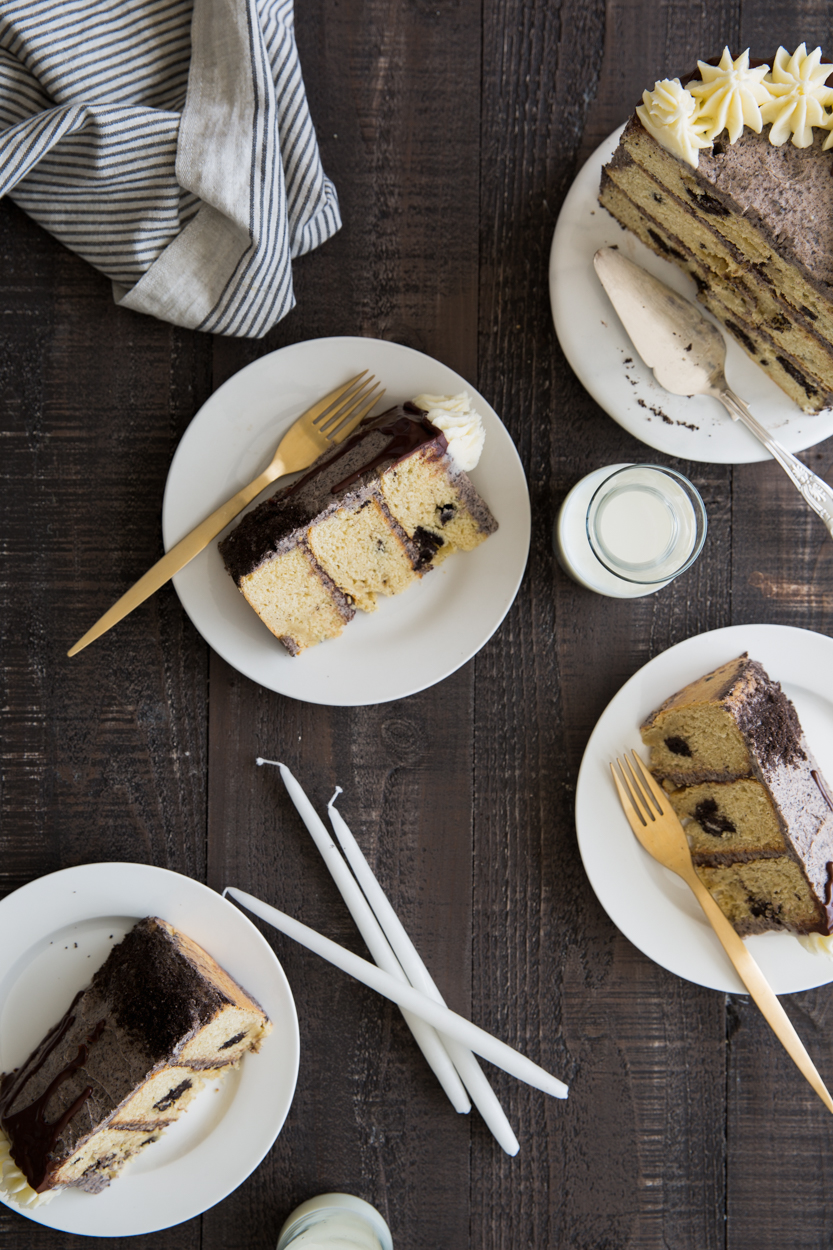
This week marks my baby’s 25th birthday. A quarter of a century! How is that possible? I think that officially makes me old, but I’m good with that. I’ve earned my wrinkles. I view them as badges of wisdom.
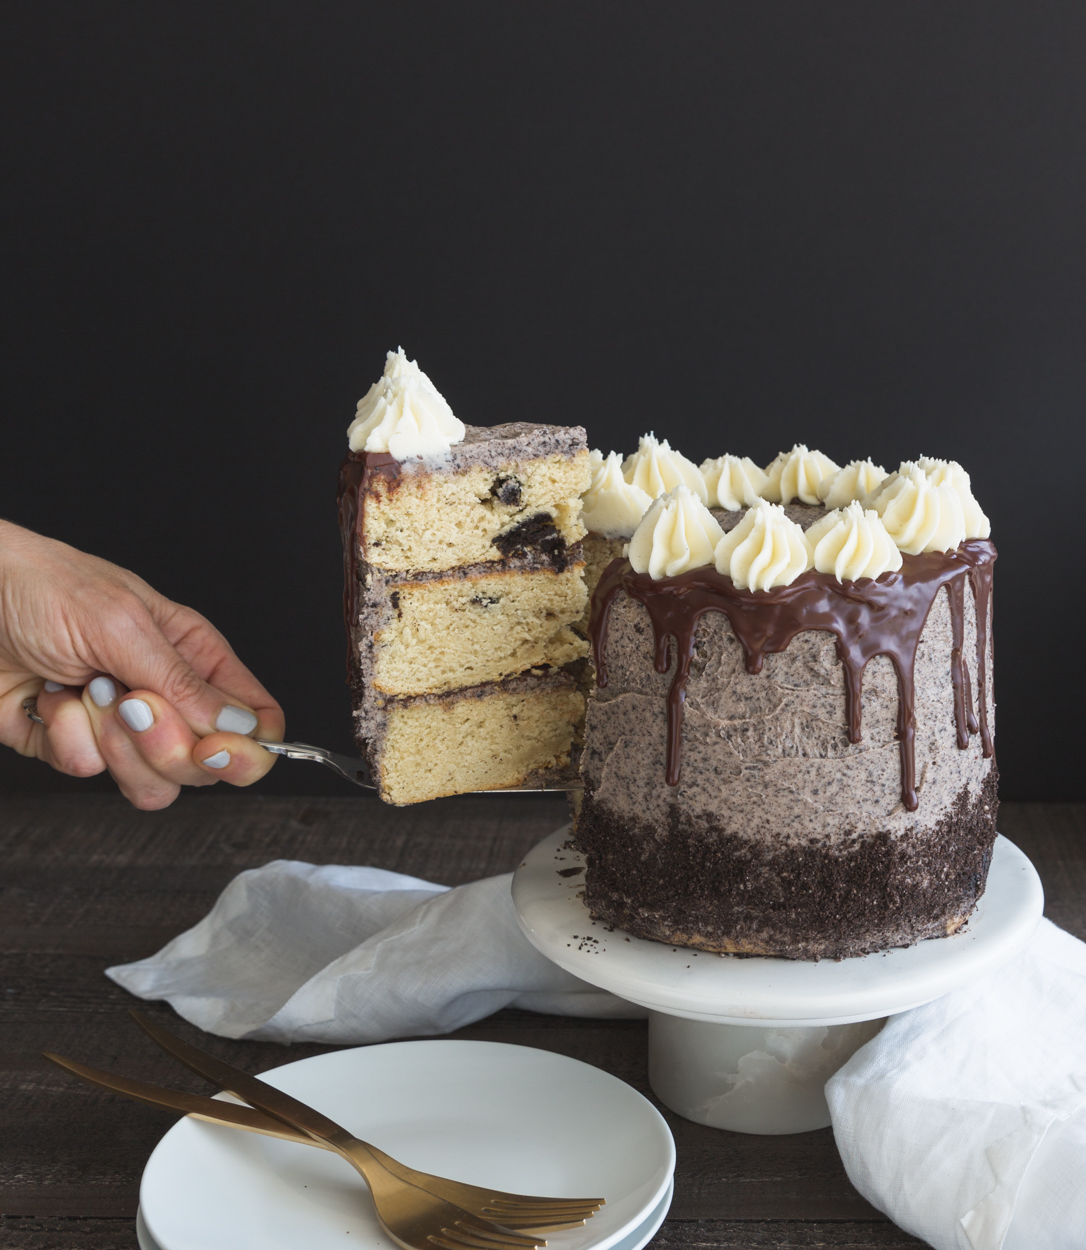
For his birthday cake, I knew that chocolate of some sort must be incorporated. Last year I went full-on chocolate with the ultimate gluten-free chocolate cake. I think his favourite was the smarties rainbow cake I made a few years ago. Ever since I saw the cookies and cream cake on preppy kitchen, I have wanted to recreate it. You need to check out his blog. I have picked up so many baking tips from him. Do you know about cake strips? They’re wrapped around the cake pan and they help prevent domed and cracked tops and over-cooked edges. I used them for these cakes and I had the most level cakes ever. No trimming necessary.
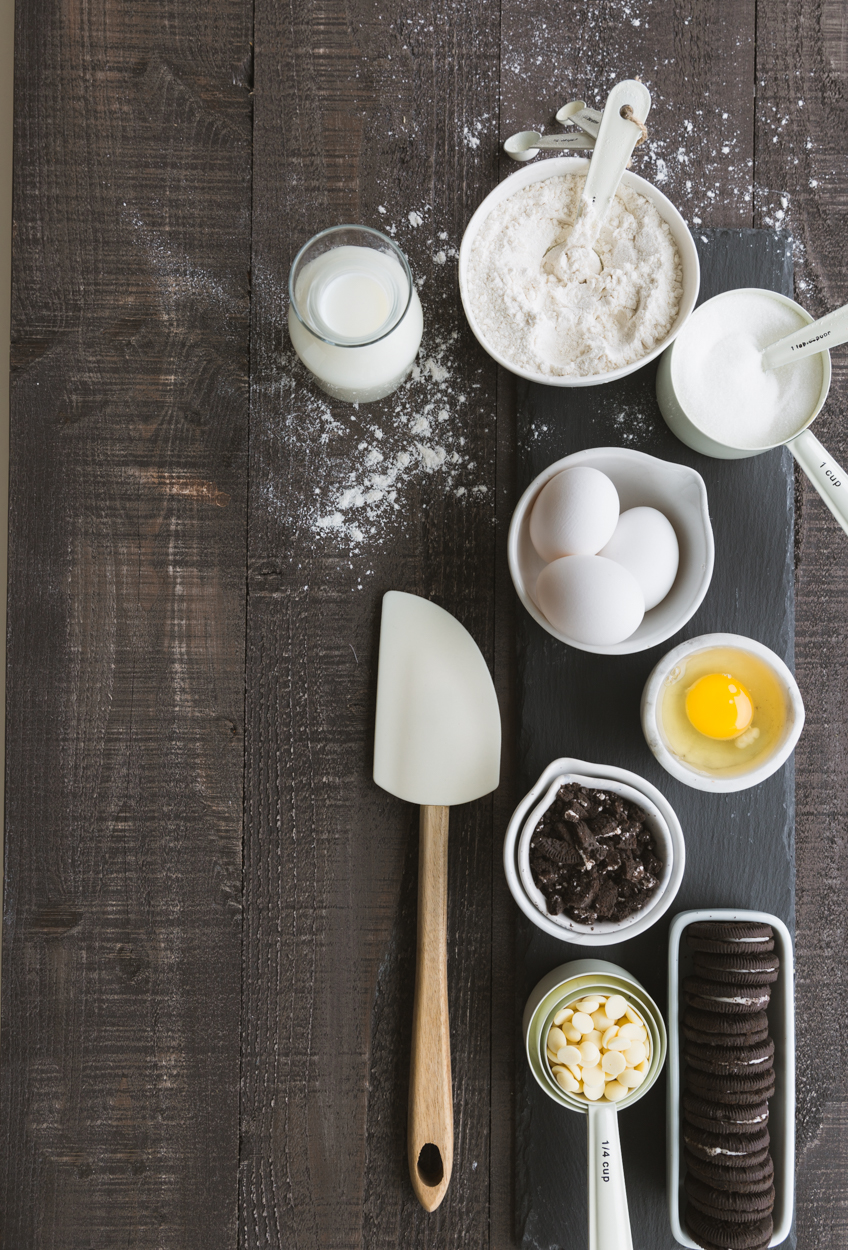
My son follows a mostly gluten-free diet so I created a GF version. The original cake used chopped Oreos in the batter. I found GF ones at Trader Joes, but there are several other brands of GF chocolate sandwich cookies. I made a Swiss meringue buttercream. It is a bit more work than an American buttercream, but I think the light and silky texture is worth it.

 I love a good kitchen hack, and when it’s suggested by none other than Alton Brown, I can’t resist.