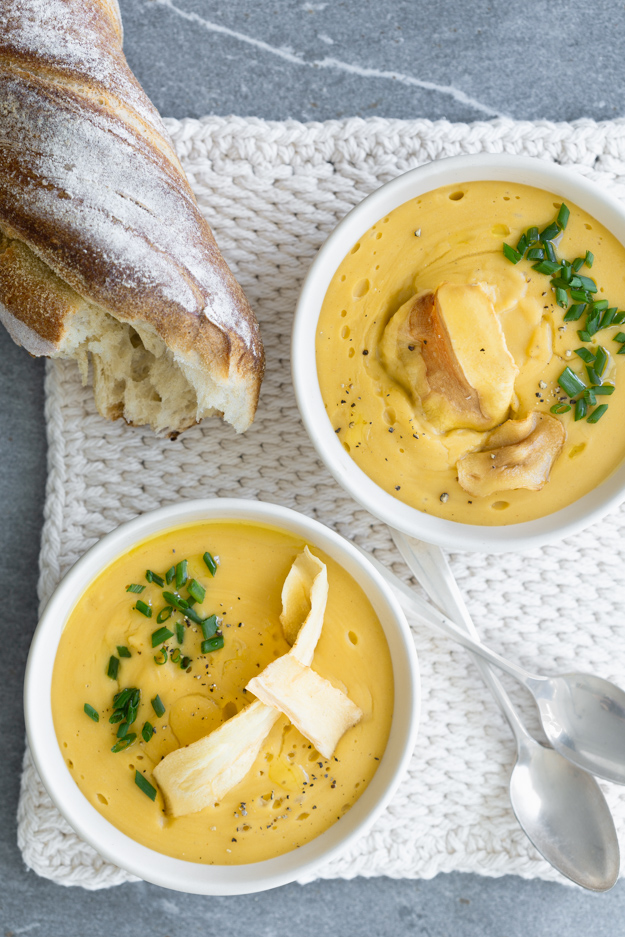
As I crunched my way through the entire bag, it occurred to me that these salty and slightly sweet chips would be a welcome bit of crunch crumbled on top of a creamy parsnip soup. Luckily I had the foresight to buy two bags. I found a forgotten jar of yellow split peas in the cupboard and decided to use them as the soup base.
After shooting all day, the last thing I want to do it eat is whatever I have been photographing. I have usually plated it 3-4 different ways, transferred it from bowl to plate to mug to see what looks better and by the time I am finished, I never want to see that food again. Depending on what it is, I will either deliver it to a friend, send it off to my husband’s office or wrap it up and stick it in the freezer.
The recipe for this soup makes a big pot so it’s perfect for freezing, and pulling out on those nights when you just can’t face cooking. Parsnips are an under-utilized vegetable. I love them roasted but they make a stellar soup ingredient. They have an mild spice flavour, reminiscent of nutmeg and cinnamon.
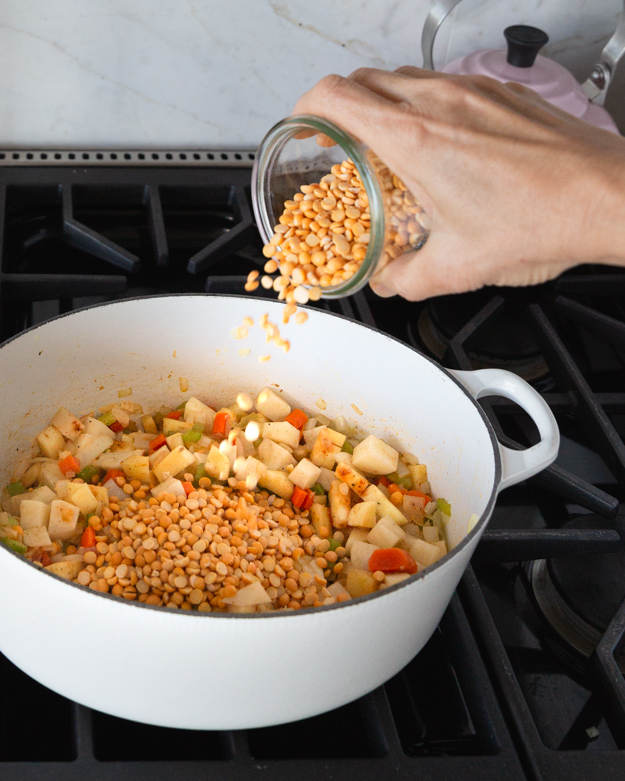
Start by sautéing the all-powerful culinary trio of onions, carrots and celery and add a heaping pile of diced parsnips. Ground cumin and smoked paprika really complement the slightly earthy flavour of parsnips.
Packed with fibre and protein, yellow split peas will make a healthy counterbalance to the parsnip chip garnish!
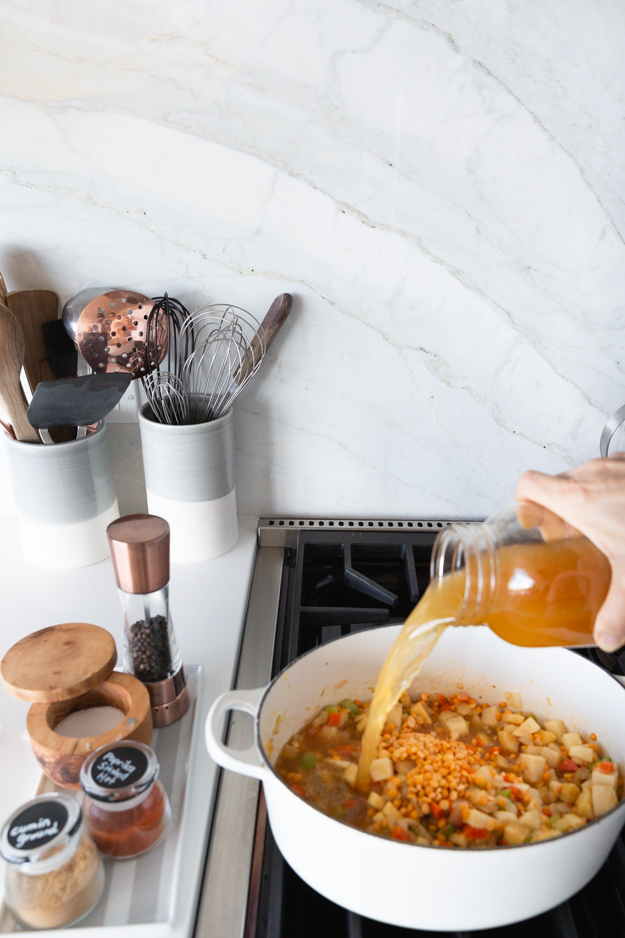
Vegetable stock was my liquid of choice.
A funny thing happens when your adult children come home for a visit. In July, my daughter moved into the cottage with me for most of the summer. I was thrilled about it, as we live in different cities, and I don’t get to see her as much as I’d like.
The kitchen starts filling up with things you don’t recall buying. My fridge boasted 3 varieties of kombucha, (cosmic cranberry, ginger berry and multi-green) 2 packages of probiotic capsules (for making non-dairy coconut yogurt), Croatian organic artisan chocolate (that tasted like wax, to my palate) and Skyr, which I’m still not sure how to pronounce properly.
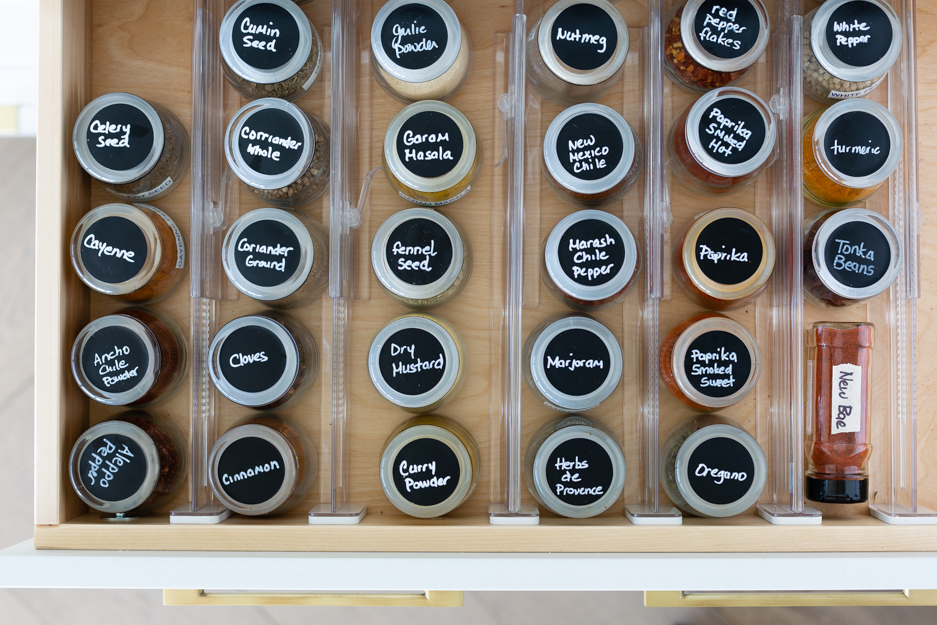
The tea drawer (yes, we have an entire drawer devoted to tea), filled up with several varieties of ginger tea as well as some turmeric concoction. The pantry shelves featured 2 flavours of muesli, collagen powder and All-Dressed Chips.
One morning I opened my spice drawer and saw a rogue shaped jar of something called New Bae Seasoning. I decant all my spices into the same shape jar, and file them alphabetically. Please don’t judge me, it’s how I keep my serenity.When I asked my daughter about it she excitedly told me that it’s a blend of different spices (Himalayan Pink Salt, Paprika, Celery, Black Pepper, Ancho Chili Powder, Cayenne, Cardamom, Allspice, Mace, Bay Leaves), and makes everything you put it on taste better. That night we sprinkled some on diced sweet potatoes and roasted them. I was hooked. We used it all summer on fish, chicken and all our roasted and grilled veggies. It was even delicious sprinkled on top of hummus. When she left at the end of the summer, she took her jar with her, but left me the probiotic capsules!
I ordered my own jar, online at purefeast.com . A few other online retailers carry it as well, but they seem to be out of stock when I last checked.
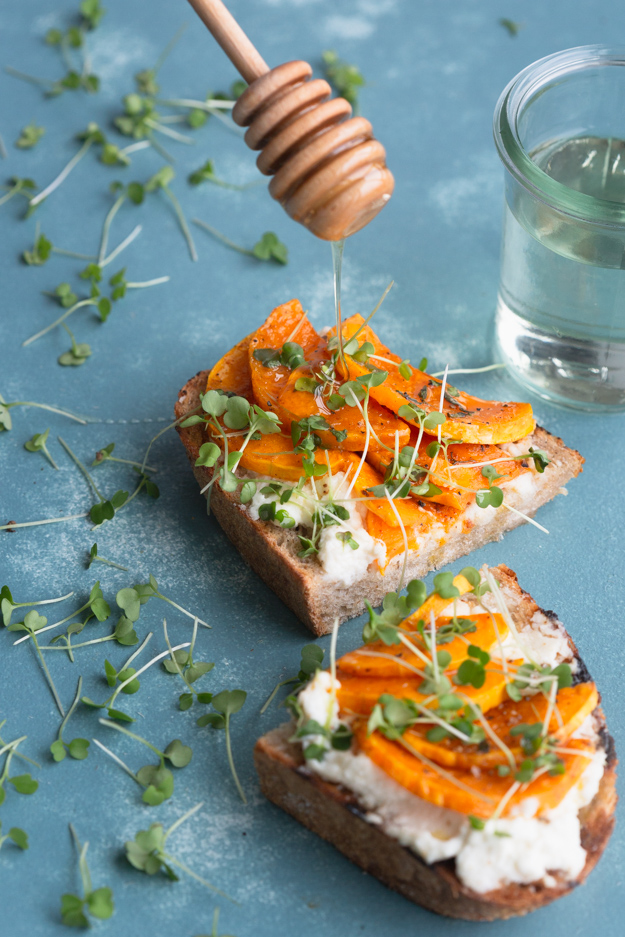
Here’s how to make these delicious tartines (that’s french for open-faced sandwich, because we’re fancy around here!)
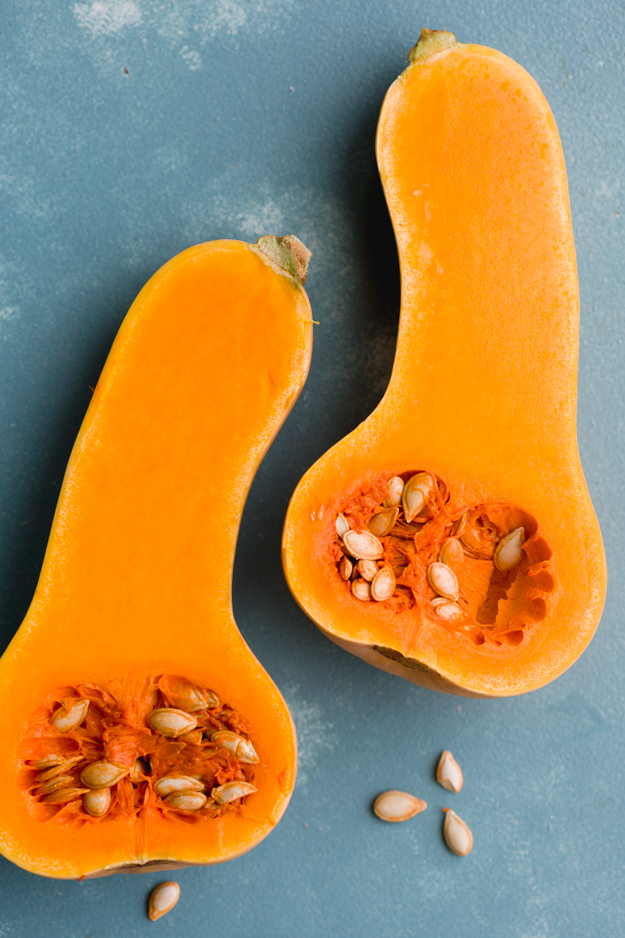
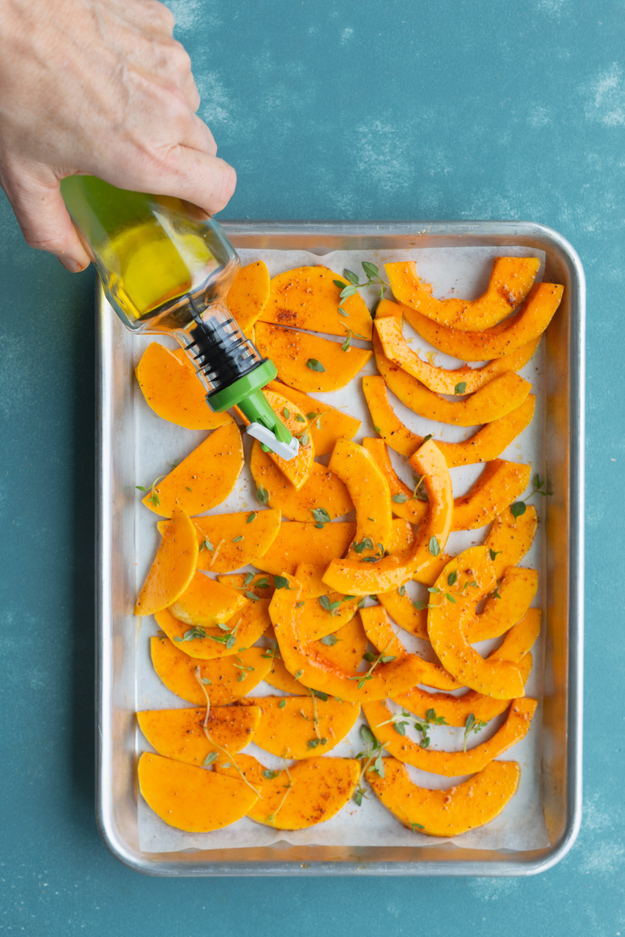
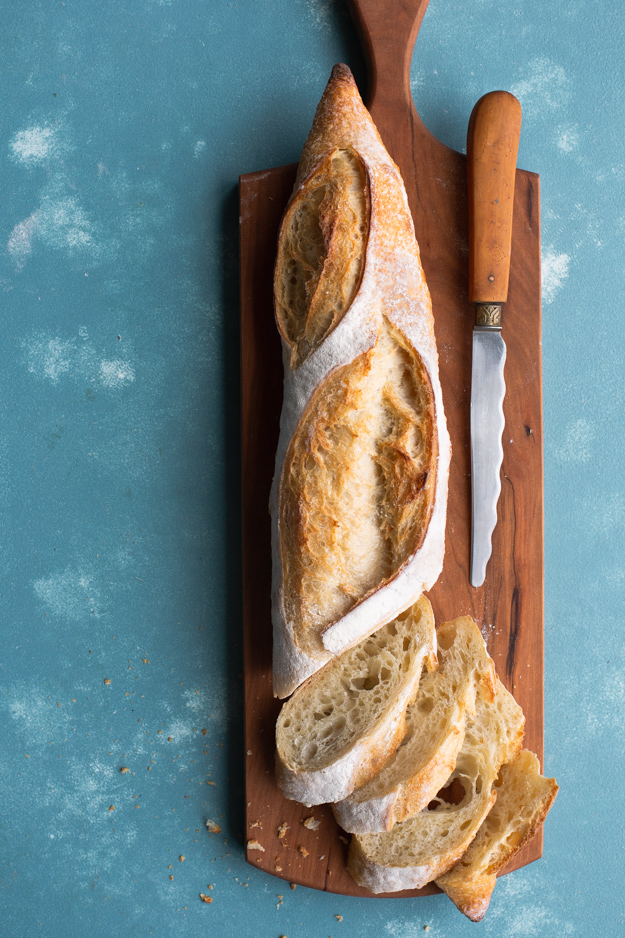
I used butternut squash and sliced it very thin. Use your favourite fall veggie. Roasted broccoli would also be delicious. Make sure you start with some really good bread and toast or grill it, so that it’s crunchy. I found a new bakery in my neighbourhood here in Ottawa that sells amazing artisan breads. If you’re in Ottawa, check our Mamie Clafouti’s on Richmond Rd. If you have an extra 15 minutes, make your own ricotta. I will include the recipe in the link below. But if time is tight, use store-bought. It will still be really good. Choose an assertive green to top your tartine with. I found micro arugula, but regular arugula or some shredded radicchio would be good choices. You want something bitter to counter balance the spicy-sweet squash and mild ricotta. A drizzle of honey is an excellent way to finish.
These cookies are vegan. If you don’t follow a vegan lifestyle, I realize that’s probably not the best opening line if I’m trying to pique your interest and keep you reading this post, but stay with me here. I promise you it will be worth it.
My experiences with vegan baking have been lacklustre. I will take the proffered sweet, politely take a bite, and say “it’s good”. And what I really mean is, it’s good, for vegan. You need that qualifier.
With these cookies, that qualifier is not necessary. These cookies are good. Actually, they’re great. They’ve become one of my favourite cookies. And that’s high praise coming from someone who has over 75 cookie recipes on her blog.The secret ingredient is coconut butter, not to be confused with coconut oil. Coconut oil is just the oil extracted from coconut, whereas coconut butter is ground-up coconut. Coconut butter is available at many health food stores, and online, or you can make it yourself. The talented Dana, over at at minimalist baker has a foolproof recipe.
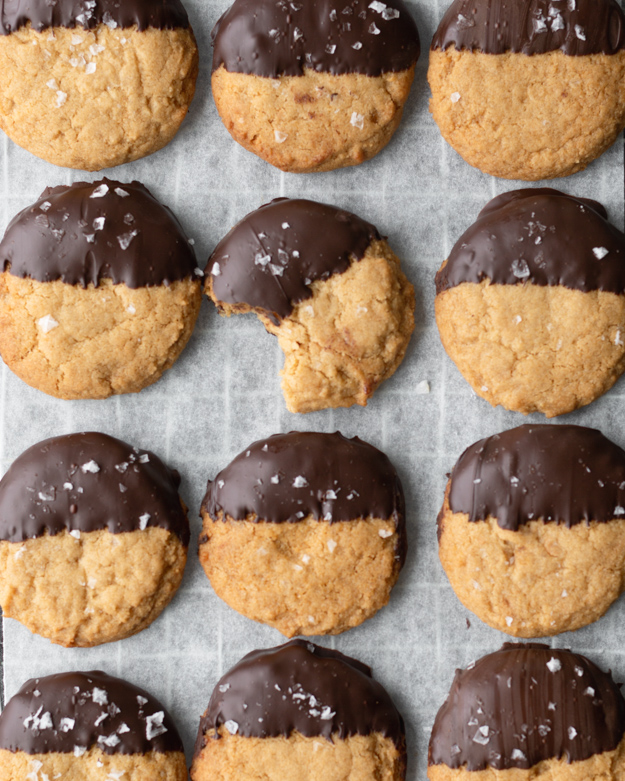
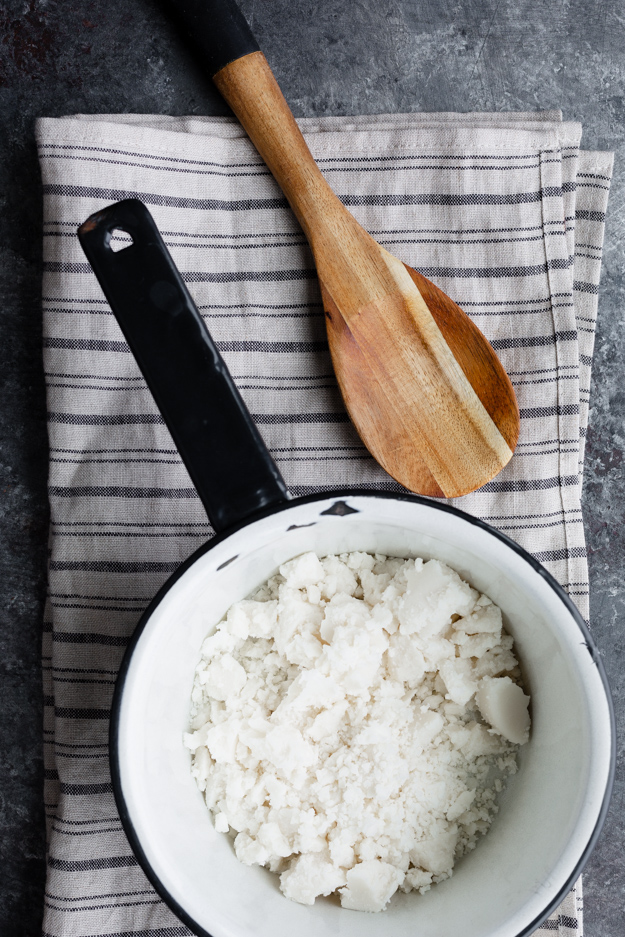
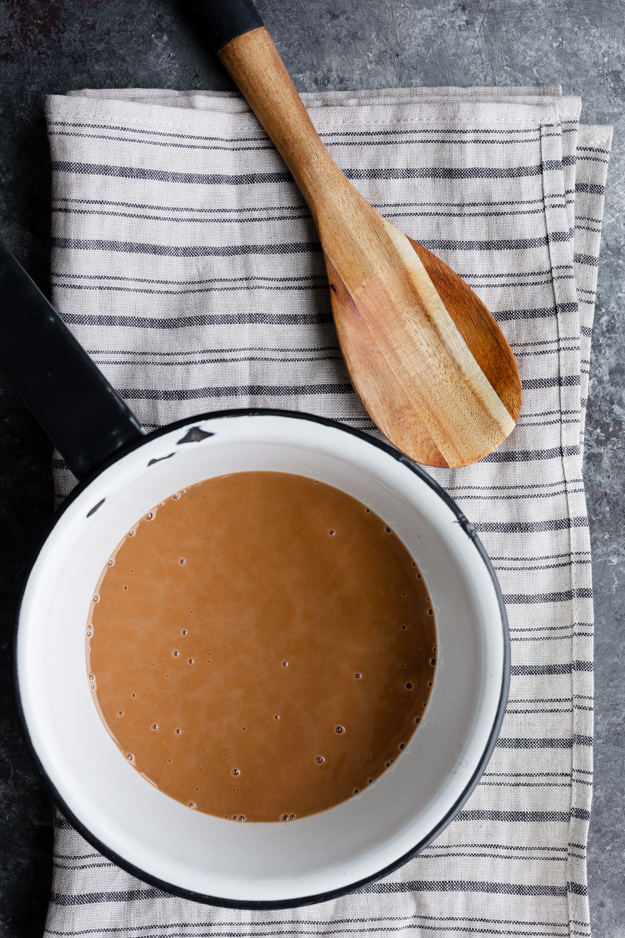
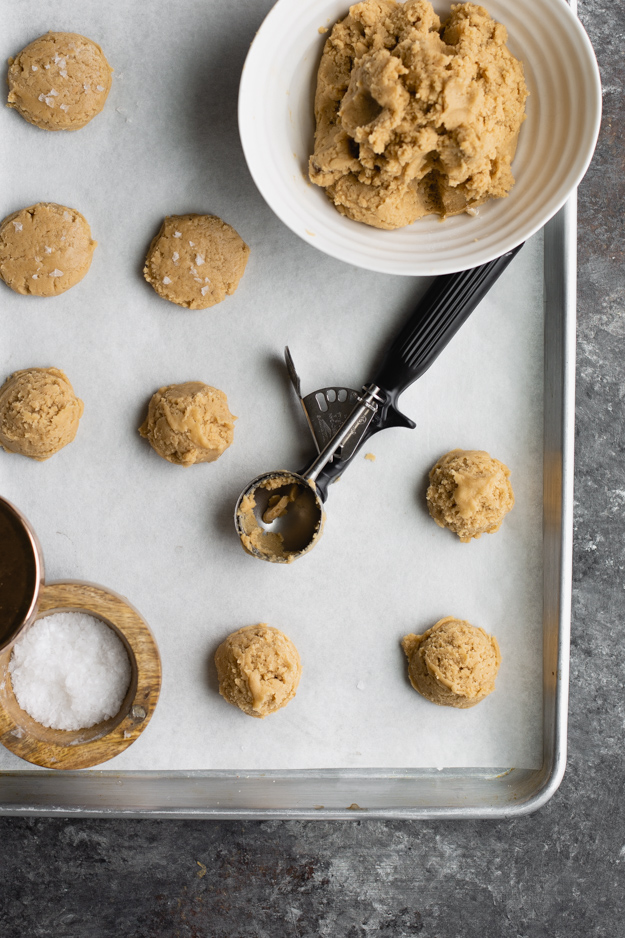
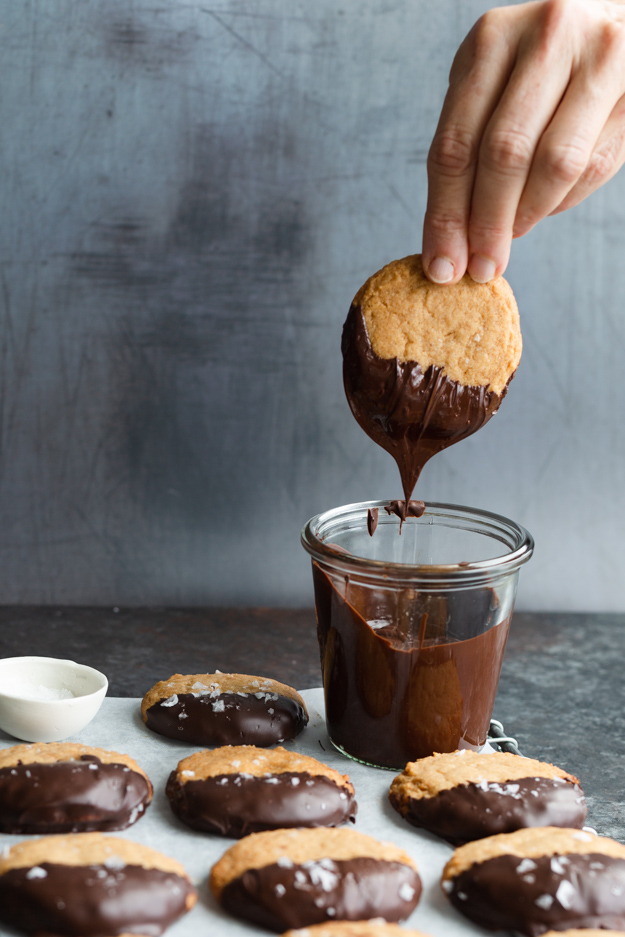
Those clever folks over at Cooks Illustrated figured out that if you melt and cook the coconut butter, it becomes brown and nutty and delicious. Right out of the jar, it’s almost pure white.Give it some heat and about 7 minutes and this is what happens. And big bonus, your house will smell amazing!No need to pull out the mixer for these cookies. Just stir everything together in a big bowl. You need all purpose flour, of course. Some brown sugar adds to the chewiness. Baking soda and baking powder give lift. No eggs or butter are needed. The coconut butter holds these cookies together. Oh, and don’t forget a pinch of salt!Pro-tip: Use an ice cream scoop to get even sized cookies that will bake evenly. Gently flatten the cookies and sprinkle lightly with flaky sea salt. Not too much, as you’ll add more after dipping in chocolate.The original recipe at Cook’s Illustrated did not include dipping them in chocolate, but coconut and chocolate just belong together! I tempered my chocolate for dipping, and if you have an instant read thermometer and a bit of patience, you should temper your chocolate as well.
Tempering the chocolate before dipping will give the cookies a smooth, glossy evenly coloured coating. Biting into into the chocolate coating, will produce that crisp satisfying snap . Without the tempering process, the cocoa butter separates out and you get a streaky, dull grey coating. I give detailed instructions on how to temper, in the recipe.
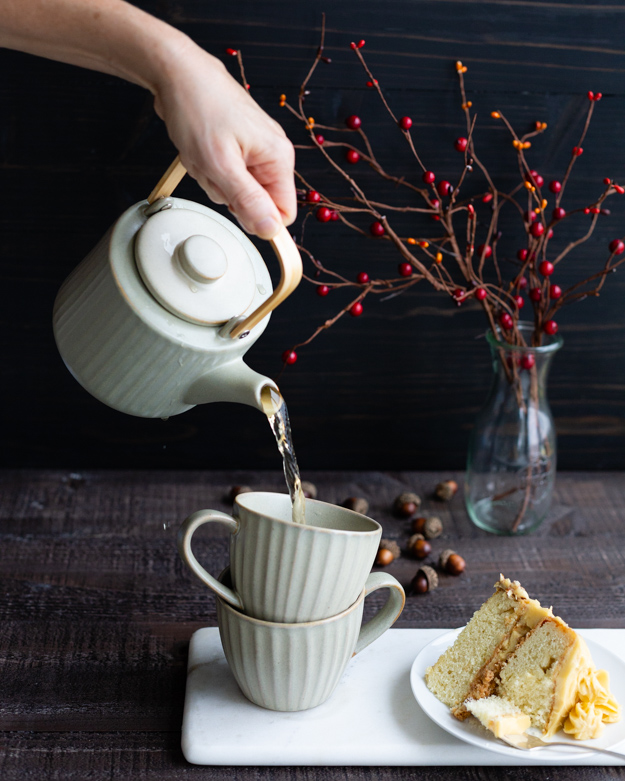
What I love best about my birthday is making my own cake. I spend weeks before the actual day pondering flavours and textures. Buttercream is not optional, it is a requirement. While some people might think it’s a little sad to have to bake your own birthday cake, I disagree. I get exactly what I want, and get so much joy creating it.
If you’re looking for a one bowl “dump and stir” cake, this is not the post for you. My birthday cake has many elements and usually takes the better part of a day.
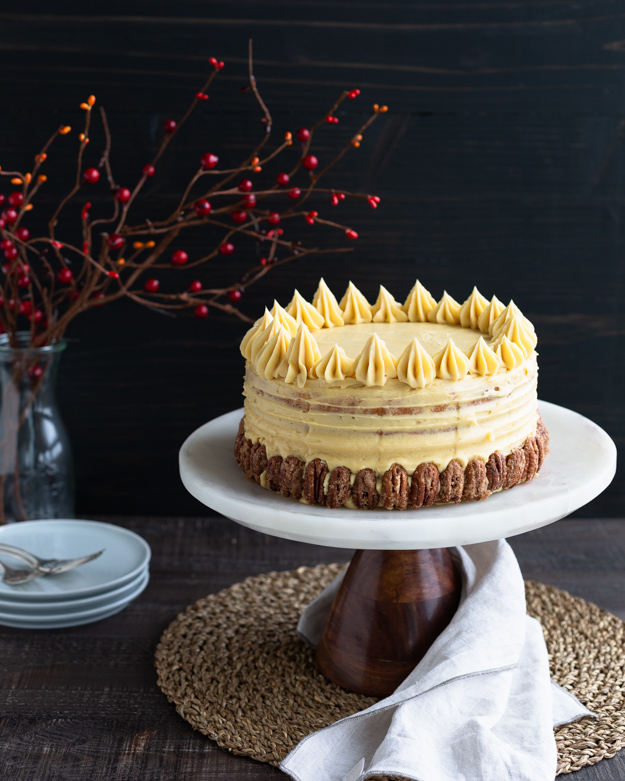
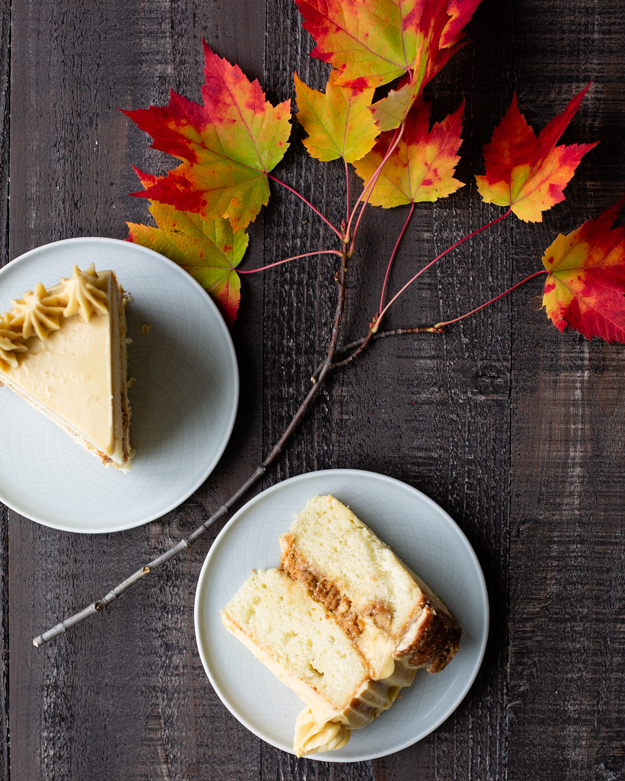
This year’s cake is a “virtual collaboration” between Anna Olson, Rose Levy Beranbaum and me! I started with Anna’s Classic Vanilla Birthday Cake, which is a perfect canvas for everything. I had my heart set on a maple cake. I thought it would be a good idea to substitute maple sugar for the granulated sugar in the recipe to really intensify the maple flavour. I was wrong. I have never baked with maple sugar before, but the texture is different from that of traditional granulated sugar, and it resulted in a crumbly cake that tasted really strange. When I remade it with granulated sugar, it turned out perfectly. Moist and light with a beautiful tender crumb.
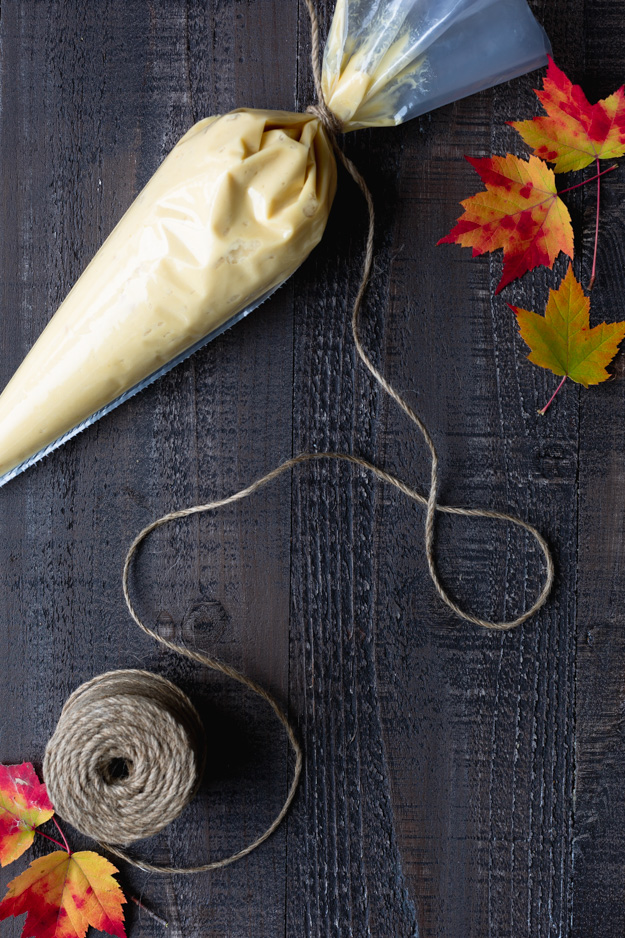
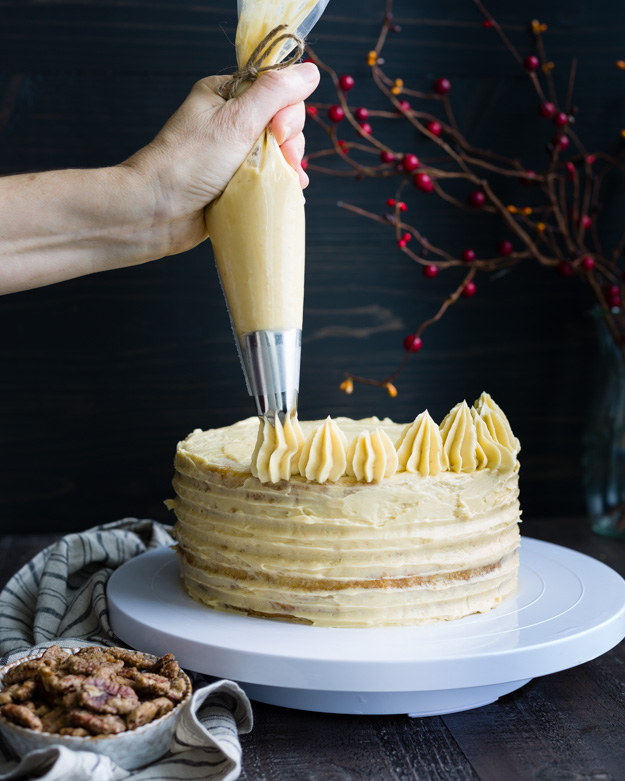
Next I moved onto the buttercream. I decided to make Rose Levy Beranbaum’s Neoclassic Buttercream, which is basically a French buttercream that uses egg yolks and butter. This is not a buttercream for the faint of heart. We’re not fooling around here . This is straight-up rich and luxurious. Rose suggests that you can replace the corn syrup for maple syrup and that’s what I did. Rich and silky , practically exploding with intense maple flavour.
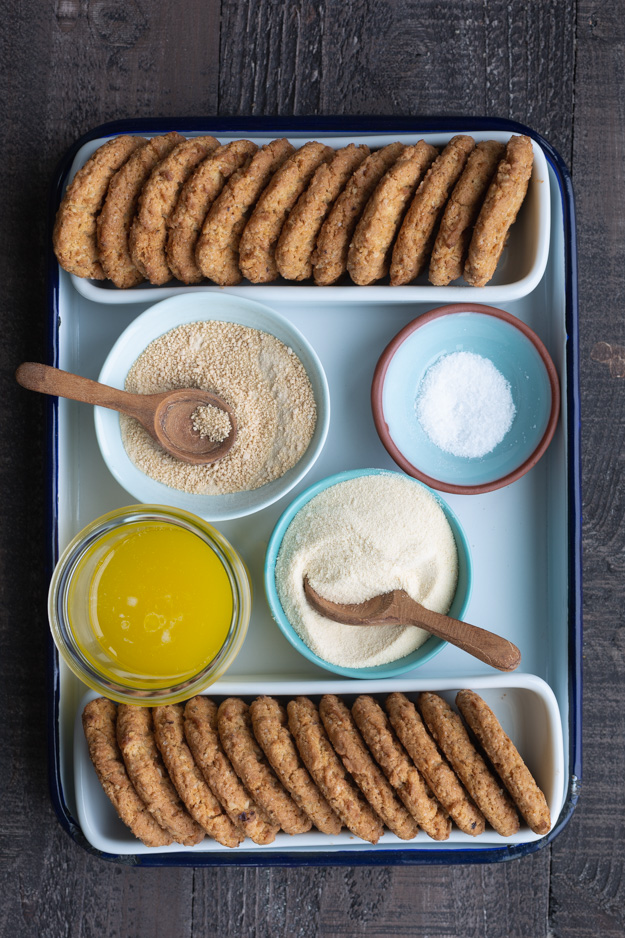
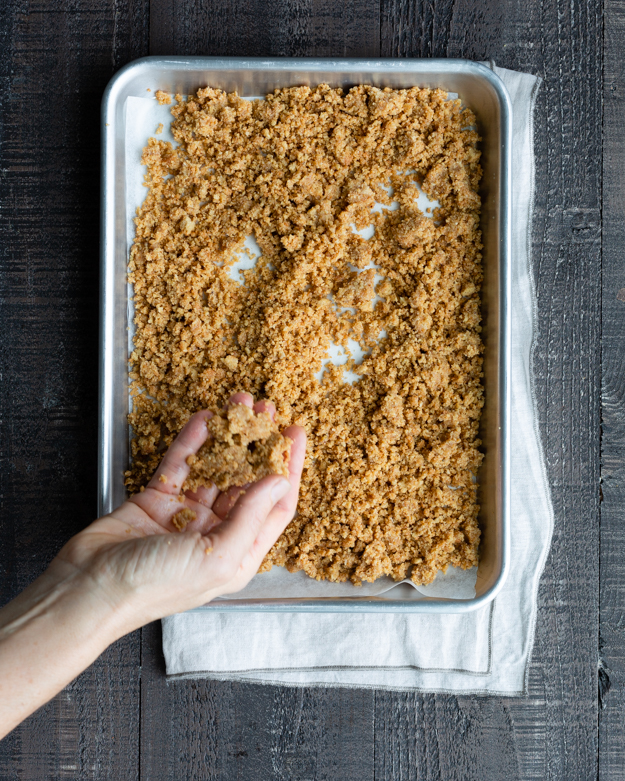
The final component of my cake is the addition of a layer of crunch. I love a cake that combines texture. I crumbled up some Dad’s Oatmeal Cookies (because maple and oatmeal!!!!) and mixed them with malted milk powder (the umami bomb of the baking world, as Stella Parks is fond of saying), a bit of sugar, some melted butter and a pinch of salt. Mix the crumb mixture until clumps form. Bake and cool. The finished crumble is crunchy and very addictive. It reminds me of the clumps in granola. The recipe makes more than you will need, so there is some leftover for snacking!
This summer, my daughter asked me how to roast a whole chicken. It dawned on me, that there is a whole generation of young adults out there who have no idea how to do this. Now, in her defence, she was a vegetarian up until a few years ago, so she never really paid attention to meat cookery when she was growing up.
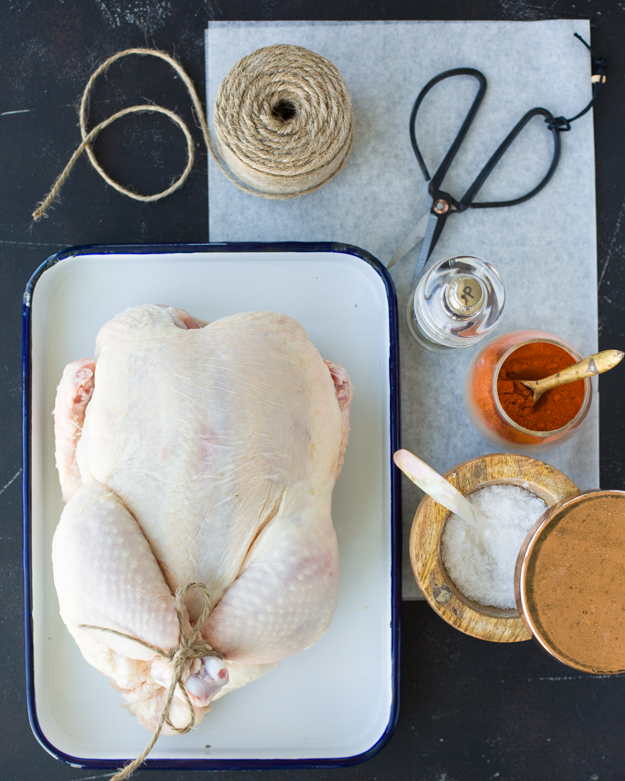
That conversation was the impetus for this post. I gathered paper, pencil, measuring cups, spoons and a scale so that I could accurately record, exactly what I do. Since I roast chickens so frequently, I don’t normally measure. I just do it on autopilot.
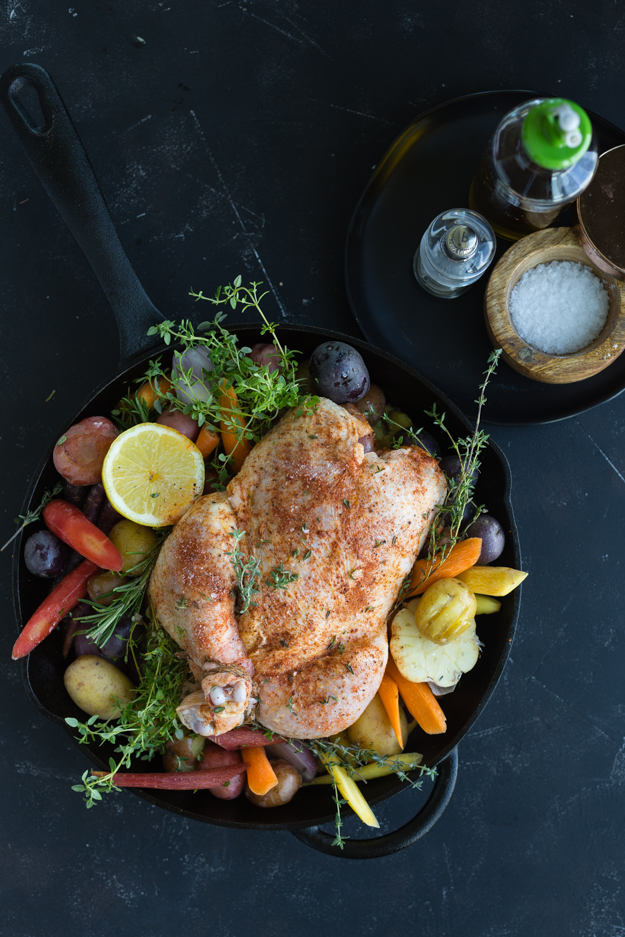
Start with a 3 1/2 -4 pound chicken. If it is at all possible, buy a kosher chicken, as the salt added during the koshering process makes the meat juicier and more flavourful. Slice a lemon in half and stuff it inside the cavity of the bird. Tie up the legs with some kitchen twine. That will help the chicken roast more evenly. Then, shower that bird with a mix of kosher salt, pepper and paprika. Sometimes I used smoked paprika. Let the chicken sit on the counter while you get everything else ready.
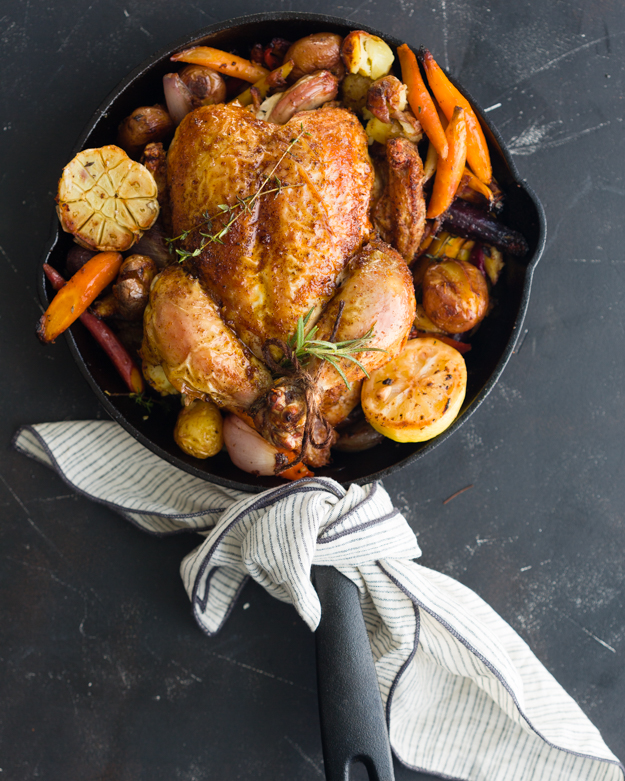
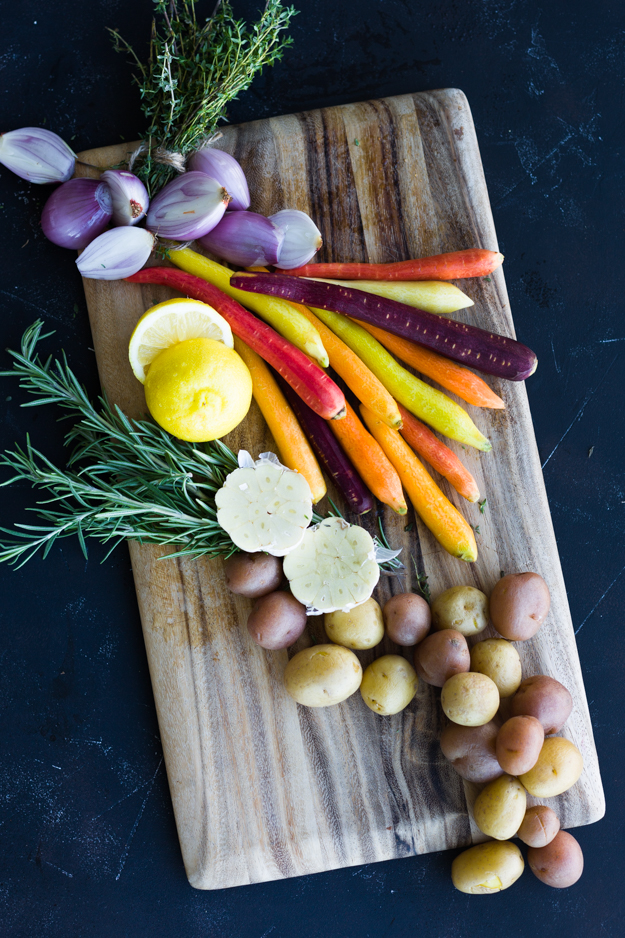
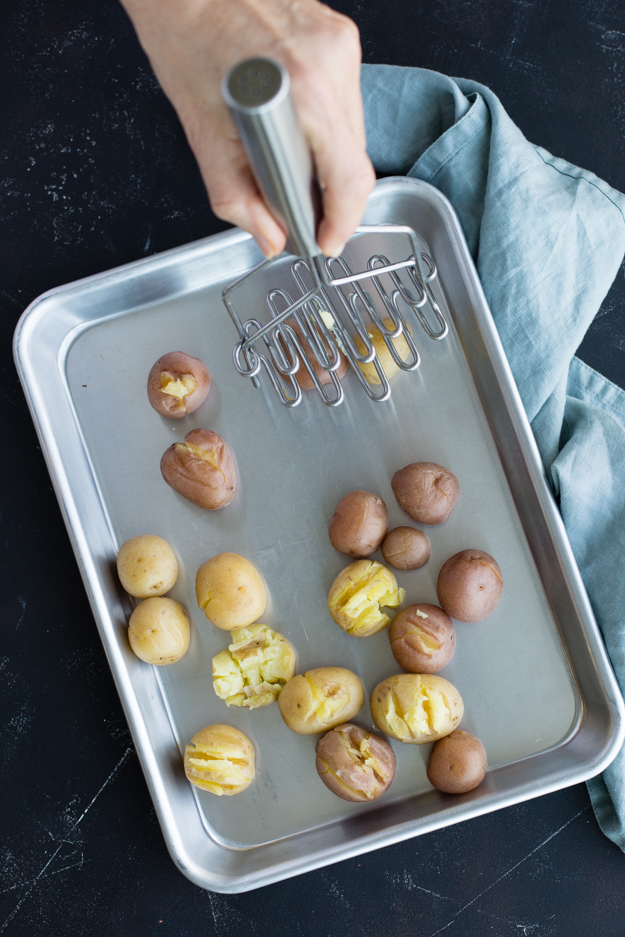
Since you’re turning on the oven, you may as well roast some veggies with the chicken. I used shallots, carrots and mini potatoes. Feel free to use whatever you like. Squash, leeks, sweet potatoes and parsnips would all be good ideas. A few sprigs of thyme and rosemary are a winning flavour addition. A whole head of garlic, halved is also an option, if that’s how you roll. If you plan to use potatoes, boil them first, for about 15 minutes, just until they begin to get tender. Then gently break the skin and flatten slightly with a fork or potato masher. This give you more potato surface area to get crispy. If you have a 12- inch cast iron frying pan, or any enamel cast iron roasting pan (ie: Le Creuset) their hear retention properties make them the perfect roasting vessel. While you’re getting everything ready, place the empty roasting pan or skillet into the oven while you are preheating it.
Carefully place chicken into hot pan and surround it with veggies,. Drizzle it all with olive oil. Roast it for about 60-65 minutes, until an instant read thermometer, inserted into the thickest part of the thigh (careful not to touch bone) registers 165°F.
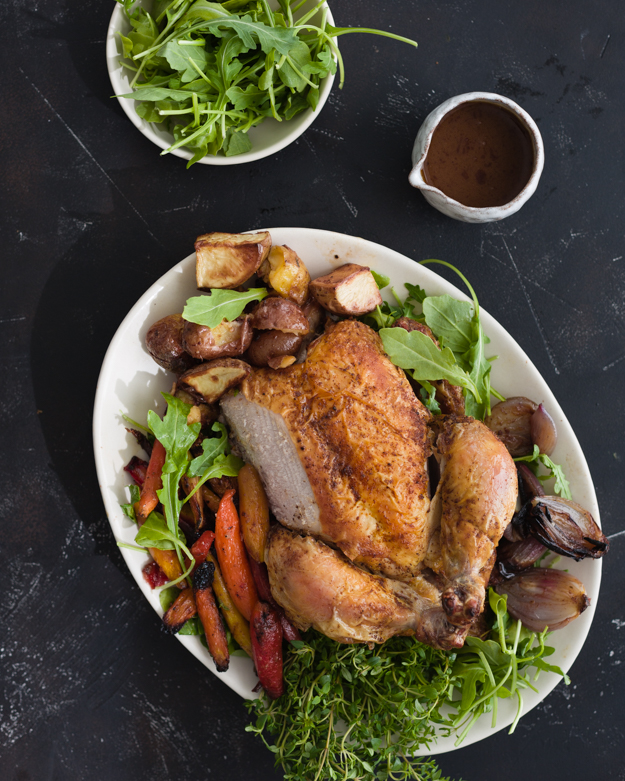
The most important instruction I will give you is to let the chicken rest for 20 minutes before serving. This will give you time to turn the pan juices into a little sauce if you want. Complete instructions for doing this are in the recipe link.
I’m feeling a little bit lonely this week. It seems like I’m swimming upstream against a huge tide of pumpkins. My entire Instagram feed is being flooded with pumpkin flavoured everything. I hate pumpkin. Perhaps it stems from Halloween memories of scooping out these slimy seeds and dealing with the stringy guts. I just don’t get the appeal. It’s mostly the pumpkin-spice craze I object to. I don’t understand why it needs to be sprinkled on everything.
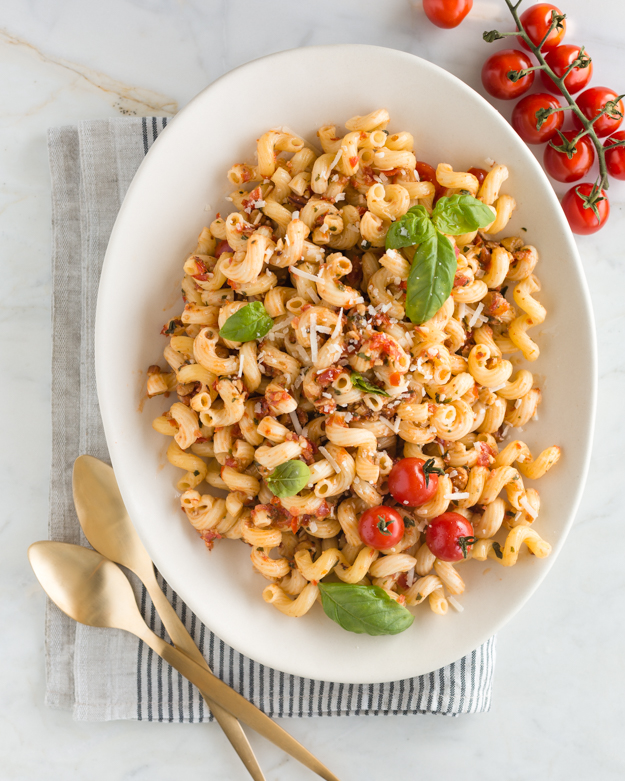
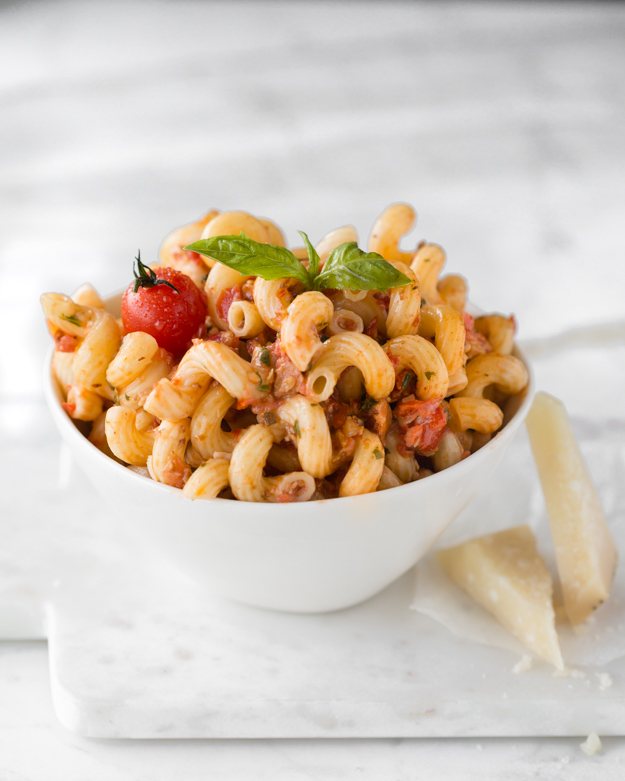
So, just to be contrary, I’m bringing you pasta made with fresh tomatoes. To be clear, they are little grape tomatoes, which are sweet all year long. Make it now, or feel free to bookmark it and save it for when you’re knee deep in snow and can’t stand to eat another roasted anything. You’ll thank me!
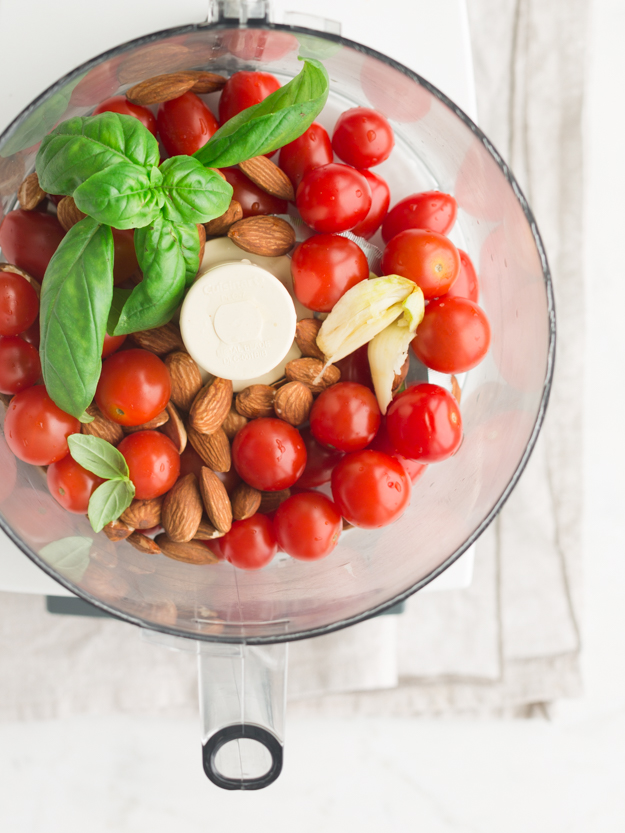
This recipe was inspired by an email from my sister with the subject line, “Best thing I’ve eaten in a while!.” Attached was an article about Lidia Bastianich and pasta all trapanese. I had never heard of this pasta sauce before. It originated in the Sicilain town of Trapani. Instead of the Ligurian pesto made with pine nuts and basil, this sauce is made with almonds, basil and tomatoes.
The sauce comes together really quickly in the food processor. The addition of garlic is a must. Just one clove, you don’t want it to overpower. A big pinch of kosher salt is needed. Make sure your almonds are roasted but not salted. Pulse everything in the food processor until you have a chunky sauce. Drizzle in a few tablespoons of really good extra virgin olive oil finish it off.
Although not traditional, I added a big pinch of red pepper flakes. The whole cheese issue is quite controversial. Some sources said to use it, others said no cheese ever. I tried it both ways and I preferred the pesto made without cheese and just a little grated on top table side.
I am continually amazed by the culinary alchemy that takes place when you roast or grill vegetables. The dry heat caramelizes the natural sugars in vegetables, which brings about a sweetness and amazing depth of flavour. Have you tried roasting parsnips? Next level fabulous, I promise you.
So although, intellectually, I know the joys of charring, when it comes to broccoli I have stubbornly resisted grilling it. I just love the taste of plain boiled broccoli. With a little drizzle of olive oil and a generous sprinkling of flaky sea salt, I could eat a huge bowl of it. I actually crave it. It’s kind of a comfort food for me. To be clear, it’s in a totally different comfort category than say, frozen chocolate chunk cookies. But chowing down on a big bowl of boiled broccoli makes me feel serene and calm.
I only tell you all this so that you will understand the depth of my resistance to grilling broccoli. But then something, or I should say someone, changed my mind and I decided to give it a try. I watched Michael Symon char broccoli and then combine it with Israeli couscous. I think he is such a talented chef. I love the big bold flavours of his food. Plus, he is just so sweet. Liz is a lucky woman.
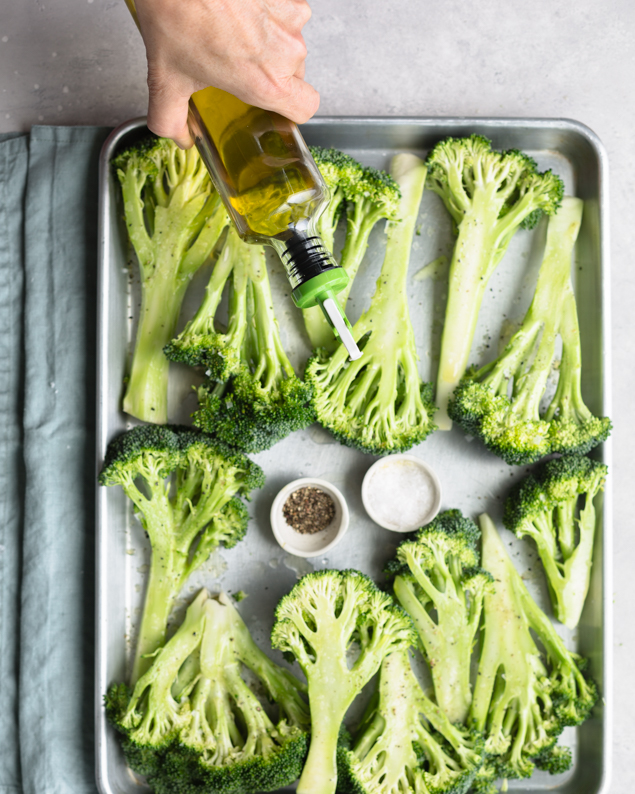
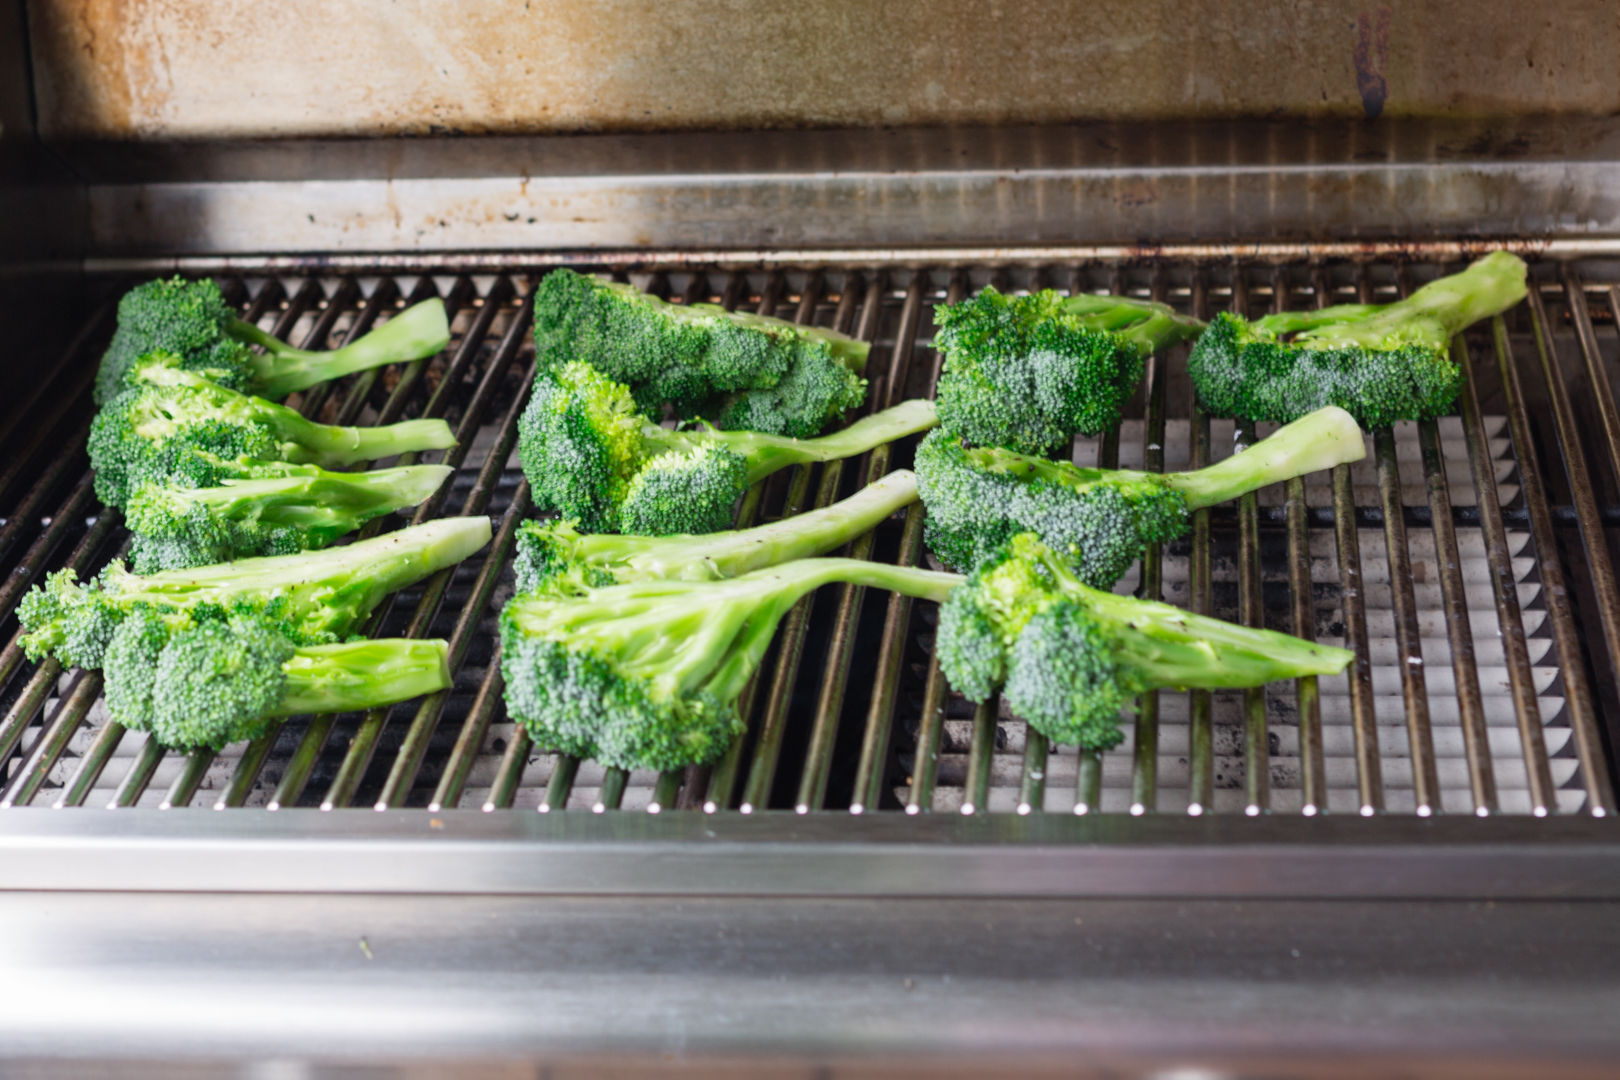
Cut the broccoli into one inch thick planks. The flatter the surface area, the more even the grilling. There will be some rounded pieces, but that’s ok. Please don’t cut off the stems. Just peel off the woody outer core. The center is tender and the best part of the broccoli, as far as I’m concerned. A few glugs of olive oil, lots of salt and pepper and you’re ready for the grill. You could also roast them in a 400°F oven for about 10-12 minutes.
If you’re grilling, turn the heat down to low. The flat parts and stems will get light golden brown. The florets will deeply char, and you might worry that they are too burned. That deep char is what give this dish it’s amazing flavour, so don’t worry if they look black.
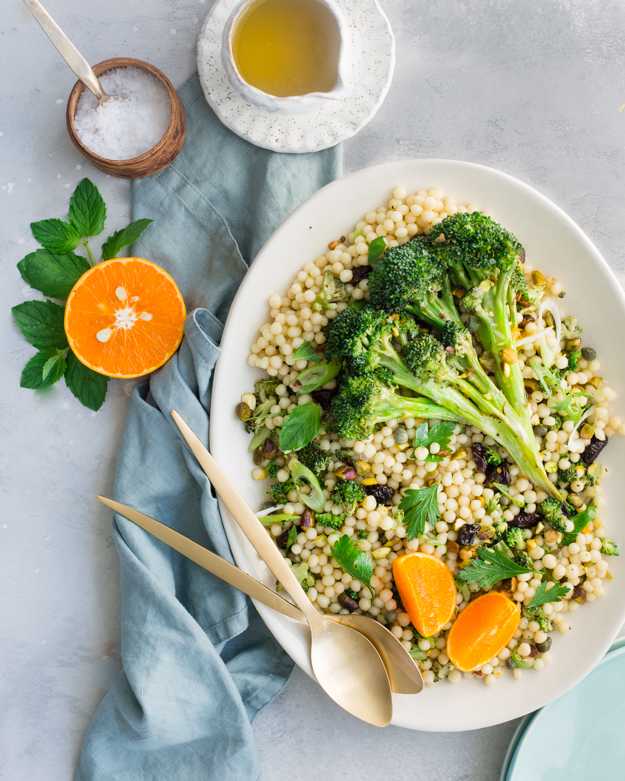
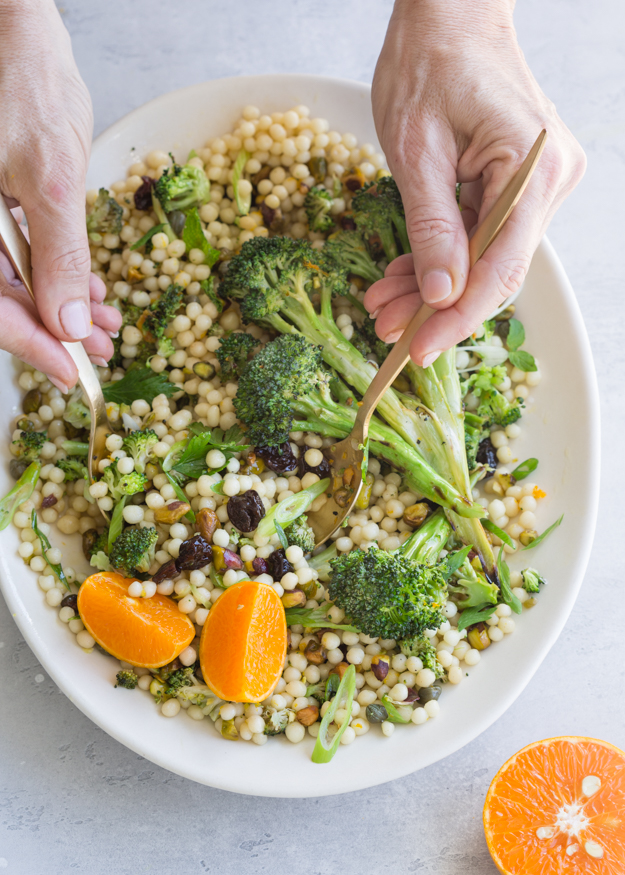
Once you take them off the grill, chop them up into bite sized pieces. I mixed mine with Israeli couscous because I love their bouncy chewy texture. Feel free to use farro, wheat berries or even quinoa if that’s what you love.
Get creative with the other mix-ins. Michael used golden raisins and sliced almonds. I substituted dried cherries and pistachios. Just don’t forget to toast your nuts. Some green onions, mint and Italian parsley add a verdantl freshness. I tossed it all together with a gentle vinaigrette made with fresh clementine juice and some fruity extra-virgin olive oil. Any leftovers will keep for a day in the fridge.
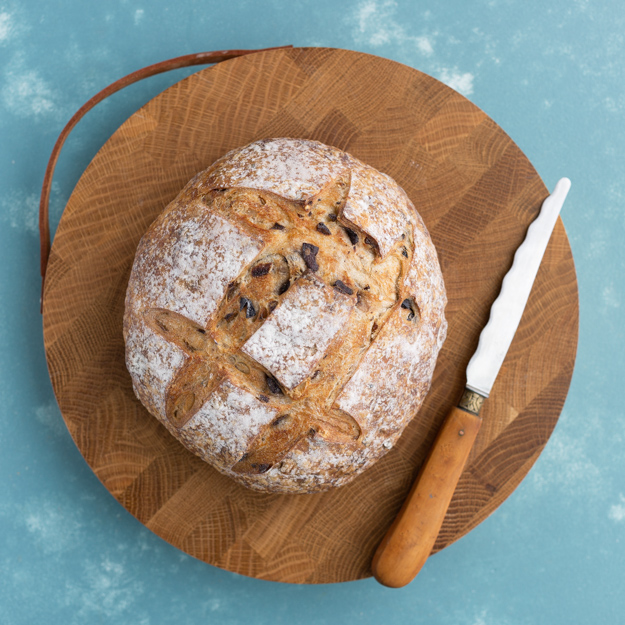
On May 19 2009, I wrote my first blog post . Today marks my 500th! I never set out to write a blog. It happened accidentally. I joined an online group who were baking their way through Peter Reinhart’s tome, “The Bread Baker’s Apprentice”. I was hoping to increase my bread baking skills beyond the simple challah I baked each Friday.
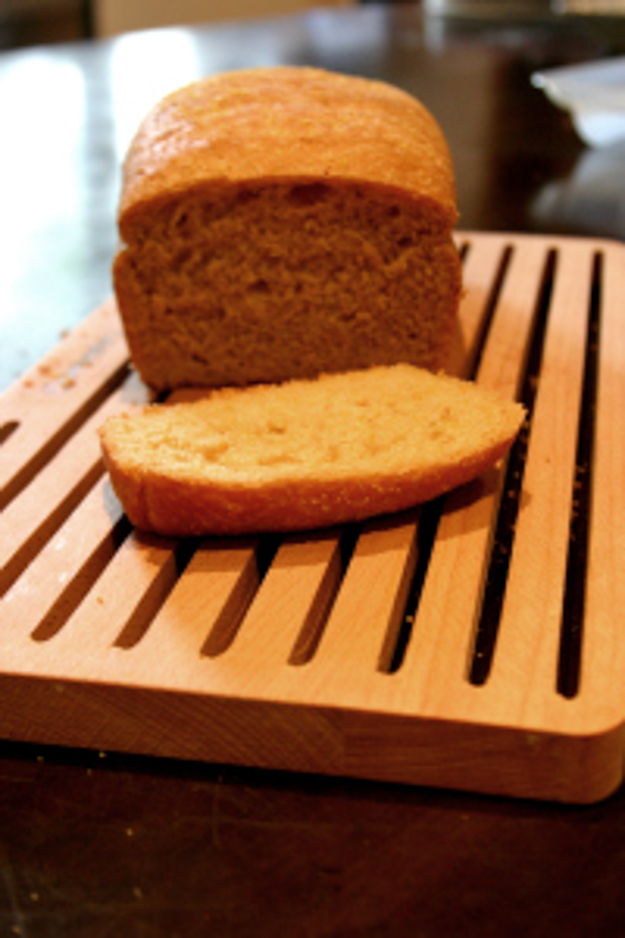
The premise of the group was that we would work our way through the book, alphabetically, from Anadama Bread to Whole Wheat , one loaf each week, for 43 weeks. Group members would share their experiences in a Google group. I noticed that some members were chronicling their journey via blogging. It seemed like a cool idea, so I stayed up all night and figured out, with the help of wordpress.com, how to do it.
Here is a shot from that first post. My bread turned out perfectly, but clearly my photography skills needed work. There were 212 of us, from all over the world, who started the challenge together. Only 12 of us actually finished! I loved the whole process! At heart, I think I am a born storyteller, so blogging really spoke to my soul. I love to create, so baking, taking photos of the process and telling stories about it really fed my creative needs.
After I finished my final loaf, I just kept on blogging. Along the way, I bought a better camera, took some online classes in food writing, and photography and attended several workshops on food styling and photography. One of the best investments I ever made was purchasing this online course from Rachel Korinek, of Two Loves Studio. She is an amazing teacher and extremely generous with her time. I have also been inspired by the effervescent Bea Lubas. Her ability to tell stories is unparalleled.
Another outstanding teacher is Joanie Simon of The Bite Shop. Her youtube videos on food photography, released every Thursday, are the highlight of my week. I have learned so many tips and techniques from her. All of these mentors have helped me along my journey, but the most important tip I have learned is practice and perseverance. Nothing replaces these.
With 500 blog posts under my belt, I am excited to see where the next 500 take me. I have a loyal group of followers who encourage me by leaving me questions and comments. Thanks from the bottom of my heart. It’s so nice to know someone is out there reading what I’m writing!
I am so grateful for the community of food bloggers and photographers. For the most part, they are people who are generous of spirit. I adore the trait of generosity. My fellow food bloggers and photographers share knowledge and offer gentle and constructive criticism as well as heaps of praise. I feel like I have found my tribe.
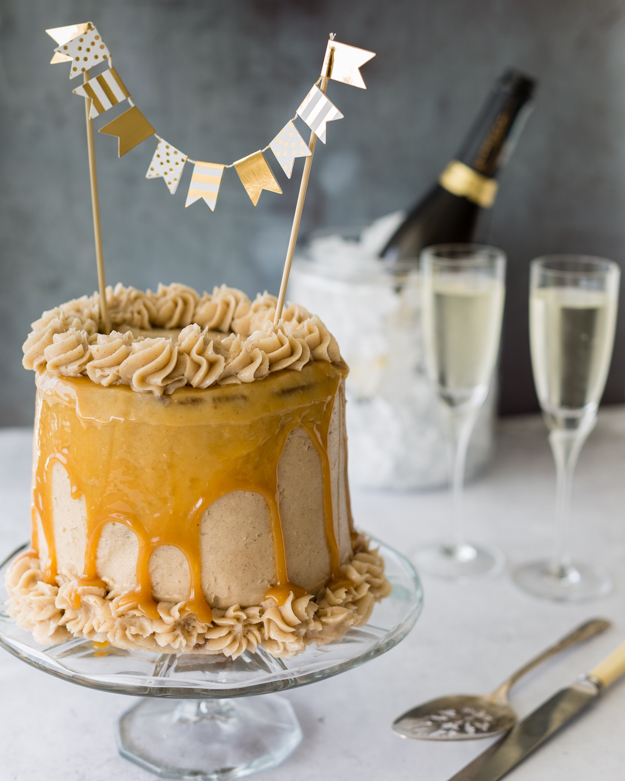
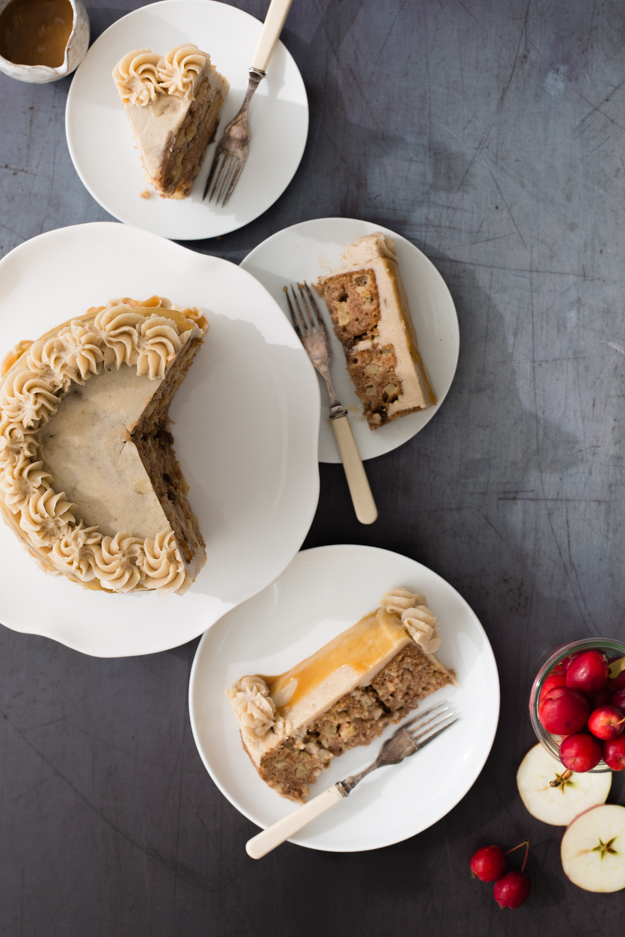
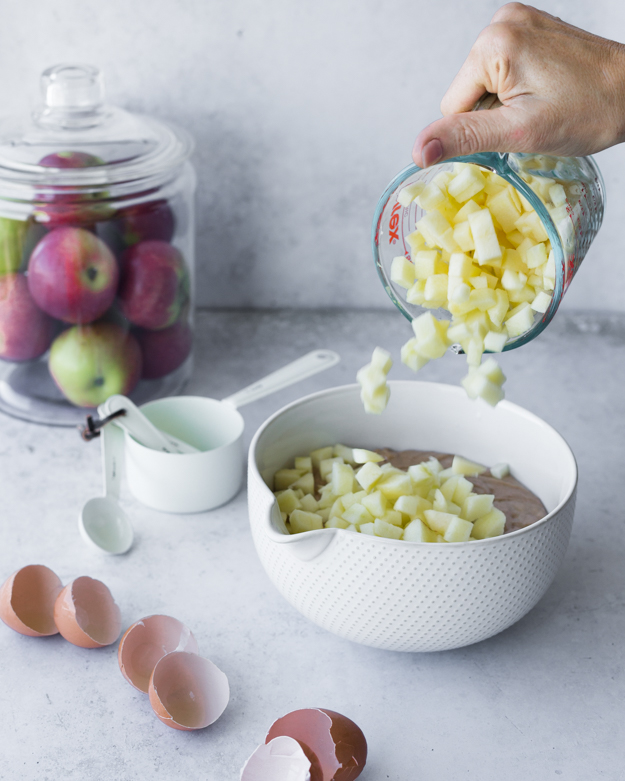
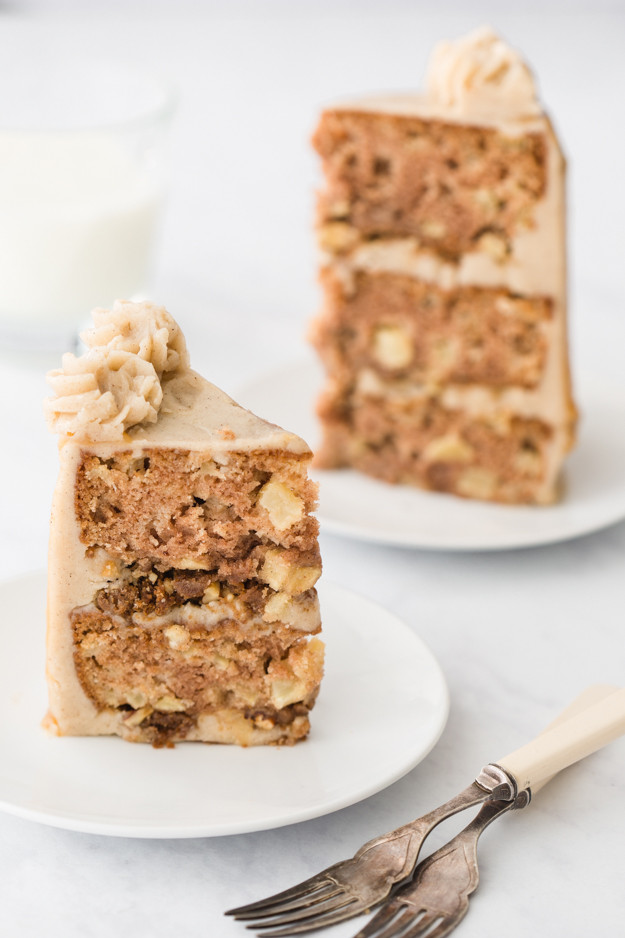
To celebrate this milestone I decided that a special cake was in order. This cake is quite spectacular. It starts with three layers of moist apple spice cake. Each layer is covered in silky cinnamon Swiss meringue buttercream. To finish this gorgeous cake, I added a drizzle of apple cider caramel. The cake batter is crammed full of diced apples. I used three huge Honeycrisp for mine. When you mix the batter together you will think you made a mistake because it is so thick. It basically looks like bits of diced apples, barely held together by batter. Don’t worry. As the cake bakes, the apples release their moisture and your cake will be perfect.
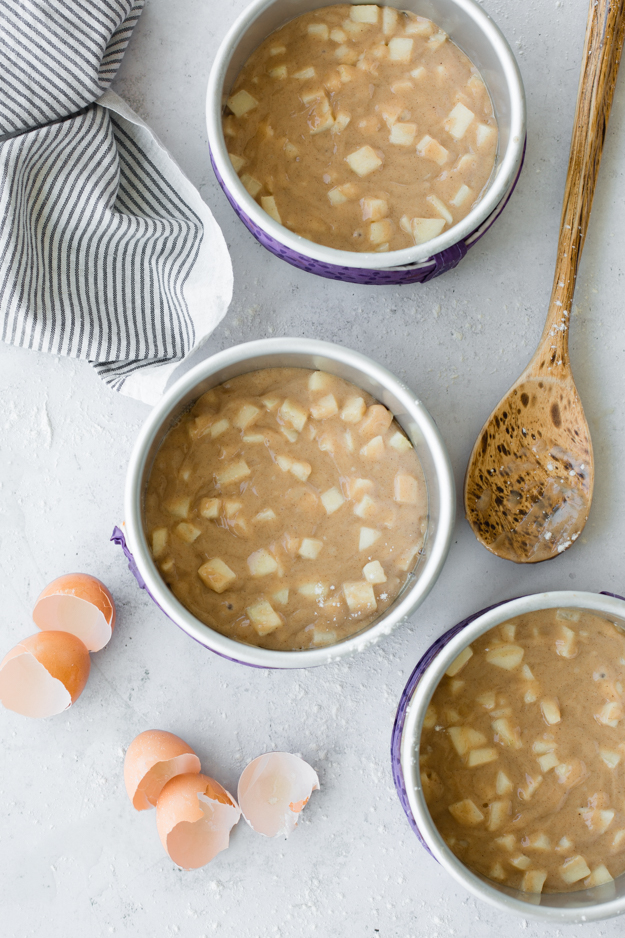
This cake recipe is barely adapted from John’s recipe on The Preppy Kitchen. His knowledge of cake baking is mind-boggling. He taught me about cake strips. They help prevent domed and cracked tops and over-cooked edges. I went with a silky Swiss meringue buttercream, accented with cinnamon. While admittedly a bit more work than a simple American buttercream, I just adore the light and velvety texture of a Swiss meringue buttercream. If you are curious, here is everything you ever wanted to know about buttercream from the über-talented Stella Parks.
For the shiny caramel drizzle recipe, I went straight to Tessa Huff’s gorgeous book, Layered, for inspiration. In a traditional caramel sauce, you use water and white sugar. Tessa suggests reduced apple cider and brown sugar instead. The tang of apple cider is perfectly balanced by the toasty notes of brown sugar in the cooked caramel. It really helps to offset the sweetness of the buttercream.
Truthfully, we didn’t drink the Prosecco (in the first photo of this post) with this cake. My first slice I had with some ice cold milk, and the second (and third, if we’re being honest), I had with tea. My fourth slice I just ate standing in front of the fridge. I ended up making this cake three times, before I got it exactly where I wanted it, so we had lots of cake. Even the mistakes were delicious. The first cake was served at our Rosh Hashanah dinner, with a birthday candle for my cousin Barbara. The second and third cakes were sliced, photographed and then wrapped and sent off to my husband’s office, where most of my baked goods go to have a happy ending.
I am struggling with the transition from summer into fall. This is nothing new for me. Transitions have always made me anxious, no matter what the season. Part of the problem this year is that Rosh Hashanah is so early this year (first night is Sunday September 9) and this is forcing me to abandon peaches and start thinking apples!
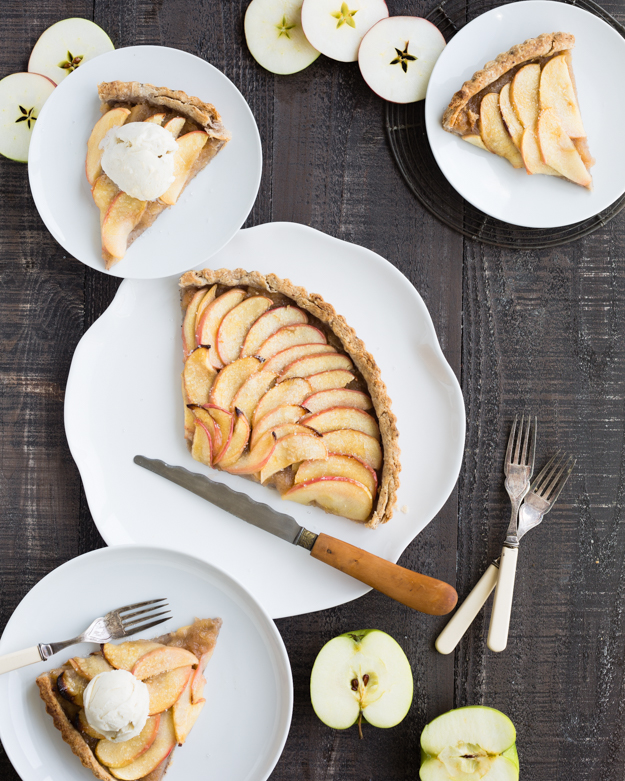
It is traditional for the Jewish New Year to dip apples into honey, symbolizing our desire for a sweet new year. Ever the proud Canadian, I decided to add maple syrup and maple sugar to my tart.
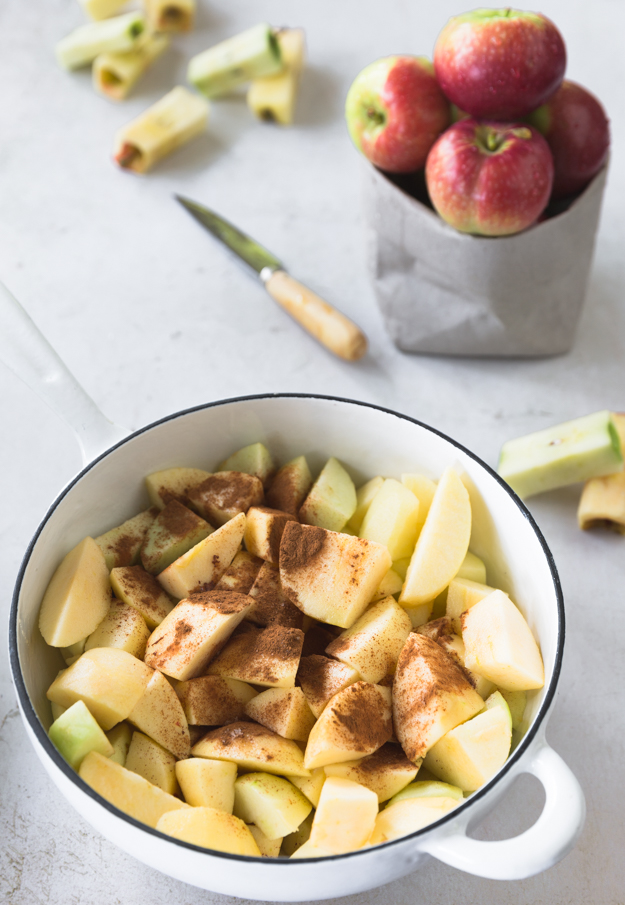
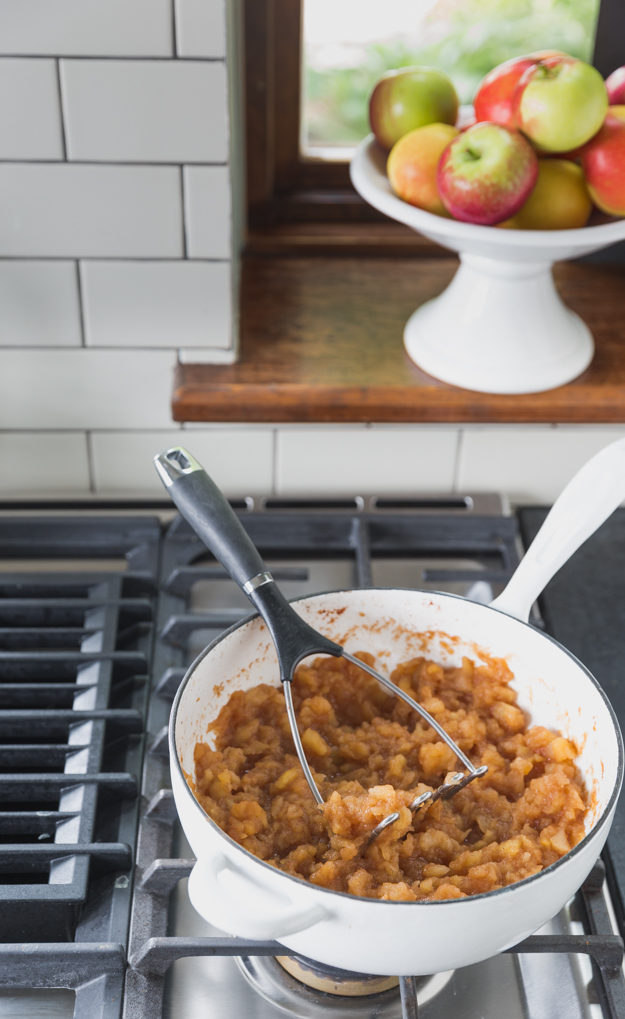
This inspiration for this gorgeous tart comes from Zoe Bakes. Her version was a galette. She spread chunky applesauce sweetened with honey on the dough, and then topped it with sliced apples. In my version, I cooked up a chunky applesauce sweetened with maple syrup, cinnamon and a bit of lemon juice.
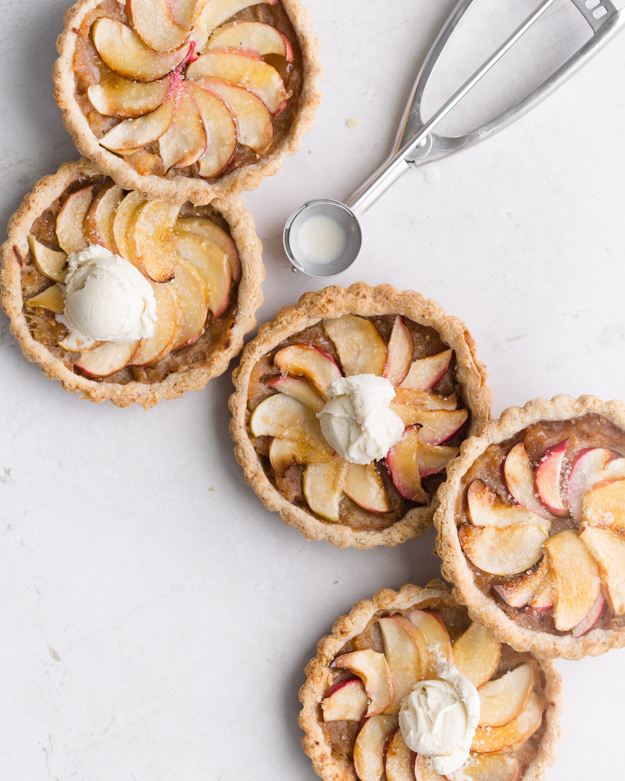
I made a pastry dough with all purpose flour and ground pecans. I love maple pecan ice cream so I figured they would work well in a tart as well.
You could also use this recipe to make 6 mini tarts instead. Vanilla ice cream goes exceptionally well with these tarts. Wishing all a sweet and healthy new year!
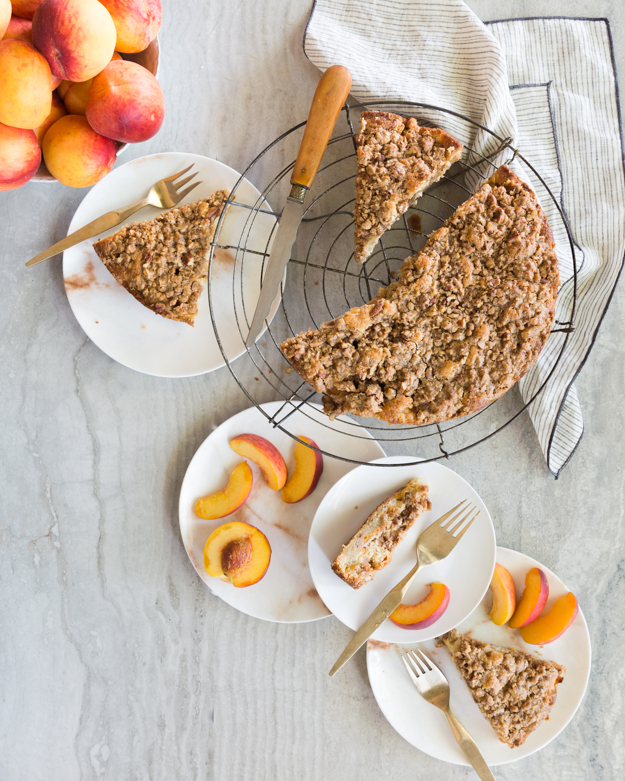
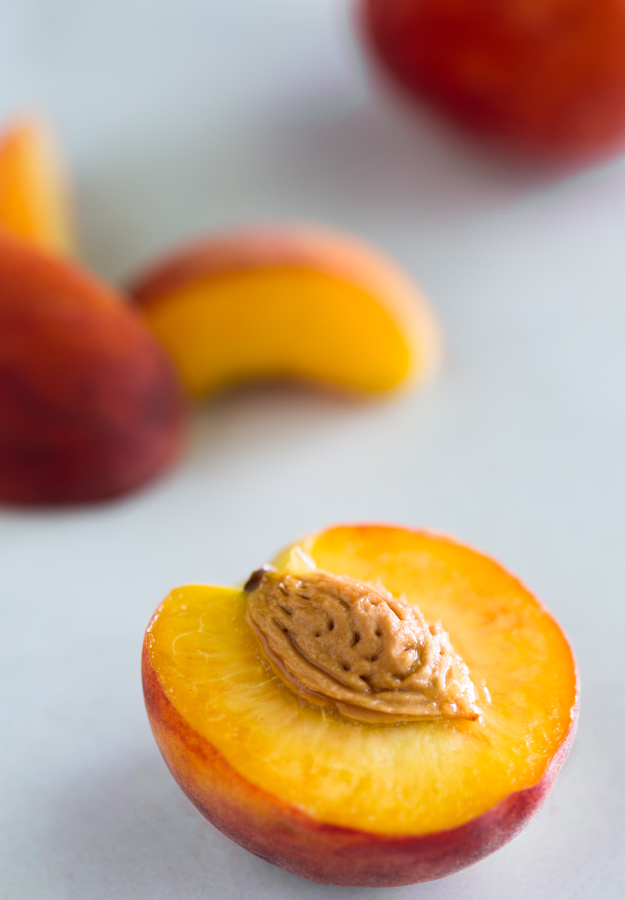
It happens every summer. I get carried away when local peaches finally arrive. The rest of the year they are like rocks with absolutely no flavour or aroma. For a few short weeks each August, they are perfect. The flesh gently yields as you take a bite, and the juice drips down your chin and stains your shirt. But it’s worth it. I always buy more peaches than we can possibly consume. Last year I peeled and pitted the extra peaches and tucked them away in the freezer to use during the winter. Of course I completely forgot about them, until I was cleaning the freezer in June and pulled out a frost covered bag.
This summer, I decided to take action and bake a cake with my peach windfall. The problem with most peach cakes is that the peaches exude so much juice that the cake has a wet, gummy texture. Cook’s Illustrated cracked the code on that problem by suggesting that you roast the peaches first, and then mix them with Panko breadcrumbs.
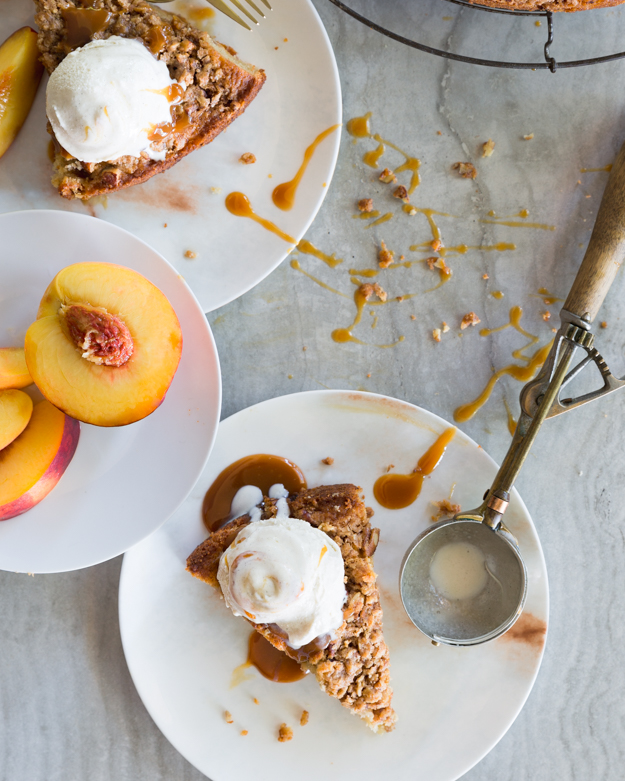
I tarted up the Cook’s Illustrated version of this cake with a delicious streusel topping, crafted from pecans, oats, butter, brown sugar and maple syrup. I love a little crunch on top of my cake.
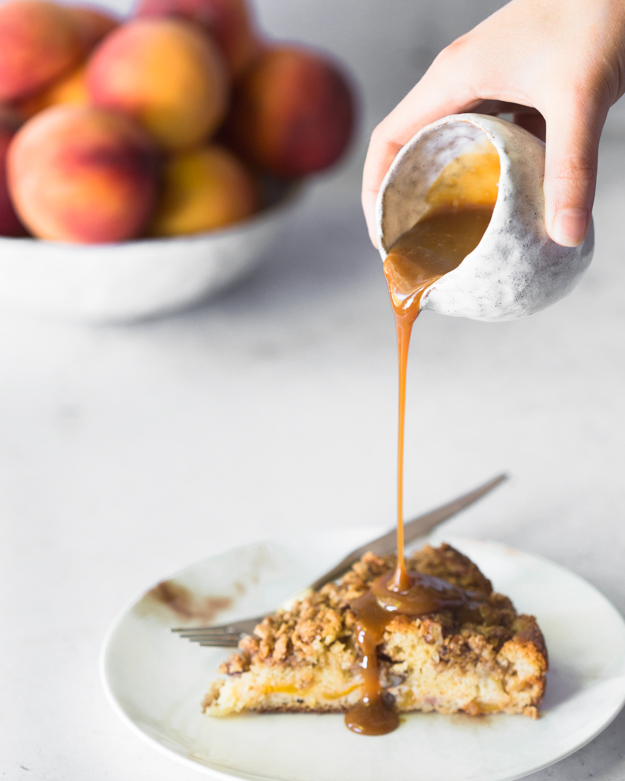
A drizzle of some salted caramel sauce wouldn’t be a bad idea. And a scoop of vanilla ice cream, because it’s the last week of summer and I propose we go out with a bang!

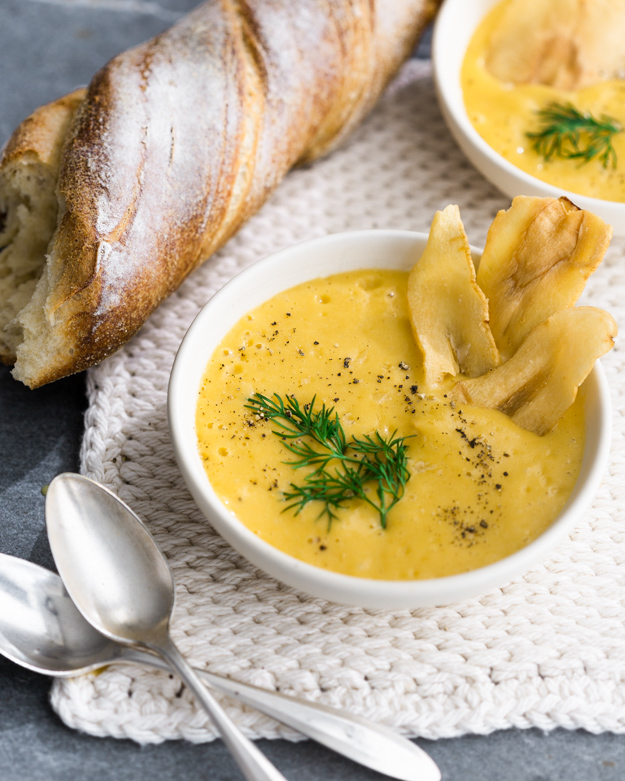 If I’m being completely honest, I need to tell you that this soup was inspired by a bag of parsnip chips from Trader Joe’s!
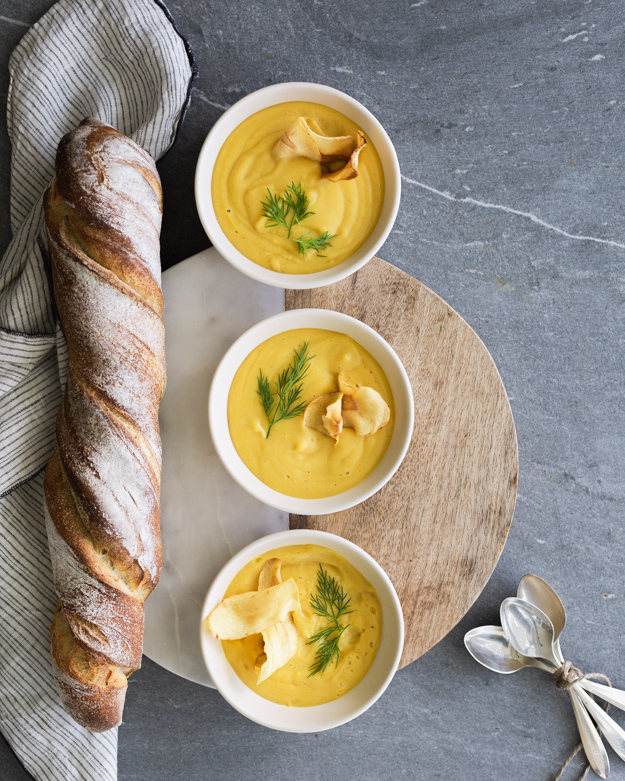 Parsnips are an under-utilized vegetable. I love them roasted but they make a stellar soup ingredient. They have an mild spice flavour, reminiscent of nutmeg and cinnamon.
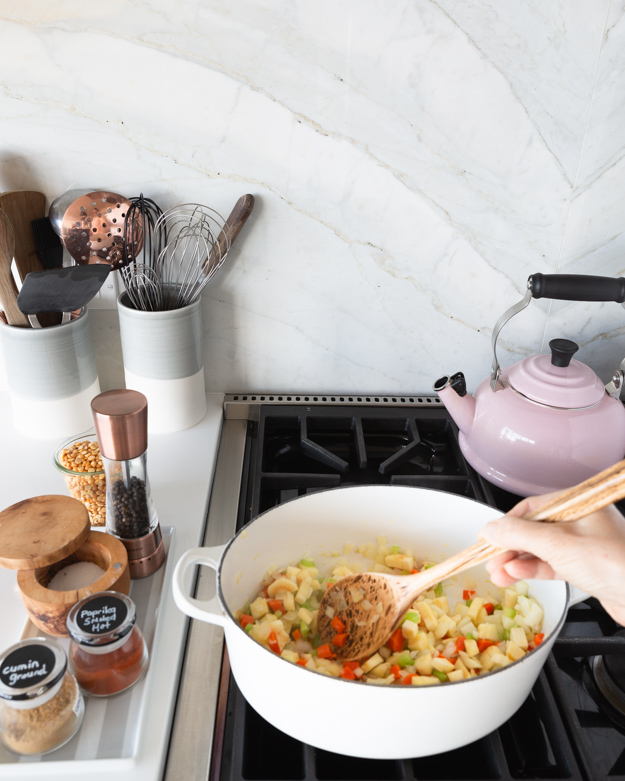 Ground cumin and smoked paprika really complement the slightly earthy flavour of parsnips.