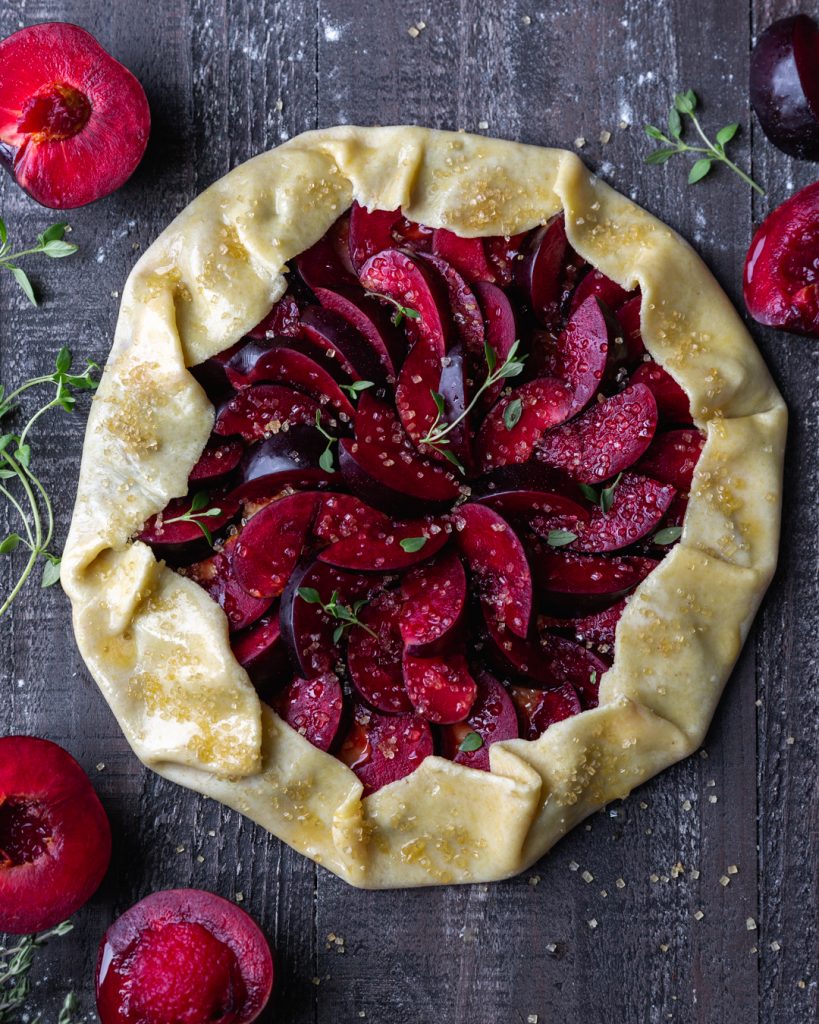
Do you guys know about pluots? They are a hybrid between Japanese plums and apricots. Unlike plums, which can sometimes be tinged with bitterness, pluots are brimming with sweetness. They come in a variety of hues, ranging from purple to red to green. Some varieties are speckled, like a dinosaur egg. Black plums would be a good substitute if you can’t find pluots.
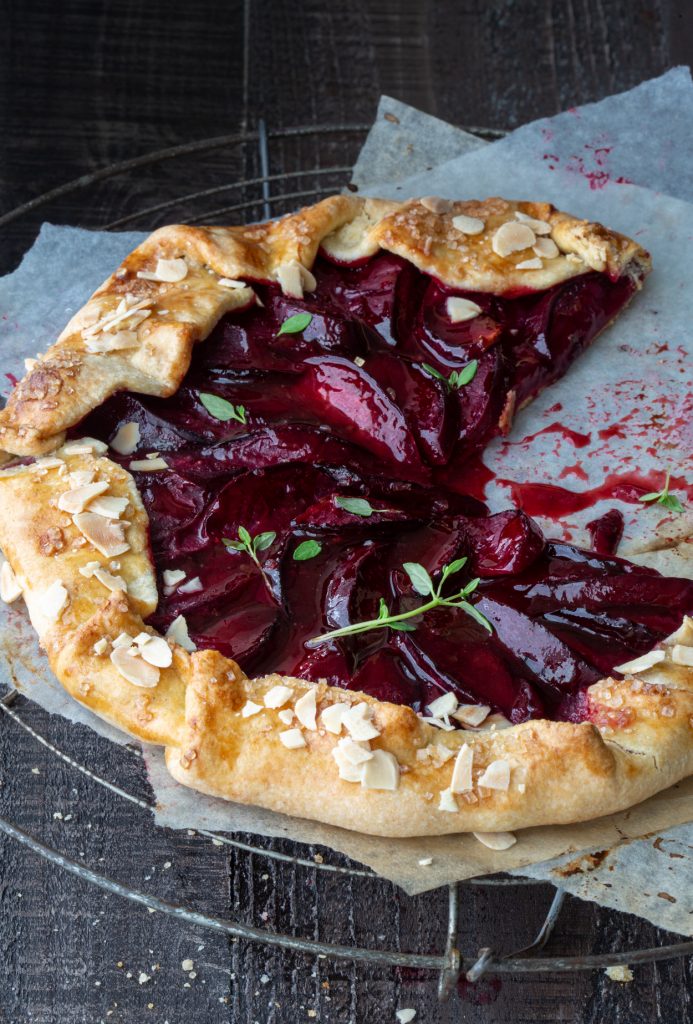
Pie is not really my thing. But I adore galettes. They are essentially a free-form pie and their casual messiness really appeals to me. They come together so quickly. I like to make a few recipes of galette dough at a time. I roll them out into 13 inch circles, wrap them in plastic wrap and stick them in the freezer. I use them for sweet and savoury galettes all summer long.
https://youtu.be/YPnToE7njIE
Any red jam would work here. I used strawberry rhubarb, but raspberry, strawberry or even fig jam would be delicious.
The addition of fresh thyme really complements the sweet pluots. The tiny leaves of a few sprigs brings out the floral note of the pluots.
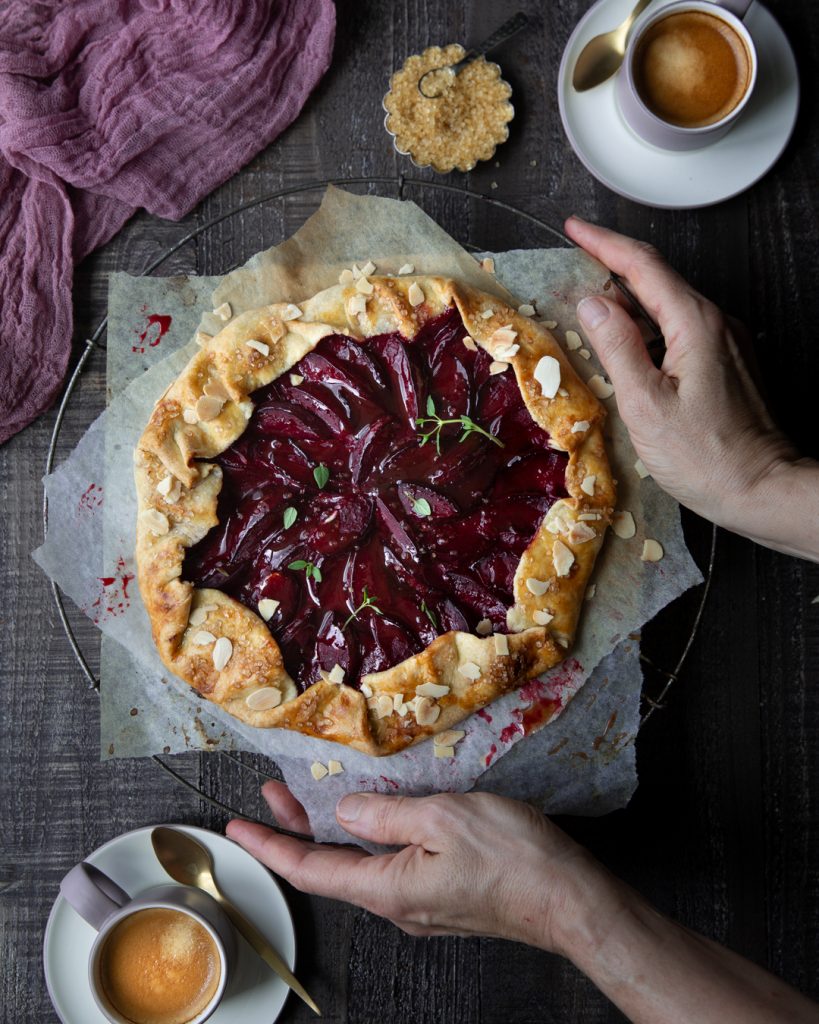
A scoop of vanilla ice cream or a dollop of whipped cream would not be unwelcome.
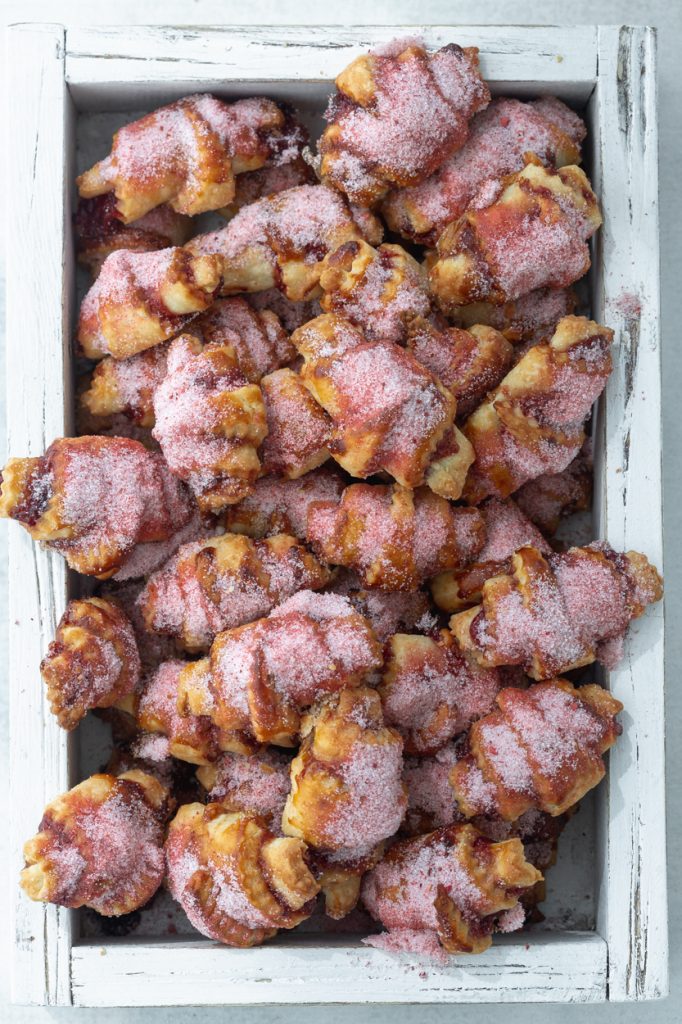
There are no shortage of Rugelach recipes recipes on this blog. Rugelach dough, rich with butter and cream cheese, is a great blank canvas. Then it’s time to have fun and create different flavour combos.
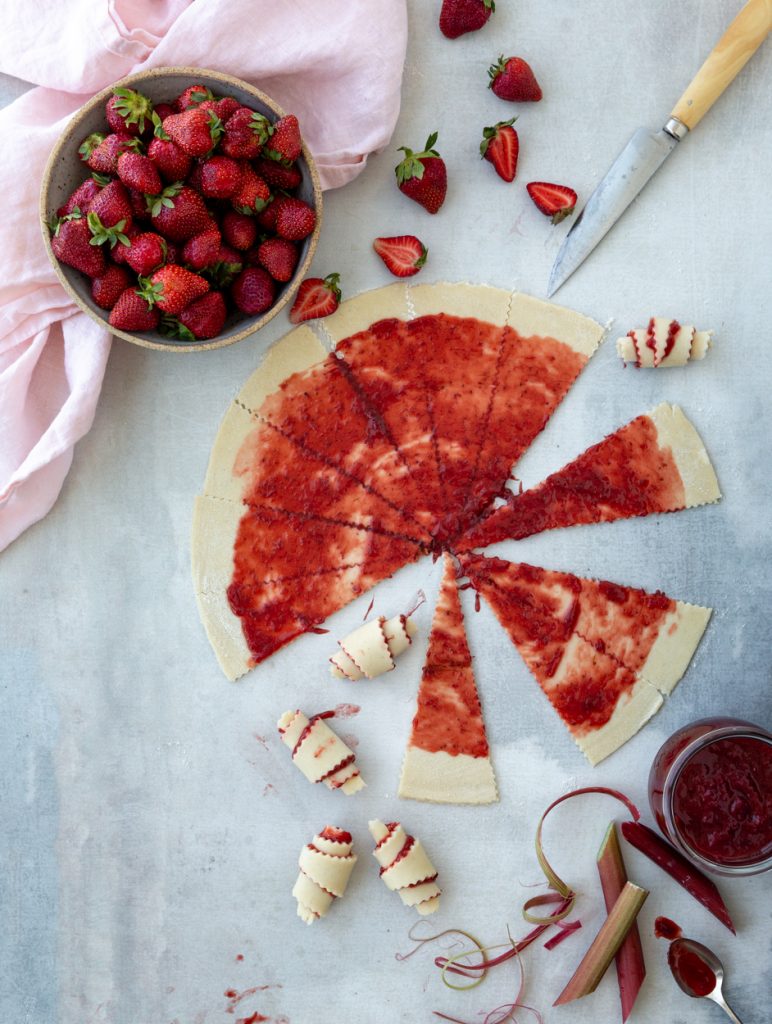
This one starts with making your own strawberry rhubarb jam. Store-bought is fine, but if you have an extra 20 minutes, this jam is stellar. I discovered this recipe from Jake Cohen over at thefeedfeed. Sweet and tart with a little pop of acidity from rice wine vinegar, you will find yourself putting this s##t on everything.
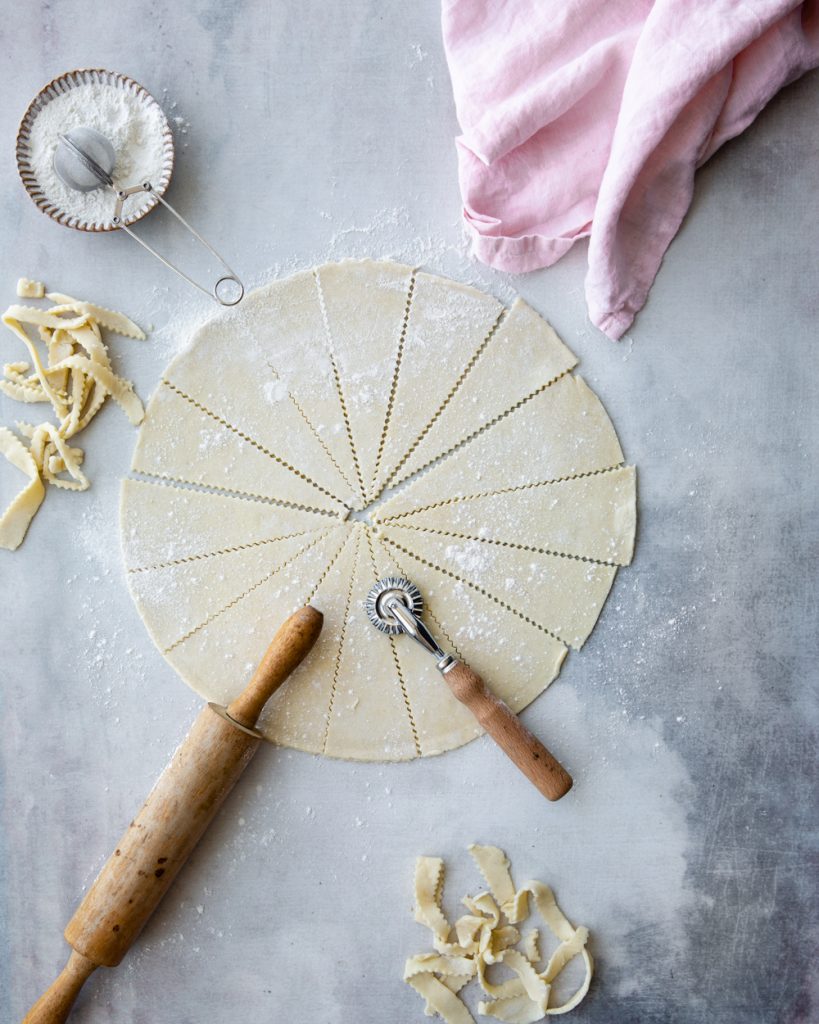
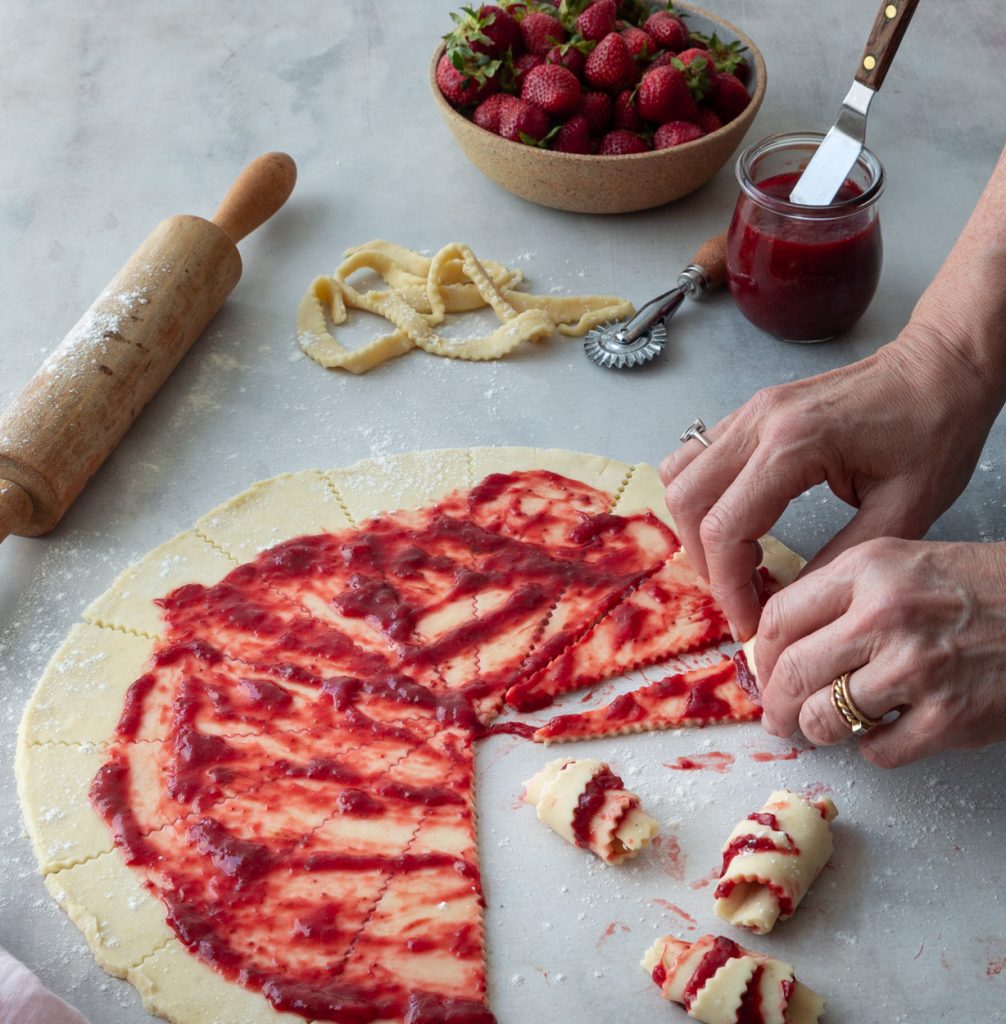
This dough rolls out like a dream. No cracking or splitting. It’s like velvet.
Each little wedge gets rolled, starting at the fat end and ending at the point.
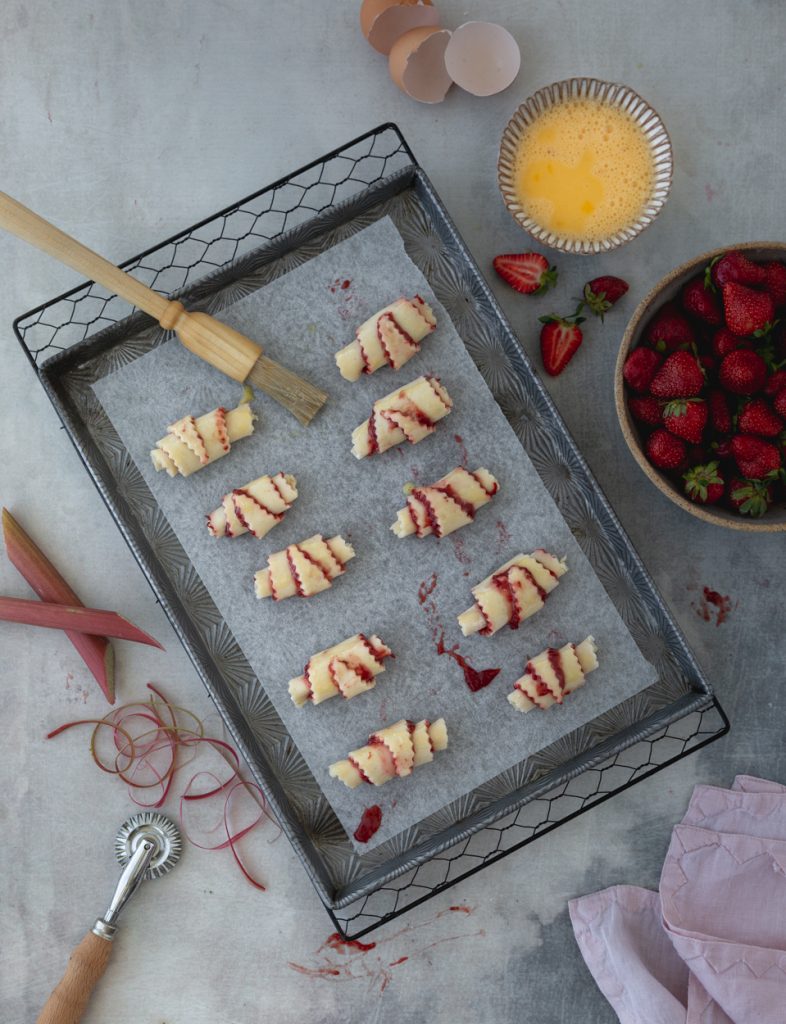
Brush with egg and bake.
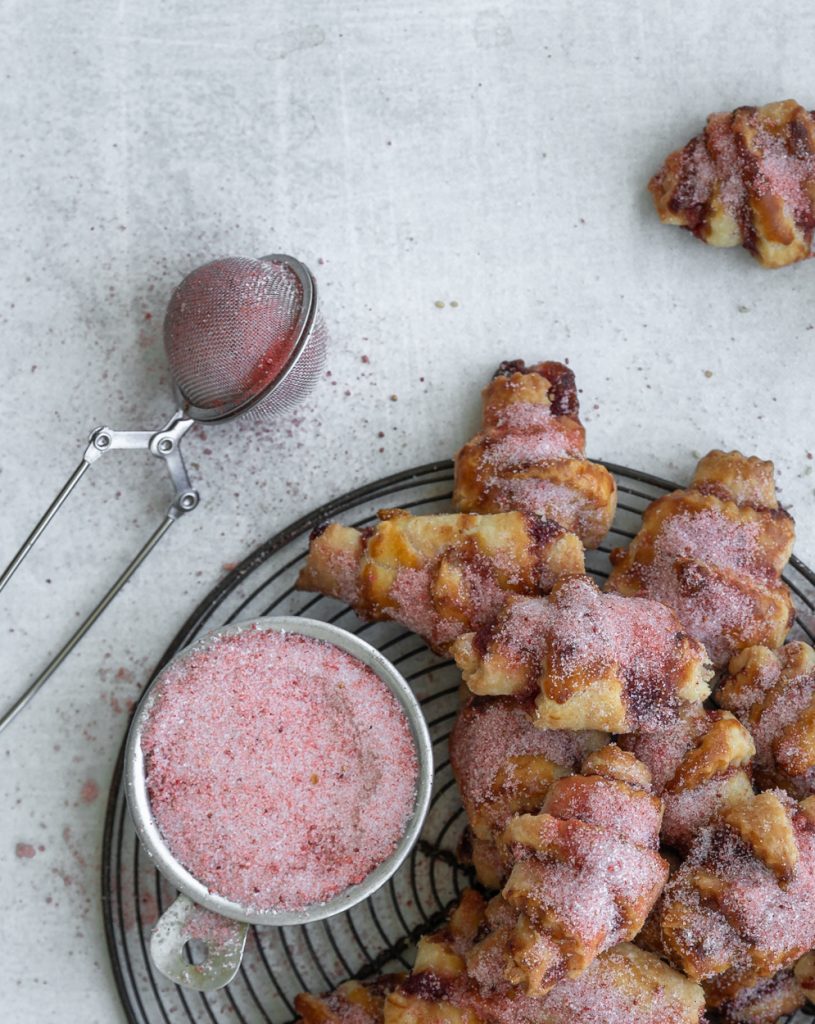
While they are baking, crush some freeze dried strawberries into a fine powder and mix with granulated sugar. As soon as the rugelach are baked, spoon some strawberry sugar over the rugelach. Once they are cool, give them a second dusting. If you have never tried freeze dried berries, you must seek them out. Many natural/health food stores carry them, as do Trader Joes and Whole Foods. They are a concentrated punch of colour and flavour that will elevate any baked good.
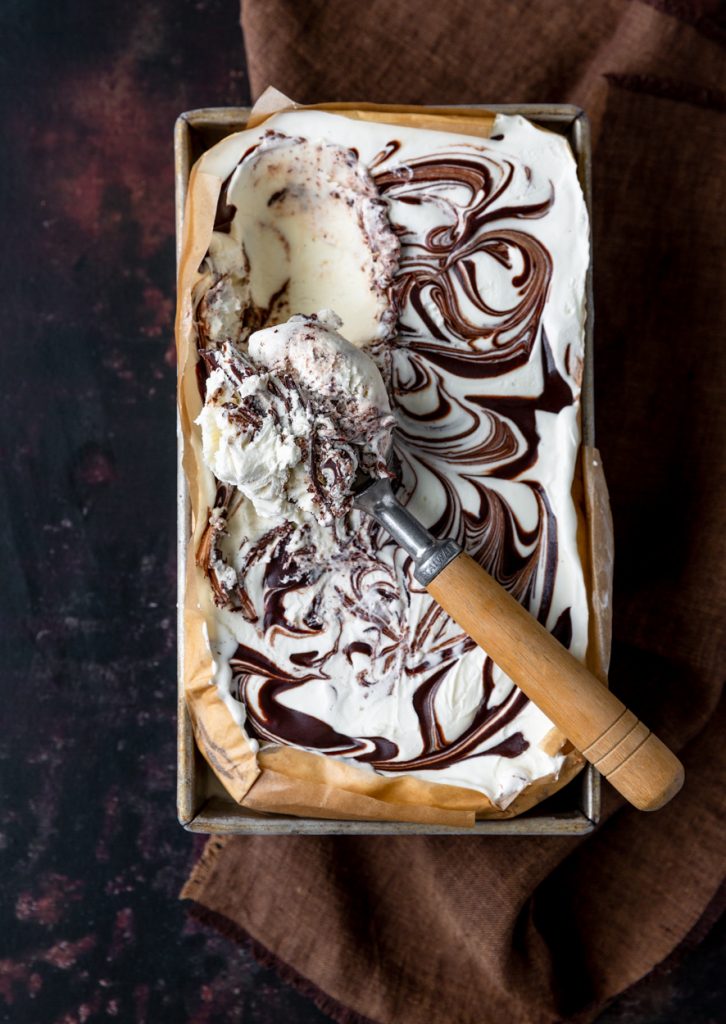
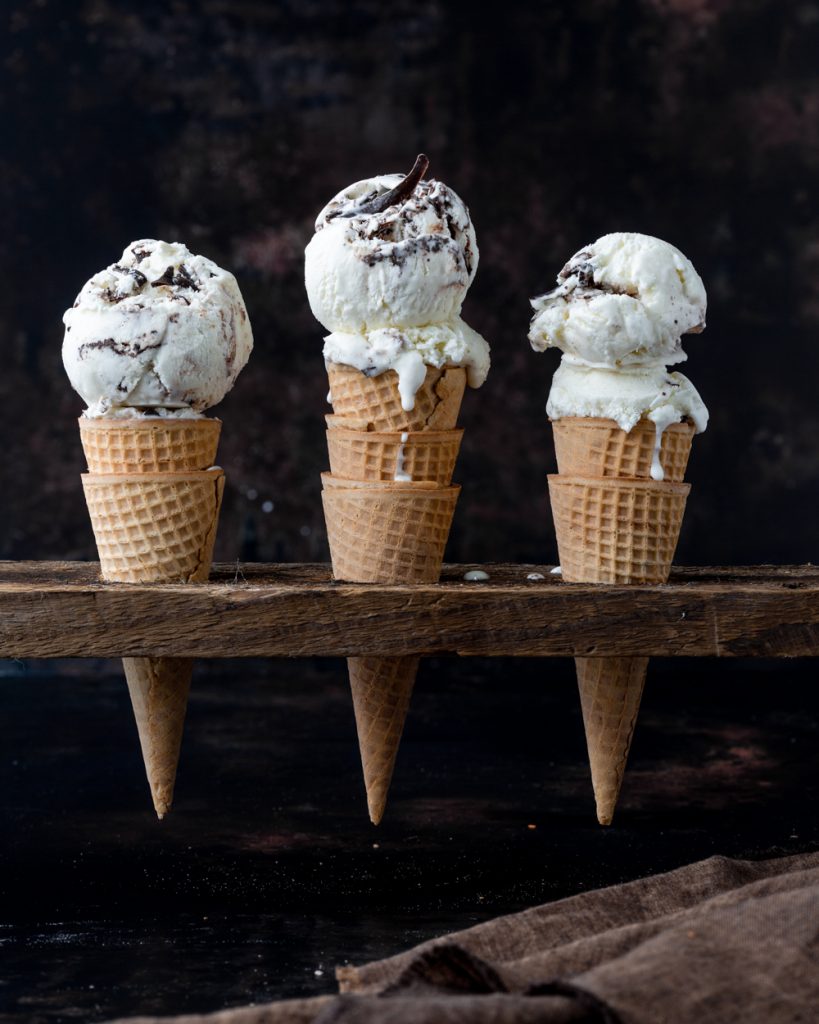
No churn ice cream means that no ice cream machine is required. You just mix all the ingredients together, freeze, and voila, creamy, smooth, luscious ice cream. How is that possible you ask?
When you make ice cream the traditional way, in an ice cream machine, the action of the paddle, churning the mixture, is actually incorporating air into the ice cream, so you end up with a light and fluffy finished product.
The secret to no churn ice cream is two key ingredients. The first is whipped cream. You whip the cream before mixing it into the other ingredients. The act of whipping causes the volume to increase and incorporates air into the cream. Whipping the cream replaces the work of the ice cream machine.
The second key ingredient is sweetened condensed milk which has a very high sugar content. Sugar lowers the freezing point and prevents the ice cream from becoming rock hard. The “condensed” in sweetened condensed milk, means that the milk has been cooked down to reduce the water content. Less water means that you will not form ice crystals. So you end up with a smooth and velvety ice cream.
But sweetened condensed milk is a mixed blessing. While the high sugar content keeps it creamy, it can also produce some very queasily sweet ice cream. The solution, I have discovered, it to be strategic about the flavours that you incorporate into it. I would not add crushed Oreos to make Cookies and Cream, or fudge and marshmallows to make Rocky Road ice cream.
I added malted milk powder to my no churn ice cream. Stella Parks calls malted milk powder the umami bomb of desserts. Malted milk powder contains barley malt, wheat flour, milk powder, and salt. The barley malt gives malted milk powder a roasted, toasty earthy flavour. The salt aids in tempering the sweetness, and enhancing all the other flavours in whatever it is combined with.
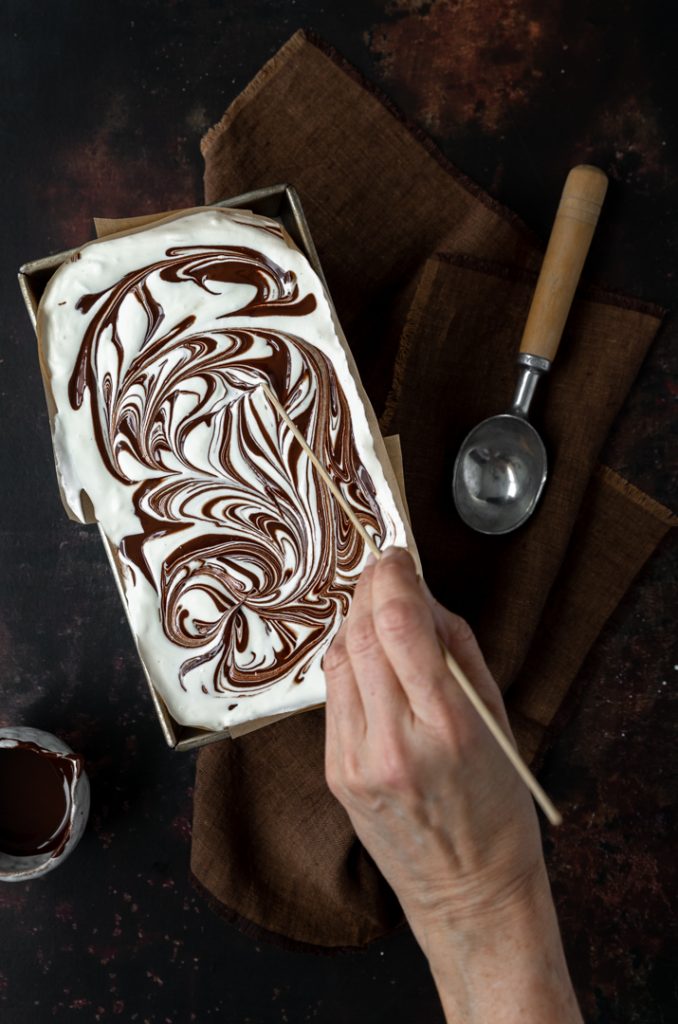
Malted milk powder is mixed with some heated 1% milk to dissolve it. That gets cooled down while you whip the cream. Mix the sweetened condensed milk with the malted milk mixture and fold in the whipped cream, some vanilla bean paste and a pinch of salt. Pour that into a 9x 5 inch loaf pan.
I decided to add a chocolate swirl to my ice cream. A touch of coconut oil added to the melted chocolate keeps it from becoming too brittle when it freezes. Put the ice cream in the freezer for at least 5 hours before scooping.
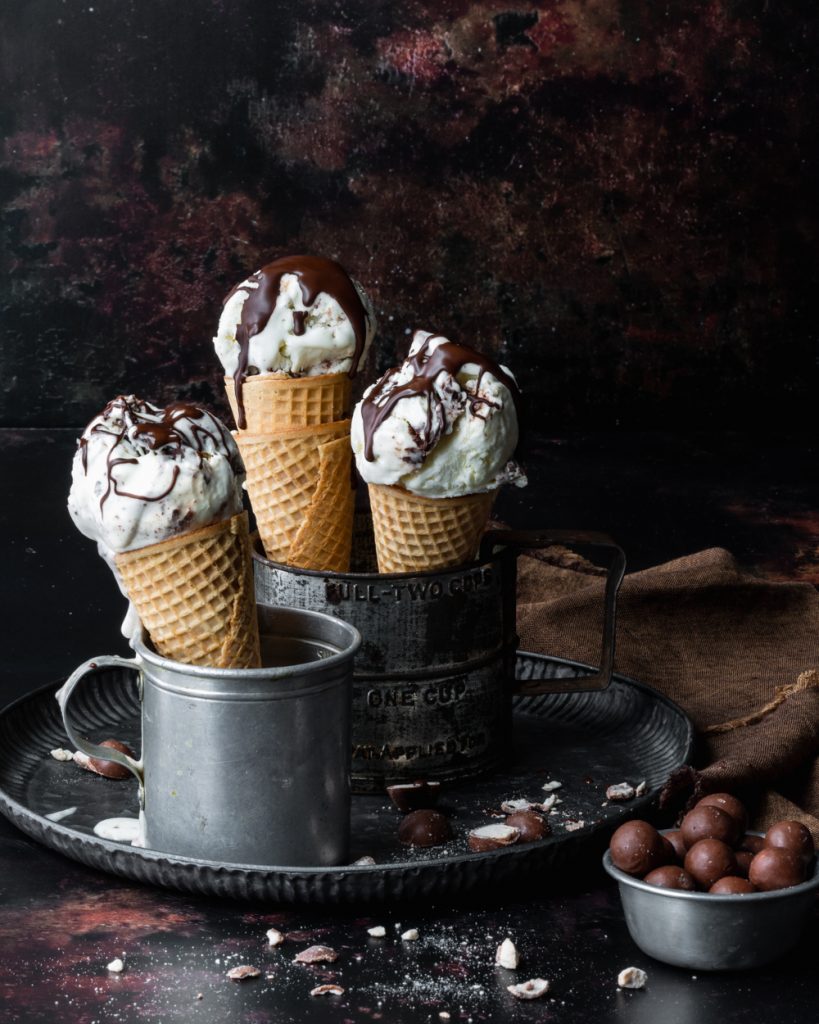
Creamy, rich and smooth, with a real toasty depth of flavour, this is ice cream for grownups. If I weren’t socially distancing this summer, I would invite my friend Mrs Grizzly over for a few scoops. She is a malted milk aficionado.
Feel free to drizzle a little extra melted chocolate on top. I don’t think anyone will complain.
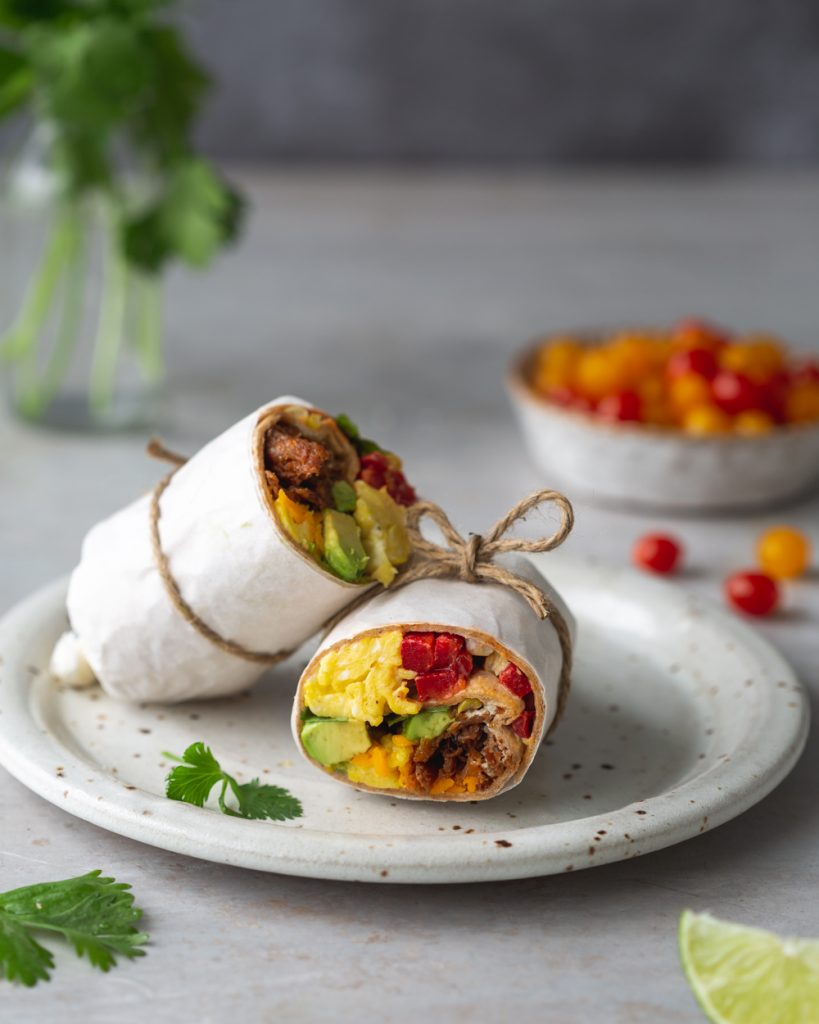
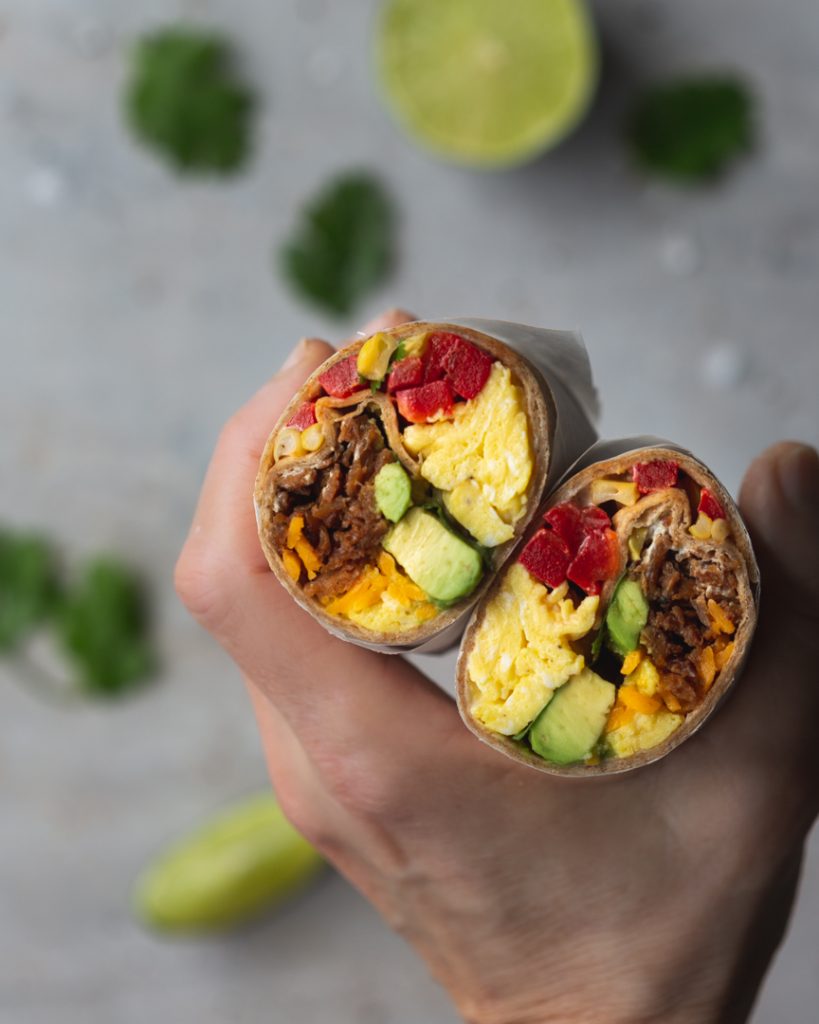
I’m a big fan of breakfast for dinner. We have eggs for supper at least once a week at our house. A burrito is the perfect way to wrap up your dinner in one neat little package. These burritos check all the boxes for a satisfying meal. Here’s how it all comes together.
I have recently discovered “Beyond Meat Spicy Italian Sausage”. It’s a plant based protein, that so closely resembles the real thing, it’s amazing. I’m always on the lookout to reduce my consumption of meat, and I have tried many “meat alternatives.” Most of them are sorely lacking in texture and flavour. This one did not disappoint. This is not a sponsored post, I just really love the product. I removed the “meat” from the casing and sautéed it in a pan, breaking it up into little pieces, until browned and crispy. I have used it as a pizza topping, mixed into frittatas, and tossed it with pasta and tomato sauce.
You can assemble and wrap the burritos ahead of time and stick them in the fridge for a few hours. Heat them in a 350°F oven for about 15 minutes to heat them through and melt the cheese.
There is no end to the fillings you can use. Sautéed onions, black beans, salsa, hash browns, mushrooms, or spinach. Get creative.
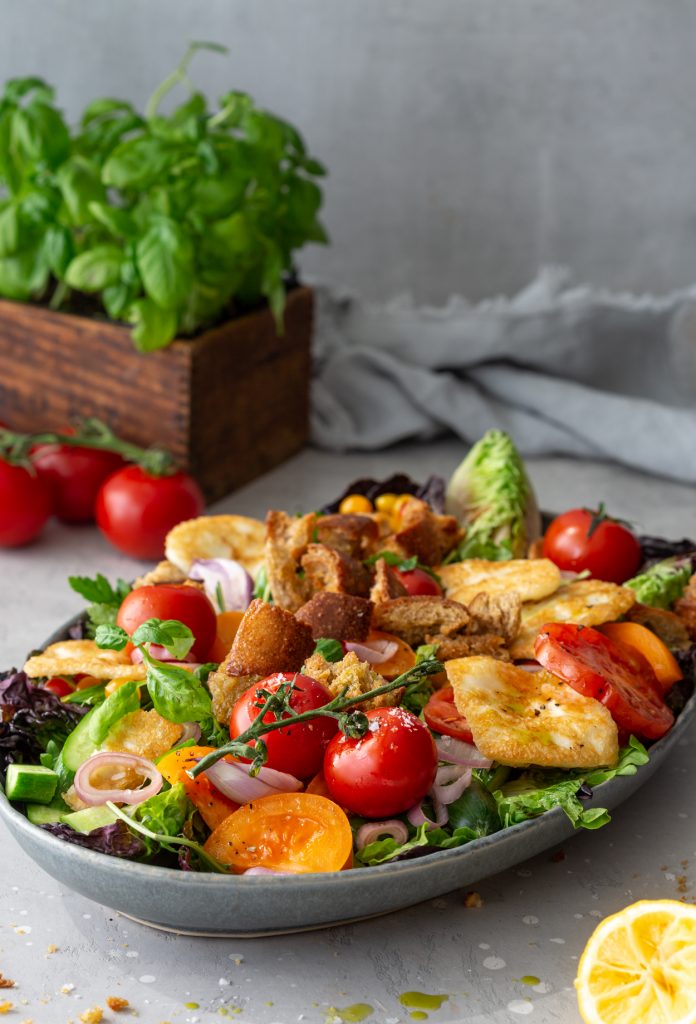
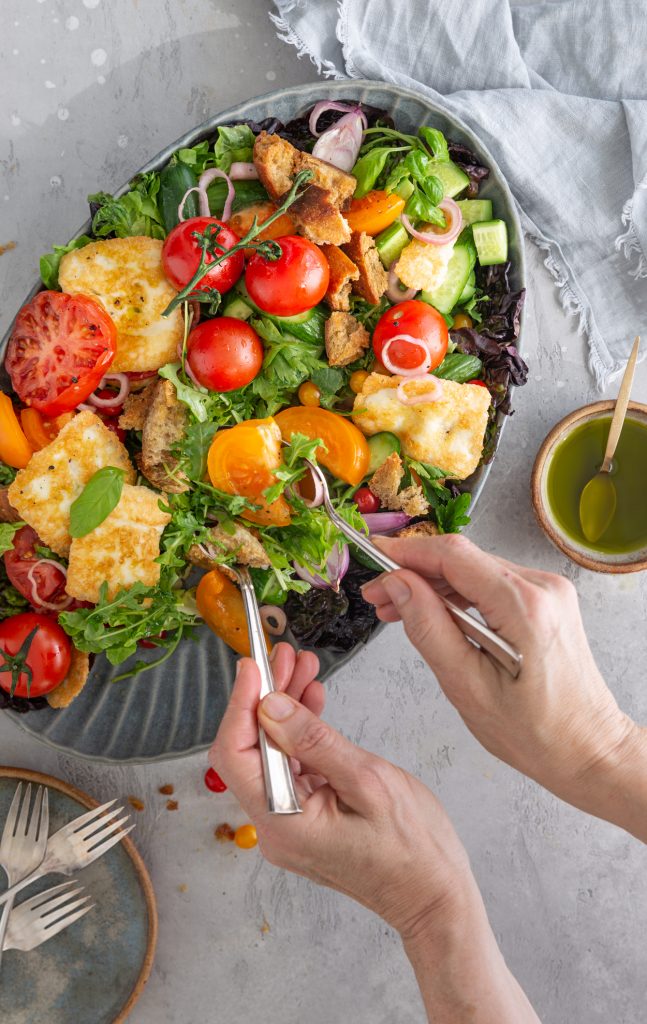
Panzanella salad was created in Tuscany as a way to use up stale bread. It is customary to soak the stale bread in water and a bit of vinegar for about 30 minutes until it becomes soft, but not soggy. The first time I ever had it was about 10 years ago, on the Amalfi coast of Italy. I discovered that the time-honoured Panzanella salad is not my jam. I really dislike the texture of the soaked bread. I prefer my stale bread with a bit of crunch.
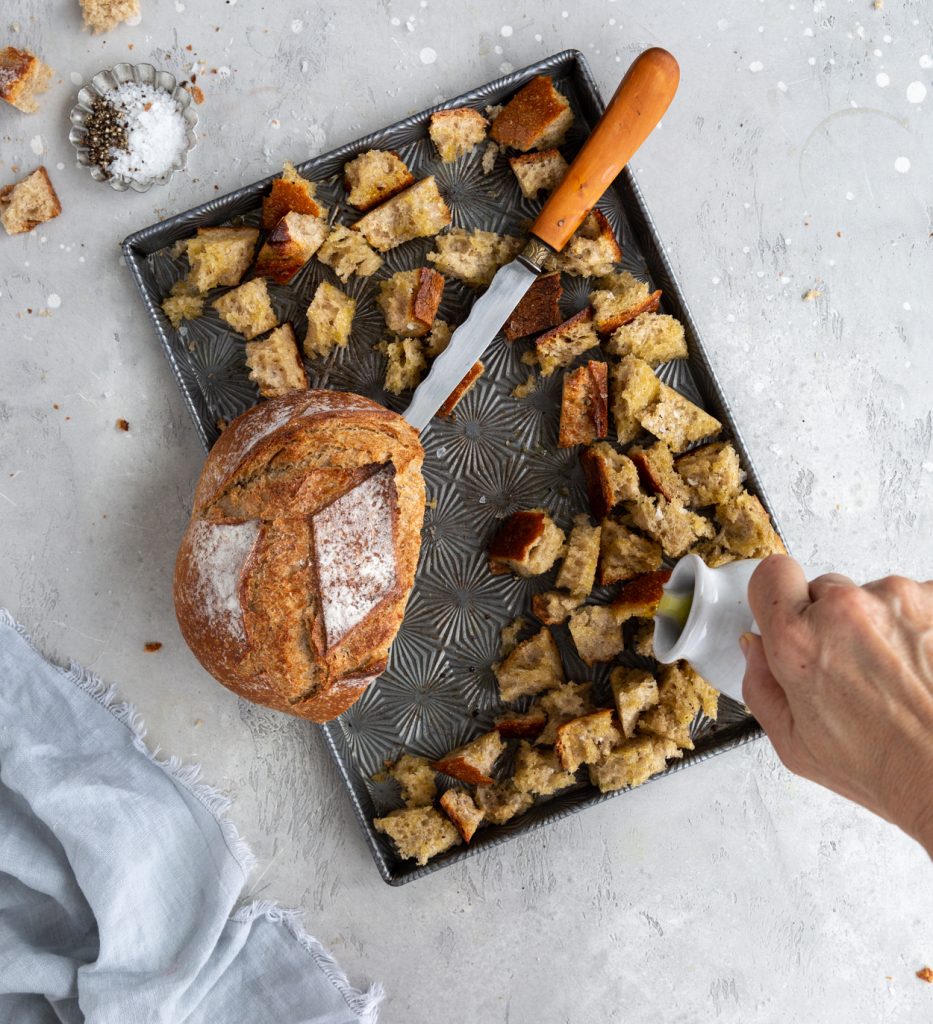
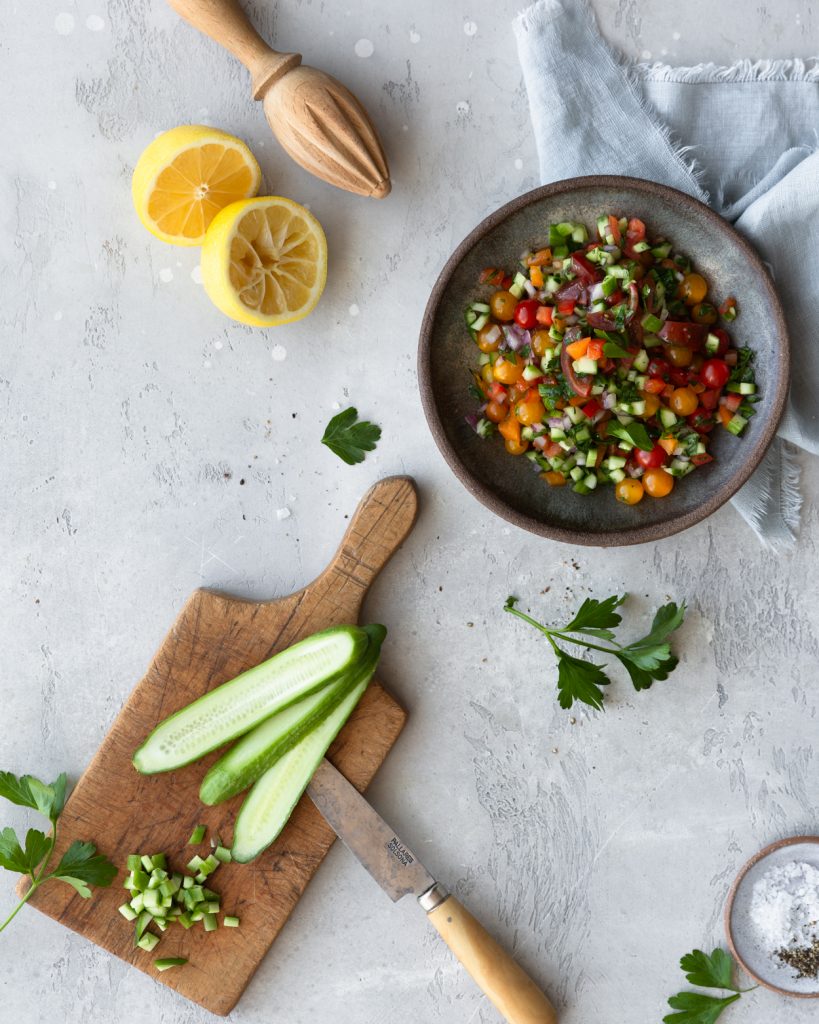
This salad was inspired by a very similar one at thefeedfeed.com. Start with some really good bread. A rustic sourdough would be perfect, if you happen to know anyone baking sourdough these days! Tear, rather than cut it into chunks, so it has lots of nooks and crannies to soak up the delicious dressing from this salad. Toss with olive oil and salt and toast in oven until golden brown. You want the croutons to still have a bit of chew to them.
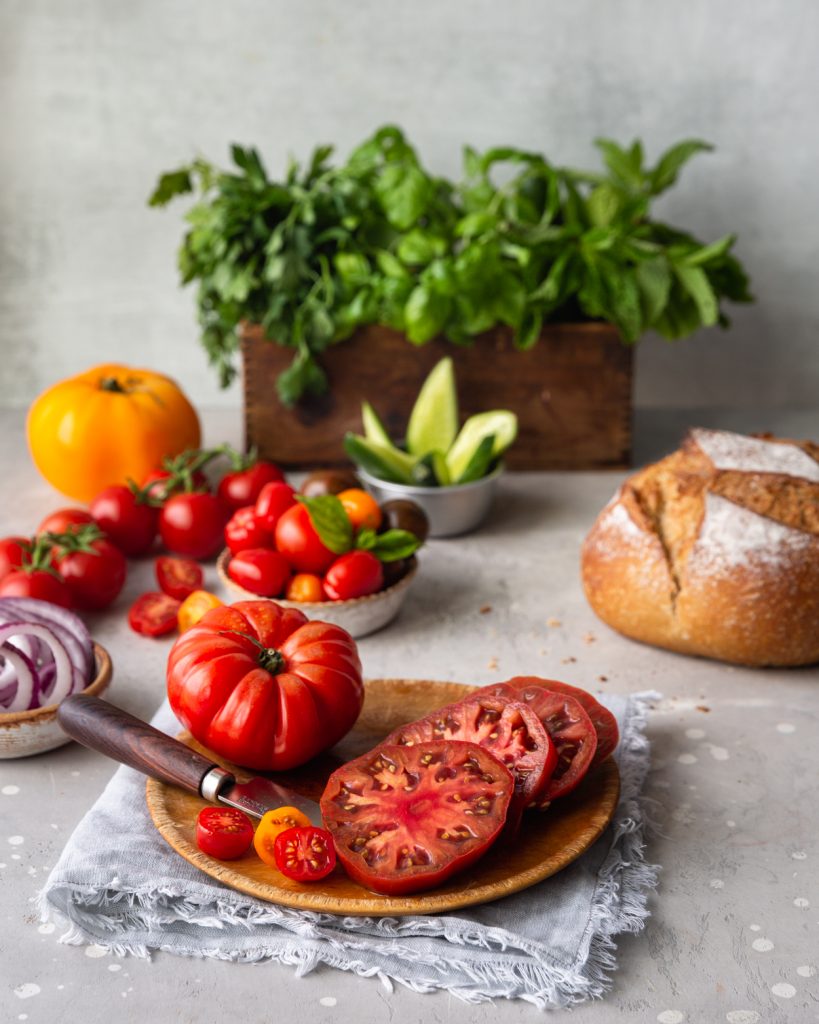
For the tomatoes, since it’s not really peak tomato season yet, I went with a mix of supermarket imported large heirloom tomatoes, grape tomatoes and some tomberries.
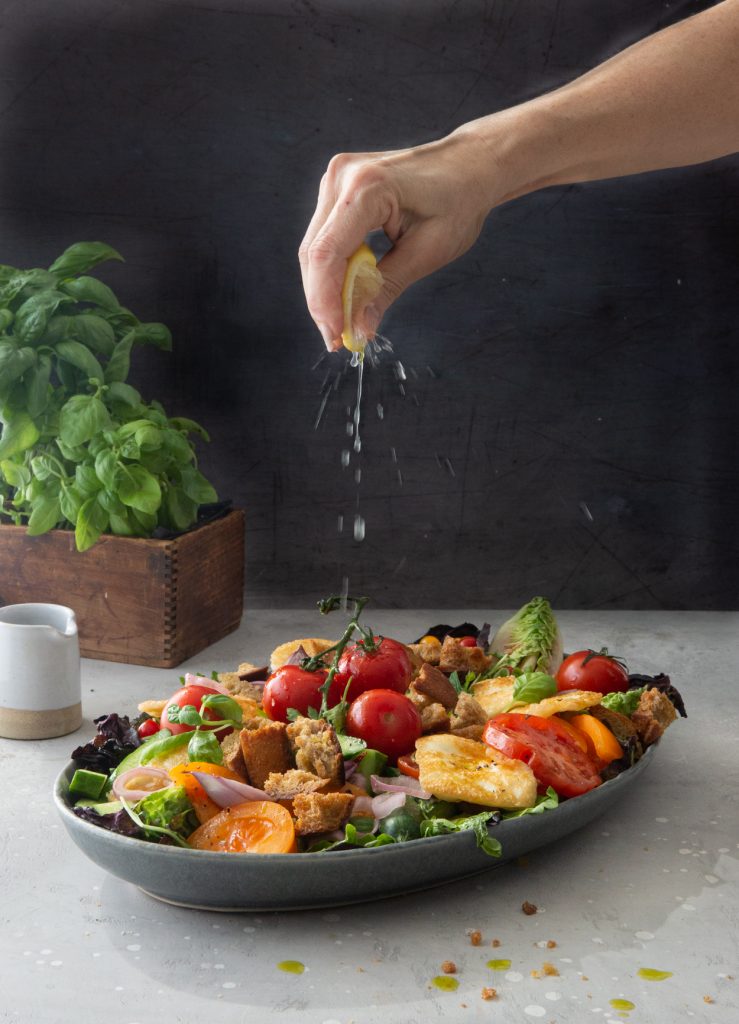
The dressing for this salad uses a mix of lemon juice, red wine vinegar and olive oil. I love tomatoes with basil, so I went one step further and made some basil infused olive oil. It takes about 5 minutes to make and it’s so delicious. Whizz some olive oil (1 cup) and basil (1/2 cup) in the blender. Pour into a saucepan and simmer for about a minute. Strain oil and let cool before using.
Fry the halloumi cheese at the last minute, so it will still be warm and crispy when you serve the salad.
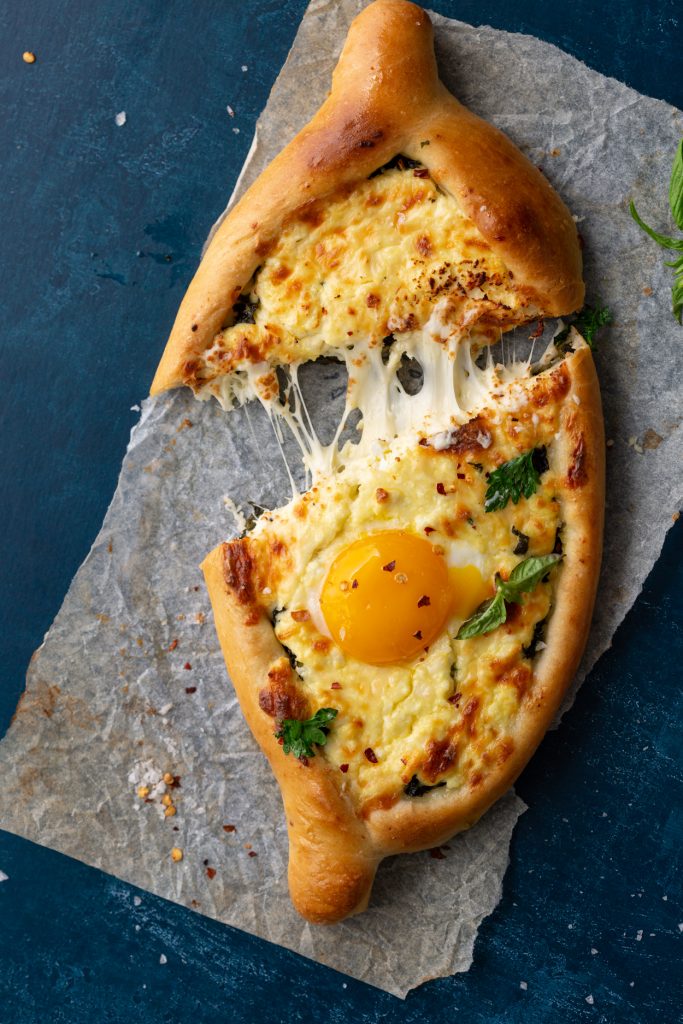
Essentially, Khachapuri (pronounced hatch-a-pooree), is a bread canoe filled with hot bubbling cheese and topped with a runny egg. How bad could that be?
This decadent dish originated in the Republic of Georgia,. It’s been on my “must bake” list for several years now. It checks all the boxes for pandemic comfort eating, so I decided the time was right. I pulled out all the various recipes I had been collecting and started baking.
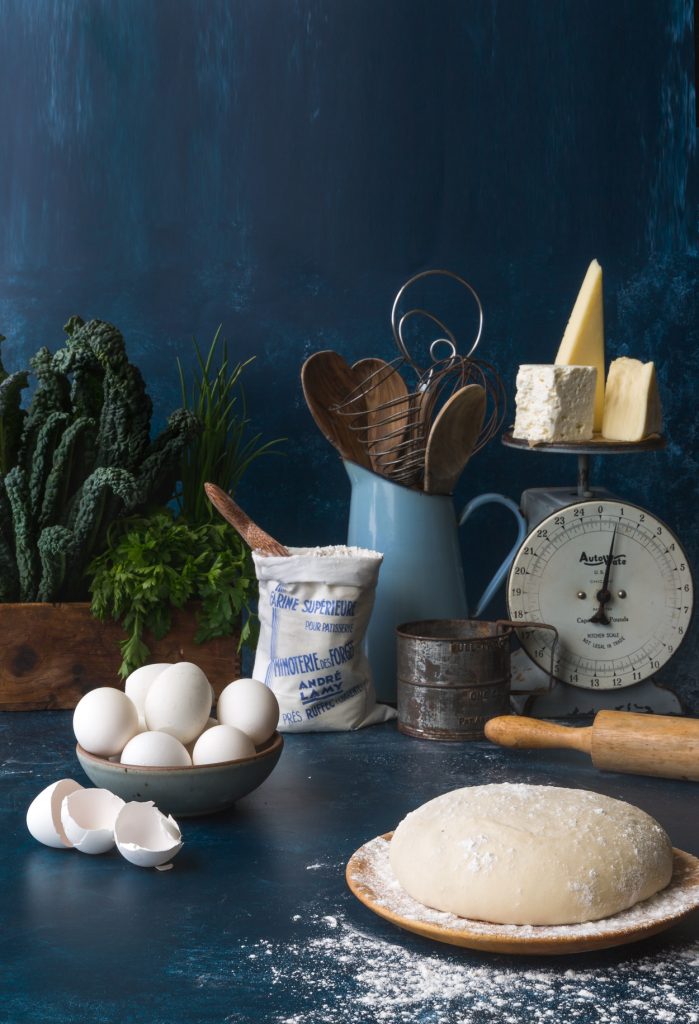
Over the past month my oven has churned out over a dozen khachapuri. I wanted to get it perfect. The first hurdle was what to use for the cheese filling. In Georgia they use a combo of imeruli and sulguni cheeses, neither of which are available in Ottawa. I tested some possible substititions and discovered that I liked a combo of mozzarella, ricotta and feta.
Once the filling was settled, I turned my attention to the dough. The more traditional recipes called for an enriched (butter and milk added) dough. While quite delicious, we found that version to be just too rich. I decided on a leaner pizza dough, enriched with just a tablespoon of olive oil. Storebought pizza dough is fine, but homemade is better.
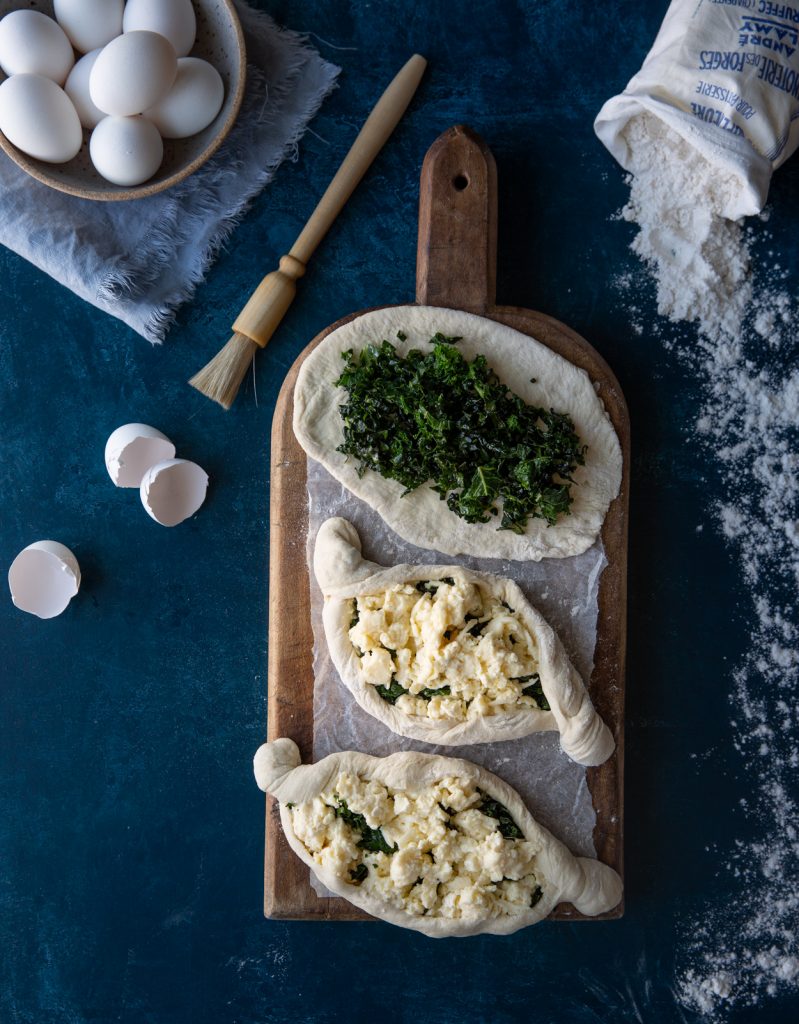
In a desperate attempt at delusion, I added a big heaping handful of massaged kale to each khachapuri, in order to convince myself that these were healthy.
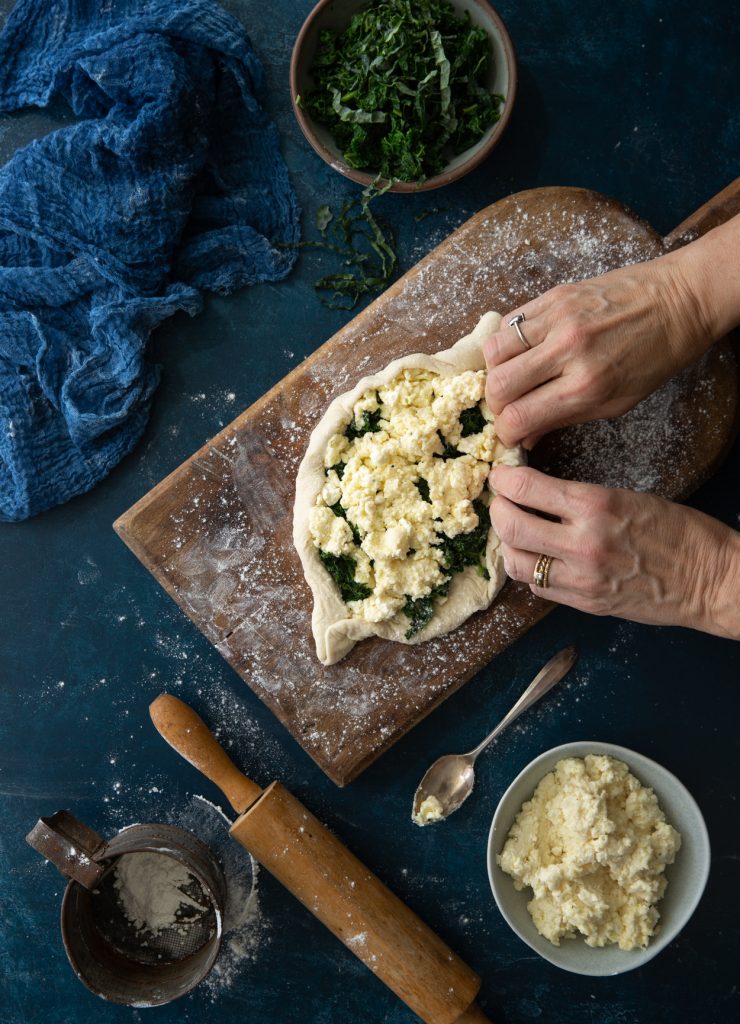
To get the classic canoe shape, the dough is rolled into an oval. Add the filling, leaving about a one inch border. Then roll up the edges, toward the centre and pinch and twist the top and bottom of the canoe to seal.
When the khachapuri are almost done, pull them from the oven to add the egg for the final few minutes of cooking. I tried it with whole eggs and just the yolk, and preferred the yolk.
In addition to finishing the dish with an egg, the traditional recipe also adds a few pats of butter once it comes out of the oven. Shockingly, this butter lover decided to omit that step of the recipe. Just too much.
The best way to eat khachapuri is with your hands. Rip off a piece of the crust and dip it in the runny egg and cheese, preferably while sitting in front of the TV watching Netflix. We’re watching Fauda right now and it makes for messy but very delicious eating.
I suspect that toilet paper is not the only thing people are hoarding during the pandemic. Anyone else notice the glut of banana bread recipes floating around the web these days? It seems we have an excess of rotting bananas on our counters.
But, I’m here to change all that. Move over banana bread. There’s a new loaf in town. It’s rhubarb season and I couldn’t be more excited. We live in an age of instant gratification, where we can get practically anything we want, at any time. But not rhubarb! We must patiently wait for rhubarb season. But it’s so worth it. I adore that tart, sour flavour.
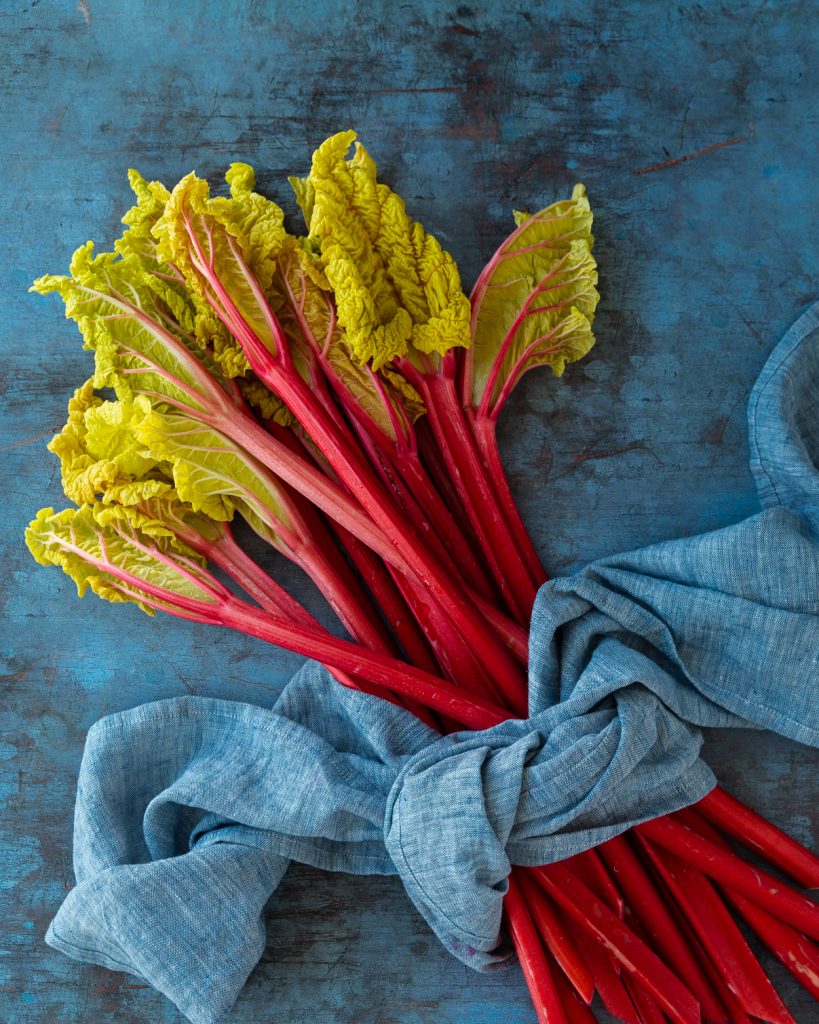
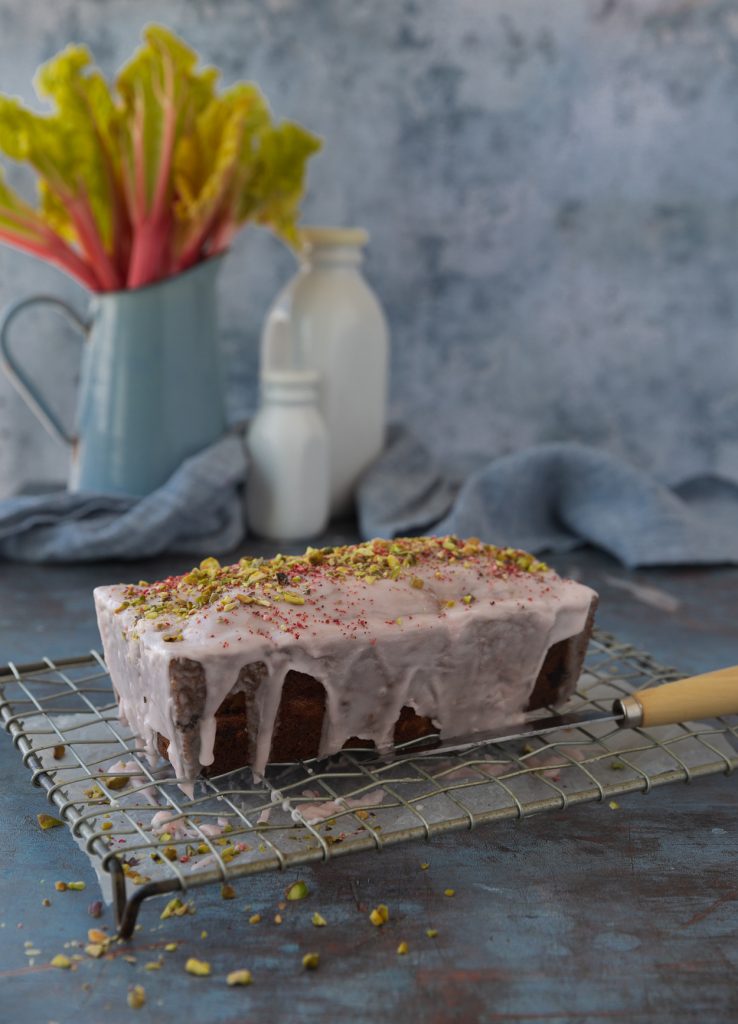
It’s rare to find rhubarb at the market with the leaves still attached. Most stores cut the leaves off before selling them because they’re poisonous. So when I find some with the leaves, I really geek out. Local rhubarb is just starting to arrive in Ottawa. This bunch is forced, which results in rosier coloured stalks.
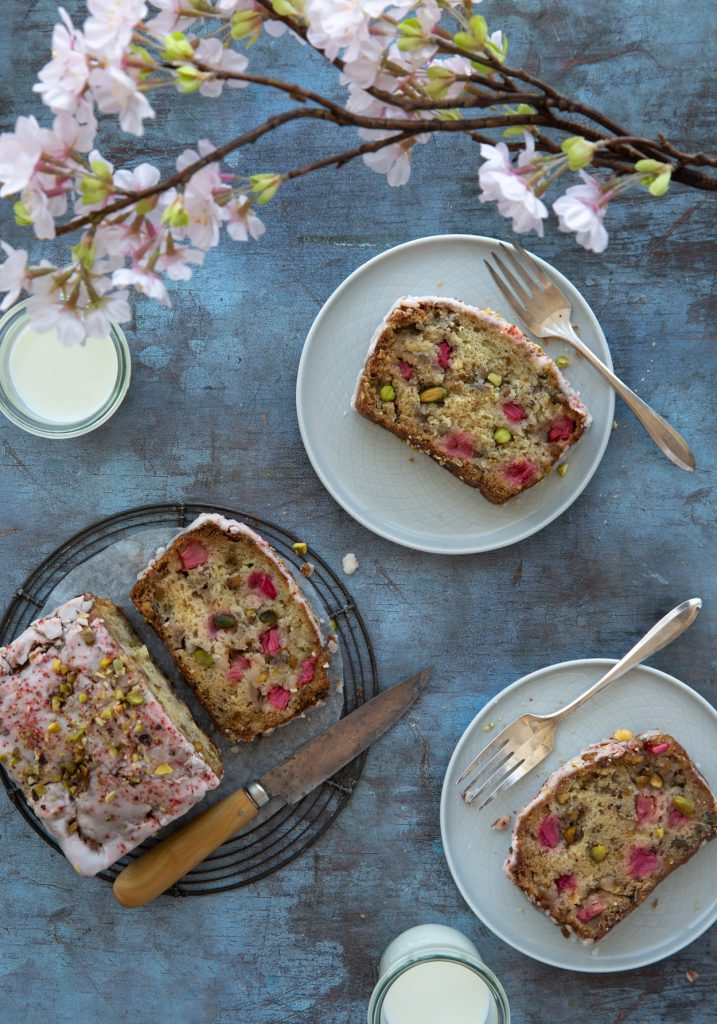
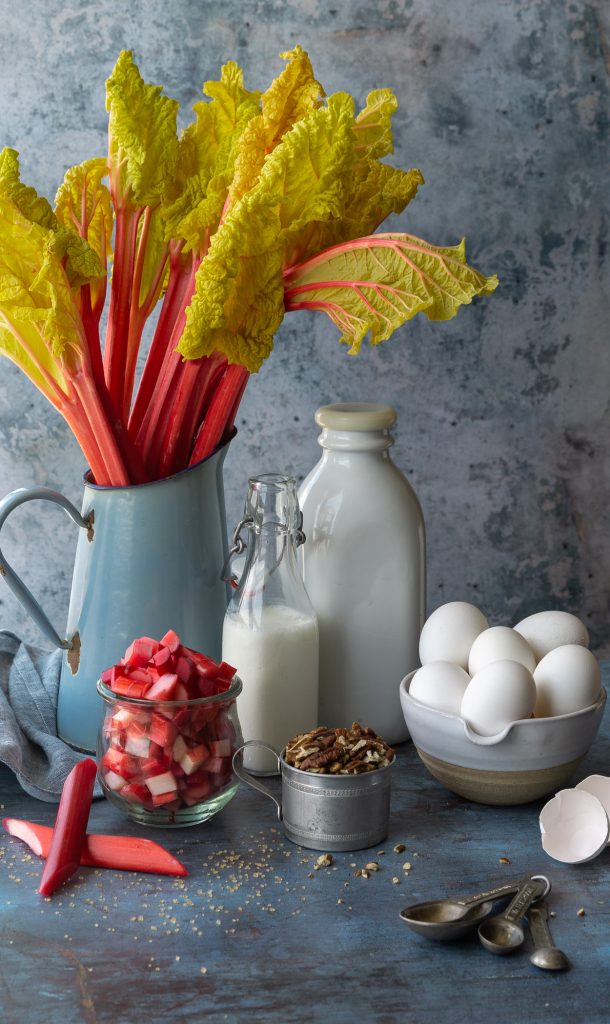
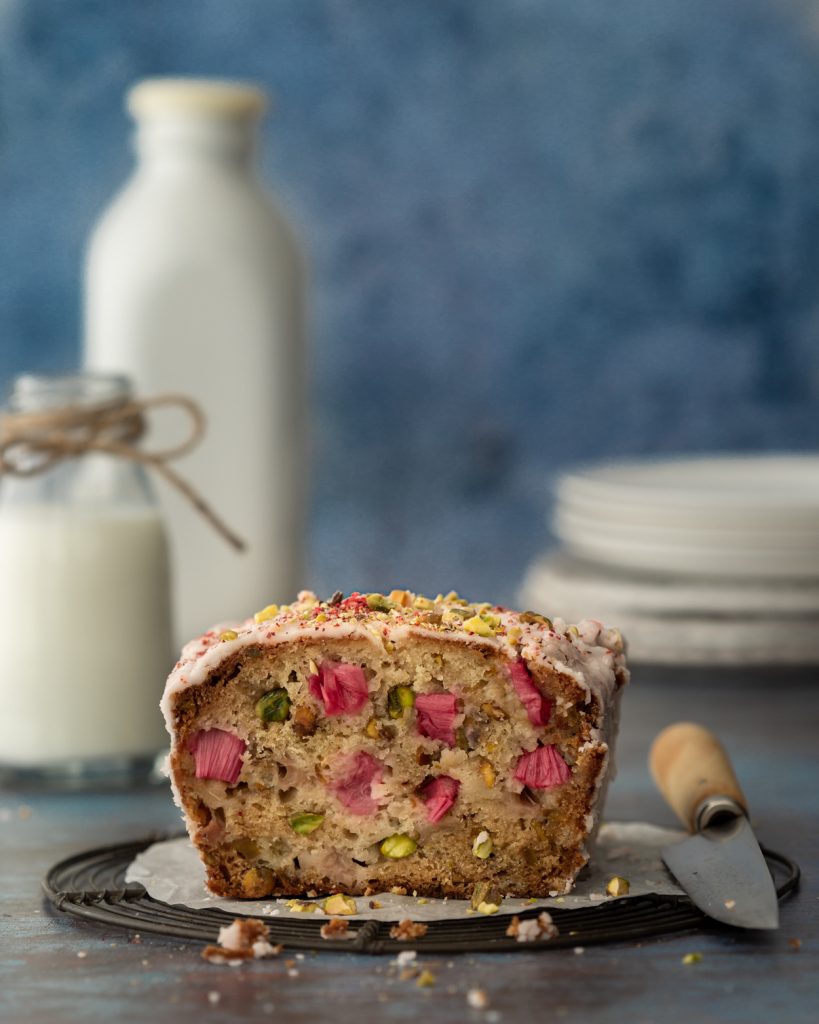
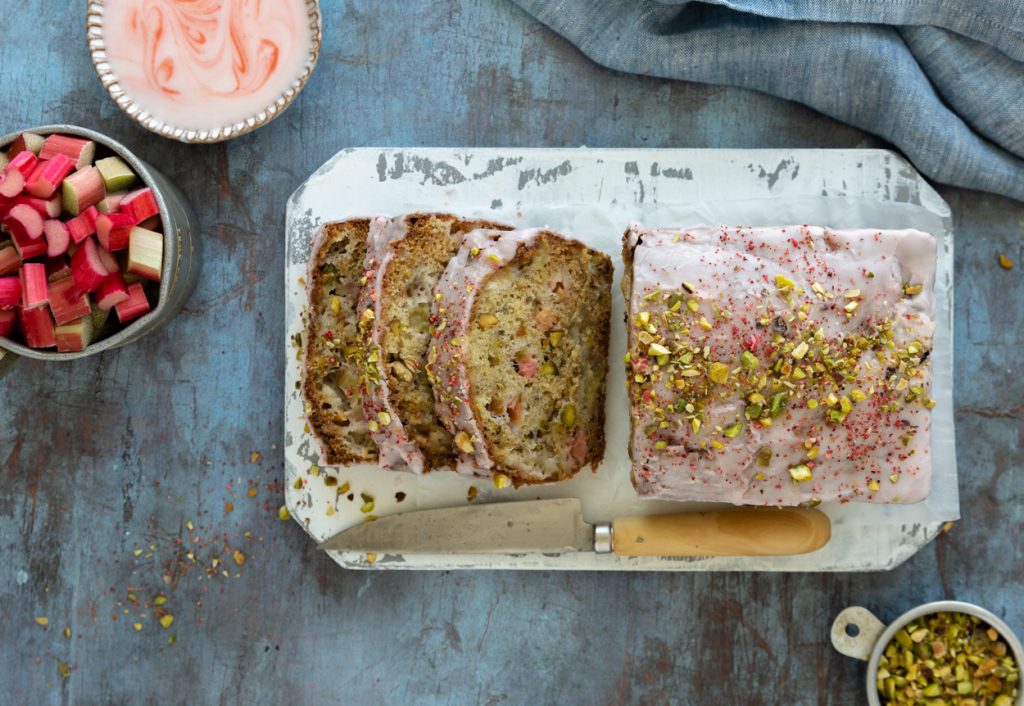
I have made many loaves over the past few weeks, turning my husband, a former rhubarb hater, into a lover. My first version featured pecans. I switched to pistachios when I ran out of pecans, and I was thrilled with the results, both in taste and in looks.
This loaf comes together very quickly. Only one bowl and no mixer required. Check out the video.
The glaze is made with icing sugar, lemon juice and about a half an ounce of freeze-dried strawberries, which I ground into a powder. One ounce of freeze dried strawberries contains almost a pound of fresh strawberries, so this glaze really packs a punch of flavour. Freeze dried fruit is not the same as dried fruit. Dried fruit is dehydrated and only about 75% of the water is removed. With freeze-drying, the fruit is placed into a vacuum chamber where the temperature is well-below freezing and 99% of the moisture can be removed from the fruit.
After glazing, I decorated the top of the top of the loaf with more pistachios and some freeze dried strawberry dust.
This is sure to become a new favourite in your house. This is a super moist loaf. I love it because it’s not too sweet. The tangy rhubarb flavour really shines through.
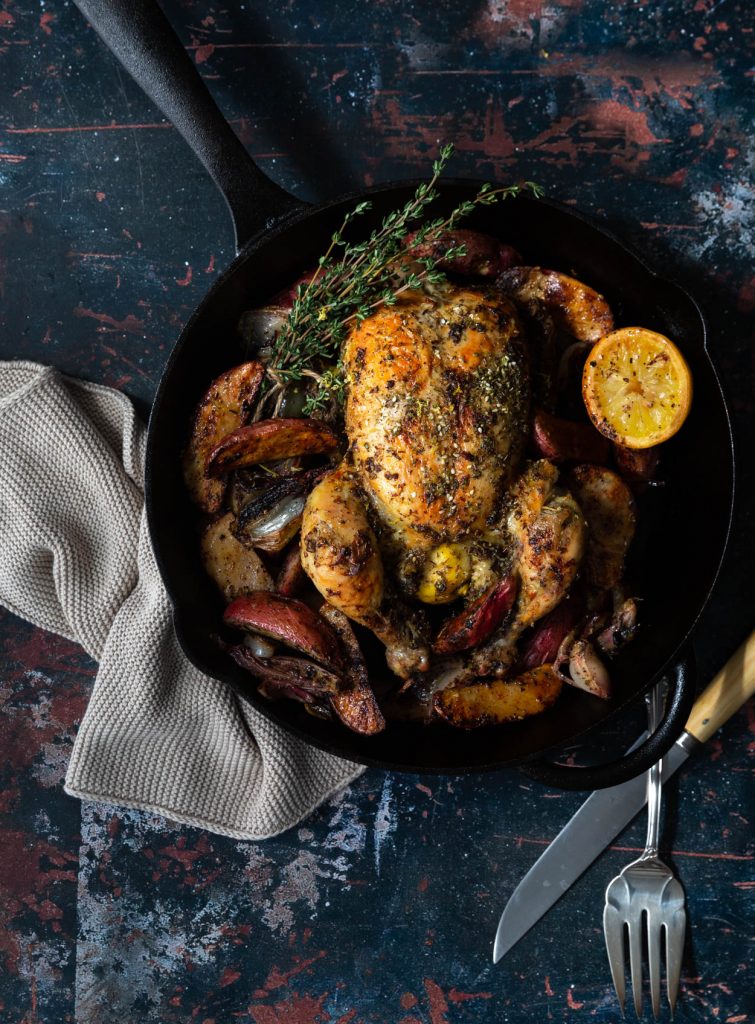
There is something about a chicken roasting in the oven that makes me feel like everything’s going to be ok. Such a simple, humble dish has an amazing power to reassure and comfort. And we could all use a little comfort right now.
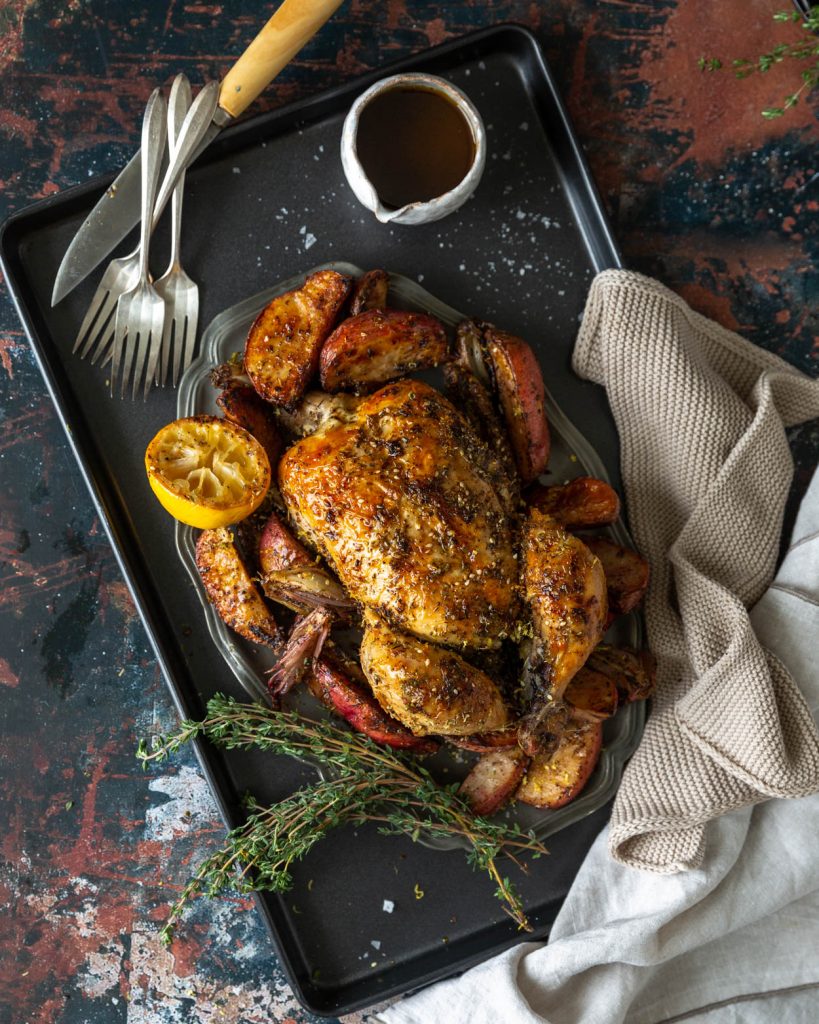
This roast chicken is comfort food with a zesty attitude. The recipe comes from Adeena Sussman‘s new cookbook, Sababa. Adeena is a Tel Aviv based food writer and recipe developer. Sababa celebrates the fresh and sunny flavours and vibrant spices of Israel. It’s my new favourite way to make roast chicken. If you have never roasted an entire chicken, nothing could be simpler. Even though we are just 2 at home now, I roast a whole chicken at least once a week. Leftovers the next day are a gift!
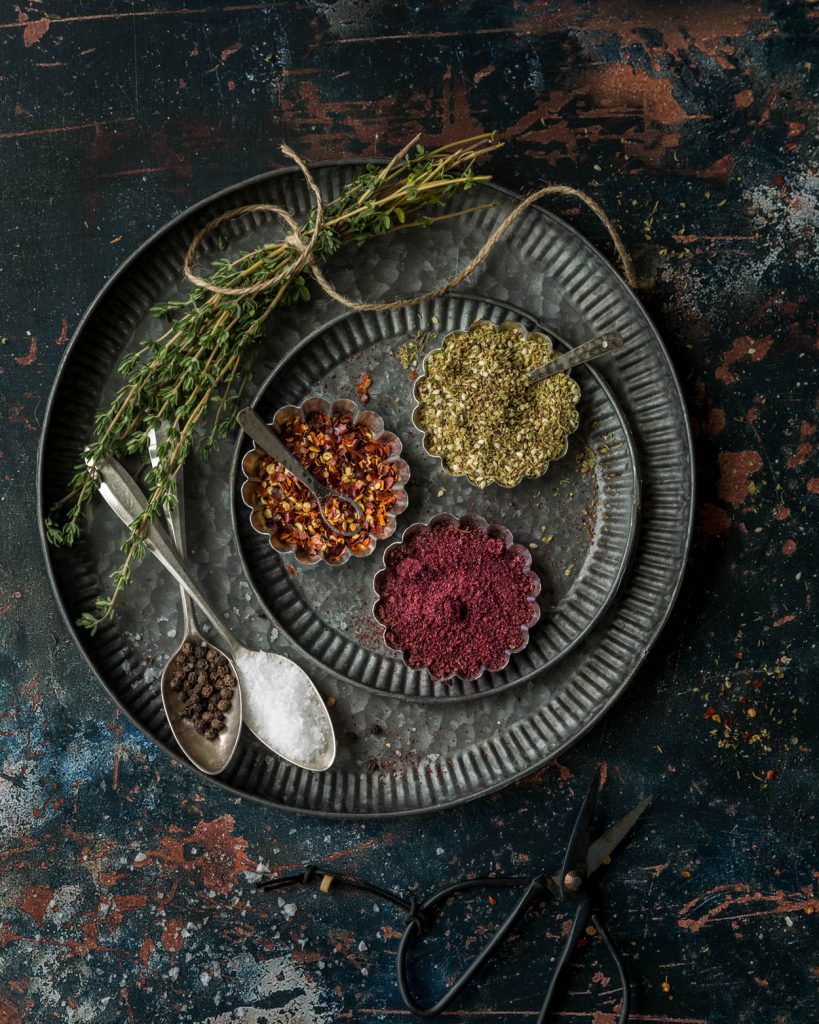
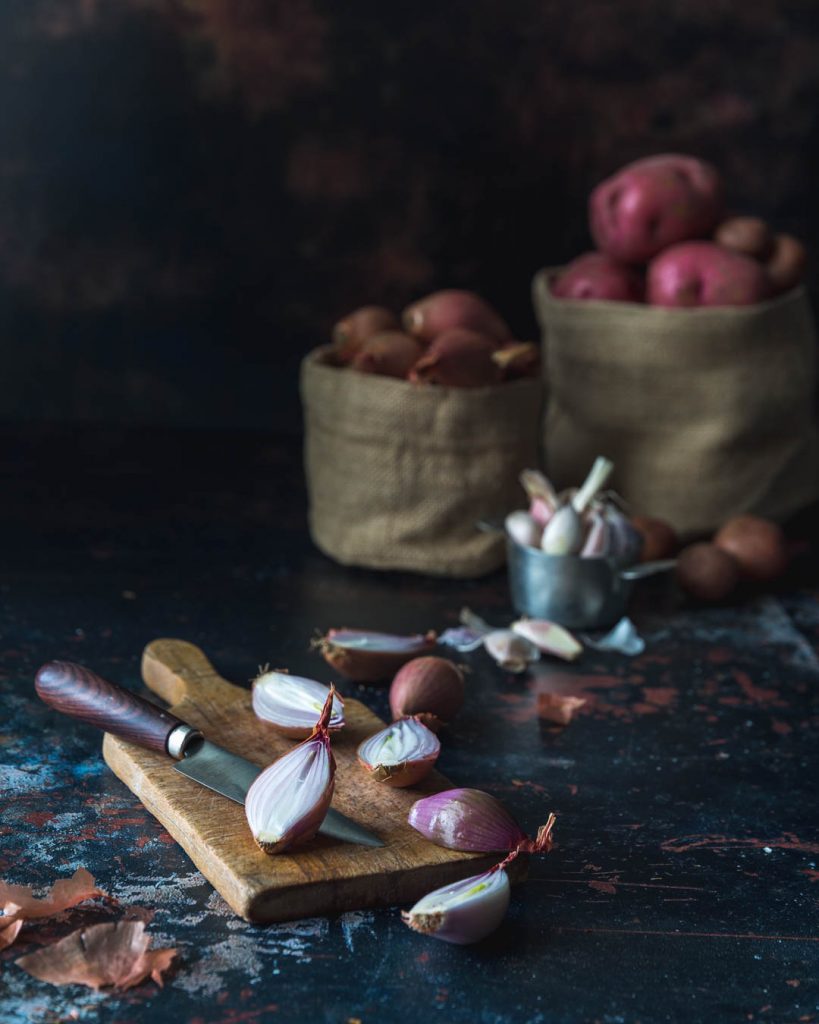
Spices figure prominently in this dish. Shallots and red potato wedges get a coating of olive oil and sumac. If you have never used ground sumac, you are missing out. Sumac is a bush that grows in the Middle East. The bright red berries are harvested, dried and ground into a coarse powder with a tangy lemony flavour. It’s much less astringent than lemon juice and adds a light pop of tartness. It’s widely available in Middle Eastern stores and if you’re in Canada, Bulk Barn carries it.
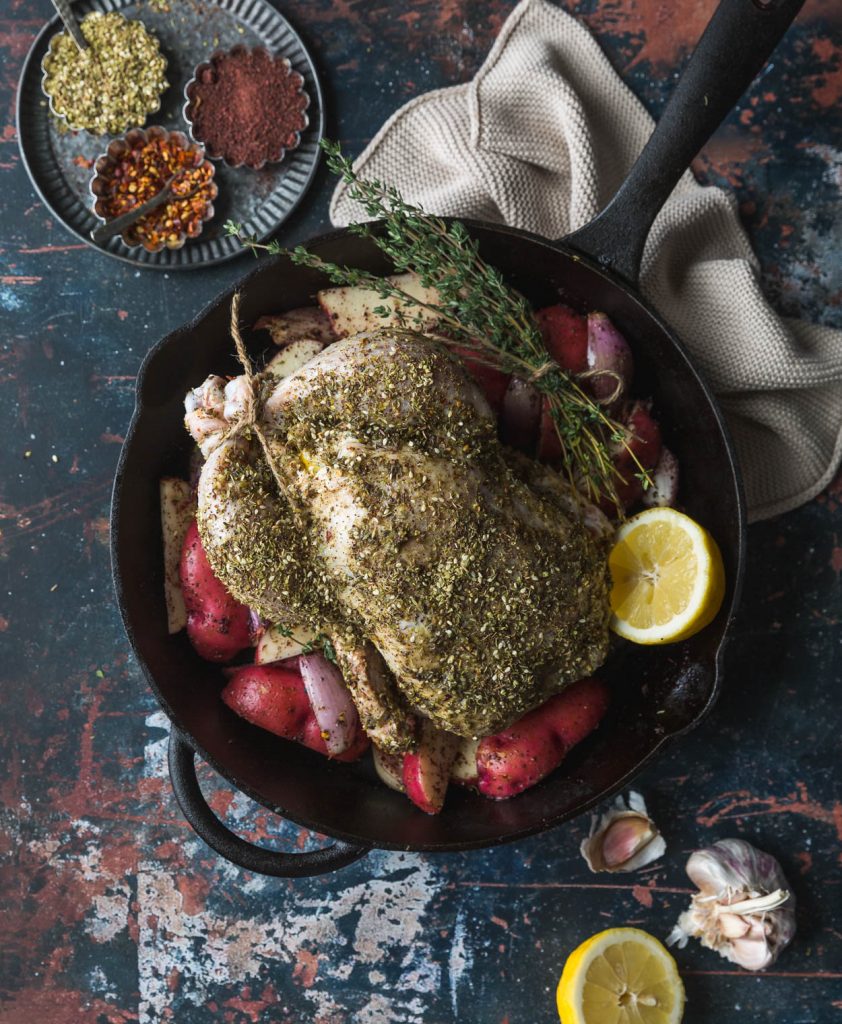
The second spice that makes an appearance is za’atar, which is actually a spice mixture. Za’atar gets mixed with lemon zest and olive oil and massaged into the chicken skin. I love this dish because you roast the chicken and the veggies all in one pan. The fat from the chicken coats the potatoes and the ones at the edge get super crispy.
Be patient and let the chicken rest for at least 10 minutes once it’s done before you try to carve it. Served with a green salad, you have a complete meal.
Because of the Covid-19 lockdown, I’ve all been spending a considerable amount of time in my kitchen. I took advantage of this opportunity and trained my humus bowl to spin. She mastered clockwise fairly quickly. Counter clockwise did not come as easily to her.
For the first few weeks of self-isolation I was embracing the experience, trying new recipes and being as imaginative and innovative as I possibly could be, given the unavailability of so many ingredients and infrequent grocery store trips. My husband and I sat down together for lunch and dinner. We used placemats and cloth napkins. It was nice.
As we enter week 7 of social distancing, I will admit that some of these niceties have slipped by the wayside. We had to have a chat about speaking more civilly to one another. Well, to be more accurate, the chat was about me being more civil. I think I snapped at him when he asked what was on the menu for lunch, and what time would it be ready at. It’s a new normal and we both have to learn the new dance steps.
Dinner is now eaten on our laps in front of the TV, watching Ozark. But we’re still using cloth napkins, we’re not animals. Saturday’s dinner was a sheet pan full of nachos for each of us. I topped them with diced tomatoes, kalamata olives, pickled jalapeños and cheddar cheese before popping them in the oven. I served them with sour cream and guacamole on the side.
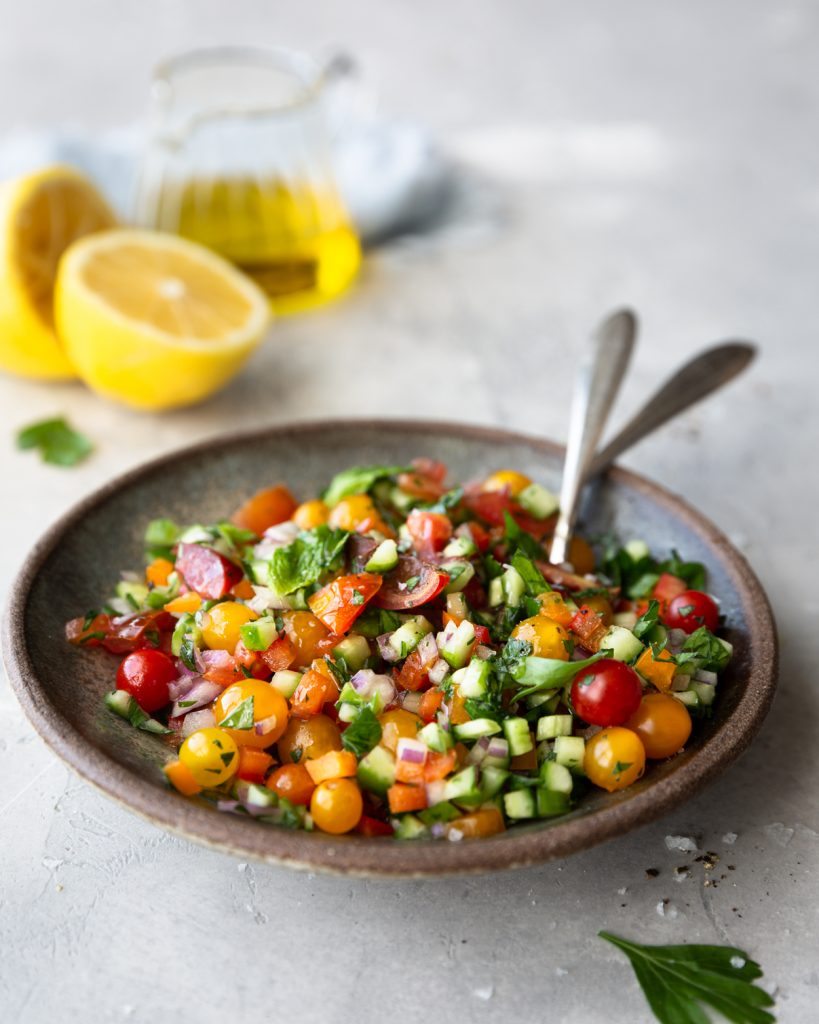
Along the same vein as nachos, but infinately healthier is this hummus and Israeli salad platter, served with pita chips for scooping up all the goodness. I was inspired by a similar dish Ina made on Back to Basics. She made her own humus, but, “store-bought is fine.” I roasted up a can of chickpeas with olive oil, cumin and smoked paprika for some extra protein and crunch.
Spread the hummus on a large plate, top with the Israeli salad and call it dinner. Cloth napkins not optional!
It’s been a while since I last posted, and, lest you think I haven’t been busy cooking and baking, don’t worry. I’ve been hard at work in my kitchen feeding and watering my husband. To be honest, it just didn’t feel right to be posting pretty pictures of food right now. It’s such a strange time. As an introvert, it’s not the social isolation that’s getting to me. I love that I’m being given permission to stay home and not feel bad about it. I’m feeling so sad about all the suffering around the world and worried about everyone I love. This uncertainty is causing a heavy blanket of anxiety. Plus, my grey roots are not helping things at all.
I was also starting to feel a lot of pressure and guilt to “use this time productively.” It seemed that everyone was immersing themselves in mastering new skills, (I’m looking at you sourdough bread) honing their craft, or coming up with innovative ways to learn and grow. I just wasn’t feeling creative. I felt unable to focus.
When I shared these feeling on an Instagram post, several people reached out to me and told me that they were feeling the same way. There is no one right way to do this. I decided to give myself permission to do less and just feel those emotions. Life lesson #1: Don’t compare yourself to others. Eventually those rotting bananas on my counter whispered that they weren’t going to turn into banana bread by themselves, and I got back into the kitchen.
Over the past two weeks I have made about 7 banana breads. I didn’t think I could just post my classic banana bread recipe. With all the creative ions in the air, I felt compelled to innovate and give you something different. I found a jar of cookie butter in the pantry and tried a few variations of Cookie Butter Swirl Banana Bread. No one complained but it was just too sweet and the spices in the cookie butter overwhelmed the bananas.
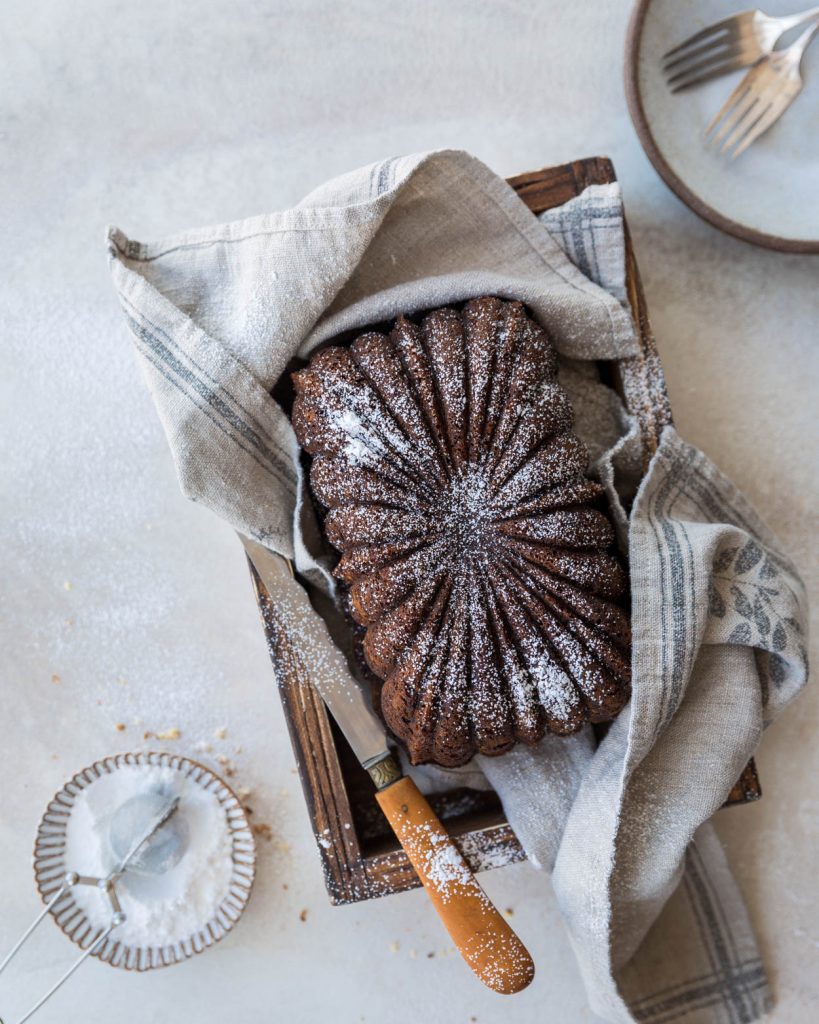
I baked a sour cream version in a fancy pan and dusted it with icing sugar. A real looker, but not so tasty.
Then I tried adding a of chopped pecans and dark chocolate. Too much! But it sure looked pretty.
Life lesson #2. Sometimes less is more. Don’t screw with the classics. So, I went back to my favourite banana bread recipe from Noreen Gilletz. Sadly, Noreen passed away in February, after a long illness. My mom’s generation learned to cook from her legendary 1968 cookbook, Second Helpings Please! I became a Noreen fan in 1985 with the release of her book, The Pleasures of Your Food Processor (reprinted as The Food Processor Bible). She will be missed by many!
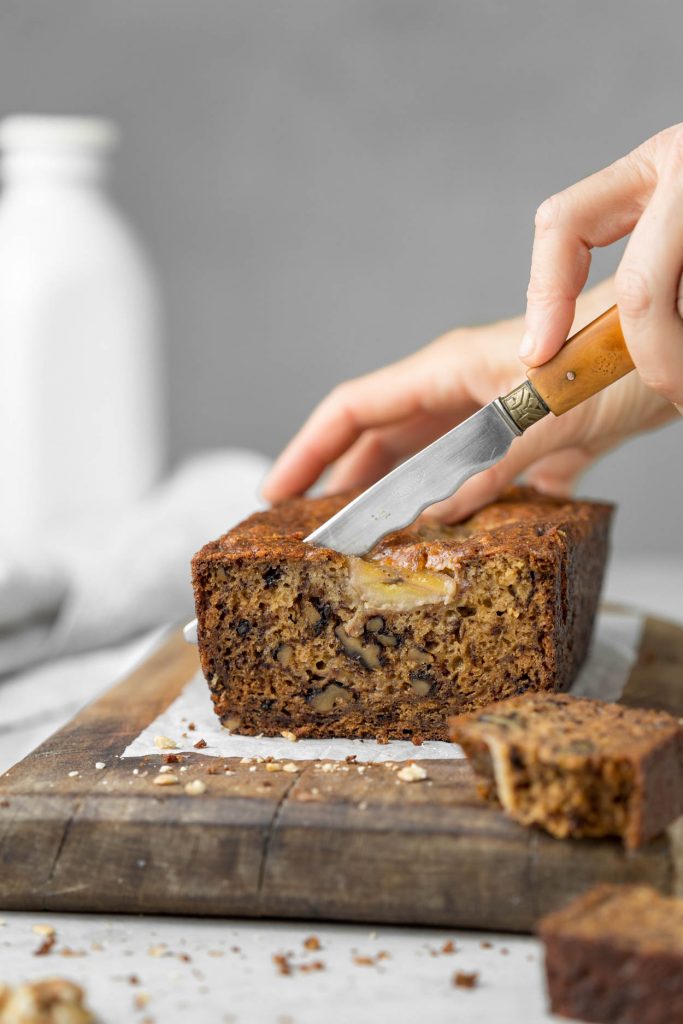
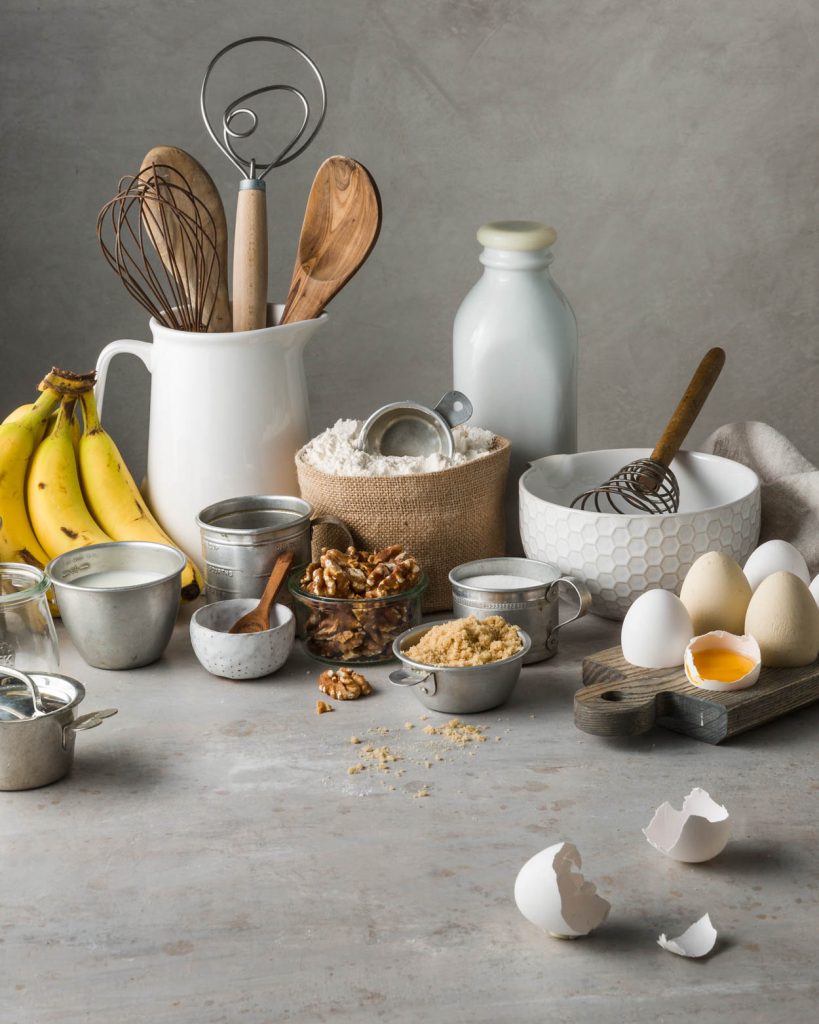
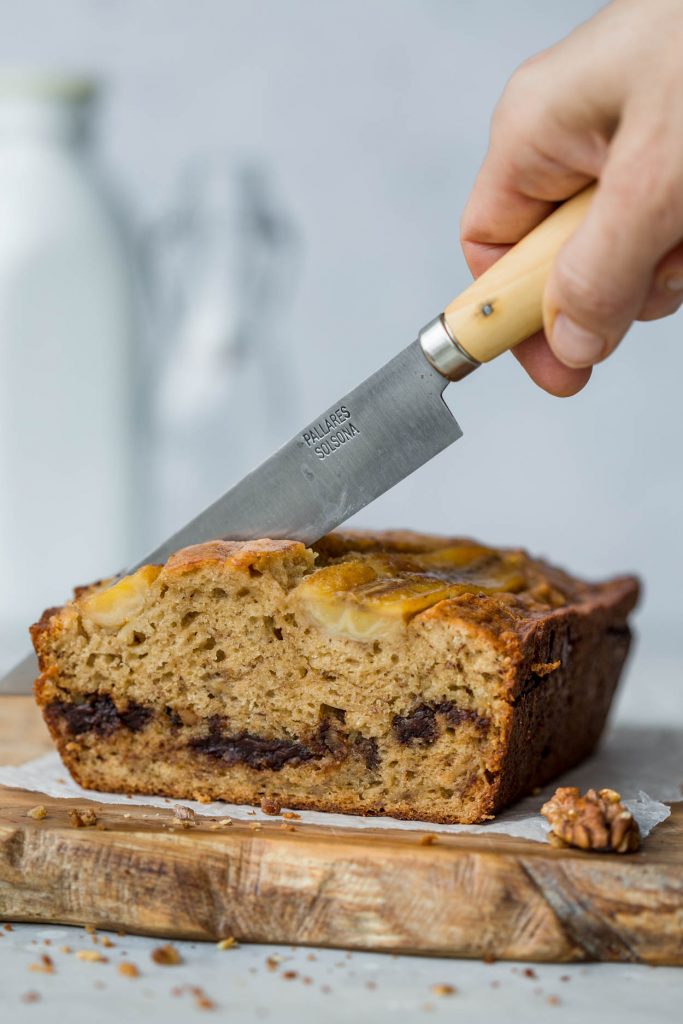
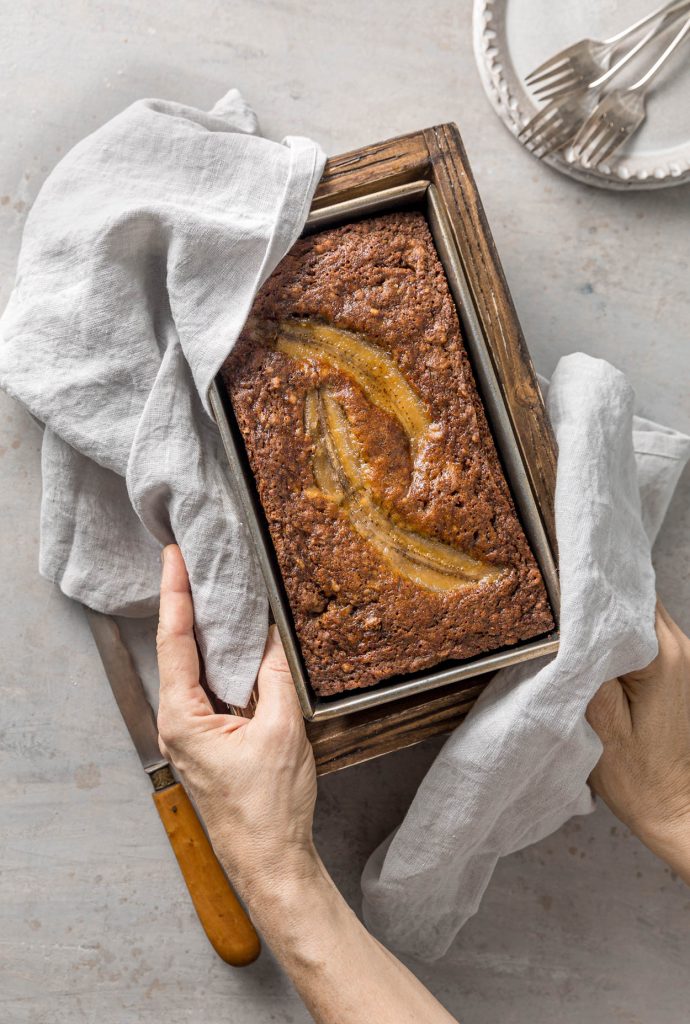
This is a dense, dark and heavy banana bread. Extremely moist and very intensely banana flavoured. In short, everything a banana bread is supposed to be.
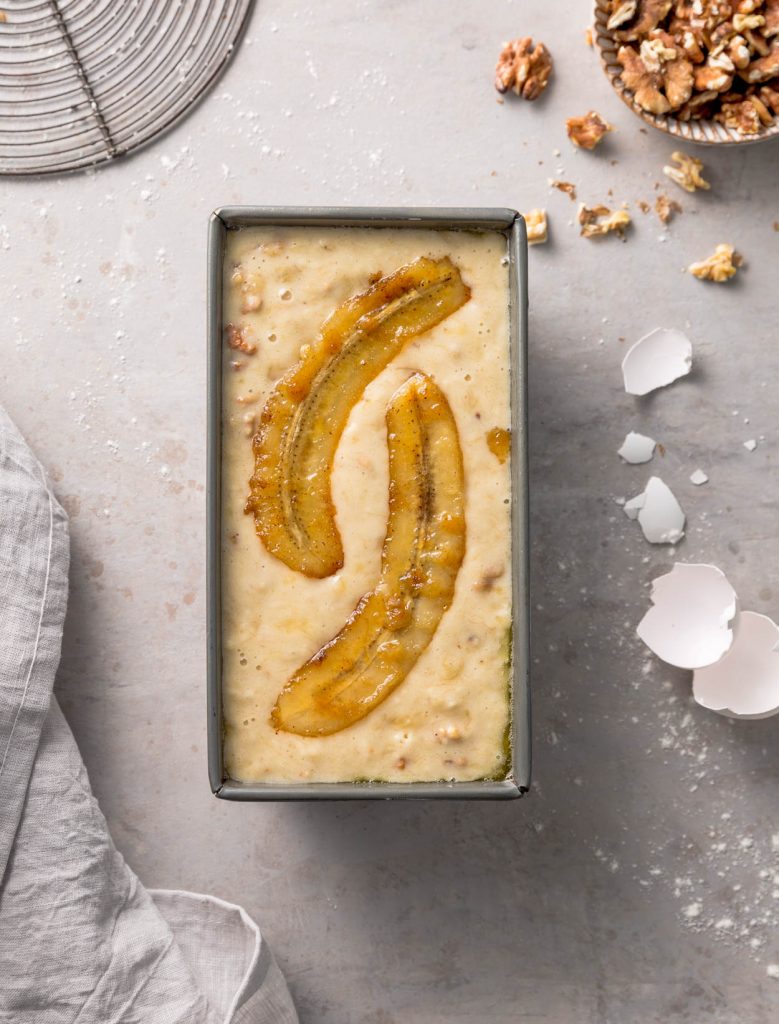
I made a few a few adaptations to Noreen’s recipe. I added a caramelized banana to the top and stirred in a big handful of toasted, chopped walnuts, but feel free to leave them out. You do you!