Mocha Rugelach

If you’re a fan of mocha (coffee +chocolate) then these rugelach are sure to satisfy. These little cookies are for an adult palate. Not too sweet, almost pleasantly bitter from the intense coffee flavour.

I adore all coffee flavoured foods, especially coffee ice cream and coffee crisp chocolate bars! But I didn’t start drinking coffee until I was in my late 30’s. I always found the taste of plain coffee (even with milk and sugar) too intense. And then my friend Brigitte made me a big bowl filled with hot foamy steamed milk and just a bit of coffee. I was hooked. Over the years, the amount of coffee has increased and the milk has decreased, but I still think of her every morning when I’m frothing my milk.

These rugelach start with a flaky cream cheese dough, studded with instant coffee crystals, to really amp up the coffee flavour. Those brown streaks in the dough, in the photo above are Folgers Instant Coffee Crystals. It gets mixed into the dough, at the very end of the process, so that the dough stays prettily speckled.

Roll the dough into a circle and then cut it into wedges. Coat each triangle with a thin layer of mocha ganache and then sprinkle with hazelnut-chocolate streusel. Roll up into little crescents.

Brush with egg and bake. Enjoy with a latte. Any leftovers freeze perfectly.

Winter Squash and Kale Rye Galette

January blog posts tend to be full of lofty resolutions and unrealistic goals about how to live a better life. I promise you, this is not one of those posts. I admit that I have have been guilty of exactly this, every January for the past 8 years. Check out my January healthy eating blog posts, if you like (2021, 2020, 2019, 2018, 2017, 2016, 2015, and 2014 ).

This year, I just can’t seem to get my ass in gear. I’m feeling particularly unmotivated and blah. I feel like this guy. Can’t get off the couch to stop bingeing on Bonus Family and Working Moms on Netflix. Very addictive. I know I’m not alone. Almost every single person I have spoken to in the past 2 weeks is feeling this way. I’m here to give you permission to forgo goal setting this year. Treat yourself kindly and ease back in at a pace that makes you feel comfortable.

I eased back in gently by choosing a galette for my first January post. Made with butter and cheese! I am a big believer in small steps. Martin Luther King Jr. said, “If you can’t fly then run, if you can’t run then walk, if you can’t walk then crawl, but whatever you do you have to keep moving forward.”

We’re taking baby steps here with this galette. I incorporated some whole grains into the crust with the addition of rye flour. I snuck in a layer of Gruyere and ricotta cheese between the kale and the butternut squash. It’s all about moderation.

This rye crust could go sweet or savoury. It is flaky AF. I learned how to make it from Kim Boyce in her book, “Good to the Grain”. If you’re interested in incorporating more whole grains into your baking, this is a fantastic resource. I love the lyrical way she describes this dough.

“The method for making this dough is similar to that for a rough puff pastry, a method I learned while working with Sherry Yard at Spago. It calls for letting a rough dough, made from chunks of butter and moist clumps of flour, rest in the refrigerator to give the gluten time to relax and the flour time to absorb the water. After an hour, the dough is rolled and folded a few times to create long “laminated” layers of butter throughout the dough, which give it its flakiness.”

Feel free to enjoy with a small glass of wine, if you are so inclined. Tell them saltandserenity told you to be kind to yourself!

Caramel Stuffed Ginger Crinkle Cookies

At first glance, ginger and caramel may seem like an odd pairing. But one bite of this cookie will convince you that it’s a marriage made in heaven. The sharp bite of ginger is tamed by the sweet creamy caramel.

While we traditionally associate ginger molasses cookies with the winter holiday season, I discovered that they are equally delicious in summer, with a big scoop of salted caramel ice cream sandwiched between two chewy ginger molasses cookies. My favourite ginger molasses cookie recipe comes from my friend Lanie. She calls them Ginger Crinkle Cookies, because they develop beautiful cracks all over the surface as they bake. Ever notice how we covet cracks and crevices in our cookies, but not in our aging skin? Just saying!

I wish I could take credit for the genius idea of stuffing a sea salt caramel into the centre of a ginger cookie. But I must give credit for the inspiration to blogger and cookbook author Ruth Tam. When she posted these cookies on her Instagram page a few weeks ago, I knew I must add them to my holiday cookie list.

Watch the video below to see how these cookies come together.

When choosing the caramel to stuff into the centre of these cookies, be sure to use a good quality sea salt caramel. The inexpensive square caramel candies they sell in the supermarket do not stay creamy for very long after baking. I have baked these a few times now. The first time I used Sea Salt Caramels from Target. They were pretty good. The second time I made them, I made my own caramels. I used this recipe from Sally. Excellent caramels and if you have a candy thermometer, they are foolproof!

Next time I make them I want to try pickle and myrrh’s sea salt caramels. They ship worldwide and I have heard amazing things about them.

More is not always better, especially in the case of caramel. A small piece in the centre of each cookie will suffice. I speak from experience. With my second batch, I tried to cram in more caramel and I got a gooey mess. The creamy caramel escaped from the confines of the dough and the cookie never really set up properly. The perfect ratio is 48-50 grams of dough (about 2.5 tablespoons or this cookie scoop) to 8 grams of caramel. And yes I measured with a scale. That’s why all my cookies baked evenly.

Once the cookies are scooped, I released them right into the coarse sanding sugar. The cookie scoop makes lovely little ridges on the top of the dough ball, perfect for filling in with the sugar. Don’t be tempted to roll the dough into a smooth tidy ball with your hands. Remember, we want a cracked surface.

When you remove them from the oven, they will be golden brown, but still quite soft. Leave them on the cookie sheet for a good 10-15 minutes to set up before you try to move them.

If you plan to make your own caramels, click here to print recipe for Sea Salt Vanilla Caramels from Sally’s Baking Addiction.

Cookie Box

Today is International Cookie Day. I can think of no better way to celebrate than with a cookie box. It’s hard to choose my favourite cookie. It’s like asking a parent to choose a favourite child. It all depends on the day and mood.

Some of the cookies in this box are over the top decadent indulgences. The Raspberry Sandwich Cookies ,the Coffee Chocolate Hazelnut Sandwich Cookies and the Toblerone Shortbread fall into this category.

Some of the cookies have a quieter more humble flavour, like the Lemon Coconut Cookies and the Chewy Brown Sugar Cookies.

As in nature, no two of my snowflake cookies are exactly the same. I went with a pink and gold colour theme this year. Very glam. Even though we’re still mostly staying home, my cookies are dressed up and ready to party.

I make Chewy Gingerbread and Brown Sugar Snowflakes every year. This year I also added some reindeer to my collection. They are undeniably adorable and so much fun to decorate.

However you’re celebrating International Cookie day at your house, I hope it’s filled with lots of sweetness, butter and sugar.

Coffee Chocolate Hazelnut Sandwich Cookies

There are over 100 cookie recipes on my blog. To say that I am passionate about cookies would be an understatement. I think that cookies are the perfect way to end a meal. Just a small bite of something sweet. I’m always puzzled why more restaurants don’t put cookie plates on their dessert menus.

Of the more than one dozen cookie cookbooks on my shelf, the one I reach for more than any other is Cookie Love by Mindy Segal. If you’re looking for quick one-bowl, stir and scoop cookies, this is not the book for you. This book is filled with cookie projects. Multi-layered and textured cookies that are a labour of love and a work of art.

These are an intensely coffee flavoured cookie. The recipe calls for instant coffee crystals, like Folgers. It’s important to use instant coffee crystals and not powdered instant coffee You want those specs of coffee to be visible in the dough. Powdered coffee would just dissolve. The cookies are sprinkled with a touch of turbinado sugar before baking. They add a lovely crunch to the cookie.

The buttercream filling is made with a mix of dark and milk chocolate, butter and sour cream for a hint of tang to balance out all the chocolate richness. The buttercream gets piped around the border and the centre is filled with a dollop of Nutella.

Because we’re fancy around here, I dipped the end in melted chocolate and then studded them with chopped toffee bits and chopped toasted hazelnuts, for crunch. We are team texture here at saltandserenity.

Apple-Potato Latkes

I have been blogging since May 19 2009. This year will be the 13th Chanukah post I will be writing. If your family is anything like mine, they want the same classic potato latkes every year. Your idea of the ultimate latke very much depends on what you grew up with.

It’s beginning to smell and sound a lot like Chanukah around here as I test latke recipes. Check out the video.

My childhood memory of latkes is bittersweet. My mom made the most delicious latkes. Thin, lacy and very crispy at the edges, they were held together with the bare minimum of egg and matzoh meal. She served them with apple sauce and sour cream. That’s the sweet part of my childhood memory. The bitter part is related to my mom’s very keen sense of smell. She was offended by the lingering scent of frying oil. Almost immediately after making latkes, she would perform an exorcism to cleanse the house of the offending odour. She used her secret blend of cleaning agents, a potent, lethal combination of Joy and Ajax.  Do not try this at home unless you are wearing a gas mask.

My husband, on the other hand, grew up with thick and creamy latkes. The potatoes were chopped quite fine and then fried, almost like a potato cake. They were served with ketchup. 😱 For a few years I made compromise latkes. Eventually, I won him over to the thin and lacy style. but he still eats them with ketchup.

As a blogger, I feel pressured to present something new and innovative every year. But the truth is, while my family smiled and nodded politely when I presented them with Sweet Potato and Brussels Sprouts Latkes one year, they just want traditional latkes.

A while ago, I came across a recipe for Apple-Potato Latkes with Cinnamon Sour Cream, from Melissa Clarke. I was intrigued with the addition of apples. We always eat latkes with applesauce, so adding apples to the batter wasn’t such a radical idea. While they were delicious, they strayed too far from my ideal latke. She added 3 eggs and 2/3 cup of flour to the batter. They held together beautifully, but they were too eggy and cake-like for me.

I played around with the ratios and came up with a more traditional latke. The apple remained as a subtle hum in the background, but the predominant flavour is potato. The key to making latkes is muscle power. You need to rid the potatoes, and apples in this case, of all their excess moisture. About 80% of a potato is water. Apples contain 85% water. After shredding, gather up the mixture into a tea towel and squeeze out as much liquid as you can. Save the liquid that the apples and potatoes give up. After sitting for a few minutes, all the starch from the potato liquid will settle to the bottom of the bowl. Drain off the liquid, and scrape that potato starch into the shredded mixture. It really helps keep the latkes together.

These latkes offer a slight variation on the classic latke, that even the die-hard traditionalists in your house will approve.

Pro tip: for pretty pink applesauce, don’t peel your apples. Just quarter them and put them in a pot with a little water. Cover and cook over low heat until tender. Use a food mill to get rid of the skins and core. Flavour with a pinch of cinnamon if desired.

Grown-Up Grilled Cheese Sandwiches

When I was growing up, we made grilled cheese sandwiches on challah, with Kraft Single slices. Not that there’s anything wrong with that, but I think we can do better now that we’re adults. An aged cheddar or gruyere has amazing flavour, but the problem is, they don’t melt well. They separate and become a bit greasy when melted.

The genius folks at America’s Test Kitchen figured out how to solve that problem by combining the gruyere with a nice melting cheese, like brie. The cheeses along with a touch of white wine are combined in the food processor to make a smooth paste.

The America’s test kitchen version of this recipe took a savoury turn and added some mustard and chives. I approached it from the opposite end and added a sweet twist. I think that one of the most beautiful flavour pairings is Brie and figs. I doubled up on the fig flavour by using fig jam as well as fresh sliced figs. Fresh basil leaves added a welcome herbal note. For the bread, I used sourdough, but any nice hearty bread would work well here. Make sure you butter the outside of the bread, so that the sandwich browns evenly all over.

A non-stick skillet is ideal for this. Don’t rush things. Keep the heat nice and low, to allow time for the cheese inside to melt and for the outside to get golden brown and crispy, and not burned. Your patience will be rewarded with a beautiful cheese pull.

Croffles (Croissant-Waffles)

We all view the world through our own unique lens. My husband, for example, walks through life looking for ways to make the world a better place. From a macro perspective, by chairing a $400 million fundraising campaign to replace our city’s 100 year old hospital, right down to a micro perspective. The other day, I came into the kitchen found him on the floor, sorting and organizing the Tupperware lids so it would be easier to find a match for the containers.

I, on the other hand, walk through my day looking for ways to make life more beautiful. As my sister says, “We are cursed blessed with a strong sense of aesthetic.” We have text chats about the prettiest way to label storage baskets, and the optimal font choices for them. It matters to me that my spice drawer has identical bottles for all the spices, and that my pantry is organized with uniform glass jars, rather than the packages that the food is sold in. I think that’s why I love food photography so much. With each shoot, I get to create a beautiful scene. I feel so creatively fulfilled.

A unique way of viewing the world has led to some wonderful culinary creations. Remember the Cronut from 2013? Recently, some genius, came up with the Croffle, a croissant-waffle hybrid . Not sure who to credit with the idea, but it was clearly someone viewing the world through a lens of “Can you Waffle it?” The internet is filled with strange and wonderful things people have waffled.

I felt compelled to try my hand at the Croffle. There is an excellent French Bakery down the street from me, so I bought a bag of their frozen croissant dough. Instructions on the bag said to lay the frozen croissants on a baking sheet with a small bowl of water. Place the baking sheet in a cold oven and leave it there overnight to thaw and proof.

Check out how it all came together.

So, in answer to the cosmic question, “Can you waffle it?” , the answer is a resounding hell yes! Croissant dough in the waffle iron is awesome! I mean, what could be bad? Crispy AF on the outside and tender flaky layers within. A simple drizzle of maple syrup or dusting of icing sugar and all is right with the world, for a few minutes at least.

Millionaire’s Rice Krispie Bars

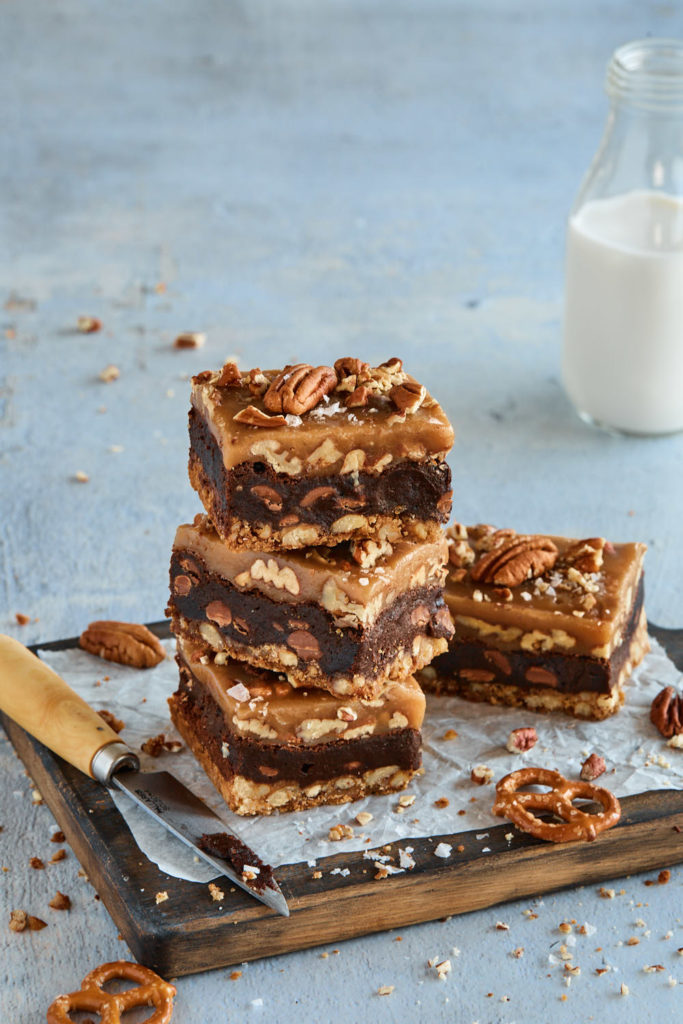
These bars are a riff on Millionaire’s Shortbread, which got their name, presumably because they are so rich and decadent. For my version of this triple layered treat, I replaced the bottom shortbread layer with Rice Krispie treats. Now, what I’m about to reveal may blow your mind. There are no marshmallows in the Rice Krispie base. Mars Bars (called Milky Way Bars in the USA) were used as the “glue” to hold together the Rice Krispies.

We have been making Rice Krispie Squares this way in our family for years. Not sure who to give credit to for this brilliant adaptation, as I can’t remember where the recipe came from.

Sandwiched between the bittersweet chocolate layer and the chewy bottom Mars Bars Rice Krispie layer is a ribbon of creamy caramel. Pure bliss.

Check out the video to see how it all comes together.

As usual, when testing this recipe, I had to make several batches to get it just right. My neighbours, chiropractor, HVAC serviceman, and UPS delivery guy were all very grateful that I shared. May I suggest you make a batch this weekend and spread the love.

Squash, Pear and Ginger Soup

Recipe development is a process of trial and error, as my husband will attest to. He is required to eat all the mistakes. This soup came about because I had an abundance of pears. When pears come into season, I can’t help but buy all the varieties, and arrange them in bowls and platters on my kitchen counter, like a still-life arrangement. I don’t actually like the taste or texture of pears, I just love to look at them, because of their beautiful shape. The way the light hits and hugs their curves is mesmerizing to me.

I had a friend in junior high school, whose mom would buy a bunch of bananas every week, and arrange them in a bowl in the centre of their kitchen table. No one in the family liked bananas, but she loved the way they looked, so at the end of the week she would just throw them out and buy a new bunch. Determined to not be wasteful with my pears, I created this soup.

I thought that delicate floral flavour of pears would work well with butternut squash. The first time I made it, I simply sautéed a mirepoix (carrots, onions and celery) and added peeled diced squash and pears. I tipped in a few cups of vegetable stock and simmered until soft and then pureed it. When I tasted, I was so disappointed. It was bland and reminded me of the jarred baby food I used to buy when my kids were tiny.

For the second round, I roasted the squash and pears first. The benefit of this, aside from a more concentrated flavour from the caramelization process, was that there was no need to peel the squash. I just cut it in half, scooped out the seeds and roasted it cut side down, until tender. This version was better but still a bit bland. I was looking for a punch of flavour, something to warm me from the inside.

For round three, I ditched the carrots and celery, so that the squash and pears would be the dominant flavours. I added some freshly grated ginger and Aleppo pepper to the sautéed shallots. The ginger added a hum of spice and the Aleppo pepper added a second subtle note of heat. If you have never tried Aleppo pepper, you must. My little sister introduced me to it many years ago and I have become a convert. I almost never use red pepper flakes anymore. Aleppo has a bright fruity quality that tempers the moderate heat. I love to sprinkle it on mashed avocado on toast and top it with a fried egg.

I topped the soup with a drizzle of thinned out yogurt and sprinkled on some pumpkin seeds for crunch. In the first image of this post, I got extra fancy and added a pear chip. They are simple to make, and I have included the instructions in the recipe if fancy is how you roll. Fresh pear slices also make a pretty garnish. The soup freezes beautifully, so tuck away any leftovers in the freezer for another day.