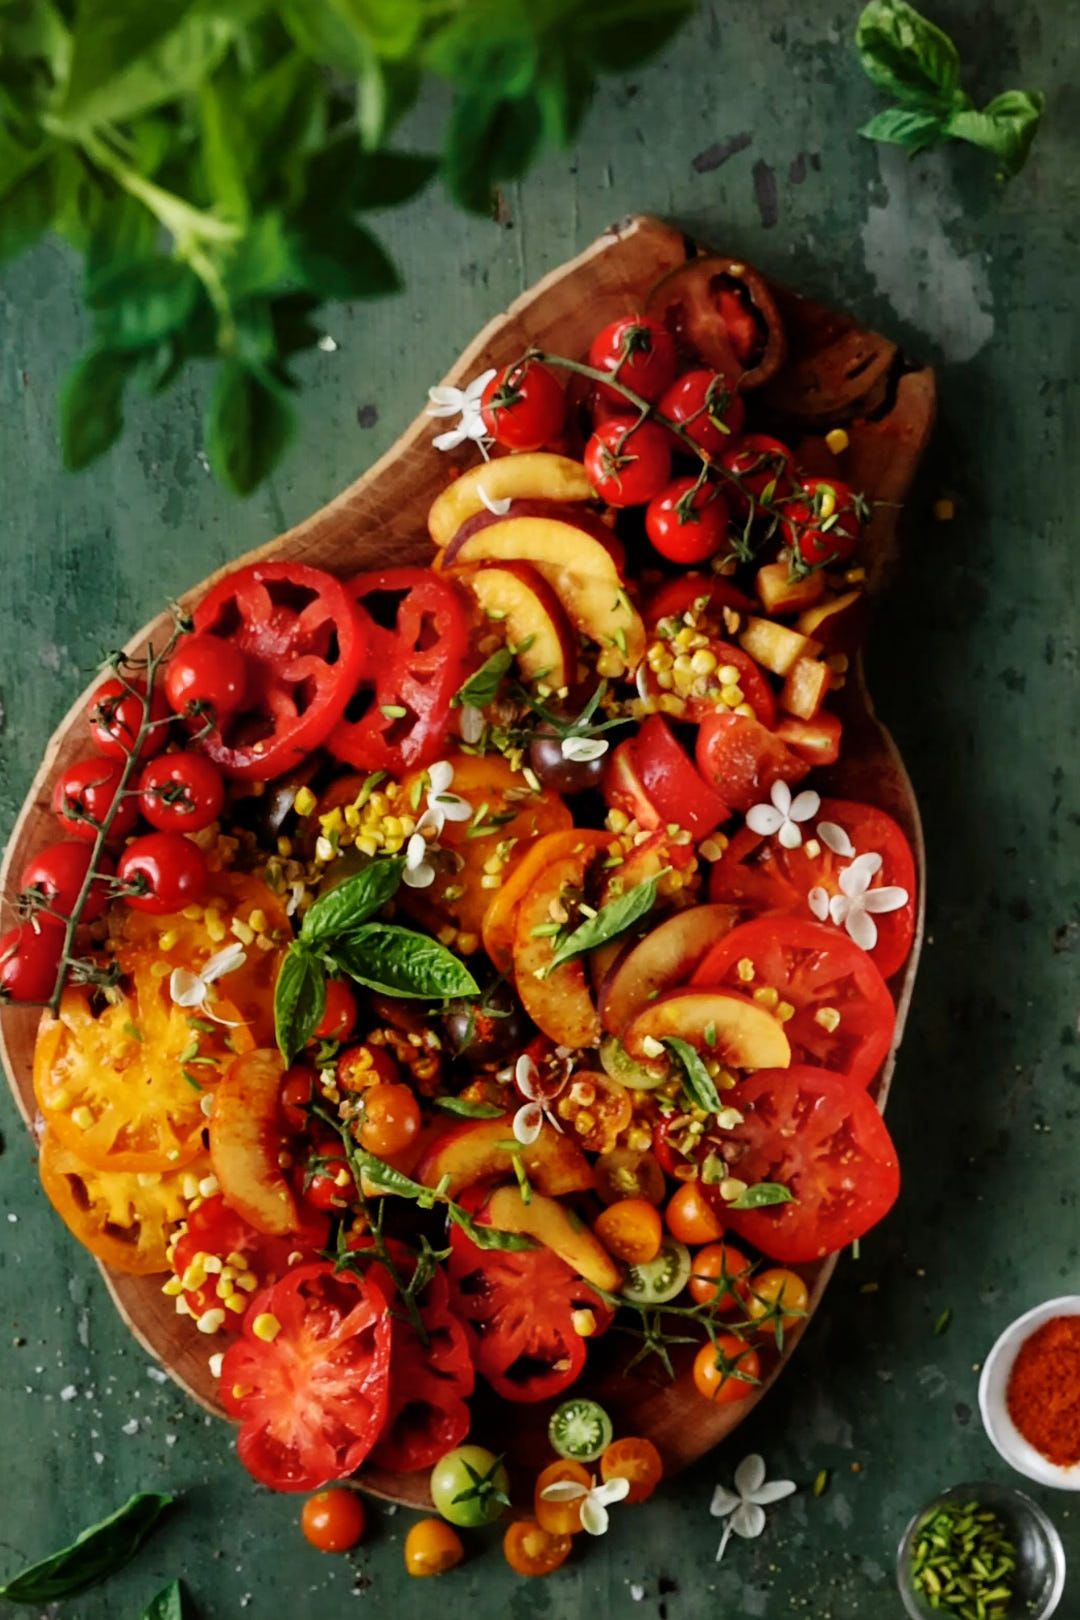
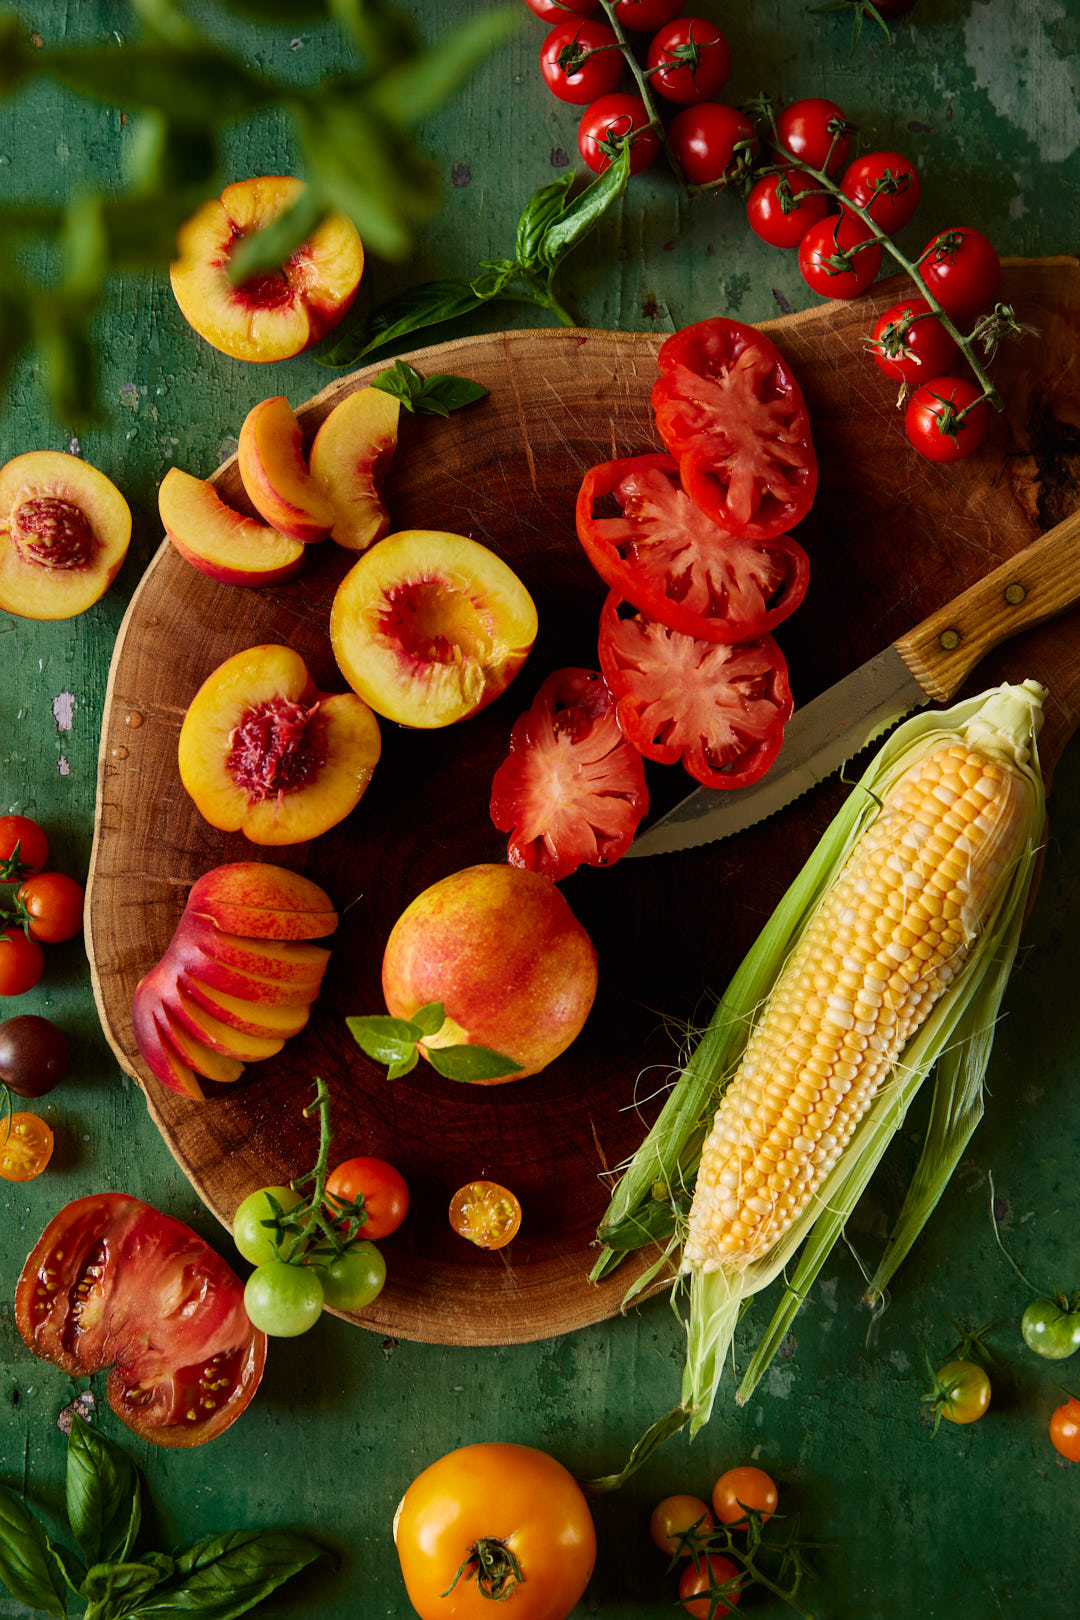
This early fall Tomato Corn and Nectarine Salad is a perfect transitional season salad. While the end caps at the supermarket and drugstore are packed with Halloween candy, I’m not ready for sweater weather. I’m still harvesting my tomato plants and the markets are brimming with sweet corn and juicy nectarines.
We are straddling that line between summer and fall and I have both feet firmly planted on the summer side. I have always had problems with transitions.
Watch me build this salad:
What is tomato powder?
The secret ingredient in this salad is tomato powder. Tomato powder is made by drying tomatoes and then pulverizing them into a fine powder. It has a bright complex acidity that delivers a hit of pure tomato flavour, in a powdered form. I first learned about it from Sohla El-Waylly.
Here are some suggestions for using it:
Sprinkle directly on sliced tomatoes.
Add to spice rubs for beef, chicken or fish.
Sprinkle on veggies before roasting.
Mix with mayo for a sandwich spread.
Reconstitute with water (2 parts powder : 1 part water) to make tomato paste and use it in any tomato based sauce.
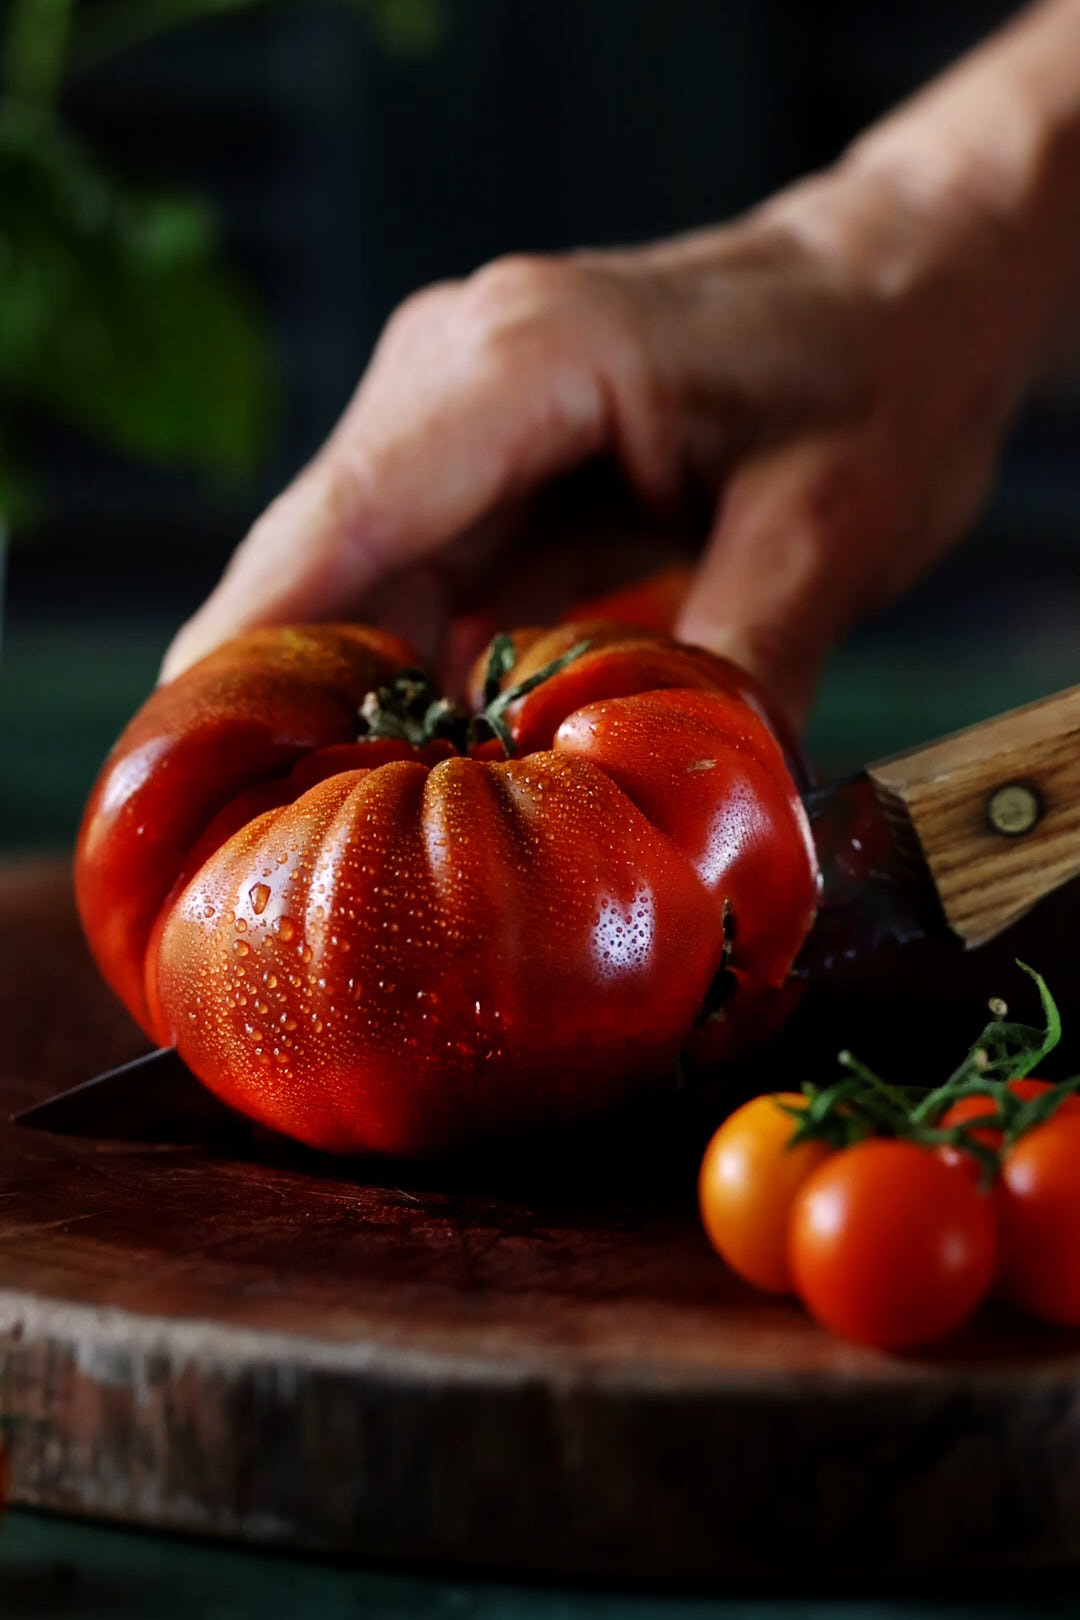
Use a mix of different tomatoes for visual aesthetics. I used a few larger heirloom tomatoes as well as a mix of different coloured cherry tomatoes. Vary the way you slice the tomatoes for a prettier presentation, I cut some in slices and others into wedges.
Check the ingredient list of your tomato powder. Most do not contain salt. Tomatoes need lots of salt so don’t be shy with adding it. I like to sprinkle the tomatoes with both the tomato powder and Diamond Crystal Kosher salt and let it sit for about 5-10 minutes before serving.
Add some toasted nuts for crunch. Pistachios, almonds or hazelnuts would be excellent choices.
Finish the salad with a healthy drizzle of a fruity good quality extra virgin olive oil and a generous sprinkle of a flaky sea salt.
2 teaspoonsDiamond Crystal Kosher Salt,or 1 teaspoon Morton's Kosher Salt
2nectarineshalved and cut into 1/4 inch wedges
2 Tablespoonsextra virgin olive oil
1/4cupshelled pistachios,toasted and coarsely chopped
10leavesfresh basil,thinly sliced
1 teaspoonflaky sea salt, such as Maldon
Instructions
In a large skillet, heat olive oil over medium heat. Add corn and saute for 3-4 minutes, until corn starts to become golden brown. Season with salt. Set aside.
On a large serving plate or board, arrange sliced heirloom halved cherry tomatoes. Sprinkle with tomato powder and kosher salt. Let sit for about 10 minutes.
Arrange sliced nectarines onto the platter. Scatter the tomatoes and nectarines with the sautéed corn. Sprinkle with pistachios and basil. Drizzle with olive oil. Serve.
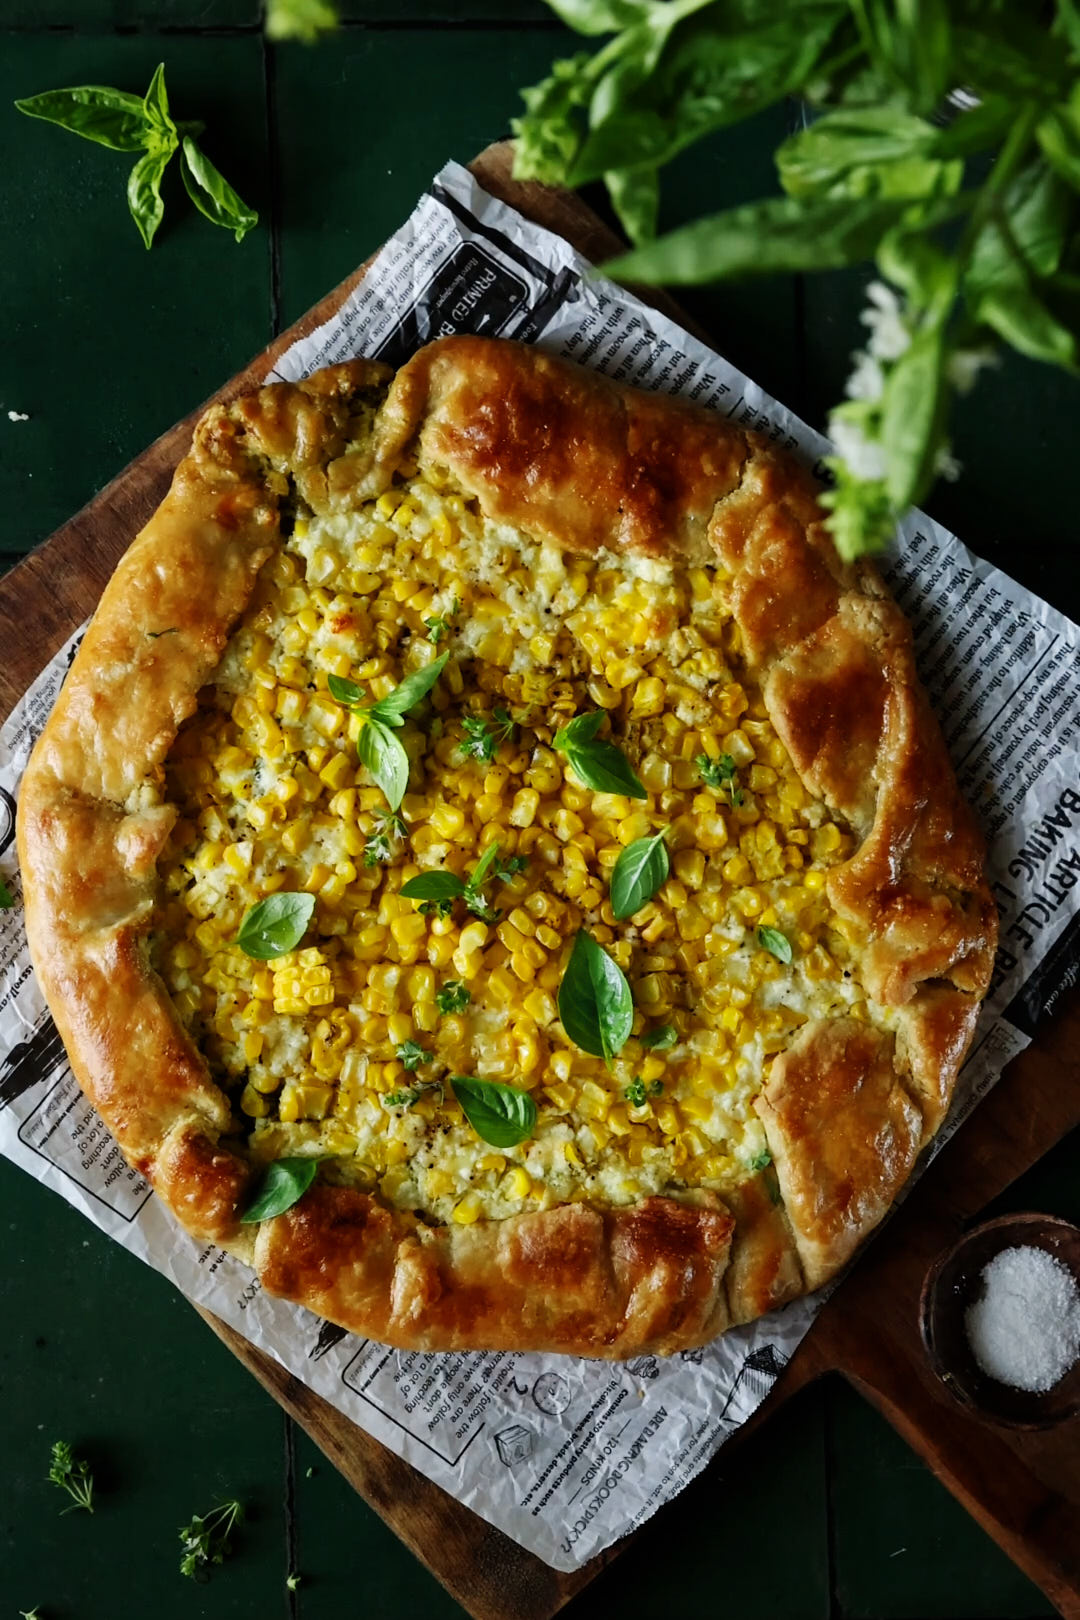
Celebrating the last day of August with this Golden Three Cheese and Corn Galette. The farmers market table is still groaning under the weight of freshly picked corn around here, so I’m indulging for as long as possible. This galette is pure sunshine.
The dough for this galette crust comes together in less than 45 seconds in the food processor. It is flaky AF, thanks to the addition of a bit of cornmeal and some sour cream for tenderness. The dough freezes beautifully and works well for both sweet and savoury galettes.
This galette was inspired by a recipe on tastecooking.com for Corn Galette with Ricotta and Chile Oi. My version uses a cornmeal crust and I added a some fontina and pecorino cheese for a more savoury flavour. I spread a layer of pesto onto the dough before adding the corn and cheese filling. I topped the baked galette with my favourite hot honey, instead of the Chile Oil.
100gramsunsalted butter, coldcut into 1/2 inch pieces
Galette Filling
300gramswhole milk ricotta cheese
40 gramspecorino cheese, grated
60 gramsfontina cheese, grated
2clove garlic, finely minced or grated on microplane
1/2teaspoonDiamond Crystal Kosher salt
6large ears of corn, shucked and corn cut off the cobor 4 ½ cups frozen corn, thawed
Assembly
120gramsbasil pesto
1largeegg, beaten with 1 Tablespoon water
Garnish
20fresh basil leaves, for garnish
40gramshot honey, I love Mike's brand.
Instructions
Galette Dough
Whisk sour cream and ice water together and set aside. Place flour, cornmeal, sugar and salt in the work bowl of a food processor, fitted with the metal blade and pulse to combine. Drop the butter pieces into the bowl and pulse 8 to 10 times, or until the mixture is speckled with pieces of butter that vary in size from breadcrumbs to peas. With the machine running, add the sour cream mixture and process just until the dough forms soft moist curds. Turn the dough out of the food processor onto the counter. Divide dough in half and shape each piece into a round disc.
Lightly dust one disc with flour, and roll between 2 sheets of parchment paper, into a 12-inch circle. A perfect circle is not necessary, just the approximation of that shape. Repeat with second disc. Chill dough rounds in fridge, still between their sheets of parchment paper, for about 30 minutes.
Make cheese filling
In a large mixing bow, mix together ricotta, pecorino, fontina, garlic, salt and half the corn. Reserve remaining corn kernels to put on top of cheese layer.
Assemble galette
Arrange racks in oven so that one is top middle and the other is bottom middle. Preheat oven to 400°F. Remove dough rounds from fridge. Peel off top sheet of each round. Flip sheet over and carefully peel off bottom sheet of parchment paper. Line 2 rimmed baking sheets with some of this parchment paper. Transfer one dough round to each baking sheet.
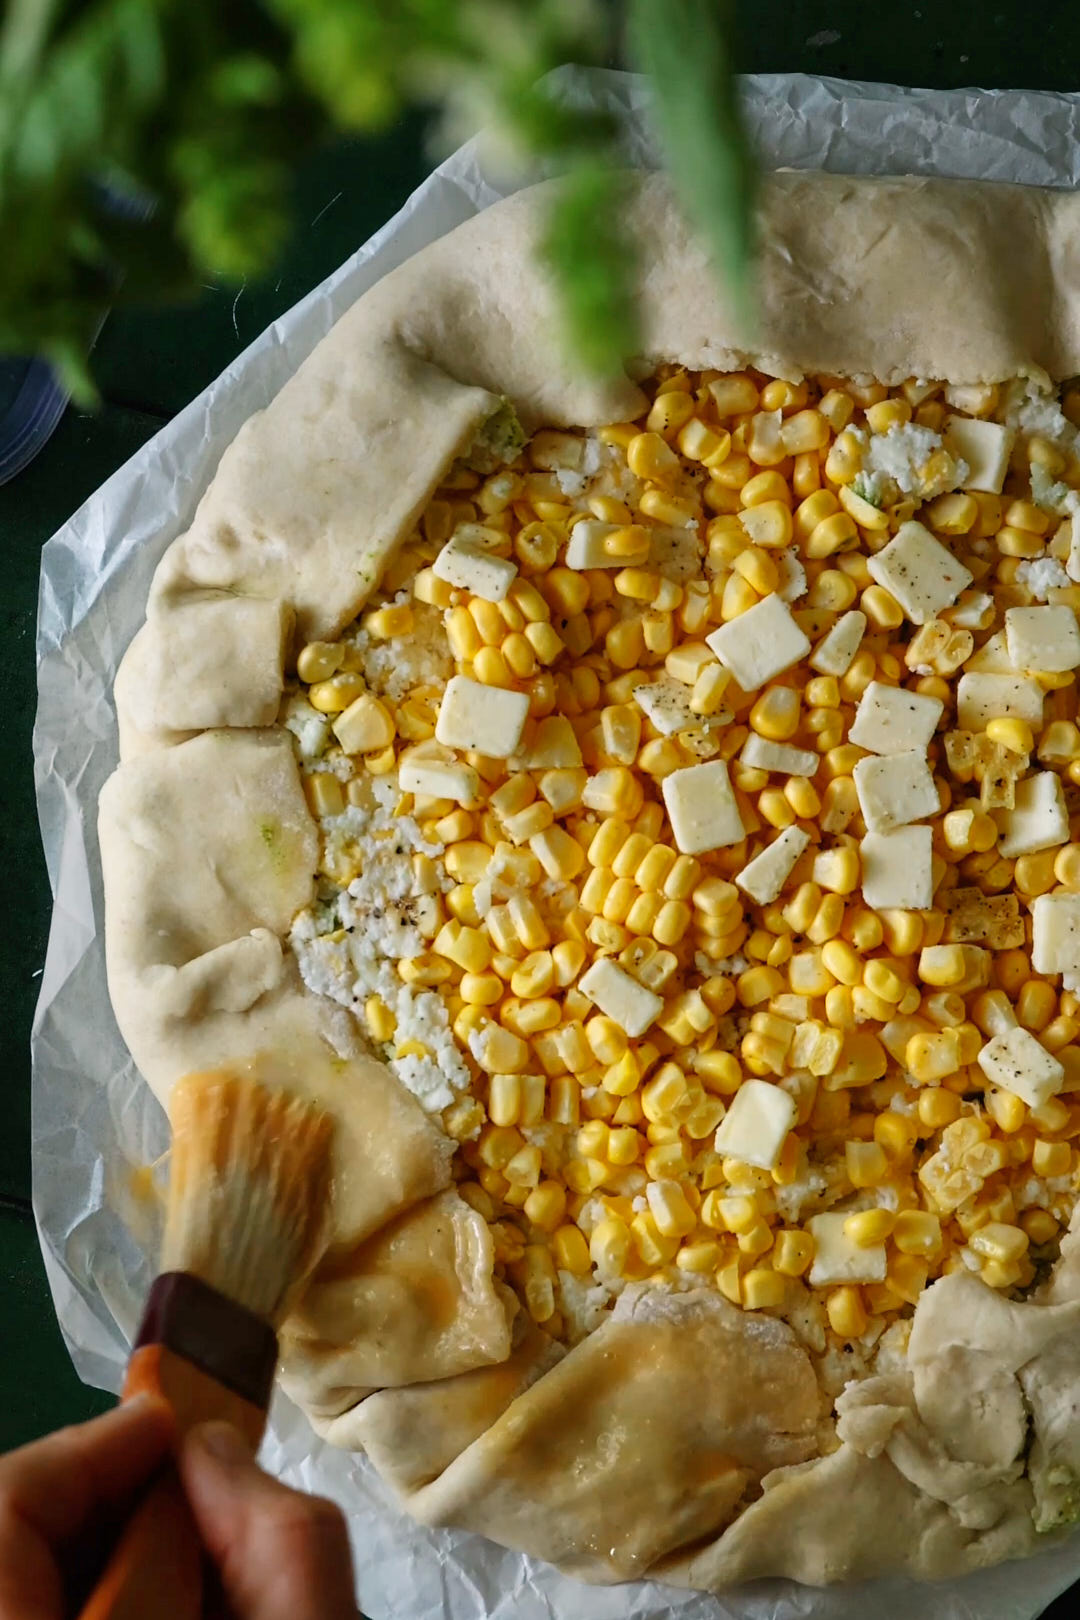
Spread each circle with half the pesto, leaving a 1½ inch border from the edge. Spread each tart with cheese mixture. Sprinkle remaining corn over each tart.
Fold the uncovered border of dough up over the filling, allowing the dough to pleat as you lift it up and work your way around the galette. Brush the border of the dough with egg wash.
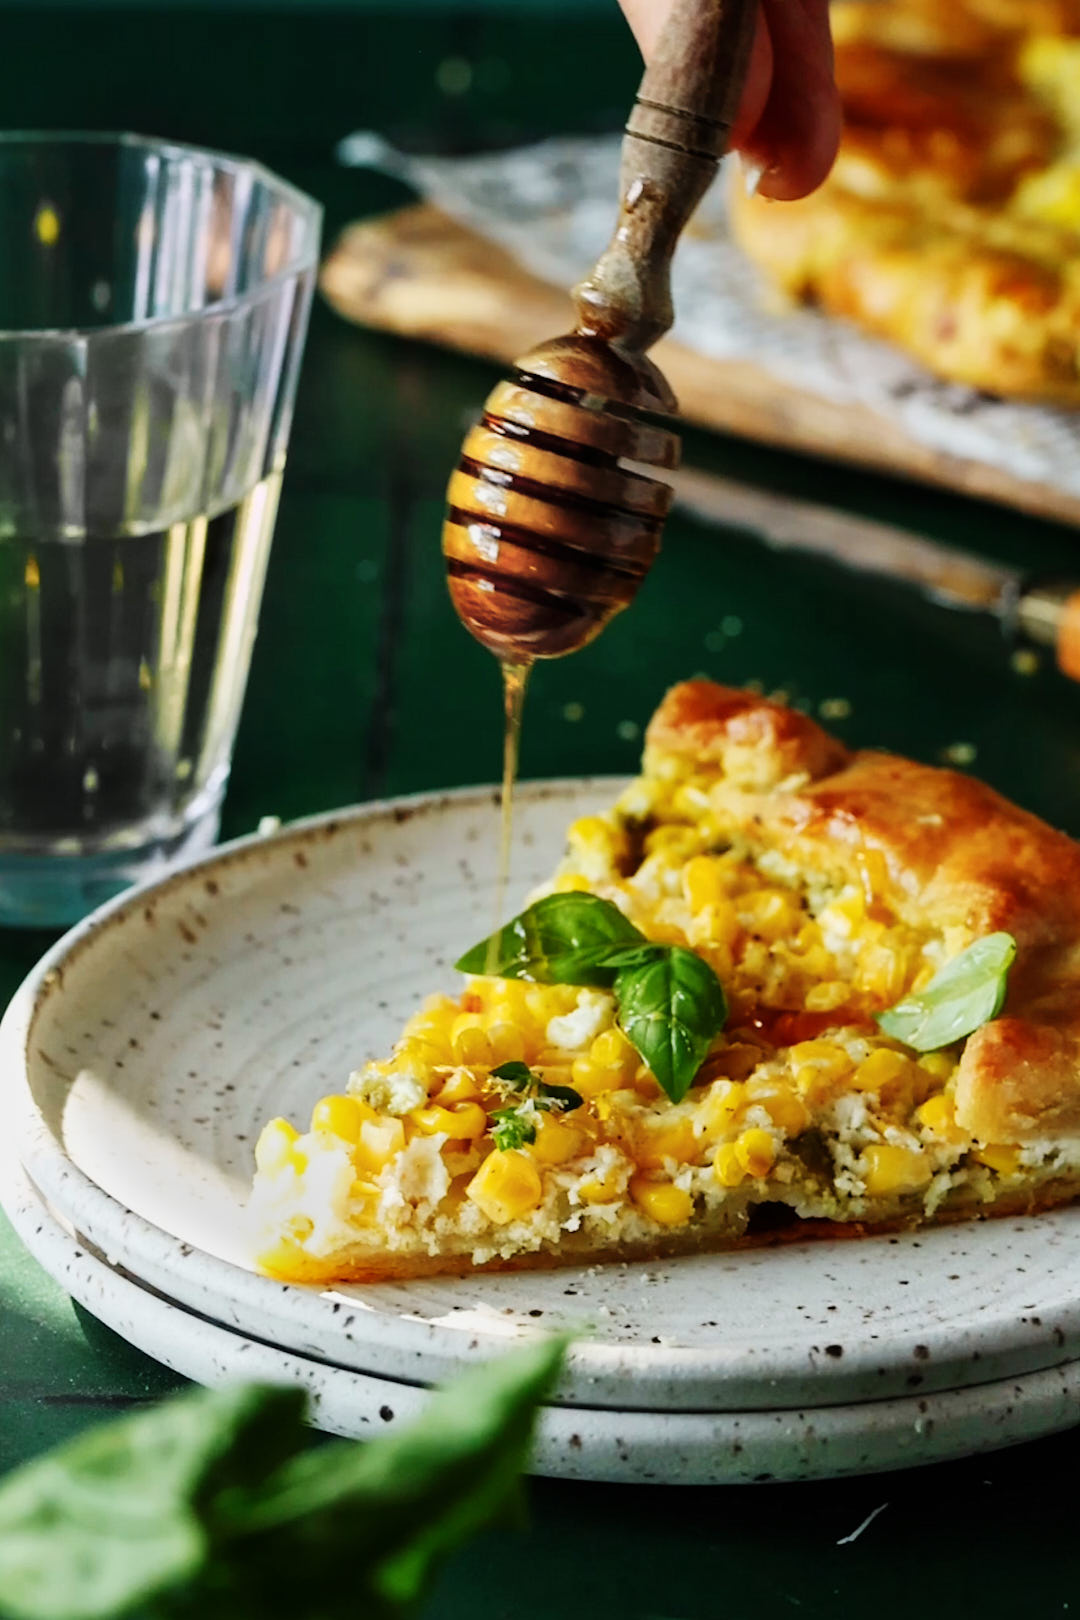
Bake in oven for 25 minutes. Switch trays so that the tart that was on the bottom rack, is now on the top rack.Bake for a further 20-25 minutes until pastry is golden brown. Let cool for at least 15 minutes before slicing.
Just before serving, sprinkle with fresh basil leaves and drizzle with hot honey.
Notes
This galette was inspired by a recipe created by tastecooking.com for Corn Galette with Ricotta and Chile Oil. I used my favourite super-flaky cornmeal galette crust, added some pesto to boost the basil flavour and instead of making my own chile oil, I topped mine with hot honey.
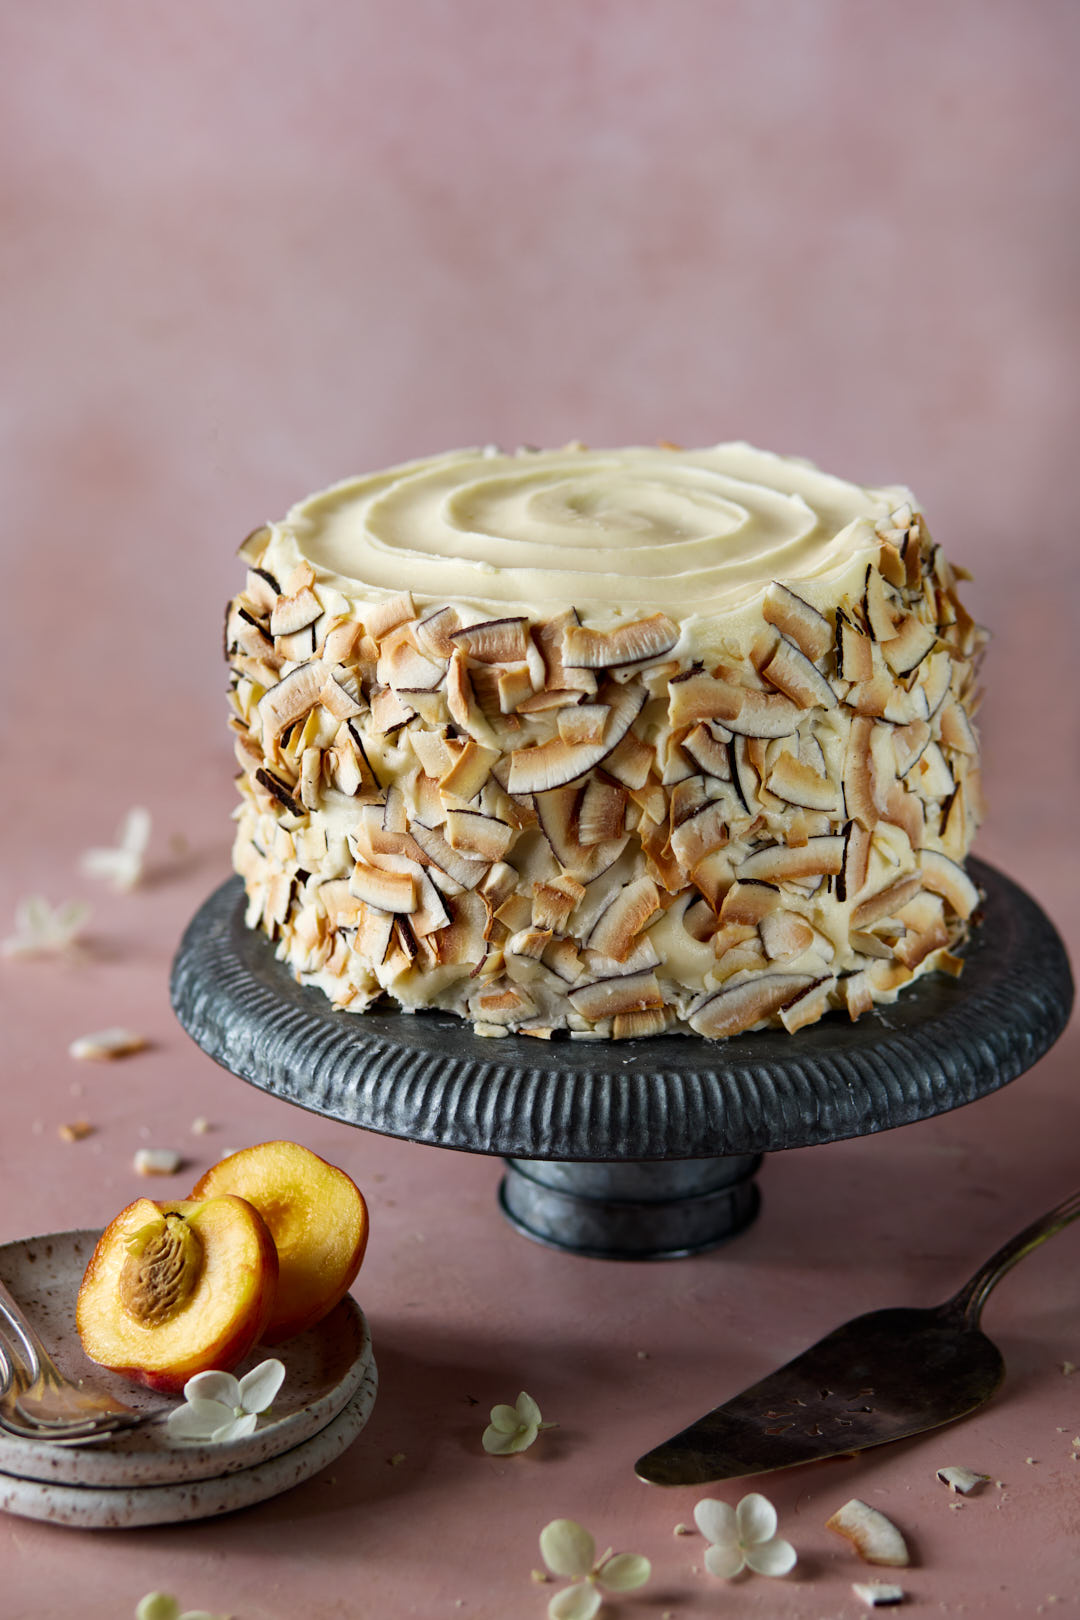
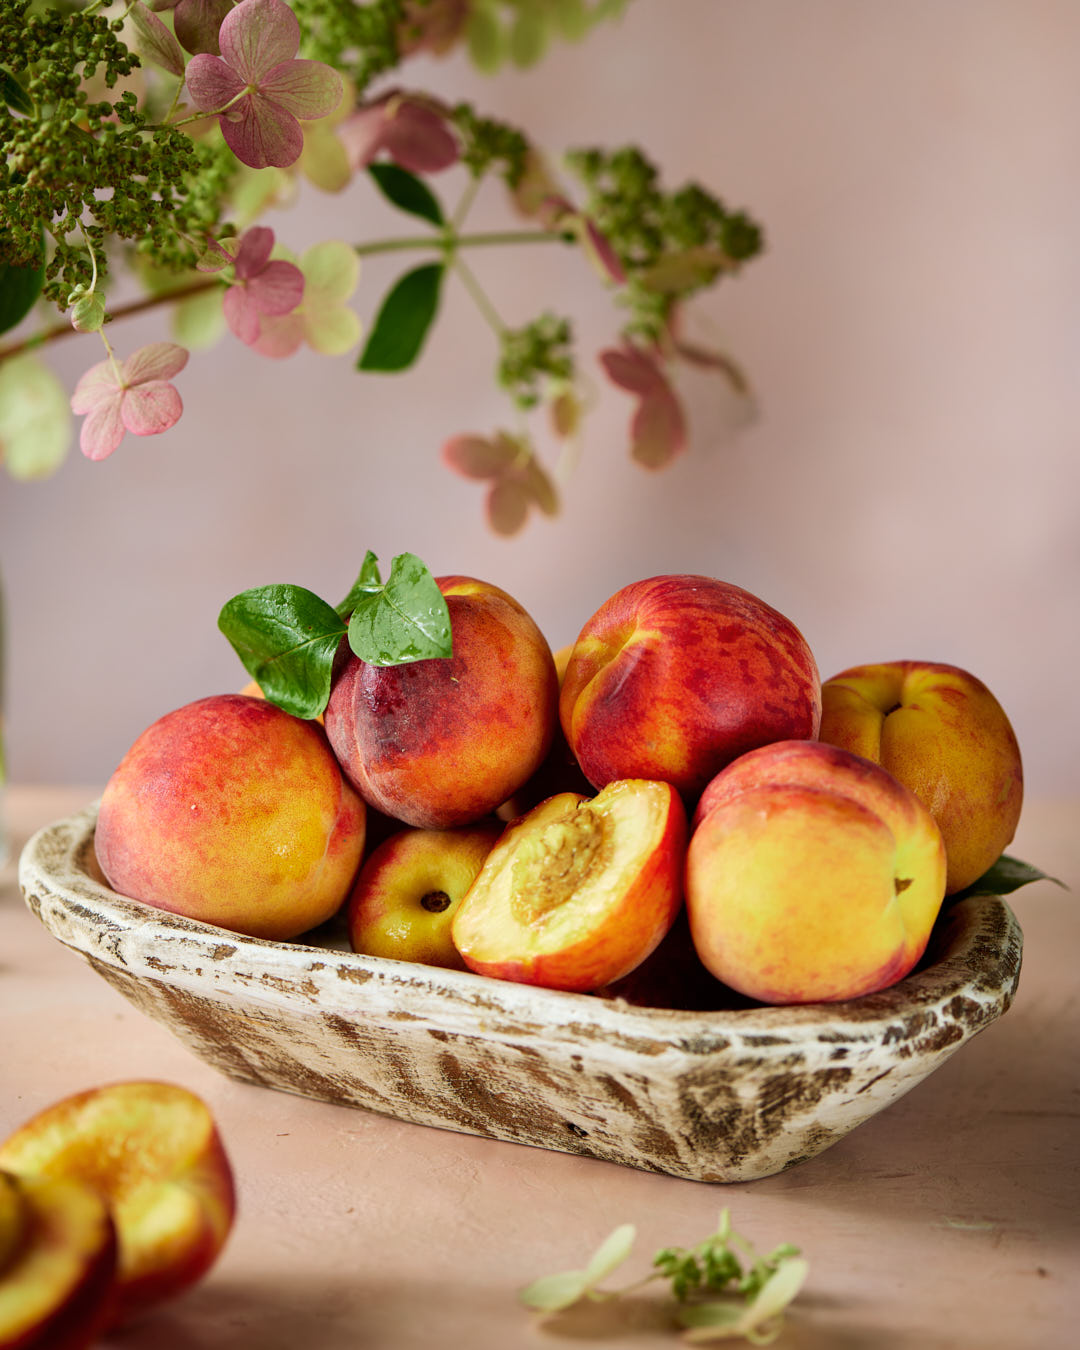
It’s the last week of August and things are just peachy around here in the saltandserenity kitchen with this Ethereal Coconut Peach Layer Cake.
I know that some of you are in a hurry to get to all things pumpkin spiced, but slow down for a minute please. The markets here in Ottawa are still brimming with peaches, corn and tomatoes, so just relax and enjoy. Pumpkins can wait their turn.
The combination of peach and coconut is an unusual but very delicious one. Considering that both are members of the drupe family, it makes sense.
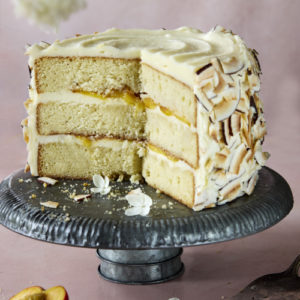
This triple layer cake, created by bake from scratch is an impressive beauty. Plush layers of coconut cake are filled with juicy peaches and fluffy vanilla buttercream. Toasted shards of coconut cover the sides for an extra burst of coconut flavour.
Watch how it all comes together:
Tips for Success for baking Ethereal Coconut Peach Layer Cake:
The recipe calls for cake flour, which has a lower protein content than all purpose flour and makes a more tender cake. No cake flour on hand, no problem. Make your own cake flour by combining all-purpose flour with some cornstarch. (The exact amounts are in the recipe). Cornstarch adds tenderness and lowers the overall protein content of the all-purpose flour, making a finer, more even crumb on your cake.
Brush cake layers with a peach simple syrup. The extra time taken to make the simple syrup will reward you with a lush and moist cake.
Use full fat coconut milk please. This is not the time to save calories.
1medium peach, peeled, pitted and sliced into 8 wedges
100gramsgranulated sugar
120 gramswater
Cake
340gramsunsalted butter, room temperatureremoved from fridge 1 hour before baking
400gramsgranulated sugar
3largeeggsroom temperature
437gramscake flouror 382 grams all purpose flour plus 55 grams cornstarch
1teaspoonbaking powder
1teaspoonbaking soda
1/2teaspoonDiamond Crystal Kosher saltor 1/4 teaspoon Morton's Kosher salt
180 gramscoconut milk
120 grams buttermilk
1 1/2 teaspoons vanilla bean paste or vanilla extract
3mediumpeaches, peeled, pitted and cut into 1/4 inch thick wedges
American Buttercream
567gramsunsalted butter, room temperatureremoved from fridge 1 hour before using
1365gramsicing sugar, sifted
240grams35% whipping cream
2teaspoonsDiamond Crystal Kosher saltor 1 teaspoon Morton's Kosher salt
Garnish
120gramscoconut flakes, toasted
Instructions
Peach Simple Syrup
In a medium saucepan, heat all ingredients over medium heat until sugar is dissolved. Remove from heat, and let cool. Using a blender, food processor or immersion blender, blend until mixture is smooth. Refrigerate in an airtight container for up to 2 weeks.
Cake
Preheat oven to 350°F. Butter and flour 3 (9-inch) round cake pans. Line bottom of pans with parchment paper; butter and flour pans again.
In the bowl of a stand mixer fitted with the paddle attachment, beat butter and sugar at medium speed until fluffy, 3 to 4 minutes, stopping to scrape sides of bowl. Add eggs, one at a time, beating well after each addition.
In a medium bowl, whisk together flour, baking powder, baking soda, and salt. In a small bowl, stir together coconut milk and buttermilk. With mixer on low speed, gradually add flour mixture to butter mixture alternately with coconut milk mixture, beginning and ending with flour mixture, beating just until combined after each addition. Beat in vanilla. Divide batter among prepared pans.
Bake until a wooden pick inserted in center comes out clean, about 30 minutes. Let cool in pans for 10 minutes. Remove from pans, and let cool completely on wire racks. Brush layers with Peach Simple Syrup.
American Buttercream
In the bowl of a stand mixer fitted with the paddle attachment, beat butter at medium speed until creamy, 5 to 6 minutes. Reduce mixer speed to low. Gradually add confectioners’ sugar, cream, and salt, beating until smooth. Use immediately.
Assemble Cake
Place 2 cups American Buttercream in a piping bag fitted with a medium round tip. Pipe a ½-inch-thick layer of buttercream around edge of one cake layer. Spread buttercream within border. Layer half of peaches in center, gently pressing into buttercream and ensuring border is higher than peaches. Repeat layers once. Top with remaining cake layer. Spread a thin layer of American Buttercream on top and sides of cake. Freeze for 30 minutes. Spread remaining American Buttercream on top and sides of cake. Press toasted coconut into sides of cake. Cover and refrigerate for up to 4 days.
Notes
Recipe created by Bake From Scratch Magazine. If you don’t have cake flour on hand, you can make your own by adding some cornstarch to all purpose flour. See amounts in recipe.
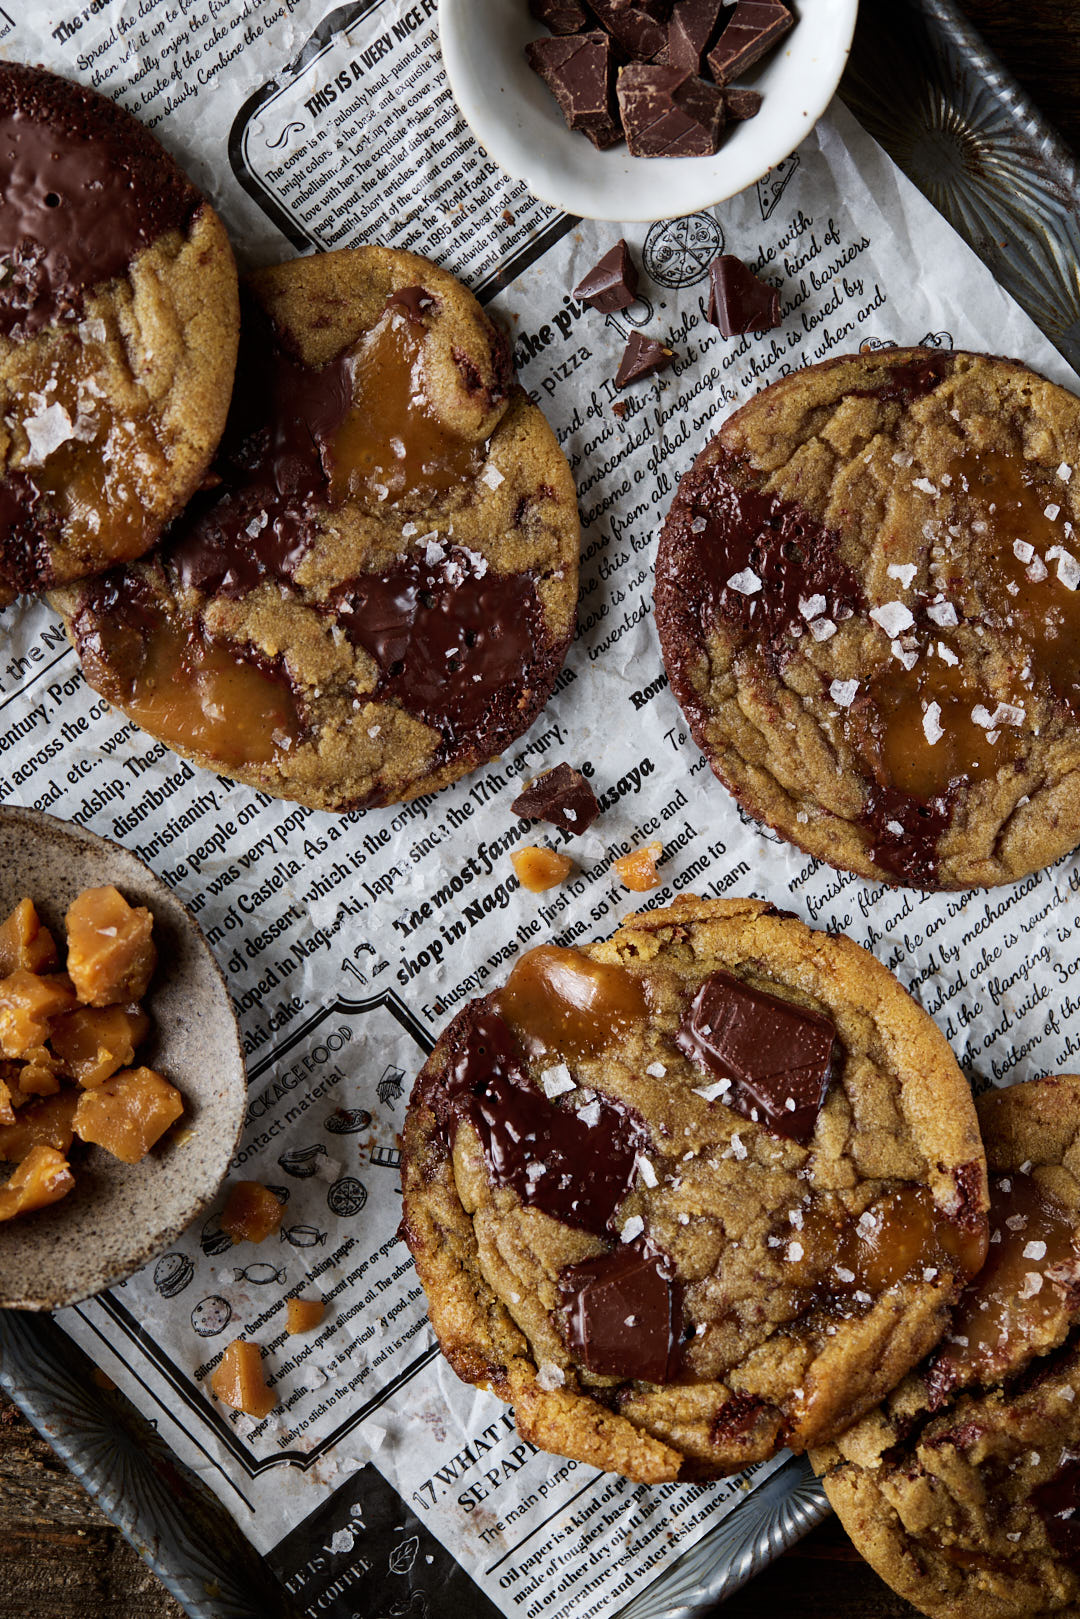
With over 118 cookie recipes on my blog, it’s fair to say that I have learned a thing or two about the science of cookie baking. I’m going to share my pro tips for cookie baking with you today as I bake my way through my new current fave cookie, Coffee Toffee Chocolate Chunk Cookies.
These are a decidedly adult cookie, with deep notes of coffee and bitter-sweet toffee and chocolate. Intense but not too sweet, they are crispy at the edges, thick and chewy in the center and completely addictive.
Here are my top 8 pro tips for cookie baking.
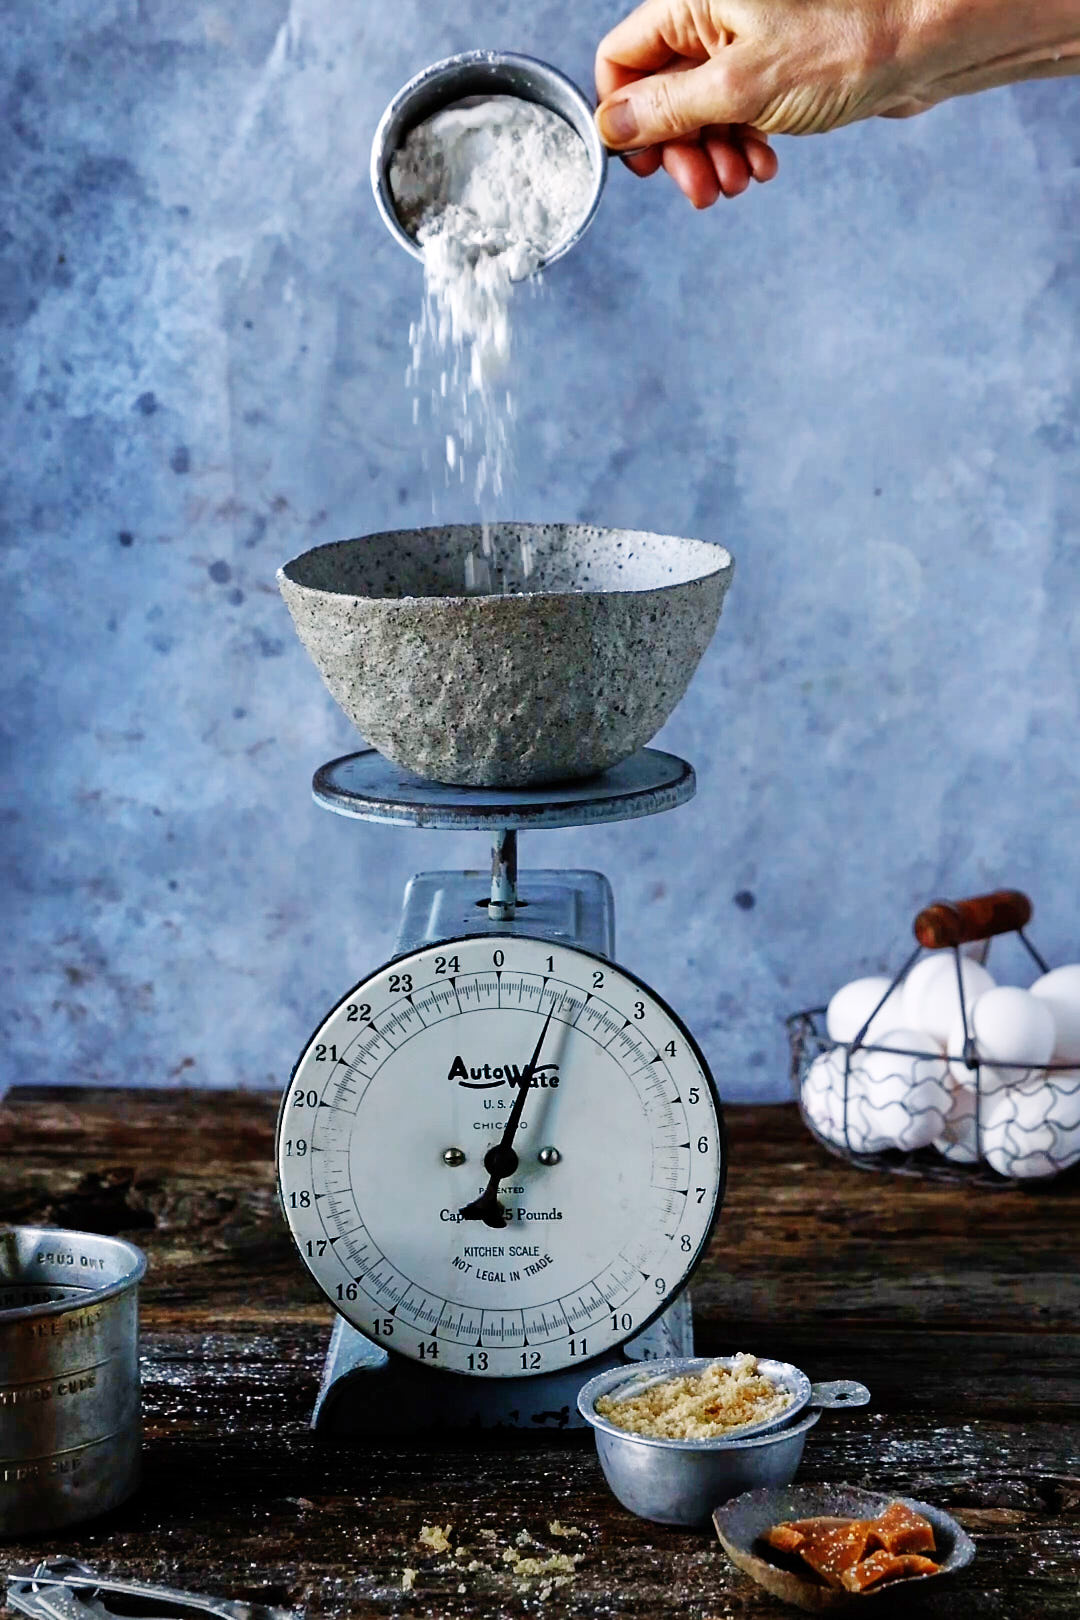
1. Ditch the measuring cups and get a scale. The most important tip I want you to adopt it is, bake by weight not volume. If you have ever been on Weight Watchers, there is a scale lurking at the back of your kitchen cabinet somewhere. This is the one I use.
Professional bakers and pastry chefs use a scale. It leads to consistent results every time. Depending on how it’s scooped and leveled, a cup of flour can weigh anywhere from 125 grams (4.5 ounces) to 170 grams (6 ounces). This is a difference of 36%. That could make a huge difference in your baking. I take the time to test my recipes several times, using grams not cups. By weighing your ingredients, your baked goods will turn out like mine, almost perfect every time.
Baking by weight also means less dirty dishes and cups to wash. Everything gets added to one mixing bowl. After measuring each ingredient you “tare” the scale, meaning you push a button to take it back to zero weight. So if you put an empty mixing bowl on the scale and press tare, the scale will read zero and the weight of the bowl is not measured.
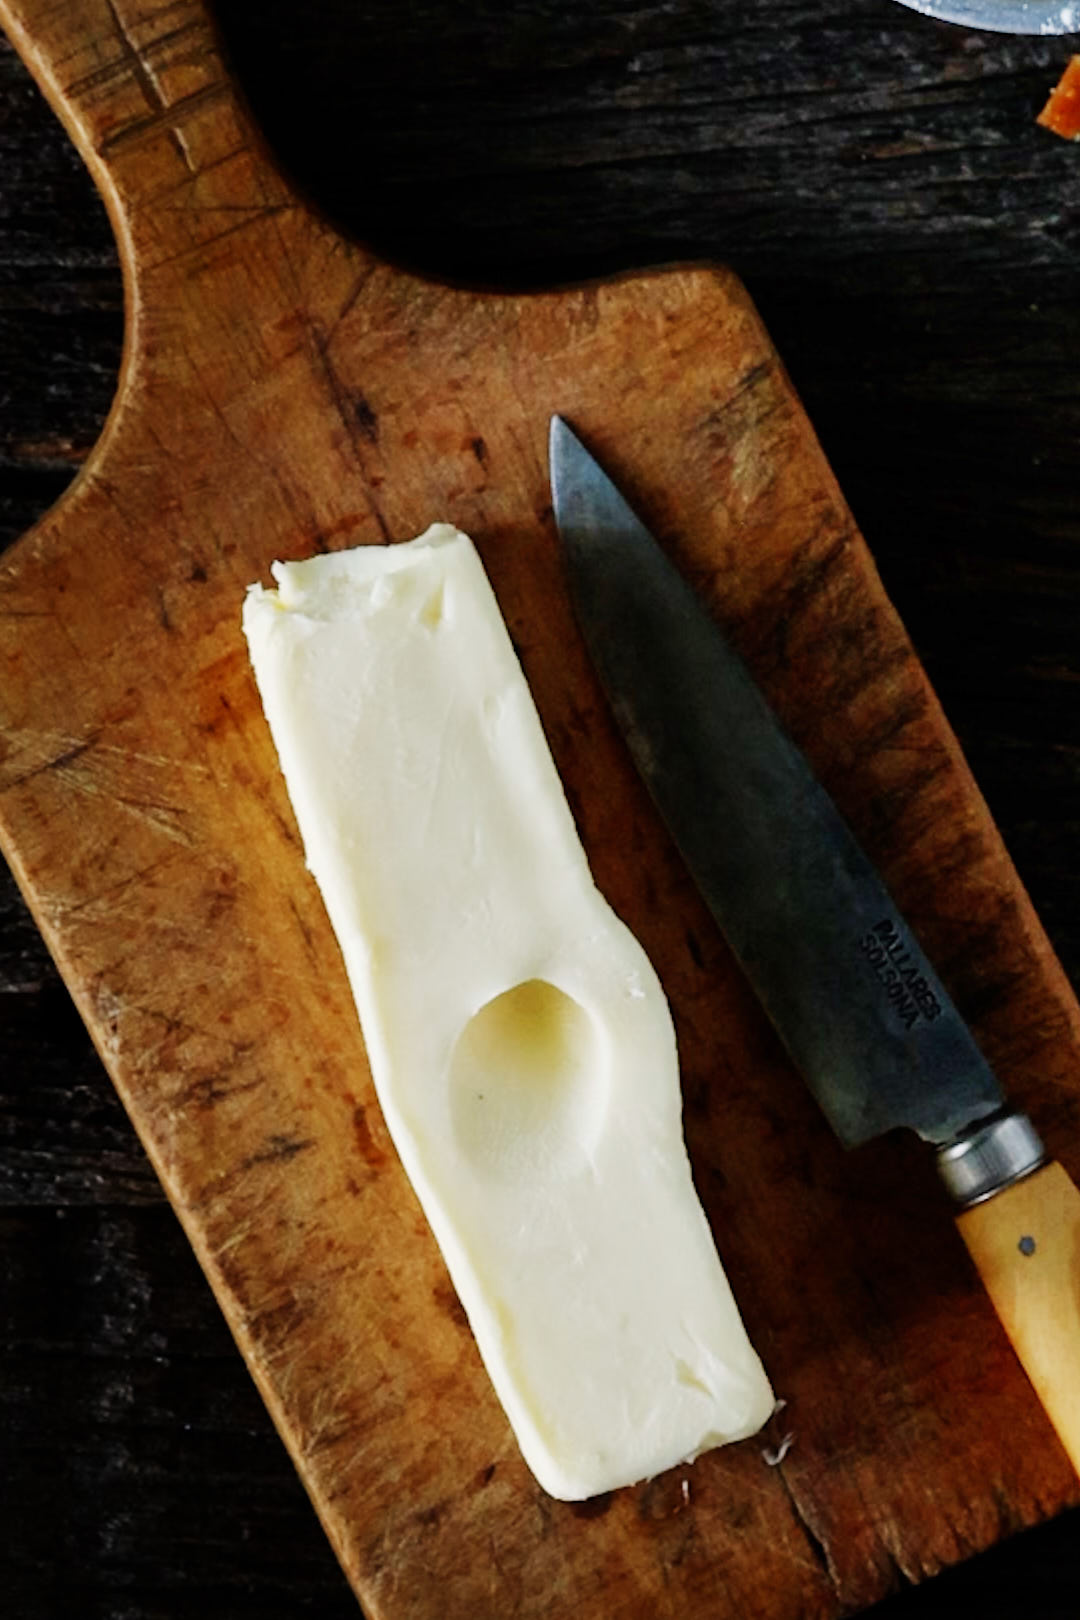
2. Use room temperature butter. It only takes about an hour for butter removed from fridge to reach room temperature (21°C/70°F). Butter sitting out on the counter all day will get too warm. You want to be able to leave a fingerprint in the butter and have the butter still feel firm and not greasy. If the butter is too soft, it won’t allow the sugar to aerate properly and you will have flat cookies.
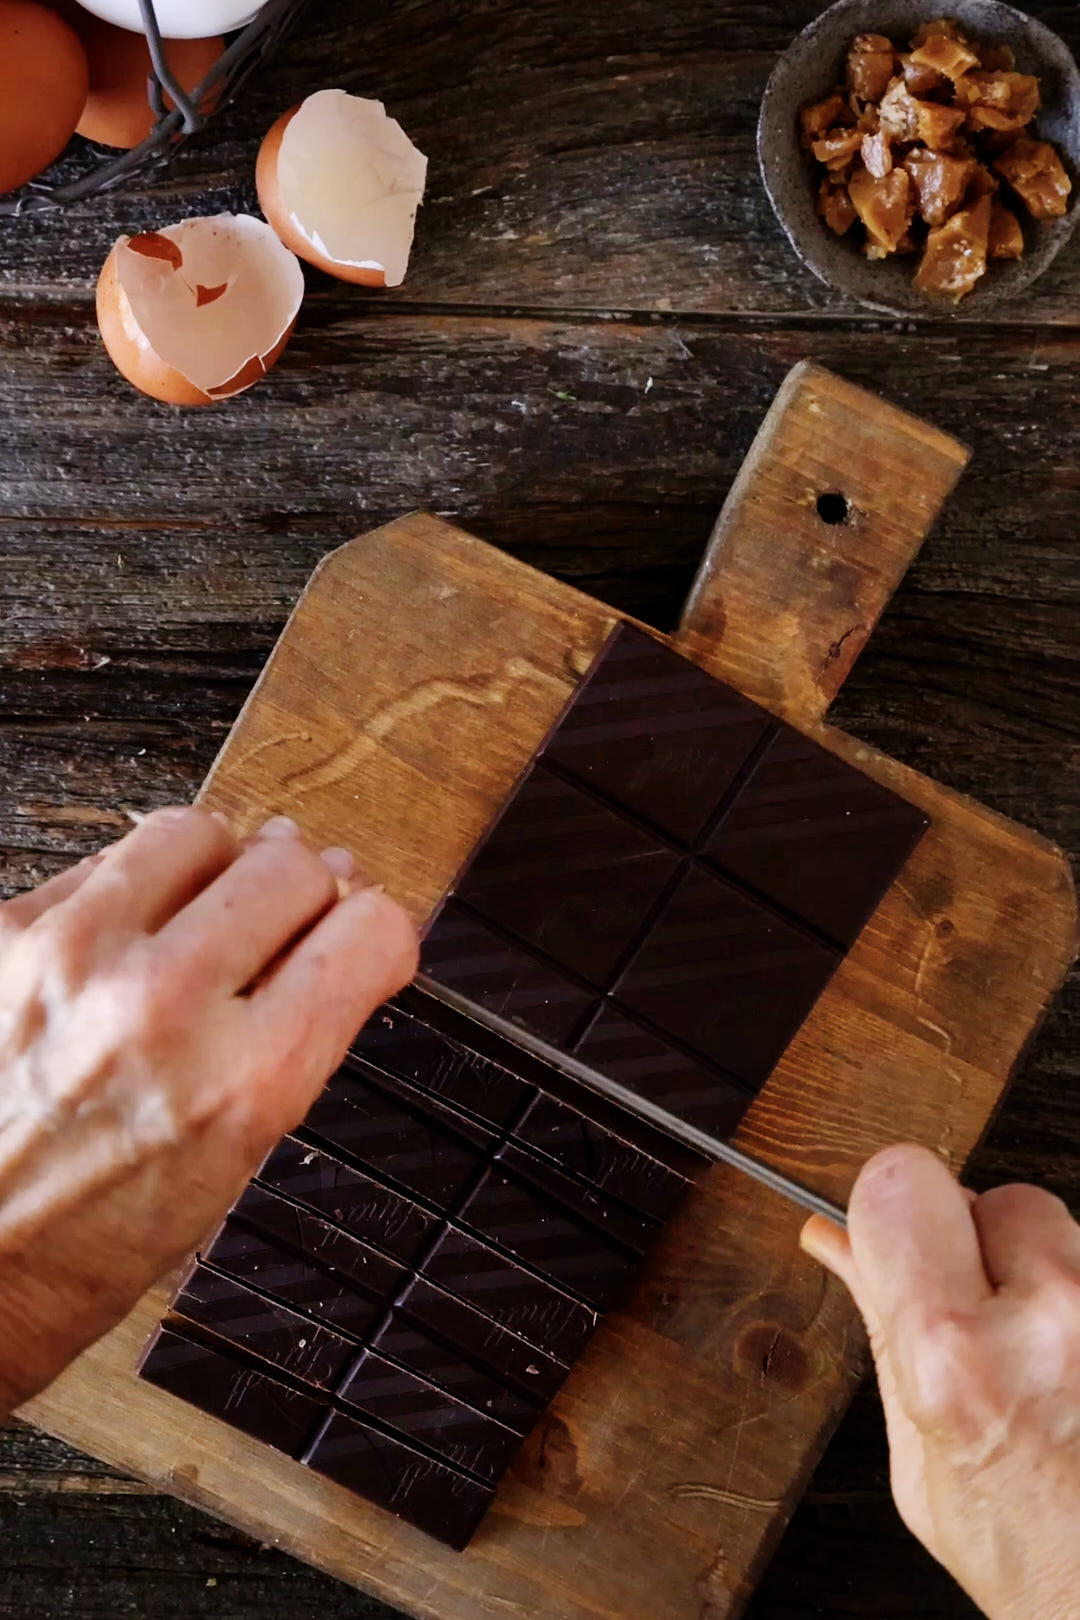
3. Don’t use supermarket chocolate chips. Use good quality baking or couverture chocolate. In the video I used Lindt 70% dark chocolate bars that I chopped up. I also love these Valrhona Manjari feves.
Supermarket chocolate chips have stabilizers in them that allow the chips to hold their shape. They never fully soften, so you won’t get those melty pools of glossy chocolate on top of your cookies. Couverture chocolate has a higher cocoa butter content so that you get that melty, silky mouthfeel.
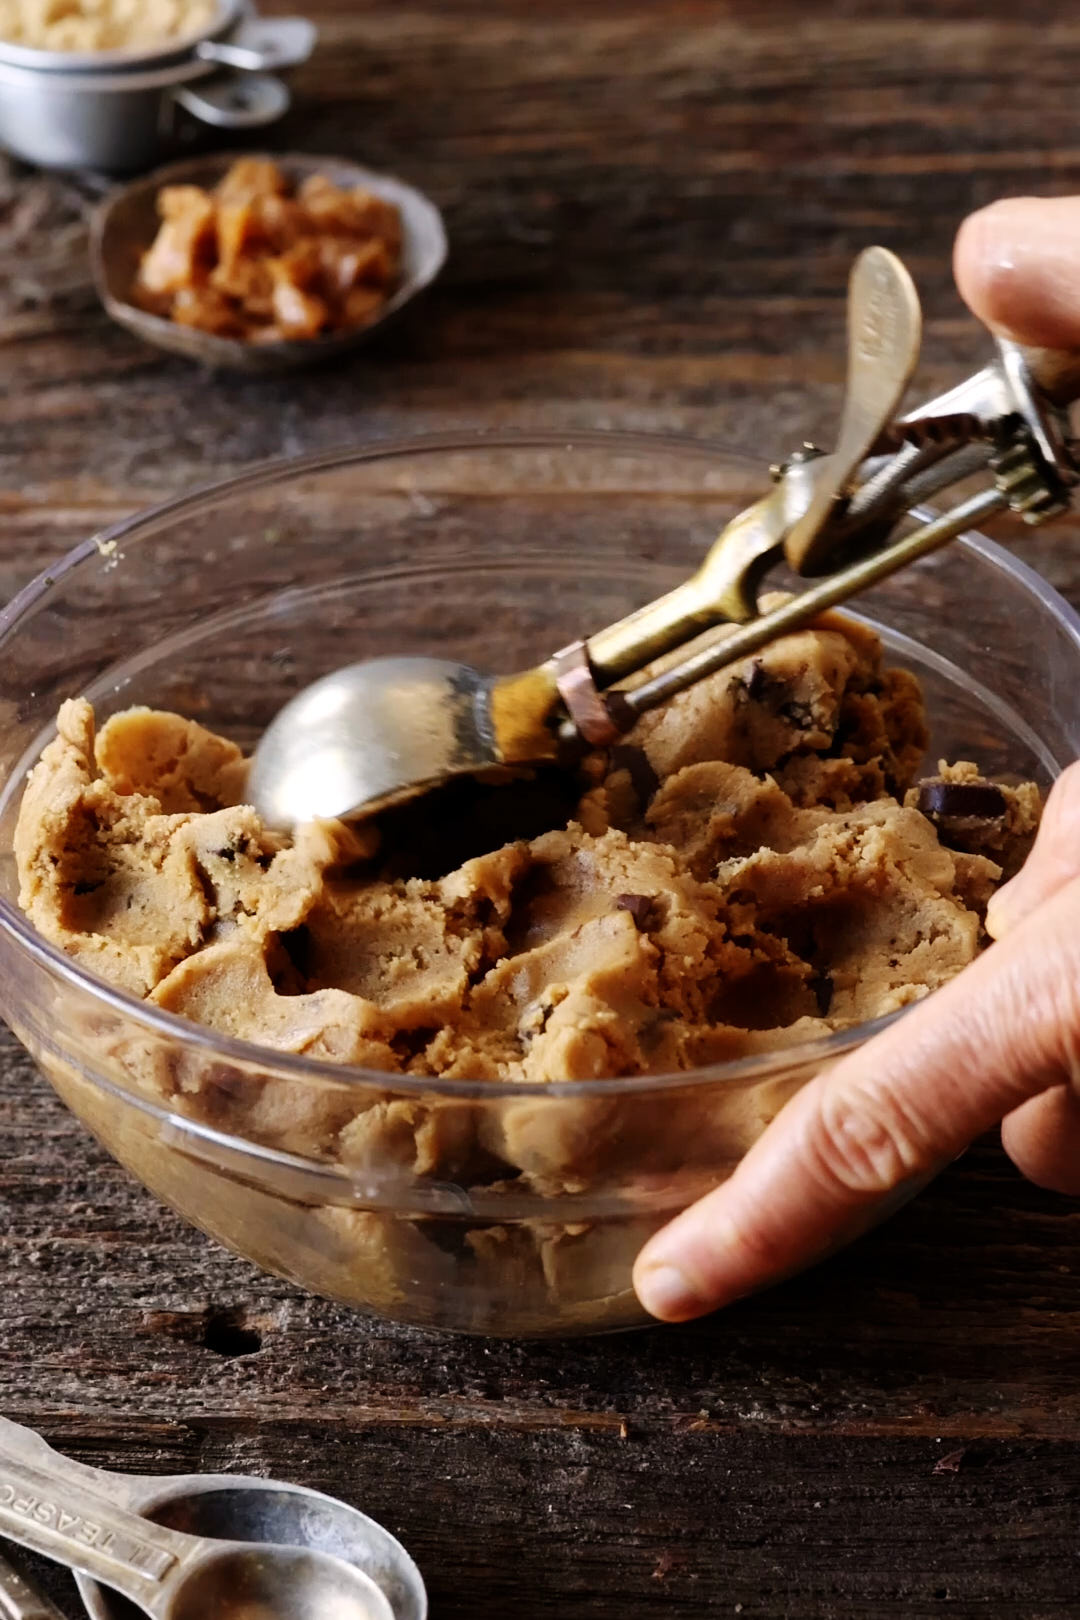
4. Use a spring loaded scoop to shape and portion your cookies. I like this one. Your cookies will all be the same size and bake evenly.
5. Chill cookie dough for at least 24 hours before baking. Practice patience. Chilling the dough improves both the texture and flavour of your cookies. While the dough is chilling the flour has a chance to hydrate, leading to a thicker and chewier cookie, better browning and a more even bake.
A second benefit to chilling is that the flavour of the cookie really intensifies. You get a more complex caramel-toffee flavour. It’s worth taking the time to chill. I recommend scooping the dough right after mixing, while it is still soft. It will be easier to scoop. Wrap the baking sheet tightly with plastic wrap before refrigerating to prevent transfer of fridge odours.
6. Add extra toppings halfway through the baking time. Hold back about 25% of your mix ins (chocolate chunks and toffee bits). After your cookies have been baking for about 5-6 minutes, pull them from the oven and carefully arrange the balance of chocolate and toffee on top of the cookies. That’s how you get those beautiful instagram worthy cookies.
7. Do the cookie scoot. The toffee bits will ooze out and create scraggly looking cookies. Use a cookie cutter slightly bigger than the cookie to reshape the cookies while still warm once they are done baking.
8. Finish with a light sprinkle of flaky sea salt. I love Maldon. There are several members of my family that vehemently oppose this, so if you’re in that camp, omit the salt. No judgement here.
227 gramsunsalted butterremoved from fridge, 30 minutes before baking
50gramsgranulated sugar
373 grams golden brown sugar
45grams turbinado sugar
5gramsvanilla bean paste or extract
2 large eggsroom temperature
195 grams bread flour
250 gramsall purpose flour
2gramsinstant espresso powder
2gramsDiamond Crystal Kosher Saltor 1 gram Mortons Kosher salt
9gramsbaking soda
280gramsbittersweet chocolate, chopped into 1/2 inch chunksI like Valrhona Guanaja Feves
130 gramstoffeeSkor bits or homemade, chopped into 1/4 inch pieces (recipe for homemade below)
2Tablespoonsflaky sea salt, optionalI like Maldon
Instructions
Place butter, granulated sugar, brown sugar, turbinado sugar into the bowl of a stand mixer, fitted with the paddle attachment. Cream butter and sugars for 3-4 minutes, until light and fluffy. Scrape down the sides and bottom of the bowl.
Add eggs, one at a time, mixing well after each addition. Add vanilla bean paste or extract and mix.
In a medium bowl, whisk together bread flour, all purpose flour, instant espresso powder, salt and baking powder.
Add the flour mixture to the cookie dough. Mix well, until no white streaks remain. Add chopped chocolate and toffee bits and mix until they are evenly distributed into the dough.
Using a 2-inch ice cream scoop, (I used this one),scoop out mounds of dough. Each ball of dough should weigh about 45 grams.Place scoops on parchment lined cookie sheet. They can be right next to each other on the baking sheet for now, as you are just putting them there to chill. Cover baking sheet with plastic wrap to prevent cookies from absorbing unwanted fridge odours. Chill dough for at least an hour and up to 36 hours.
About 30 minutes before you’re ready to bake cookies, set one rack in upper middle position and other rack in lower middle position of oven and preheat the oven to 350ºF.
Spread cookies out on two parchment lined baking sheets, making sure there is at least 2 inches between cookies. You should be able to get about 8-9 cookies on each baking sheet. You will need to bake in two batches.
Bake cookies, two sheets at a time for 5 minutes.Switch position of cookies and bake for a further 5-6 minutes, until the cookies are lightly golden on the edges and a bit gooey in the center. Do not over bake! Remove sheet from oven and sprinkle tops of cookies with flaky sea salt if desired. The cookies may be a bit irregular looking, and not completely circular. While they are still warm, use a cookie cutter slightly bigger than the cookie to "scoot" the cookies (swirling motion to make cookies round again). Allow cookies to sit undisturbed on baking sheet until totally cool. Repeat with the remaining cookies.
Notes
Note: If you want pretty, melted pools of chocolate and toffee on top of your cookies, hold back about 1/3 cup of the chopped chocolate and 1/4 cup of the toffee bits that gets mixed into the dough. After the cookies have been baking for 5 minutes, arrange a few chocolate nuggets and toffee bits on top of each partially baked cookie and continue baking for about 5 more minutes.
4 gramsDiamond Crystal Kosher saltor 2 grams Mortons's kosher salt
14gramsvanilla bean paste or vanilla extract
2gramsbaking soda
Instructions
Line a baking sheet with sides with parchment paper.
In a medium heavy bottomed saucepan, combine the sugar, butter, water, corn syrup and salt. Bring to a boil over medium-high heat and cook, stirring occasionally, until a candy thermometer registers 300°F. This will take about 12-15 minutes. Remove from heat and stir in vanilla and baking soda. Immediately pour the toffee onto the baking sheet and using a rubber spatula, spread it out into a rectangle roughly12 x 15 inches. It does not have to be a perfect rectangle. Allow the toffee to cool completely at room temperature. Do not refrigerate. Once totally cool, break into small pieces.
Store in an airtight container at room temperature. It will keep for 2 months.
Notes
You can certainly buy Skor Bits to add to your cookies, but homemade toffee is so much better. This recipe is adapted from the beautiful new cookbook, “Bobbette & Belle”, written by Toronto bakers Allyson Bobbitt and Sarah Bell. A candy thermometer is essential for making toffee.
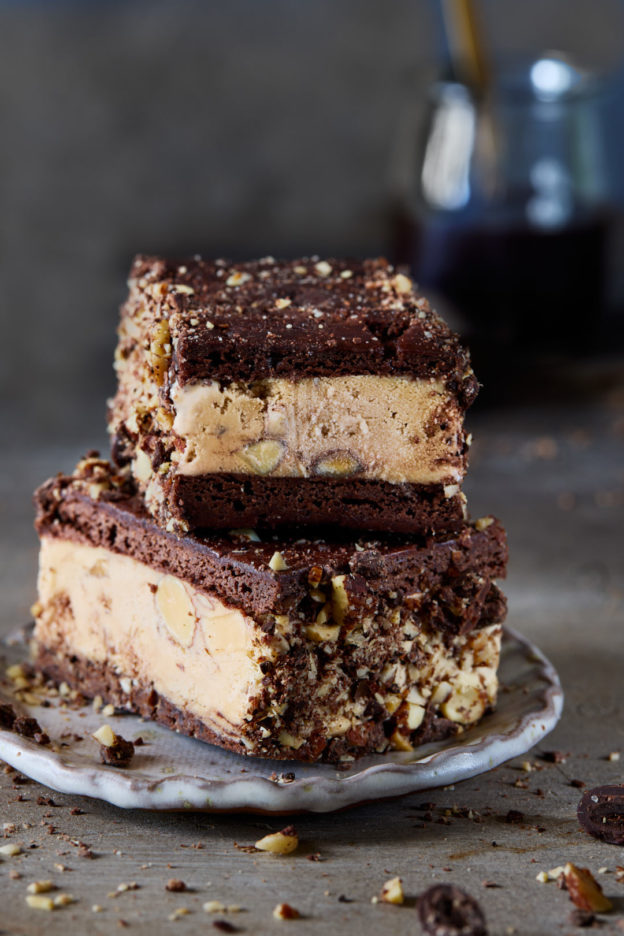
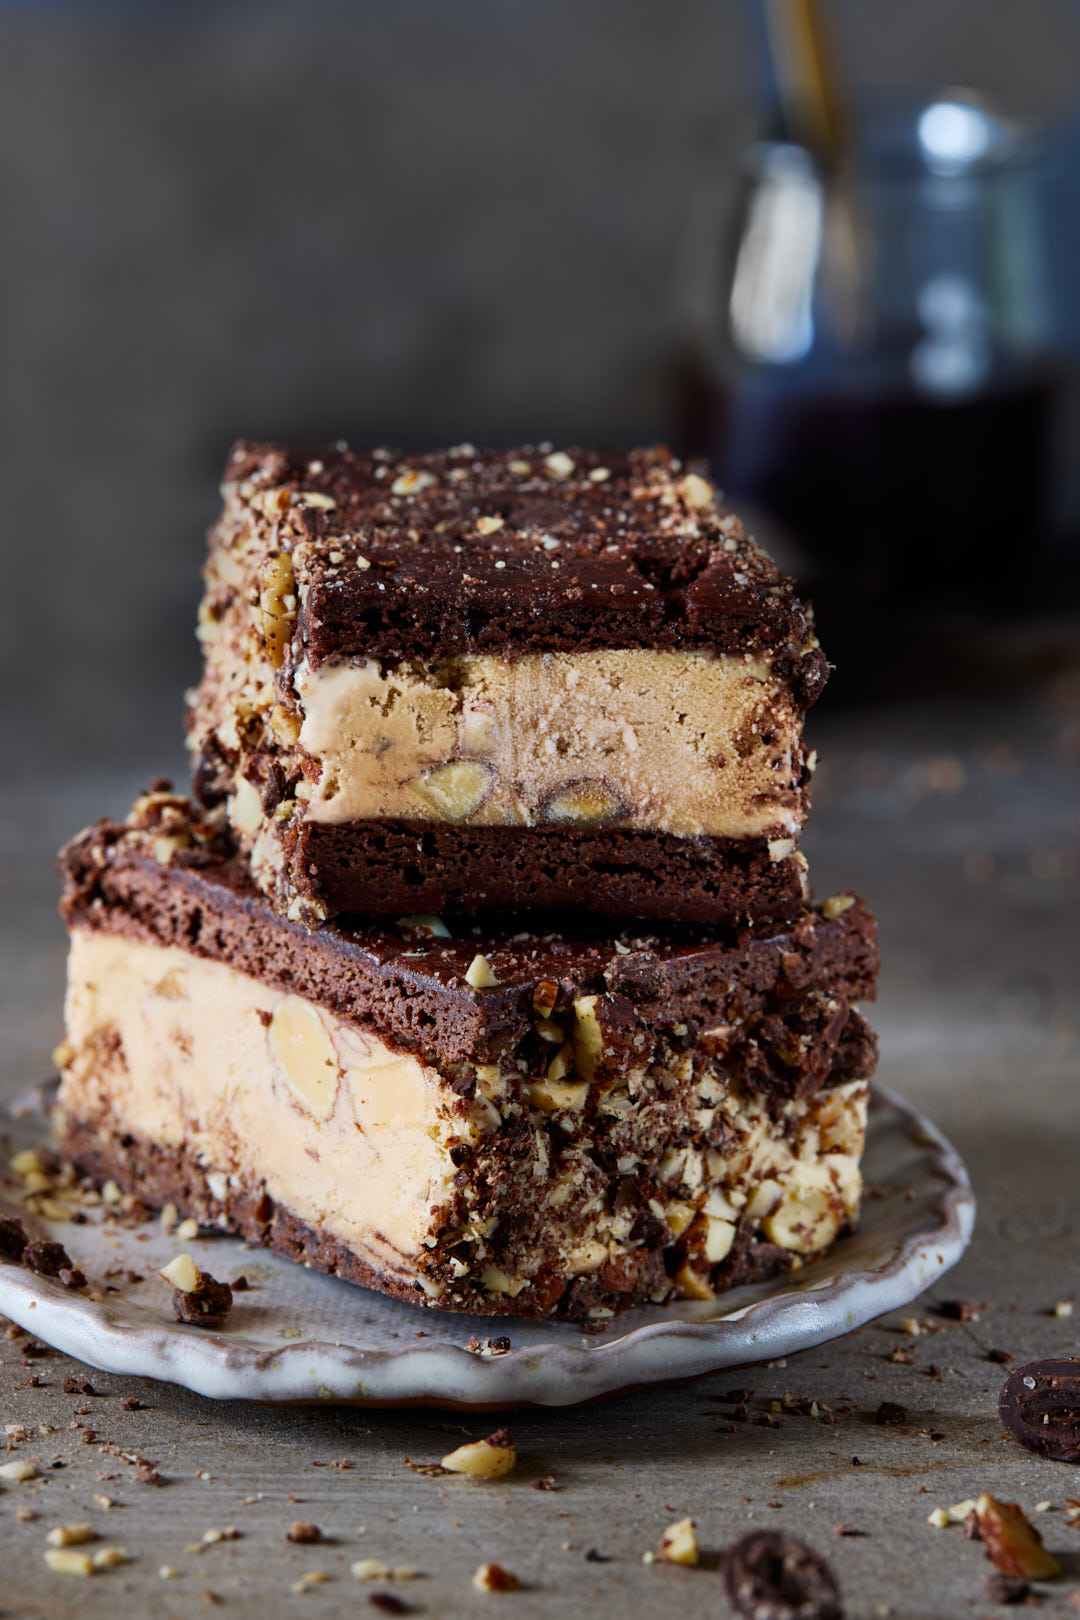
The problem with most homemade ice cream sandwiches is that the cookie part of the sandwich becomes rock hard upon freezing. It becomes impossible to take a bite and the ice cream just squishes out and makes a huge mess. You need a cookie with a soft texture.
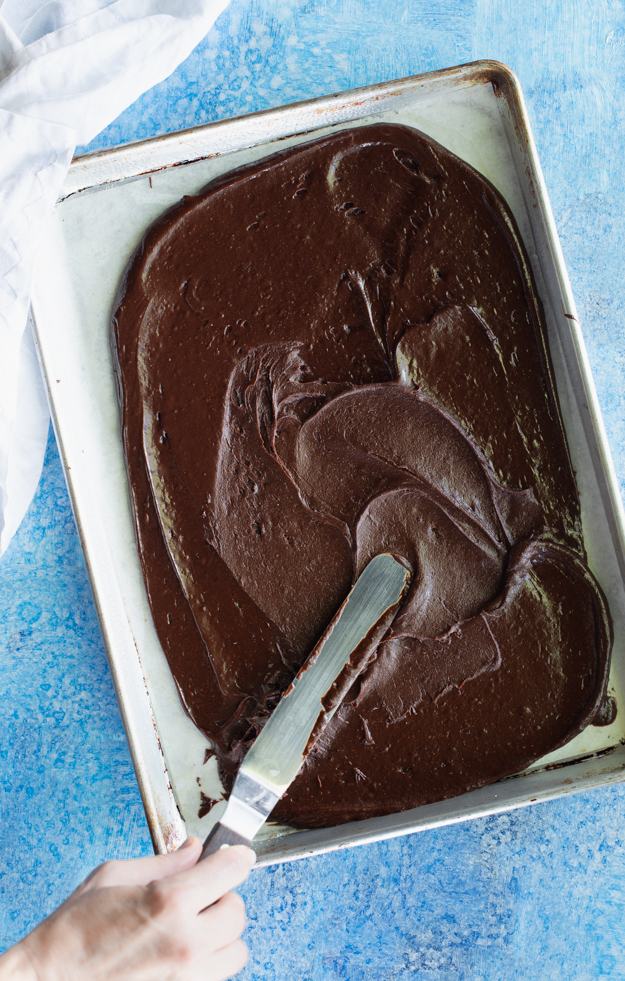
The talented folks at America’s Test Kitchen have figured out how to make a squidgy chocolate wafer, just like the classic ice cream sandwich of my youth. A chocolate wafer, so moist, it stuck to the paper wrapper. I had to lick the chocolate crumbs off my fingers when I was all done. The secret ingredient to keeping that cookie layer super fudgy is chocolate syrup. All the ingredients are mixed in a bowl and spread into a thin layer on a baking sheet.
For the ice cream filling, I had no interest in recreating the bland, insipid vanilla ice cream center of my youth. My goal was the ultimate ice cream sandwich. I decided to fill mine with Mocha Almond Fudge Ice Cream, my spin on Baskin & Robbins Jamoca Almond Fudge.
The last time I made this ice cream I just scooped it into cones. I think the ice cream sandwiches take it to another level. I dipped the short sides of the sandwiches in a mixture of crushed chocolate covered espresso beans and chopped toasted almonds. The textural crunch they provide balance the soft ice cream and squishy cookie layer. Perfection.
Freeze the work bowl of an ice cream maker according to the manufacturer's instructions. Usually, it needs at least 24 hours in the freezer before you start, so plan accordingly.
In a large measuring cup or bowl with a spout, whisk together milk, cream, sugar, corn syrup, espresso powder, vanilla and salt.
Turn on ice cream machine and pour mixture into canister. Freeze for about 20-25 minutes, until the ice cream has soft serve consistency. Add almonds during the last minute of mixing.
Warm hot fudge sauce slightly, so that it has a drizzling consistency. Set out a 9×5 inch loaf pan to transfer the ice cream into.
Drizzle ¼ of the hot fudge sauce into the empty loaf pan. Scoop ⅓ of the ice cream over the fudge sauce and smooth out with a spatula. Continue drizzling and layering ice cream until you have 3 layers of ice cream and 4 layers of sauce. Freeze for at least 4 hours, until firm.
Chocolate Cookies
Adjust oven rack to middle position and heat to 350°F. Lightly spray two 9×13 inch quarter-sheet pans with non-stick cooking spray and line with parchment paper (do not grease parchment).
Sift flour, cocoa, salt, and baking soda into medium bowl.
Beat eggs, sugar, and chocolate syrup in large bowl until light brown. Add melted butter and whisk until fully incorporated.
Add dry ingredients to egg mixture. With rubber spatula, gradually incorporate dry ingredients into wet; stir until evenly moistened and no dry streaks remain. Pour half the batter into each prepared baking sheet. Use an offset metal spatula to spread batter evenly in pan. Bake until cookie springs back when touched with finger, 10 to 12 minutes. Cool in pan on wire rack 5 minutes, then run paring knife around perimeter of baking sheets to loosen.If you want the classic look of a store bought ice cream sandwich, dock the surface with a fork. Invert cookie onto work surface or large cutting board; carefully peel off parchment. Cool to room temperature, about 30 minutes.
Assemble Sandwiches
Line one 9×13 inch quarter sheet pan with plastic wrap, leaving a 4 inch overhang on each of the four sides. Place one cooled chocolate cookie, upside down, onto plastic wrap.
Remove ice cream from freezer and let sit at room temperature for a few minutes to soften. Scoop the ice cream onto the cookie in the pan, and using an offset spatula, spread it out evenly. Top with second chocolate cookie. Cover with overhanging plastic wrap and freeze for at least 8 hours.
Unwrap ice cream sandwich and place on cutting board. Cut into 12 rectangles. Place ice cream sandwiches back onto baking sheet to keep frozen while you get the decorating ingredients ready to use.
Mix chopped chocolate covered coffee beans and chopped almonds together and place in a shallow bowl. Remove ice cream sandwiches from freezer and press the long sides of each sandwich into the crumble mixture. Wrap each sandwich in plastic wrap and store in freezer bag until ready to serve.
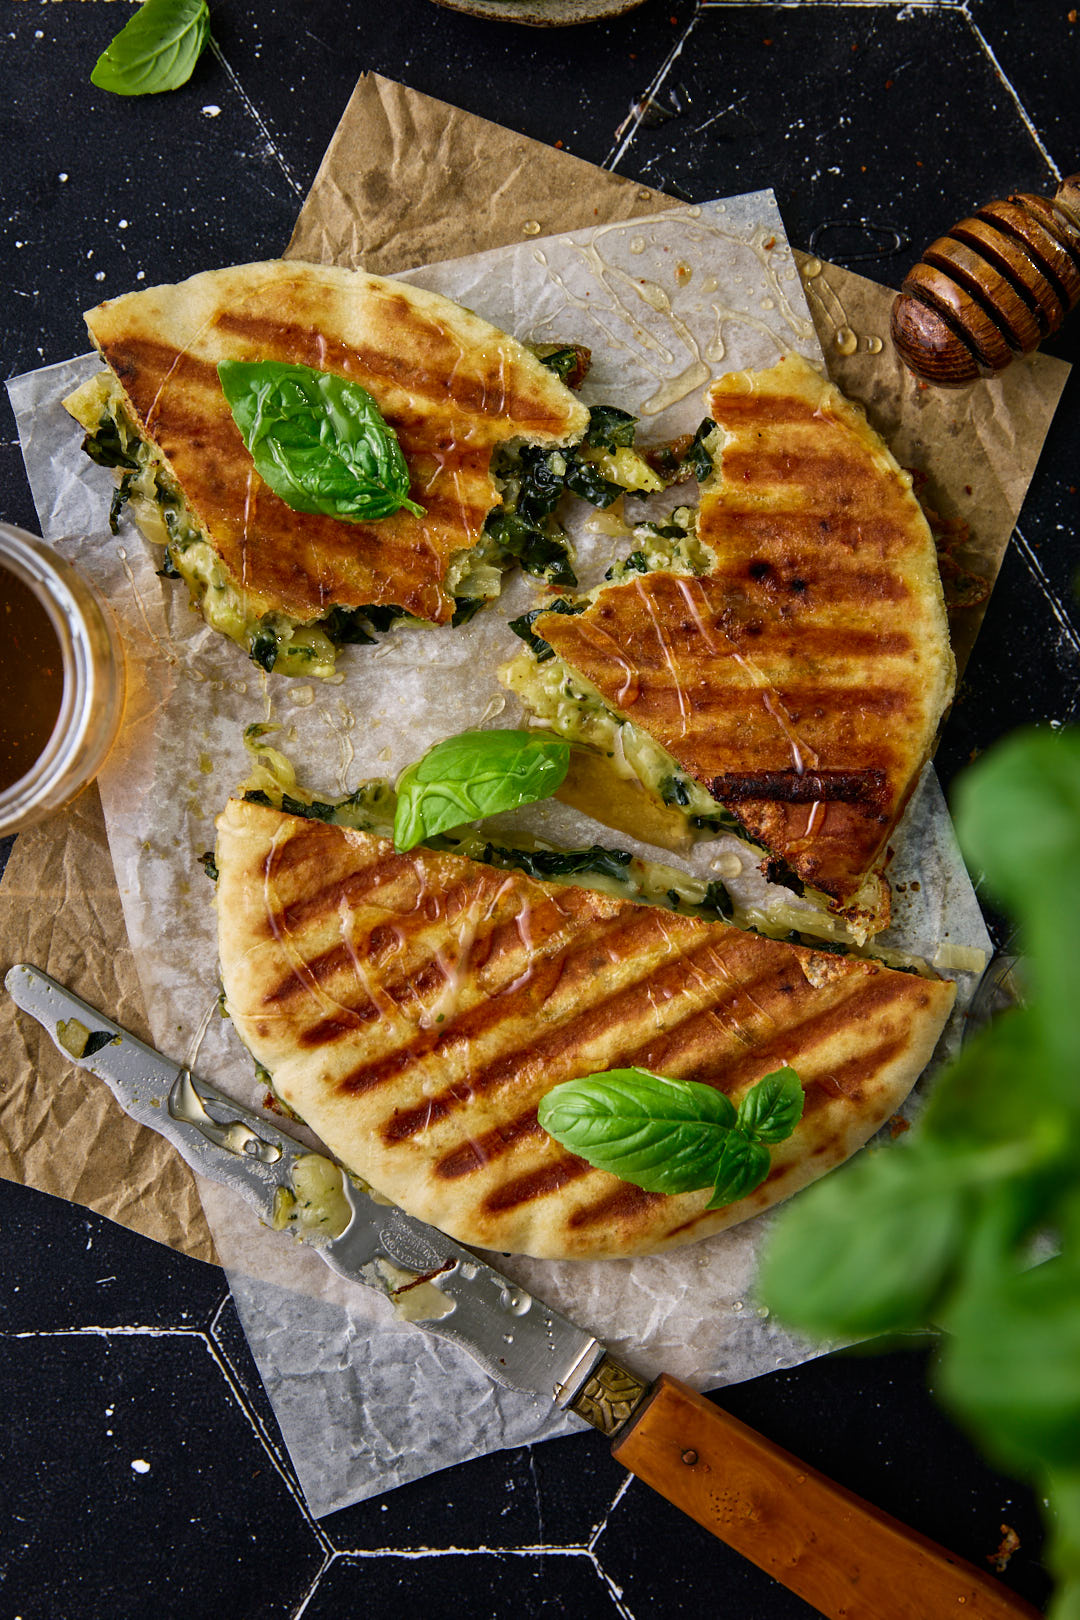
This cheesy kale pita panini will turn kale haters into believers. This is a decidedly adult grilled cheese sandwich that will have you craving kale. A heap of kale, flavoured with onions, garlic and Aleppo pepper wilts down into a glorious pile of shiny tangy greens. Mixed with some mozzarella, Fontina and Gouda, this panini will satisfy both your grilled cheese craving and your need for green nutrients. Don’t omit the finishing drizzle of hot honey.
Check out how it all comes together:
Get to Know the Different Varieties of Kale
If you had told me a few years ago that I would actually crave a kale salad, I would have thought you were crazy. I used to hate kale. It made my throat itchy.
Apparently, I was doing it all wrong. I was buying curly kale, and using it raw, in salads. Curly kale is best for blending into smoothies or sauteeing, stews and soups, where the heat can mellow it’s bitter bite.
For eating raw, Tuscan Kale (aka Lacinato Kale or Dinosaur Kale or Cavalo Nero/Black Kale) is a better choice. It is a bit more tender than the curly variety and the flavour, while still quite earthy, has an almost nutty sweetness. You need to remove the stems, slice it quite thinly and let it sit in the dressing for about 10 minutes before serving. That will help to tenderize it.
Keys to Success for Cheesy Kale Pita Panini
If you don’t have a panini press, just heat a frying pan over medium heat. Place stuffed pita onto the hot pan. Place another heavy pan, like a cast iron pan, onto the sandwich, then add two heavy cans to the top pan. Press down on the cans to compress the sandwich.
Since you are sautéing the kale, either curly or Tuscan kale can be used here. Just make sure you remove the leaves from the stems and slice them very thinly.
For the cheese, use a good mix of flavourful melting cheeses. I used mozzarella, Gouda and Fontina. Monterey Jack would be a good choice as well.
Rather than trying to cut a pocket into the pita to stuff it, make your life easier and just slice the pita in half so that you can top it like a sandwich made with two slices of bread.
Don’t be shy with the Aleppo pepper or red pepper flakes. Cheese is bland and needs something to wake it up.
Be picky about your pita. Not all pita bread is created equal. There are some brands out there that have the texture of cardboard. You want a thick fluffy pita. I love Angel Bakeries pita (I find it at Whole Foods).
Wash kale leaves. Strip kale leaves from stem. I find the tip of a paring knife is the best job for separating the leaf from the stem. Discard stems. Pile the leaves up and use a sharp chef's knife to slice across into 1/4 inch strips.
Heat a large sauté pan over medium heat. Add olive oil and diced onions. Sauté over medium heat until onions are tender, about 4-5 minutes. If onions start to burn add about 1/4 cup water. Add minced garlic and cook for an additional minute. Stir in Aleppo pepper.
Add kale and cook, tossing, until kale is wilted down. This will take 1-2 minutes. Transfer kale and onions to a large mixing bowl.
Add pesto, shredded cheese, salt and pepper to kale mixture. Mix well until everything is well combined.
Preheat panini press. (see note if you do not have panini press). Slice pita in half horizontally, and spread 1/4 of the kale and cheese mixture onto each pita. Brush both sides of pita with olive oil.
Place 2 pita onto the panini maker and grill for about 5 minutes, until cheese is melted and pita is golden brown. If using a skillet, flip the pita over at the 3 minute mark and grill for an additional 2 minutes. Repeat with remaining 2 pita.
Drizzle with hot honey and serve.
Notes
If you don’t have a panini press, just heat a frying pan over medium heat. Place stuffed pita onto the hot pan. Place another heavy pan, like a cast iron pan, onto the sandwich, then add two heavy cans to the top pan. Press down on the cans to compress the sandwich.
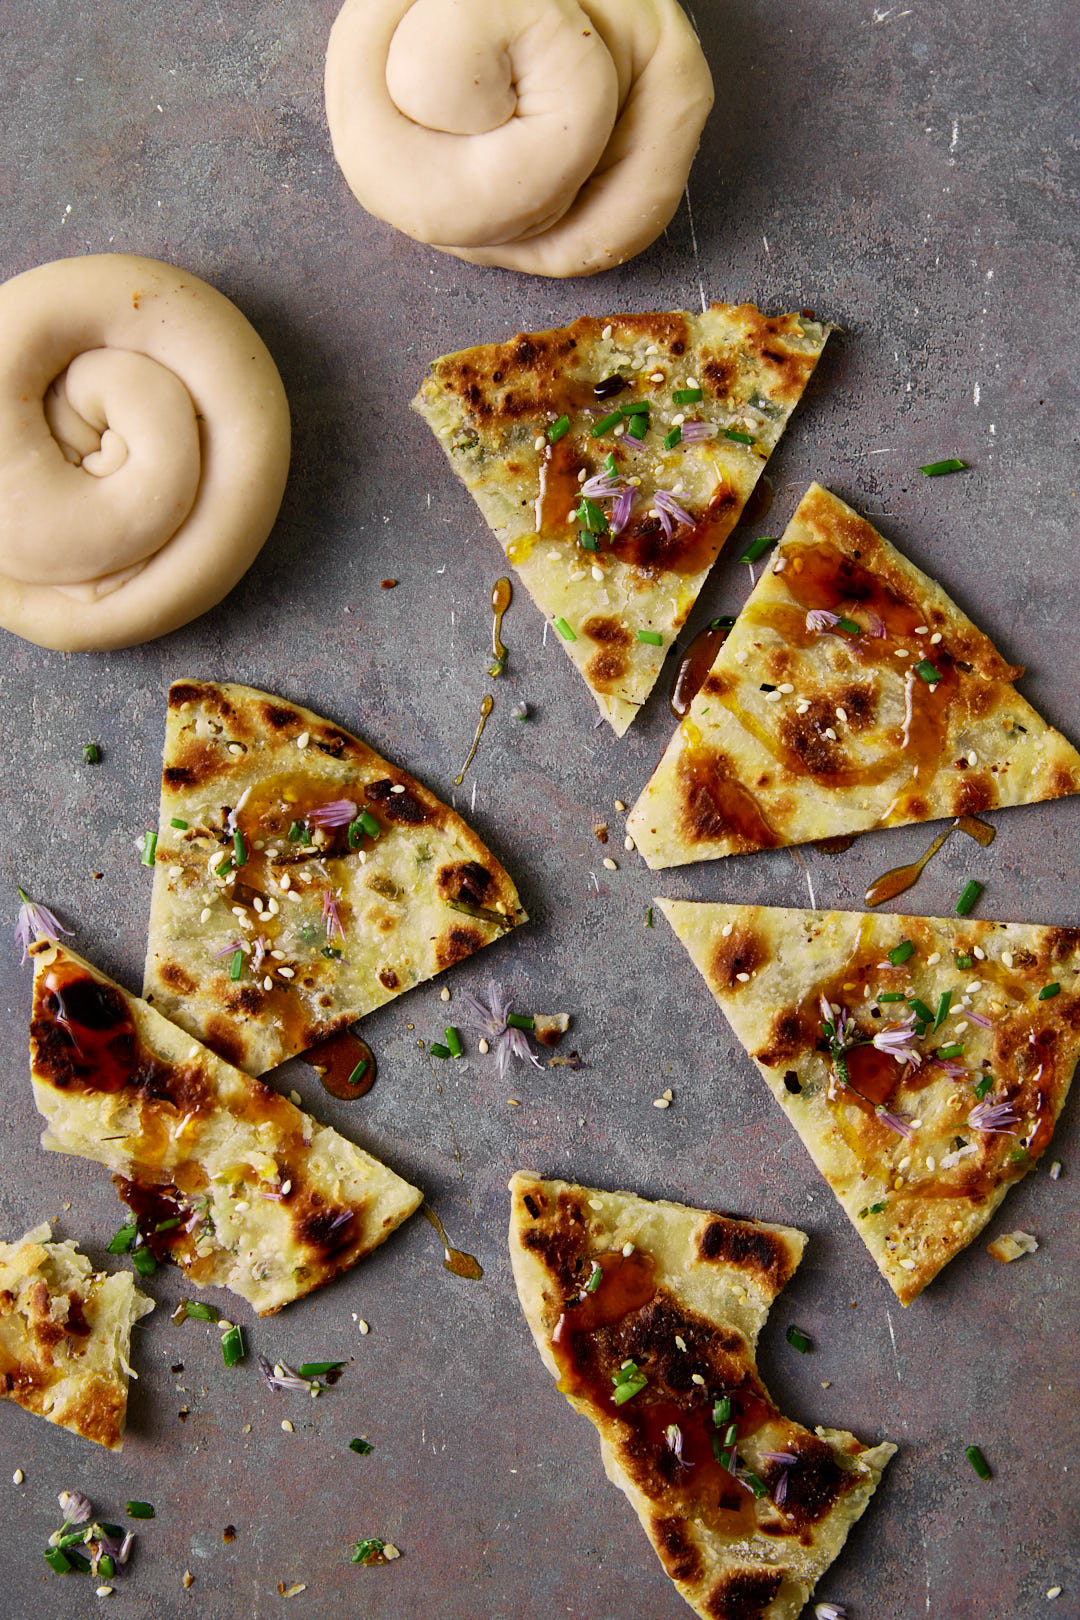
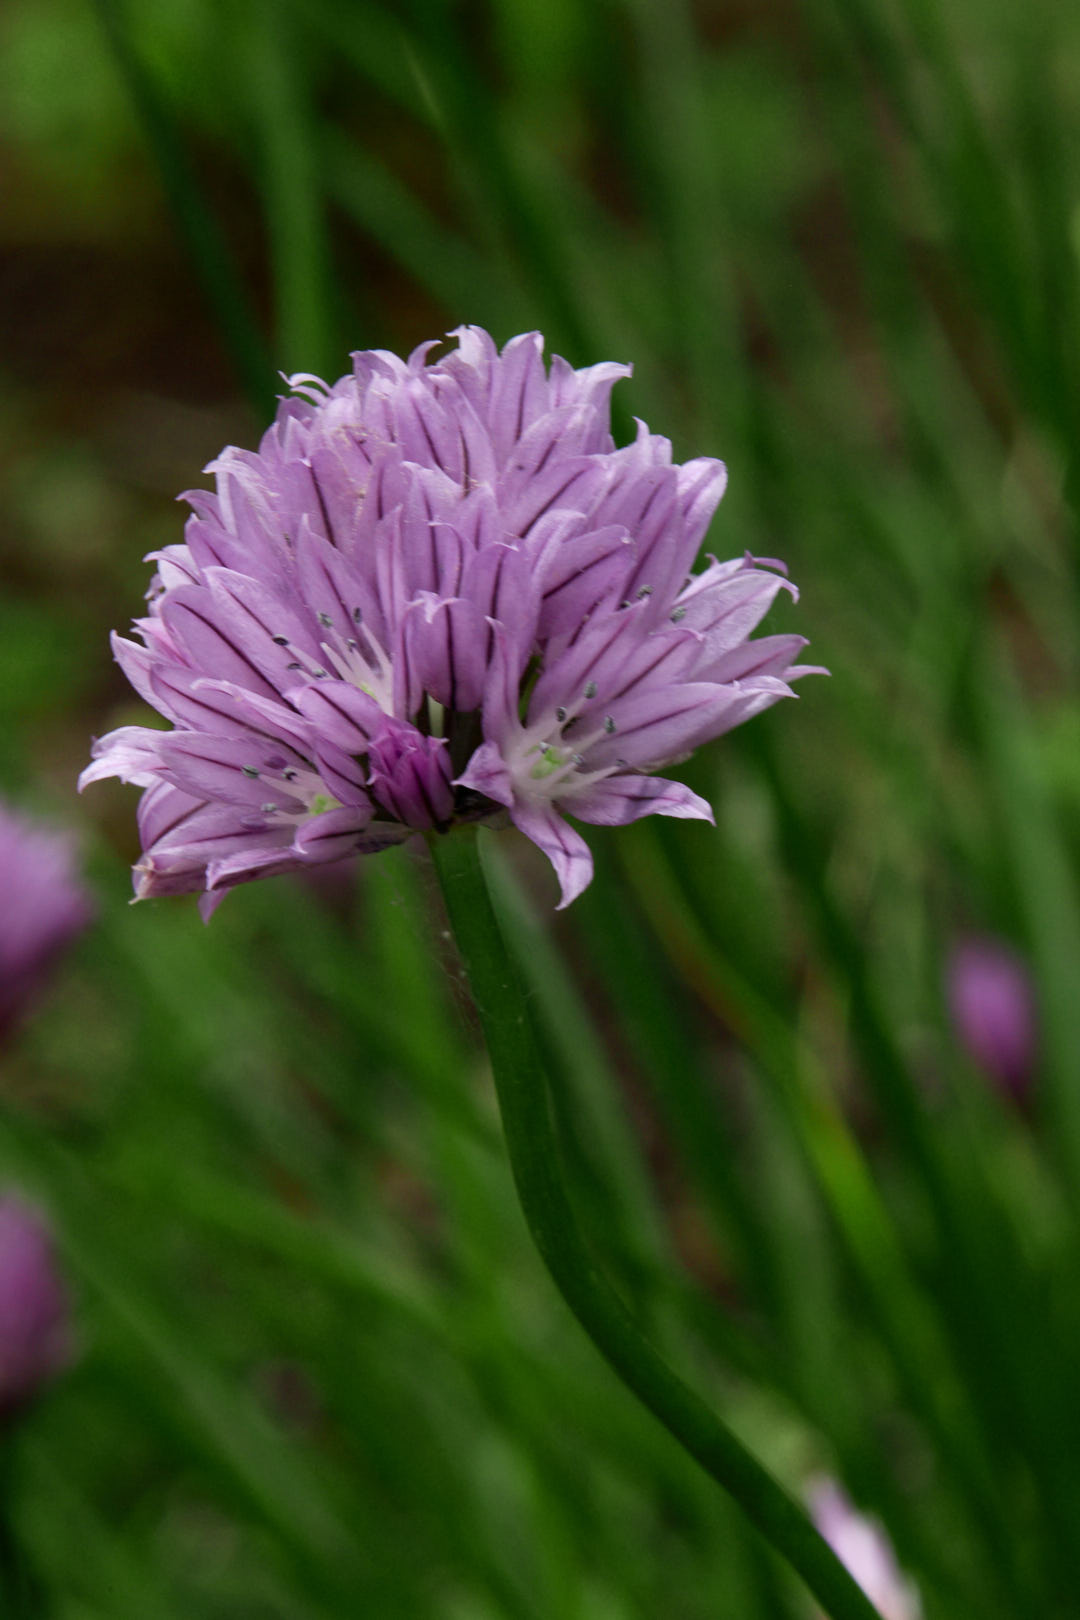
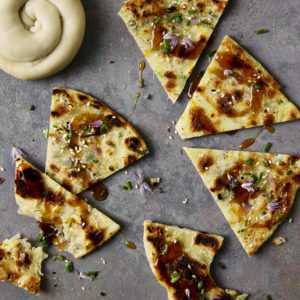
Chive Blossom Chinese Pancakes, not to be confused with the traditional Western sweet breakfast pancake, are a savoury snack. Traditionally the dough is sprinkled with scallions and sesame oil, rolled up and coiled into a spiral and then flattened out into a disc and pan-fried.
My chives have all flowered, and after last year’s success with creating Chive Blossom Butter, I was excited to find another way to use up those gorgeous chive blossoms.
I scattered my dough with toasted sesame seeds, finely chopped chives and their vibrant purple flowers for a yummy aperitivo snack. Ultra crispy and flaky on the outside and slightly chewy inside, these are addictive.
Watch how they come together.
A hot water dough for Chive Blossom Chinese Pancakes
Commonly, the dough for most Chinese pastries, like dumplings and these pancakes, is made with hot water. This is counterintuitive to everything we have been taught about pastry. Pie dough and biscuits are made with ice cold ingredients. But, the hot water acts to inhibit gluten formation. This dough rolls out so easily and is a dream to work with. A dough with a lower gluten content will be more tender. This is what we want in these pancakes. They will still have a pleasant chew.
The secret to flaky layers in Chive Blossom Chinese Pancakes
Traditionally, the dough for Chinese pancakes is made with hot water and flour. But I came across a recipe for Scallion Pancakes, by food journalist Julie Van Rosendaal that added butter to the dough. I was intrigued. First of all, butter equals flavour, and secondly, if you think about traditional butter pastries, like croissants and puff pastry, butter adds layers of flakiness. In forming these pancakes, you are in essence performing a mini lamination.
I added butter in two forms. Solid butter is worked into the flour, with your fingertips, so that you have flat shards of butter, that will release steam when it hits the hot oven, contributing to flaky layers. The second addition of butter is melted butter. After rolling the dough flat it gets brushed with melted butter and rolled up a second time to create more flaky layers. J Kenji Lopez-Alt, had the genius idea to add a second rolling and coiling of the dough, to enhance those flaky layers. It’s a small additional step, but the payoff is worth it.
What to serve these with
I made Kenji’s soy dipping sauce, loaded with ginger and scallions. It is very delicious. I also added a big drizzle of Mike’s Hot Honey just before serving and that sweet heat was fantastic. If you’re feeling fancy, a glass of Prosecco is the perfect accompaniment for aperitivo hour.
Make ahead tips
The pancakes freeze beautifully. After the final rolling, I layered the uncooked pancakes between sheets of parchment or waxed paper and slid them into a freezer bag . I cooked them right from frozen, no defrosting. The cooking time was slightly longer.
In a medium bowl, stir together the flour, baking powder and salt. Rub in 28 grams of butter. Stir in the hot water until you have a soft dough. Turn it out onto the countertop and knead for a few minutes, until it’s smooth. Return it to the bowl, cover with a towel and set aside for 30 minutes.
Using sharp scissors, snip the chive flower blossoms into individual petals. Place in a small bowl. Using scissors or knife, finely slice chives into bowl with blossoms. Mix and set aside.
Divide the dough into four pieces and roll each into a rectangle (it can be oval-ish) as thin as you can – about 7×10 inches, with a long side facing you. Brush with the melted butter.
Starting at a long side, roll up tightly into a long roll, and then shape it into a coil. Repeat with the remaining 3 pieces of dough and let them rest for about five minutes.
Flatten each coil, gently with your hand, then re-roll into a 7×10 inch rectangle/oval for the second time.
Brush with another layer of melted butter and sprinkle with 1/4 teaspoon salt, 1/4 of the chives and chive blossom mixture and 1/4 of the toasted sesame seeds and roll up tightly into a long roll, and then shape it into a coil. Flatten coil gently, with your palm and re-roll into a 7-inch disk, about 1/4 inch thick. Repeat with remaining dough balls.
In a small bowl, whisk together sauce ingredients and set aside at room temperature.
Drizzle 1 tablespoon vegetable oil into in an 8-inch nonstick pan and heat over medium-high heat. Carefully slip pancake into hot oil. Cook, shaking pan gently, until first side is an even golden brown (about 2 minutes). Carefully flip with tongs and continue to cook, shaking pan gently, until second side is an even golden brown (about 2 minutes longer). Transfer to a paper towel-lined plate to drain. Season with salt and cut into 6 wedges. Repeat with remaining 3 pancakes. Drizzle with hot honey, if using, and serve immediately with dipping sauce.
Notes
This recipe is adapted from Julie Van Rosendaal’s recipe for Spring-Onion Cakes (Globe and Mail May 23, 2024) and Serious Eat’s Recipe for Extra-Flaky Scallion Pancakes. The additional step of a second layer of lamination is what gives a super flaky pancake. This was the genius idea of Kenji López-Alt at Serious Eats. The drizzle of hot honey was my idea. I loved the addition of sweet heat to these pancakes. I’m planning to serve these all summer long at Aperitivo hour with a glass of Prosecco. They freeze beautifully too, if you want to make them in advance and have them ready to go. Freeze them, rolled flat and uncooked, between pieces of waxed paper or parchment, and cook them straight from frozen
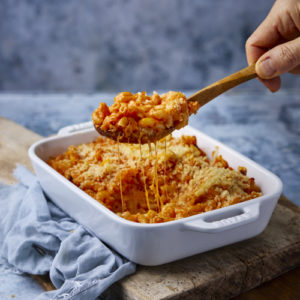
My husband’s side of the family is putting together a cookbook of favourite family recipes. When they polled the family, Bubbe Bess’ Tomato Macaroni and Cheese was at the top of the list for recipes that must be included. It occurred to me that I had never blogged about it, so I’m sharing the recipe with you today.
Sam Sifton, former NY Times food critic developed something he called the “Pizza Cognition Theory “(PCT). He posited that, “The first slice of pizza a child sees and tastes …, becomes, for him, pizza.” The same could be applied to any food really. When I was growing up, mac and cheese came in a box. (KD, or Kraft Macaroni and Cheese if you live in the USA).
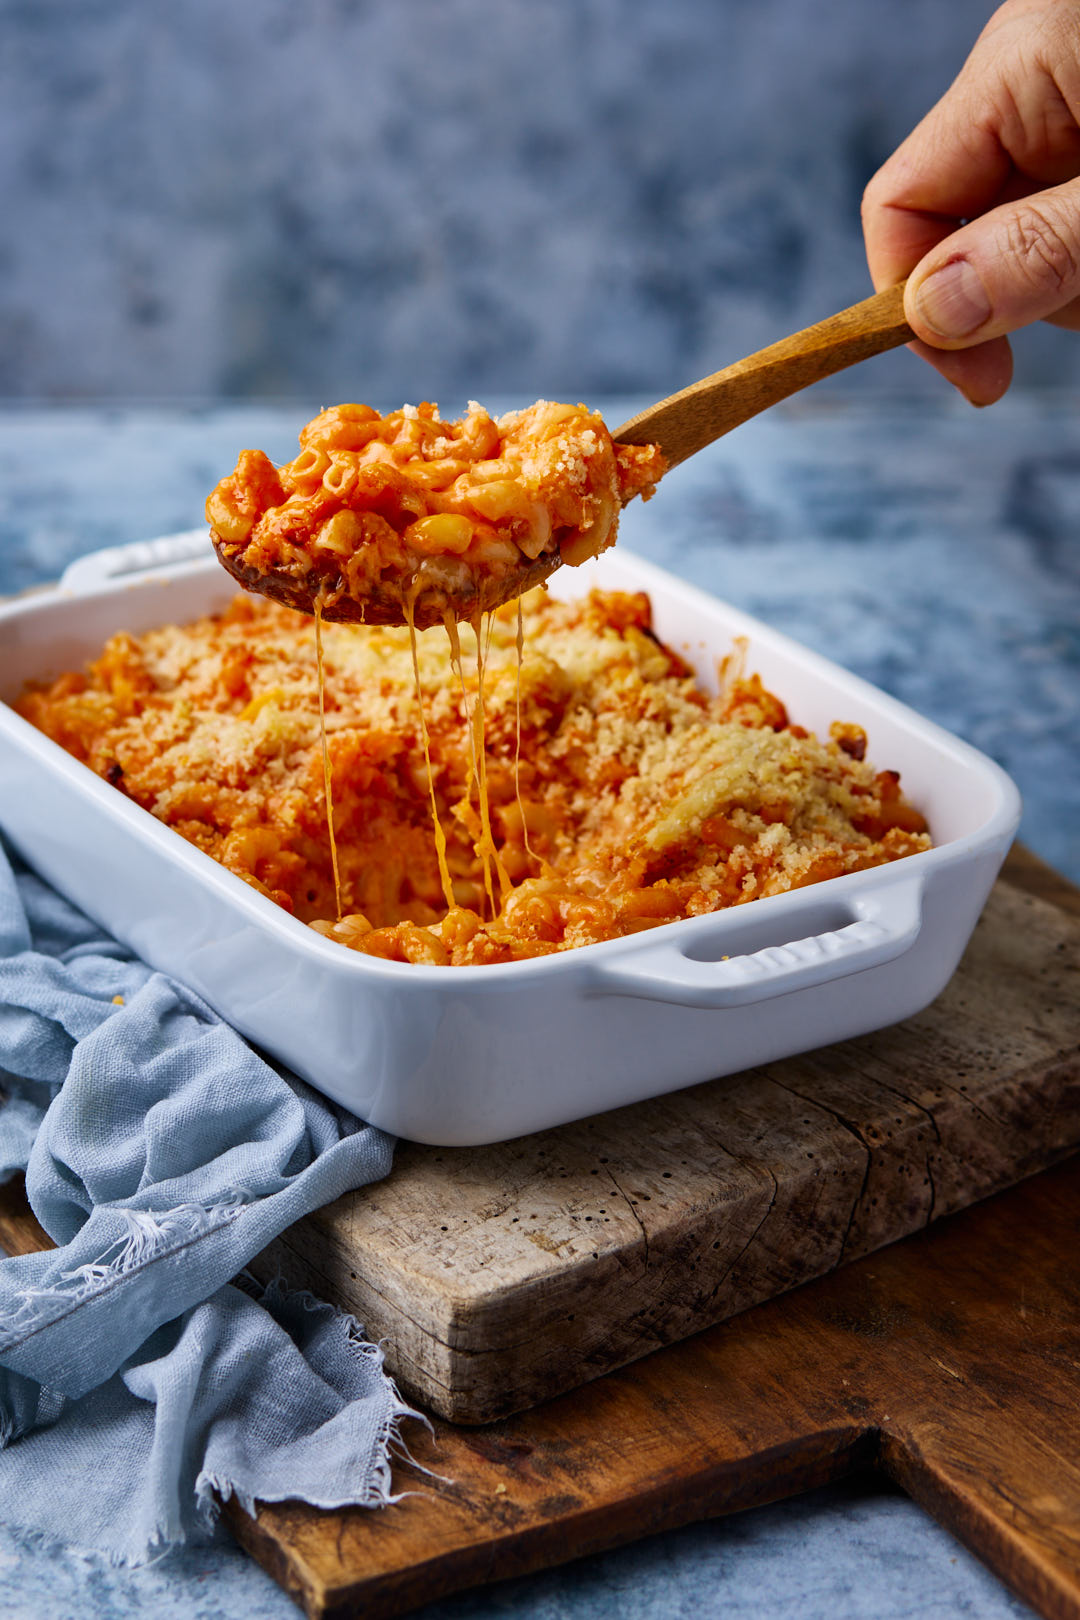
Macaroni and cheese for my husband was something else entirely. He grew up with his mom’s (Bess) mac and cheese. Her version, a Tomato Macaroni and Cheese, forgoes the making of a traditional roux. She relied on a very unusual ingredient to add richness and creaminess. Canned tomato soup.
Watch how it comes together.
When I was introduced to my husband’s childhood mac and cheese, I was stunned. But I must admit, it has grown on me over the years. I love the tang that the tomato brings to the dish. I adapted Bess’ Tomato Macaroni and Cheese recipe slightly by adding some cream to the mix, as I found it to be a bit dry without it.
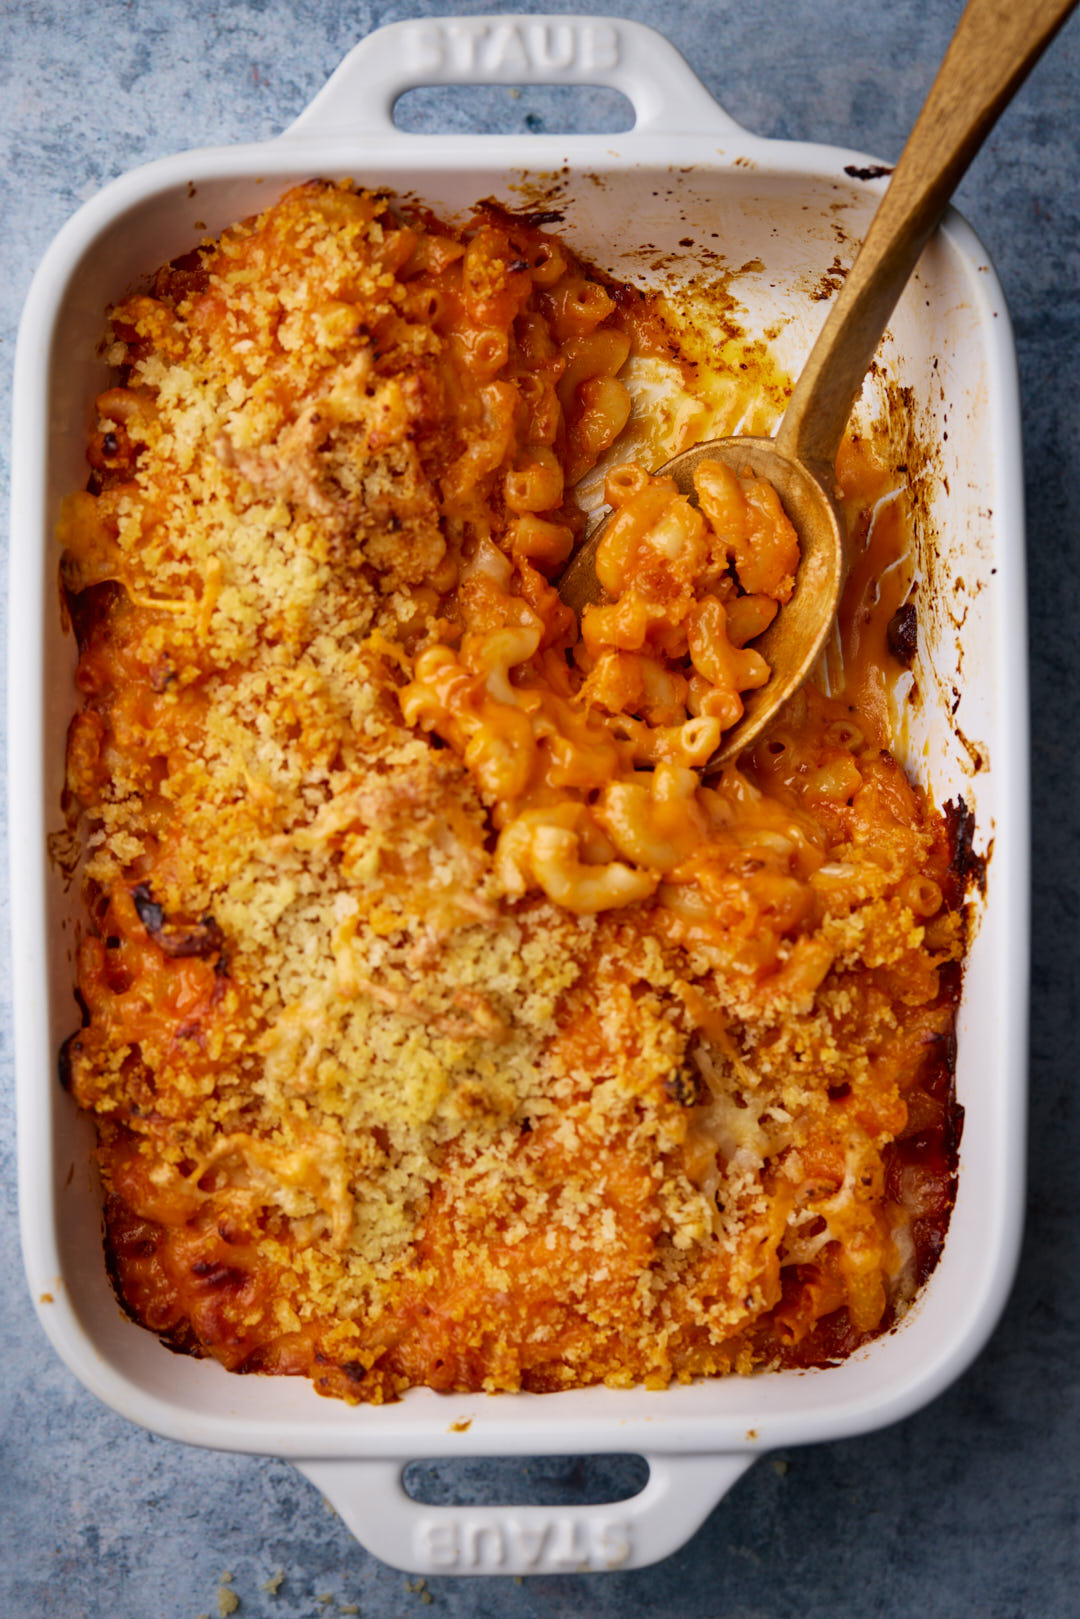
Breaking through the crispy golden breadcrumb topping to reveal the layer of creamy cheesy noodles is a study in textural contrast.
For my children and their cousins, this is the ultimate mac and cheese.
Bubbe Bess’ Macaroni and Cheese
A quick and easy macaroni and cheese that skips the step of making a roux. Canned tomato soup and cream combine with cheddar to make a rich and creamy casserole. A crispy golden breadcrumb topping adds great textural contrast to the cheesy tangy noodles.
Preheat oven to 325°F. Grease a 2 Quart casserole dish with butter and set aside.
Bring a large pot of water to a boil. Add 2 Tablespoons Diamond Crystal Salt to the water. Add macaroni and cook for 3 minutes less than the package instructions. Drain noodles and transfer back to pot.
Add grated cheddar, tomato soup and cream to the noodles in the pot. Mix well and transfer macaroni to the casserole dish.
Melt 2 Tablespoons butter in a large skillet. Add bread crumbs and toss until all the crumbs are coated. Cook for about another 2 minutes, tossing well. Spread breadcrumbs over top of casserole dish. Bake macaroni and cheese for 30 minutes until cheese is bubbling and top is golden brown.
Notes
This is my late mother-in-law’s recipe. I have adapted it slightly by adding a bit of cream to the mixture, as I found it to be a bit dry. My children and all their cousins think that this is the ultimate mac and cheese!
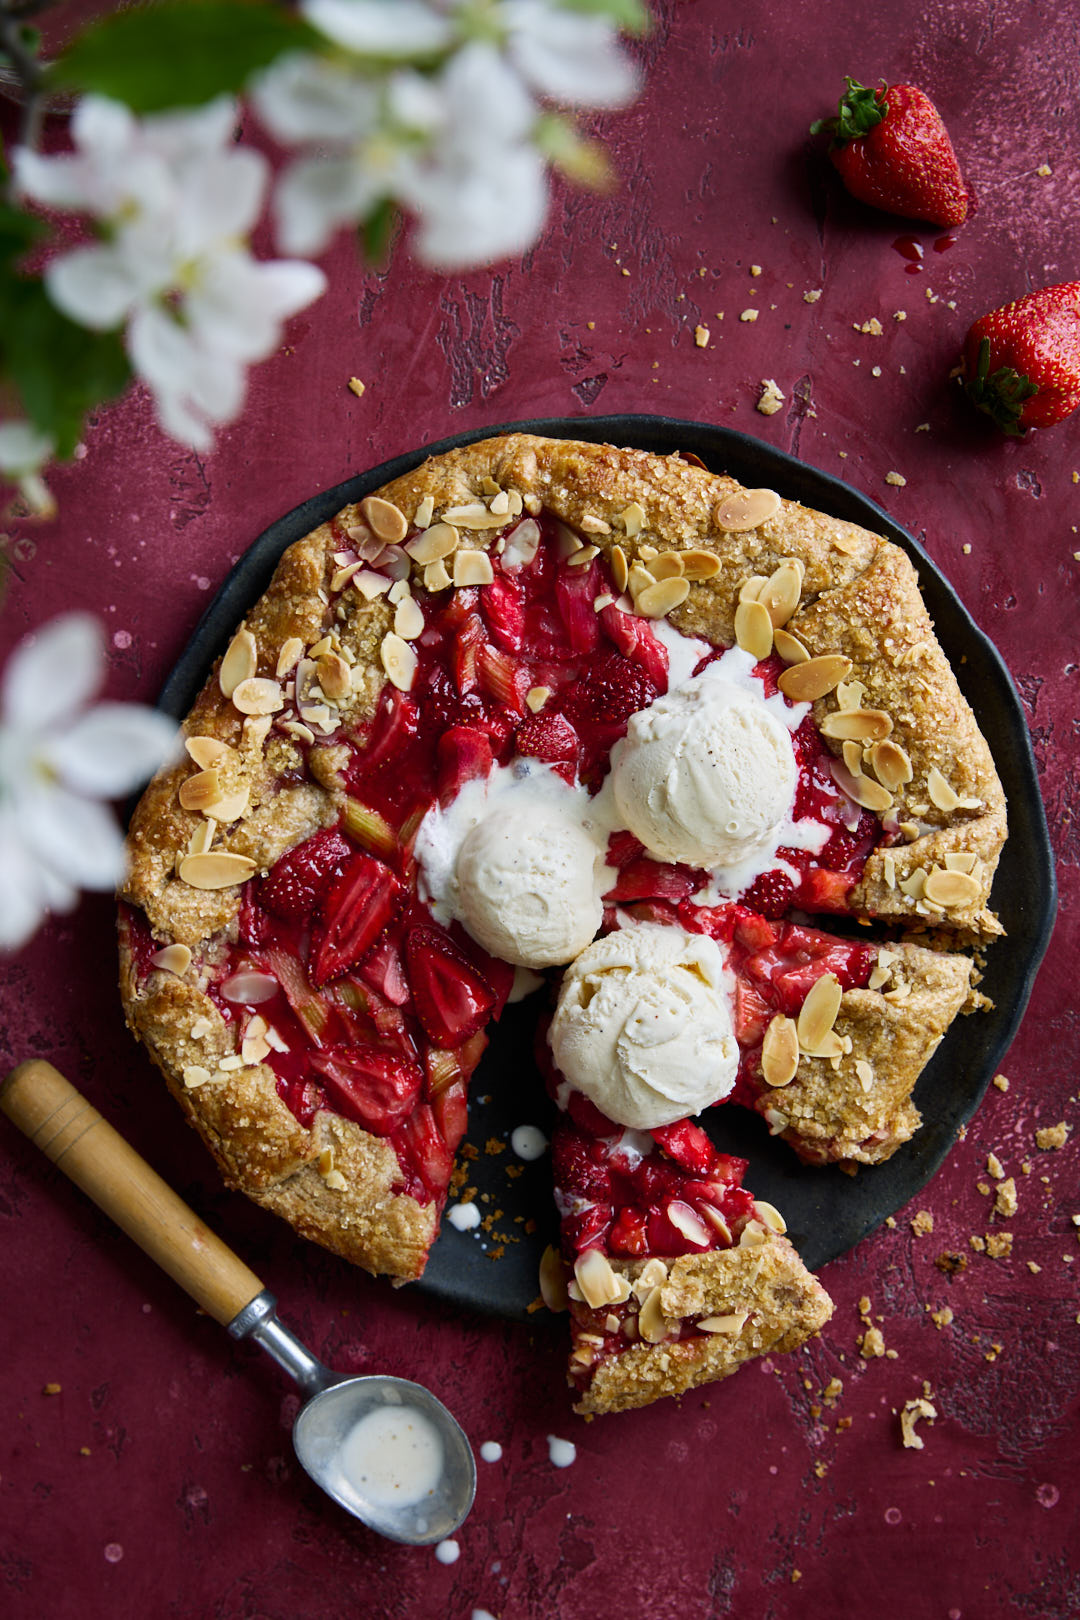
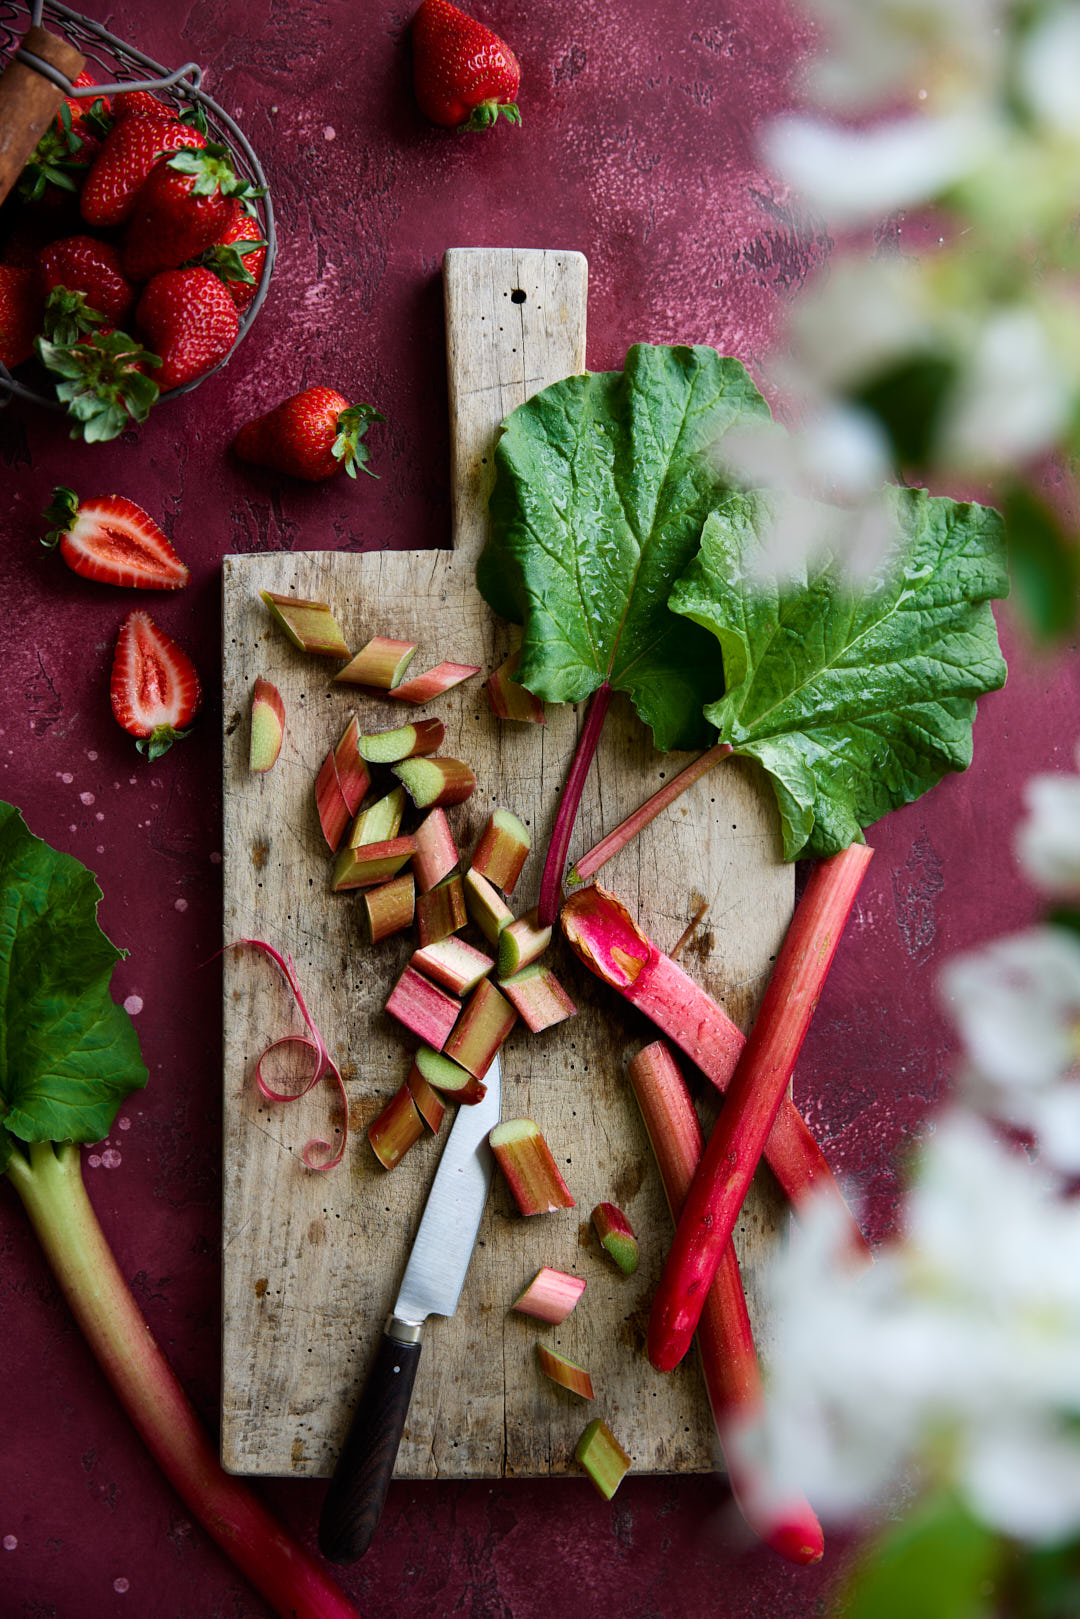
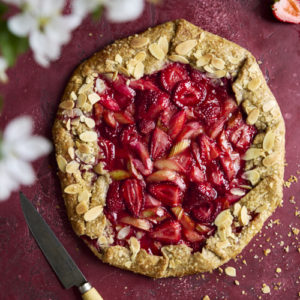
Rhubarb season is here and I am thrilled. Strawberries are a classic pairing with rhubarb, and they come together perfectly in this galette. What makes this the ultimate strawberry-rhubarb galette is the rye crust. Yes, of course you could just use store bought puff pastry or a ready made pie crust for this galette, but I implore you to try this rye crust. This rye crust recipe comes from the book, “Good to the Grain” by Kim Boyce and Amy Scattergood. It is flaky AF and I love the the nutty, subtle earthy flavour of the rye dough. It complements the sweetness of the strawberries and tanginess of the rhubarb.
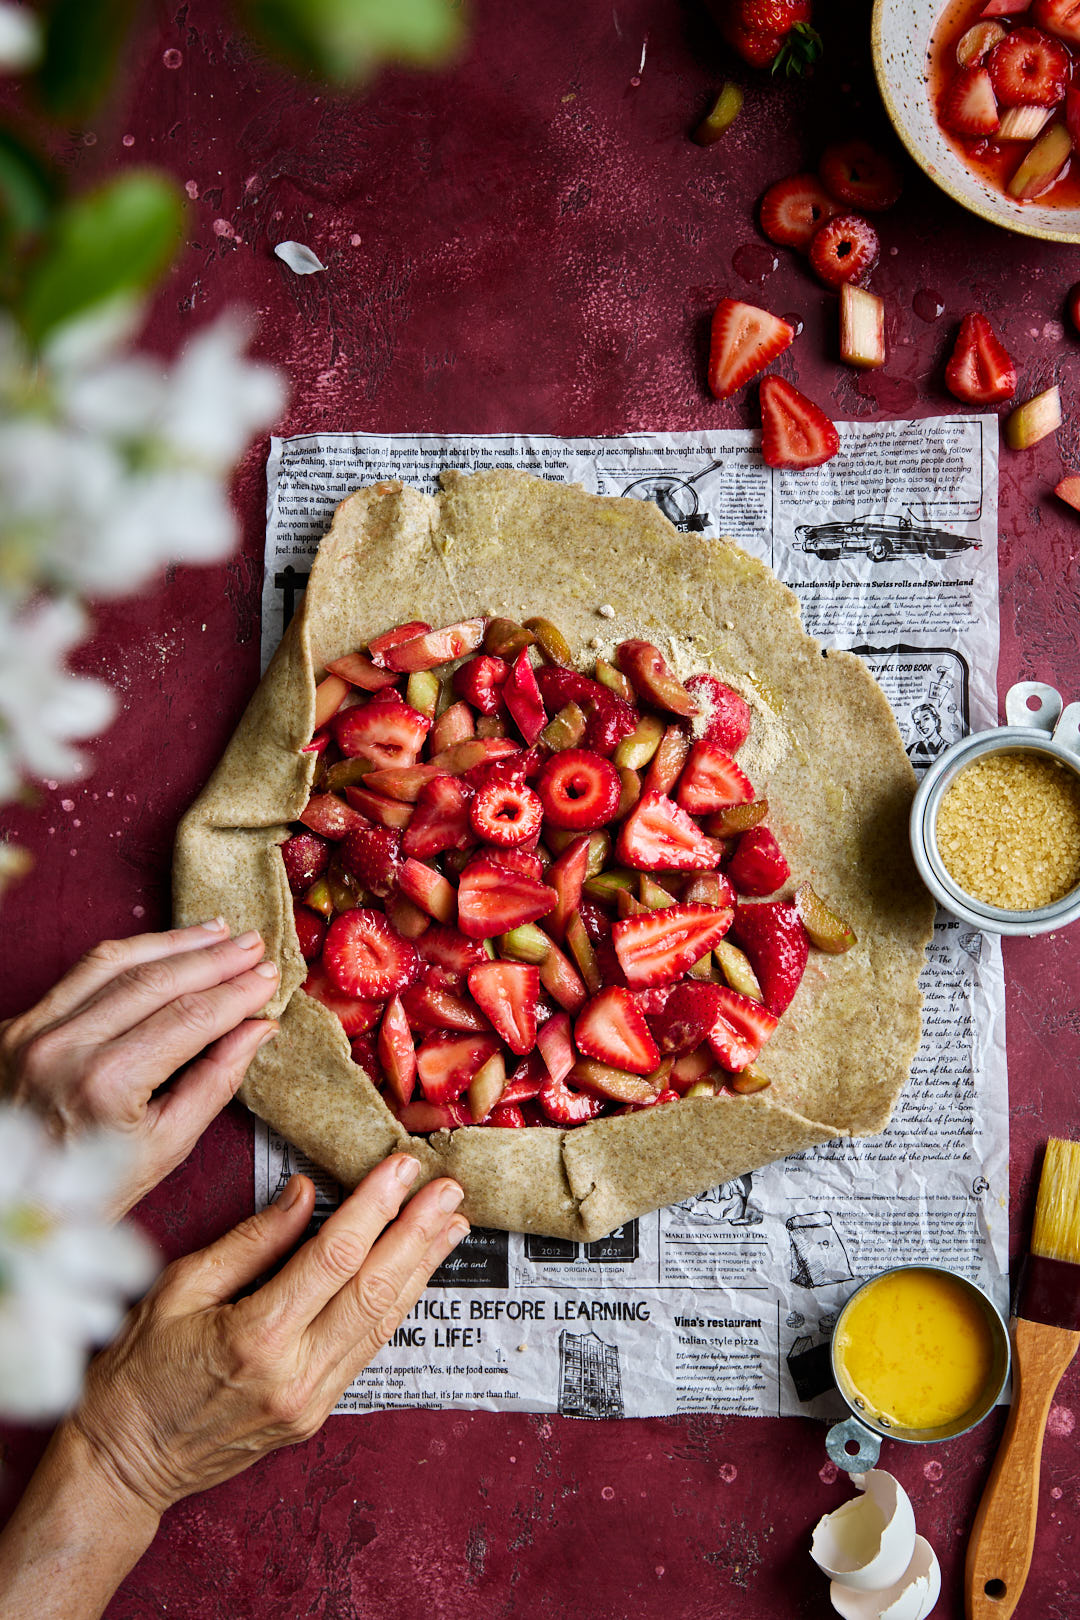
Start with making the dough. It will need time to chill. The butter must be ice cold when you work it into the flour. Don’t totally incorporate the butter. Only work it in until you can see pea sized pieces of butter. The pastry must be chilled for an hour before rolling it out.
Now here’s where the magic occurs. The dough is rolled out and folded into thirds, like a letter being stuffed out into an envelope. That rolling and folding is repeated 2 more times. What you are doing is creating distinct layers of dough and butter. Once the dough hits the hot oven, the water in the butter evaporates and creates steam. The steam gets trapped in the dough and creates air pockets. When the dough cools, you are left with delicate layers of the flakiest pastry. I could geek out on culinary alchemy all day. But suffice it to say, it’s worth taking the time to make this crust. You will be rewarded with the Ultimate Strawberry Rhubarb Galette.
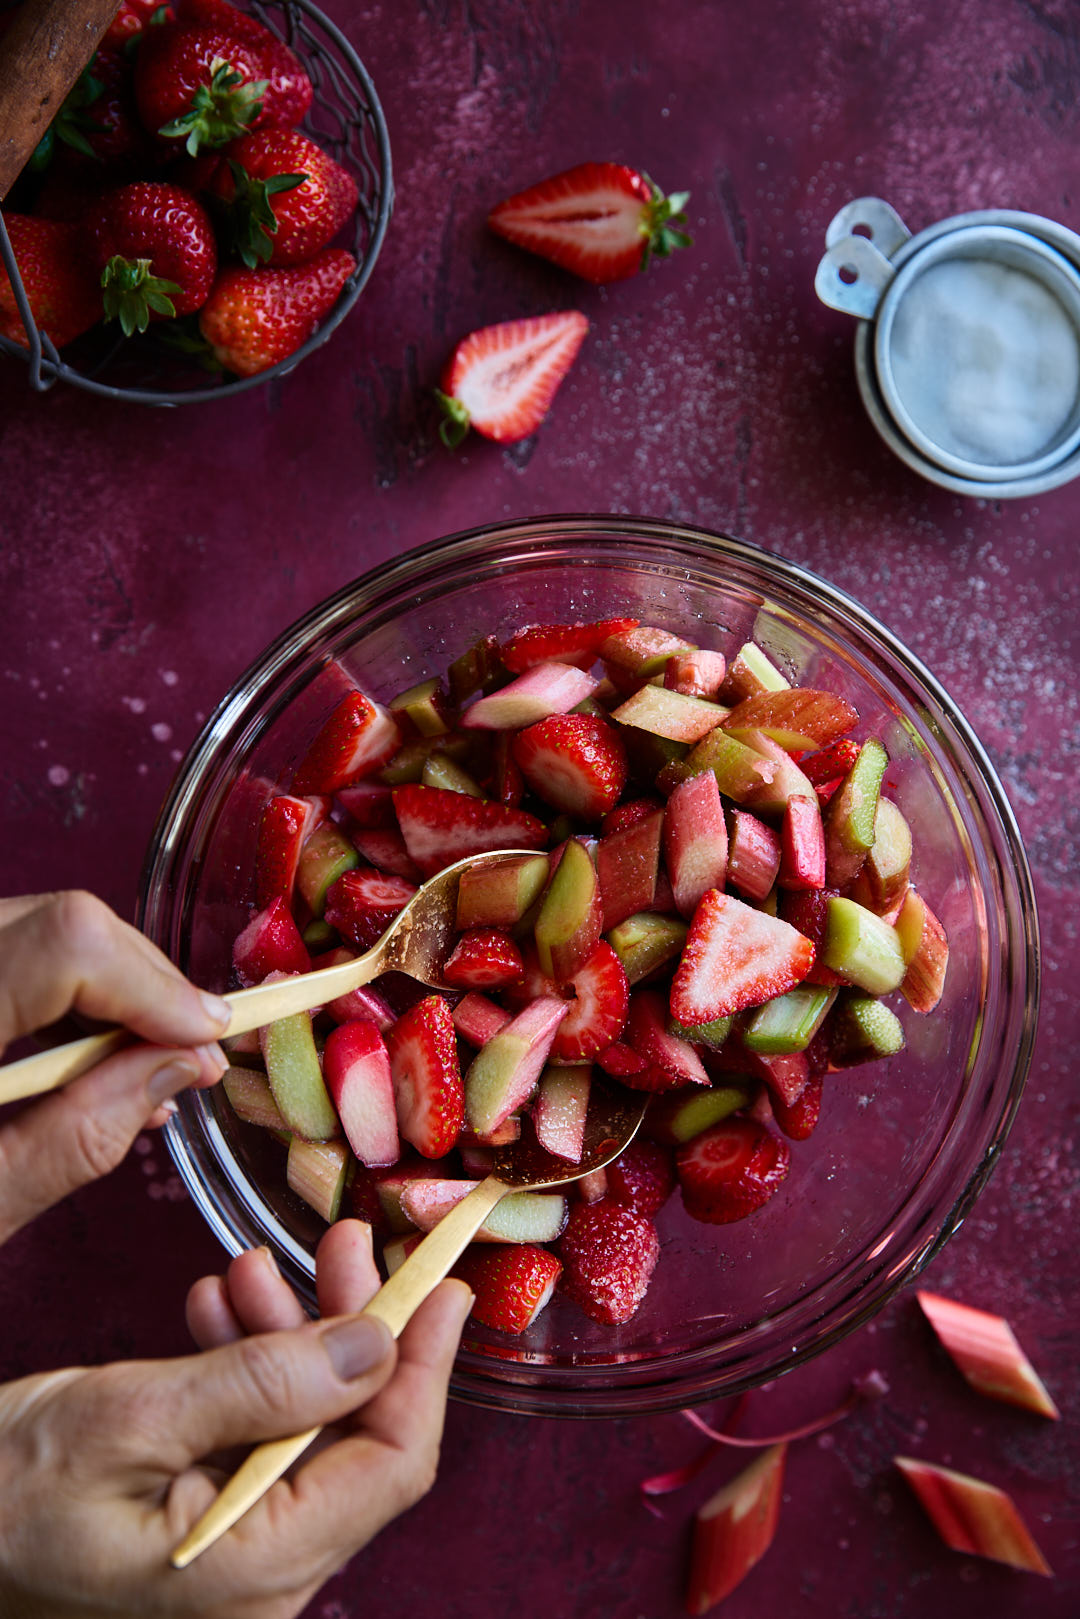
While the dough is chilling, mix the strawberries and rhubarb with some sugar and let it sit to macerate for a while. It will release lots of liquid which we will use to make a glaze later.
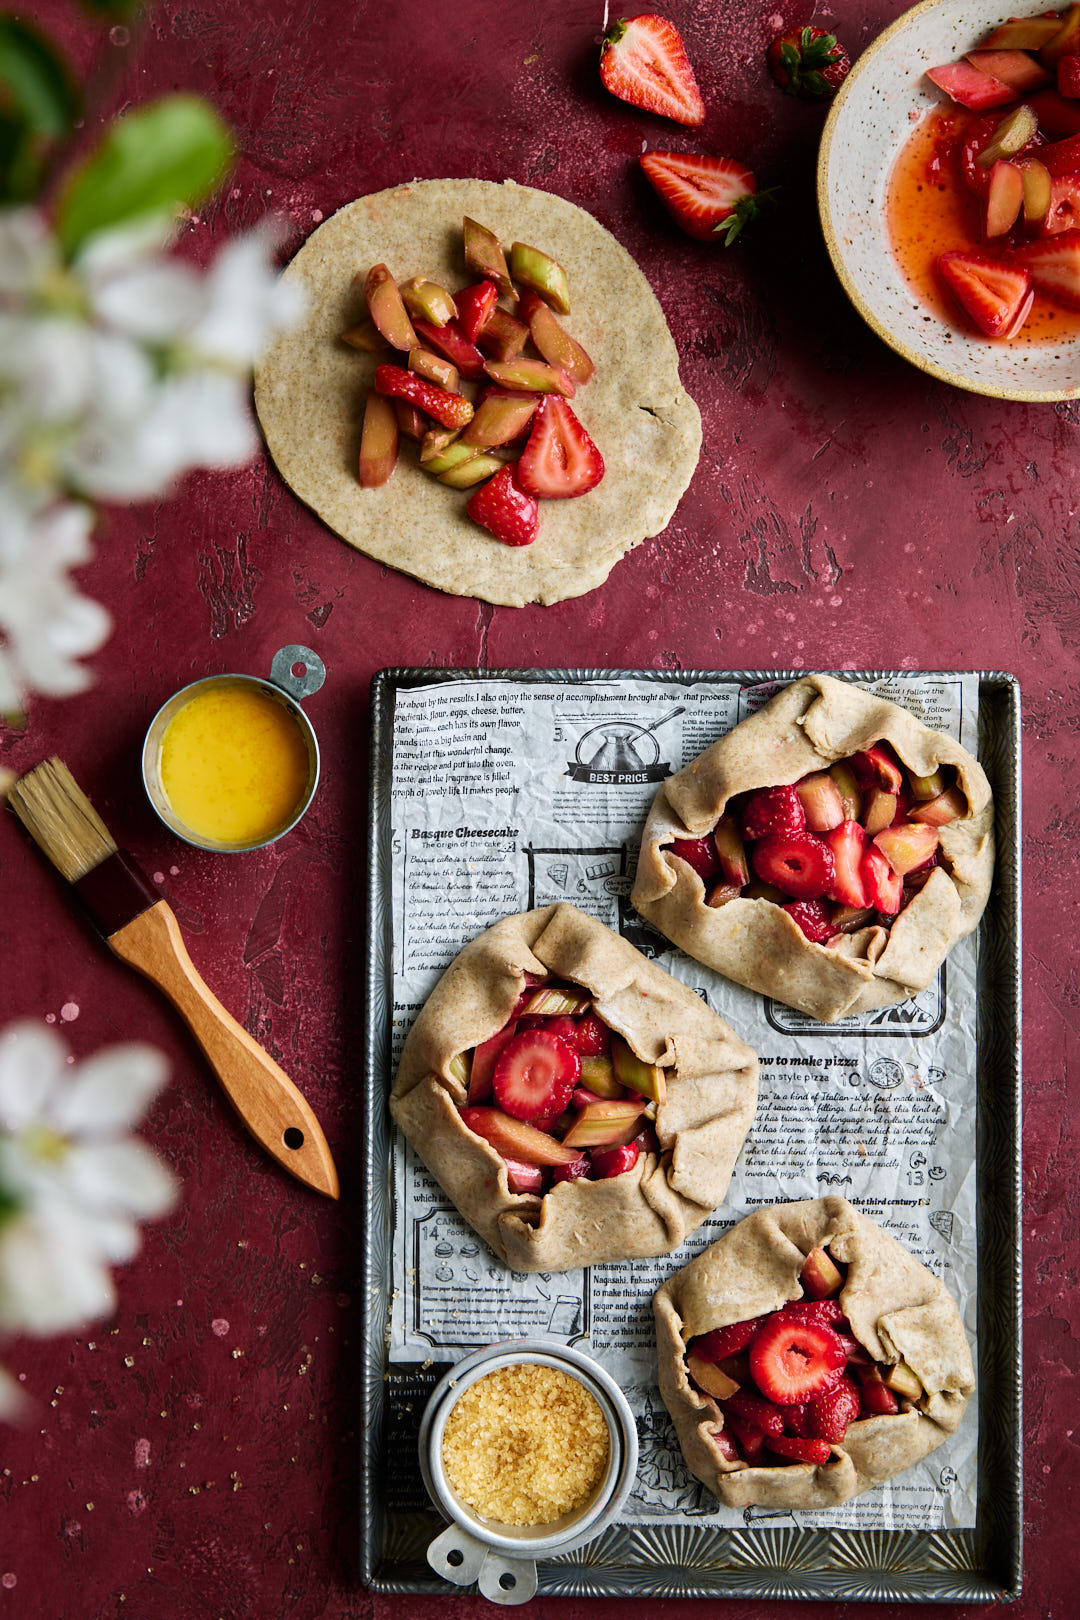
You can make one big galette or several mini personal sized ones, your choice. Galettes are a free-form tart. Just fold the dough up over the sides. It will pleat naturally, it’s meant to be rustic looking. That is part of the galette aesthetic.
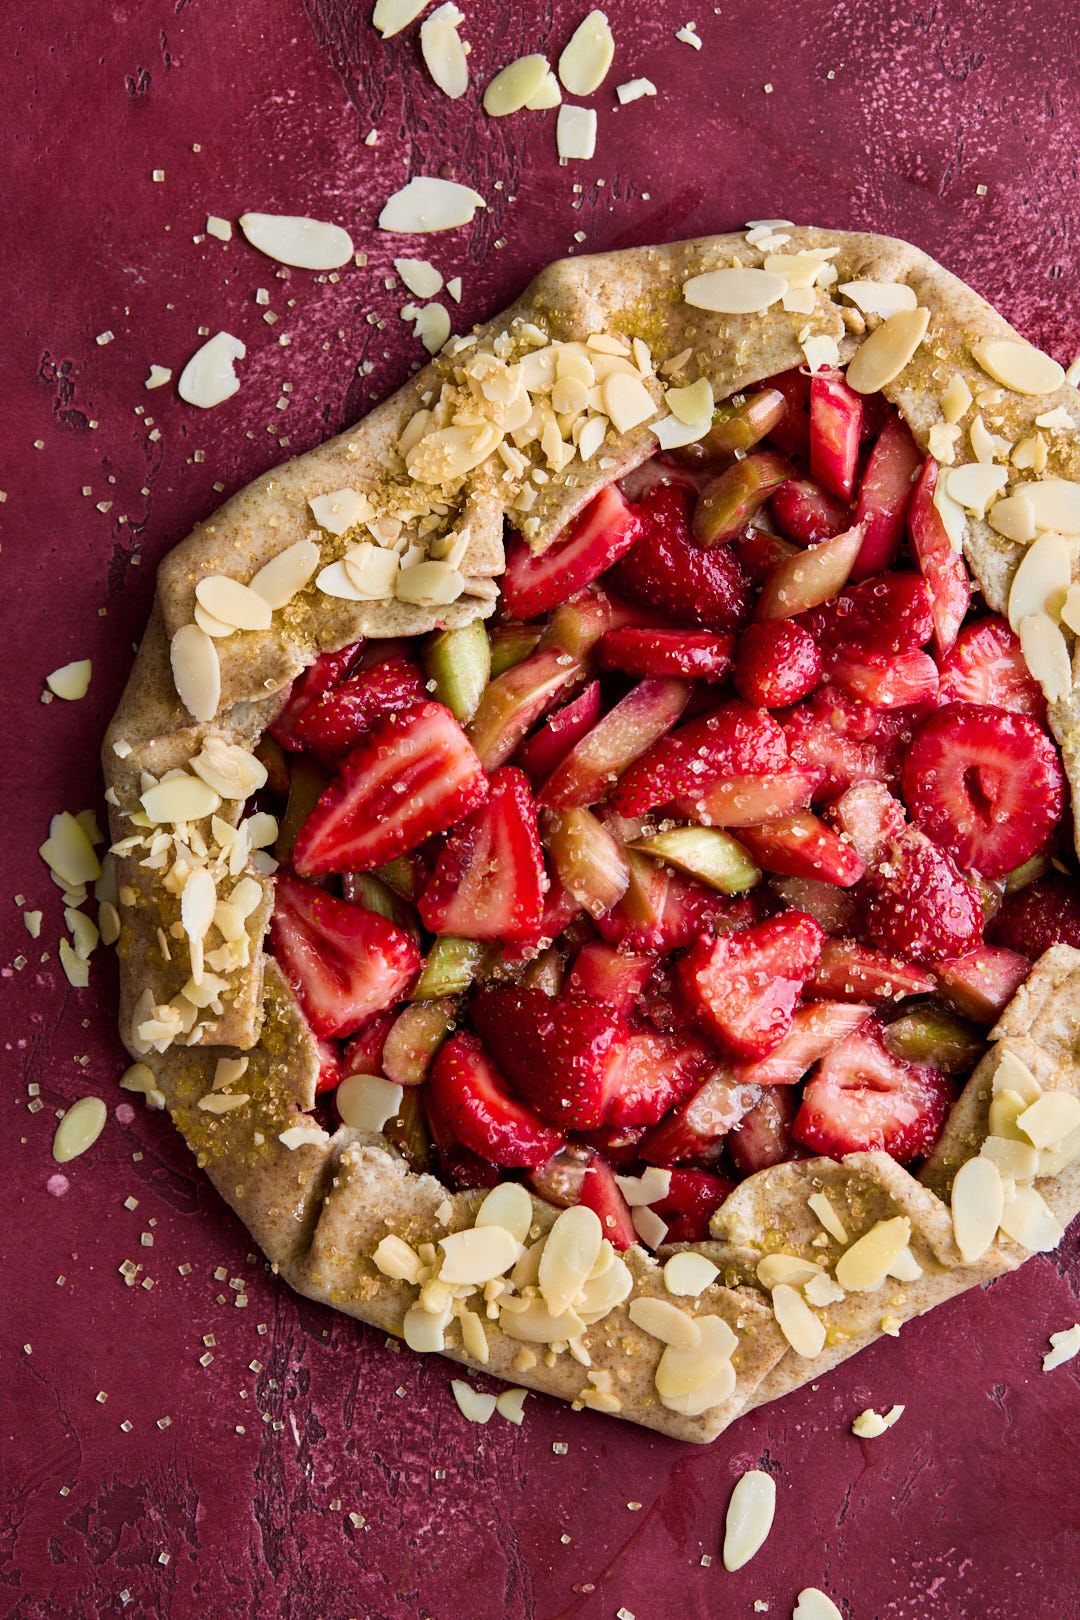
Brush it with egg wash and sprinkle with coarse sanding sugar. Give the galette a good chill in the fridge before baking, to firm up the butter in the dough. Halfway through the baking time, add a few tablespoons of sliced almonds to the rim of the galette. If you add them at the beginning of the baking time, they will burn. I love the added crunchy texture they add to the crust.
Sift the dry ingredients into a large bowl, adding back any bits of grain or other ingredients that may remain in the sifter. Add the 1/2-inch pieces of cold butter.
Rub the butter between your fingers, breaking it into smaller bits. Continue rubbing until the butter is in sizes ranging from peas to hazelnuts. The more quickly you do this, the more the butter will stay solid, which is important for the success of the recipe.
Add the vinegar and 8 tablespoons of ice water to the flour mixture. Working from the outer edge of the flour, mix the ingredients with your hands just to moisten the flour. The dough needs to come together as mostly one lump, with a few shaggy pieces. Squeeze the dough together to see if a ball forms. If it is too dry to come together, add additional ice water 1 tablespoon at a time.
Pile the dough onto a sheet of plastic wrap, sprinkle a few drops of water over the top, wrap tightly, and chill for a minimum of 1 hour or overnight.
Unwrap the dough onto a floured surface. Pat the dough into a square, then use a rolling pin to roll it into a rectangle about 81/2 x 11 inches. The dough will be crumbly and rough around the edges, but don't add more flour or water, as it will come together during the rolling.
For the first turn, fold the dough into thirds like a letter. The seam should be on the left side. Turn the dough so that the seam is at the top and parallel to your body.
For the second turn, again roll the dough into an 81/2 x 11-inch rectangle and repeat the previous step.
For the third turn, repeat the previous step, and then wrap the dough in plastic and chill in fridge for 1 hour or up to 3 days before using, or freezer for up to a month. Thaw dough in fridge if frozen
In a large bowl, stir the strawberries and rhubarb with the granulated sugar, gently mixing until the sugar evenly coats the fruit. Set aside.
Place the chilled pastry on a lightly floured work surface. Roll it into a 13”-14" inch circle, about 1/4" thick. Lay the circle of dough onto a sheet of parchment paper. It will overlap the edges of the paper, but you will be folding it over later when you form the galette. Let the dough rest at room temperature, lightly covered, while you finish the filling.
Drain the strawberry-rhubarb mixture, pressing gently to remove any excess liquid; reserve the liquid for the glaze.
In a small bowl, combine the flour and brown sugar, breaking up any large clumps with your fingers. Add the flour/sugar mixture and lemon zest to the drained fruit. Toss gently until the fruit is evenly coated.
Pour filling into the center of the galette dough, leaving a 2 inch bare pastry border. Brush pastry border with egg wash.
Fold the uncovered border of dough up over the filling, allowing the dough to pleat as you lift it up and work your way around the galette. This sounds harder than it actually is. It will pleat naturally. Place galette onto a rimmed baking sheet and place into fridge for about 30 minutes.
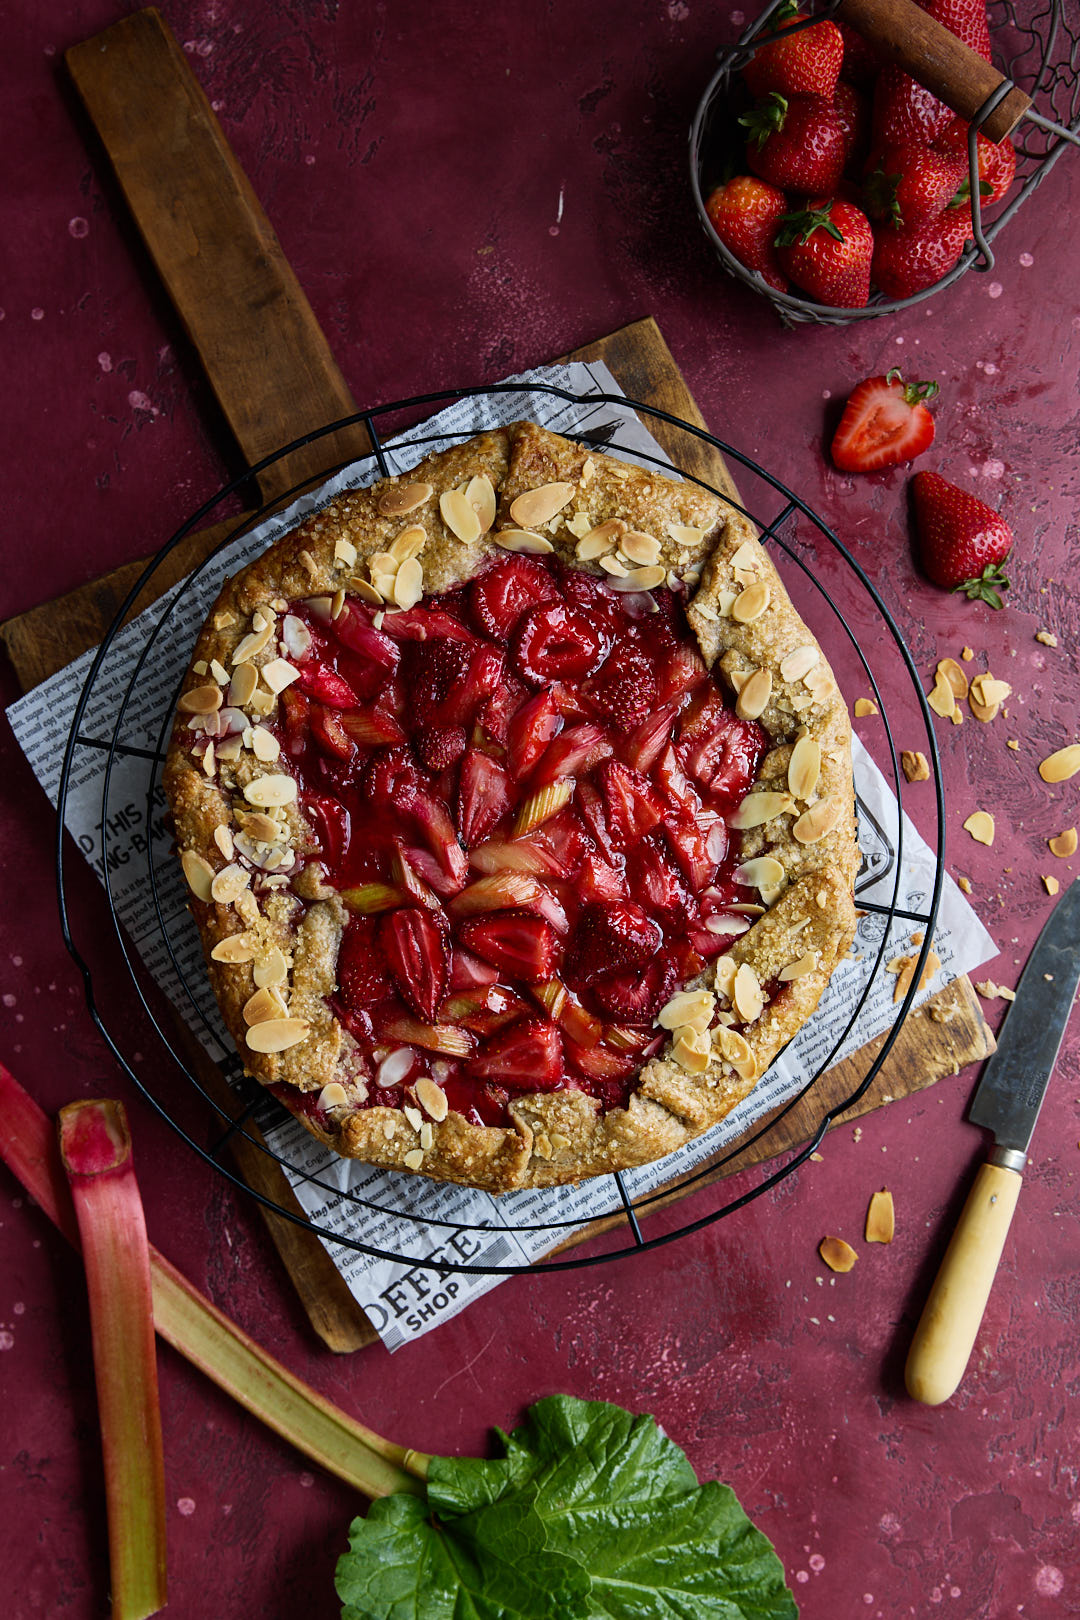
Preheat the oven to 375°F. After galette has chilled, remove from fridge, brush pastry with egg wash and sprinkle with coarse sanding sugar. Bake for 20 minutes. Remove from oven and sprinkle crust with sliced almonds. Return galette to oven and continue baking for a further 10-15 minutes until galette has a firm, golden bottom crust, a bubbling filling, and a deeply coloured, crispy top crust. If in doubt, err on the side of baking the galettes a bit longer. They won’t dry out, and extra time in the oven will ensure a crispy crust.
While the galette is baking, prepare the glaze. Pour the reserved strawberry-rhubarb juice (about 90g, 1/3 cup plus 1 tablespoon) into a small saucepan. Add dried hibiscus flowers if using, Stir in the lemon juice and bring to a boil. Simmer the mixture until thickened, about 5 to 7 minutes; it should be the consistency of heavy cream. Strain glaze to remove hibiscus flowers.
Immediately after baking, brush the glaze onto the fruit-filled center of the galette. Let cool for at least 30 minutes before serving. Garnish with freshly whipped cream or ice cream, or simply enjoy plain.
Notes
The crust for this galette comes from the book, “Good to the Grain” by Kim Boyce and Amy Scattergood. The filling recipe was created by King Arthur Baking. They suggested baking it in a puff pastry crust, but I love the the subtle, nutty, slightly earthy flavour of the rye dough. It complements the strawberries and rhubarb. The dried hibiscus flowers in the glaze are my addition.Totally optional but they add a great tangy flavour to the tart. I happened to have some in the pantry as we use it to infuse gin for a Hibiscus and Gin Tonic. Storage information: Store any leftover galettes, lightly wrapped, at room temperature for a couple of days; freeze for longer storage. Galettes can be re-crisped in a 300°F oven for 10 minutes, or until warmed through.
I hoard rhubarb during the local season and freeze it so that I can be assured of having it all year round. While you can find all kinds of other fruits and vegetables frozen in the supermarket, it’s not that easy to find frozen rhubarb. At least twice a week I mix roasted strawberry-rhubarb compote into my morning yogurt. Here’s what I do:
Preheat oven to 350°F. Line a baking sheet with parchment paper. Place 2 cups frozen strawberries (no need to thaw) and 2 cups frozen sliced rhubarb (no need to thaw) onto baking sheet., Sprinkle with 1-2 Tablespoons granulated sugar. Roast in oven for 15-20 minutes until fruit is tender. Use potato masher to mash fruit into jammy consistency. Store in airtight container in fridge for 2 weeks. Yummy mixed with yogurt, or use as a filling for hand pies, or an addition to cheese for a grilled cheese sandwich.
For more rhubarb deliciousness, check out these other rhubarb recipes.
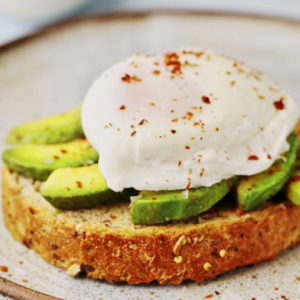
Poached eggs are not something I ever made at home until a few weeks ago. They always seemed so complicated to make. Swirling the simmering water into a vortex and then gently lowering the egg into this seemed like a recipe for disaster. But then I started seeing people making them in the microwave all over Instagram. I wondered if it could really work.
It took me over a dozen eggs until I finally cracked the code! (a little egg humour there). The problem is that all microwaves are different with respect to wattage. Home microwaves can range from 600-1200 watts. Timing will depend on your oven’s wattage. It will take a bit of trial and error, but soon you will be poaching like a pro.
Check out this video to see how I do it.
Tips for success:
Start egg in boiling water rather than room temperature, to give the whites a head start on setting.
Add about a teaspoon of vinegar to the water. The acid helps to coagulate the whites so you do not end up with feathery whites.
Use 80% power. I discovered that 100% power set the yolk too quickly and I had undercooked whites.
Start with the freshest eggs you can find when poaching. With fresh eggs, the yolk sits up high, and the white is thick and surrounds the yolk. An older egg has a thinner, watery white.
Do not crack egg on edge of bowl. It encourages shells to fall into bowl. Crack egg on counter or tap with a spoon to crack it.
Cover the bowl with a microwave safe plate to prevent exploding yolks and to create steam to help whites set more evenly.
After 30-35 seconds, use a spoon to gently turn the egg so that the yolk gets entirely surrounded by the white. Continue cooking for a further 10-15 seconds. If the white is not completely set, continue cooking in 5 second intervals until you learn the sweet spot for your microwave.
Drain egg on a towel right away, to prevent further cooking.
1 teaspoonvinegarwhite wine, rice wine, apple cider or champagne vinegar
Instructions
Fill a microwave safe 1-cup bowl 3/4 full of boiling water from kettle. Add 1 teaspoon vinegar (white wine or any flavour you like).
Crack egg on counter top or with spoon and gently put it into hot water. Cover bowl with microwave safe plate.
Microwave on 80% power for 30 seconds. Uncover plate and use a spoon to flip egg so white has a chance to totally encase egg yolk. Cover bowl with plate again and microwave on 80% power for 15 more seconds. If egg white is not totally set continue cooking for 5-10 second intervals.
Drain with slotted spoon and place on towel to dry. Repeat with fresh water and vinegar for second egg if desired.