Author Archives: saltandserenity

Apple Cider Browned Butter Baked Doughnuts

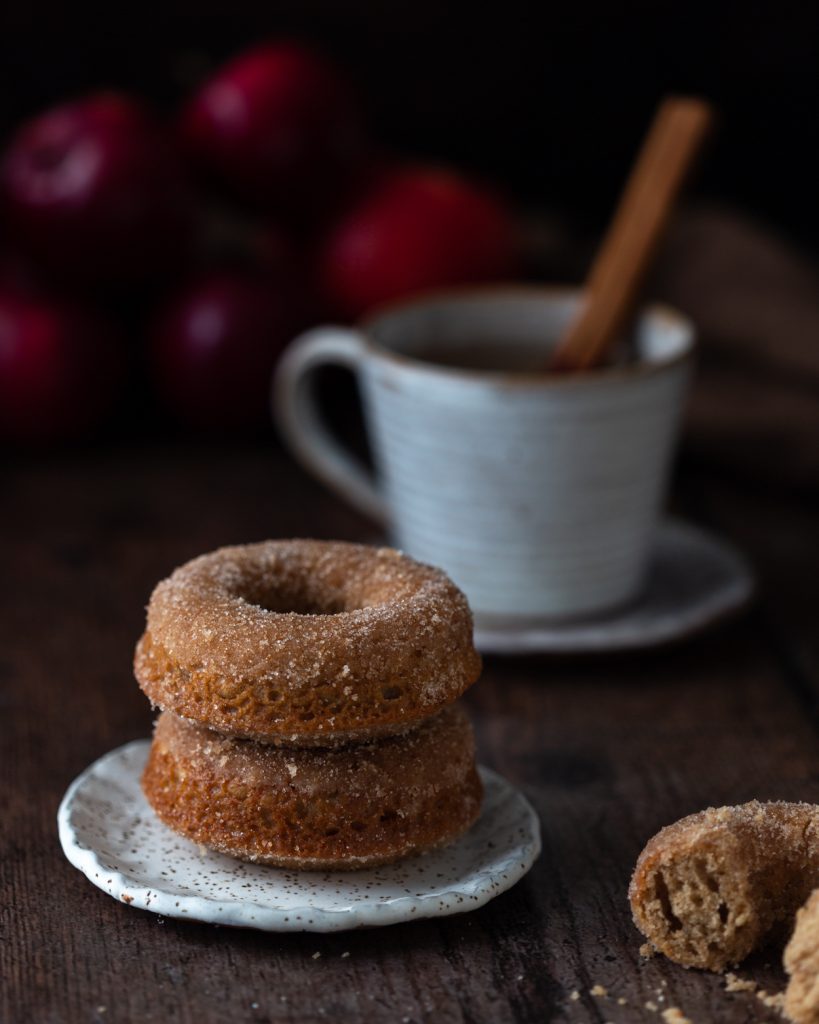
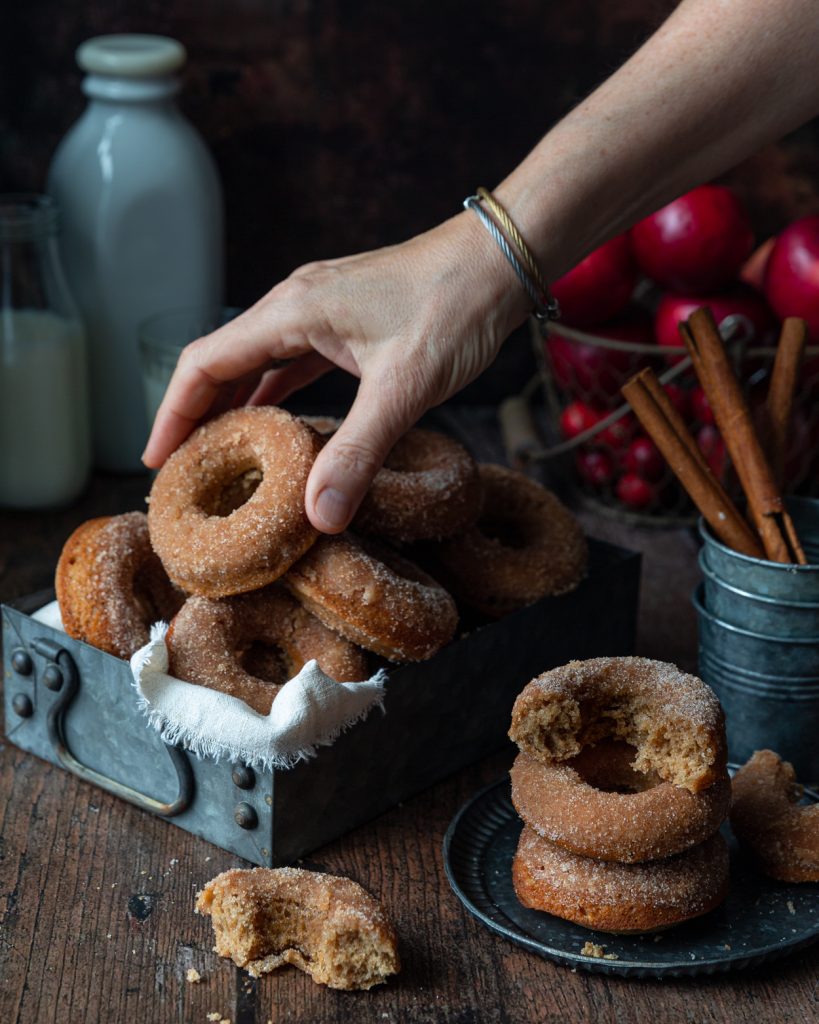
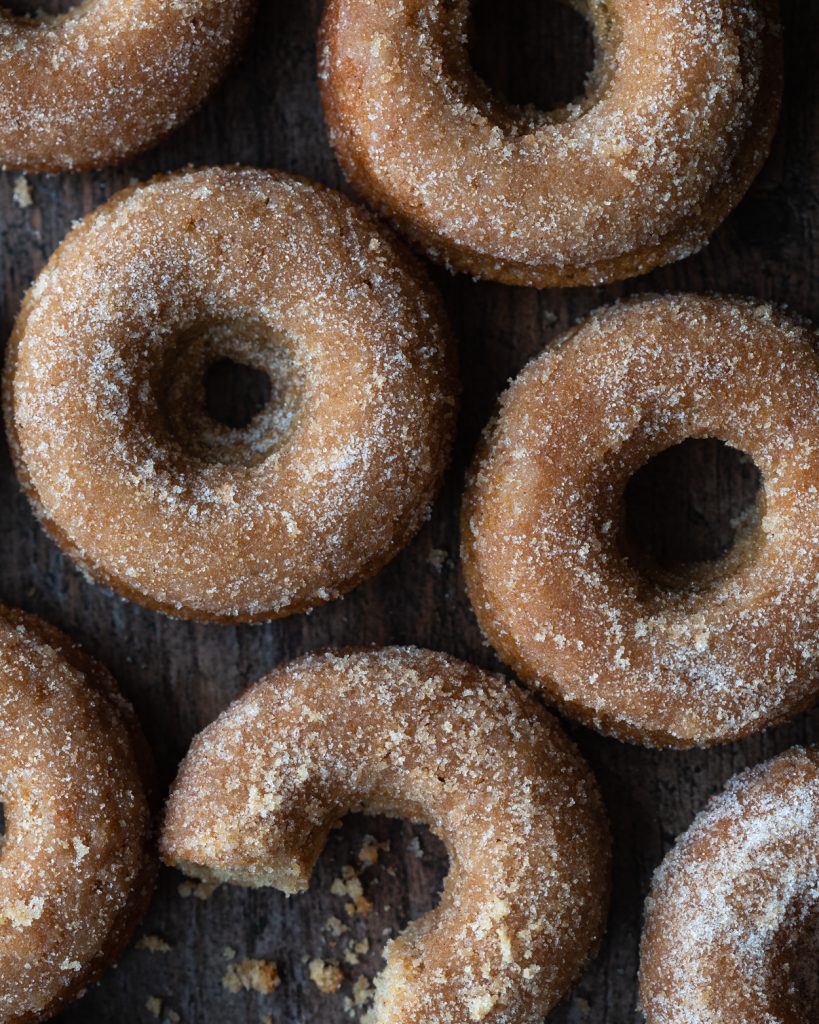
These Apple Cider Browned Butter Doughnuts are the best thing I have baked all year. Yes, I realize that’s a bold statement, given the number of things I have baked in 2020. (It’s been a heavy baking year… we all deal with stress in our own way, don’t judge!)

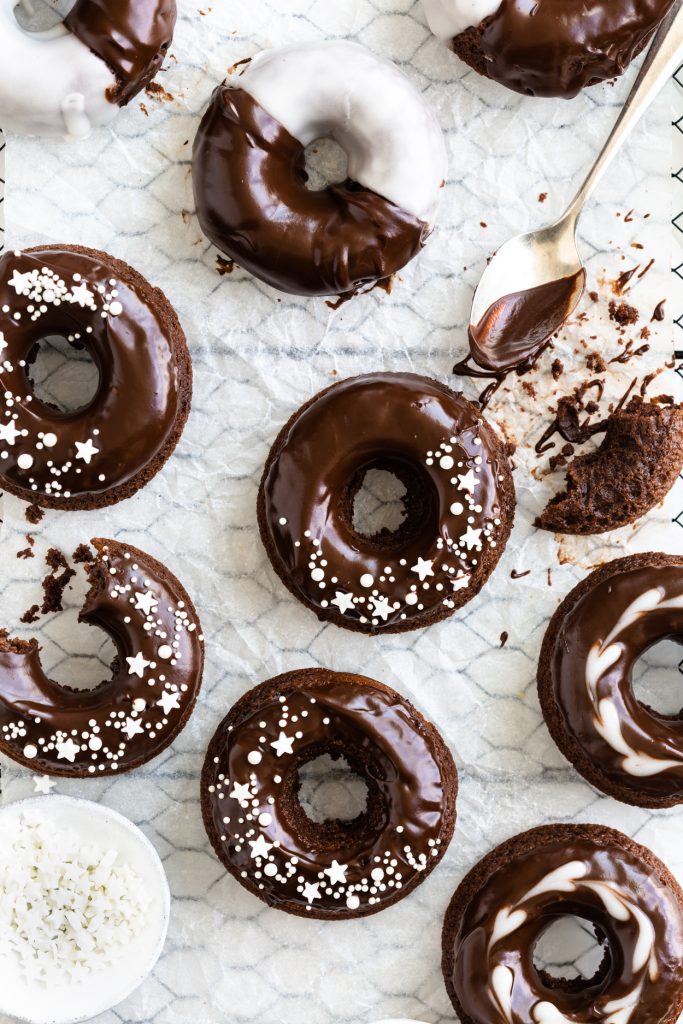
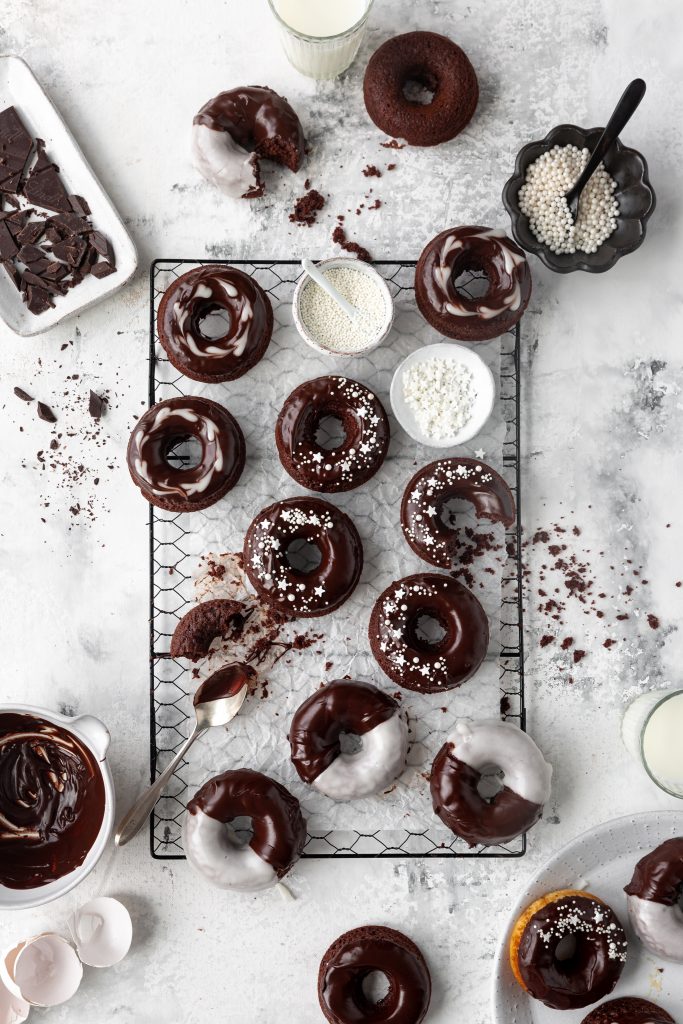
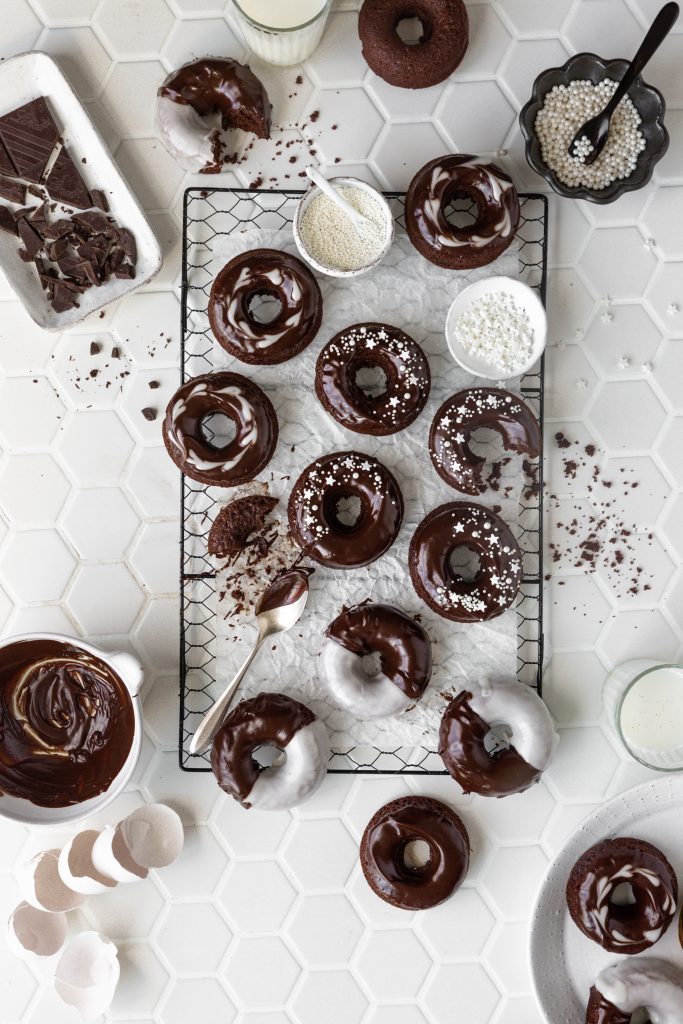
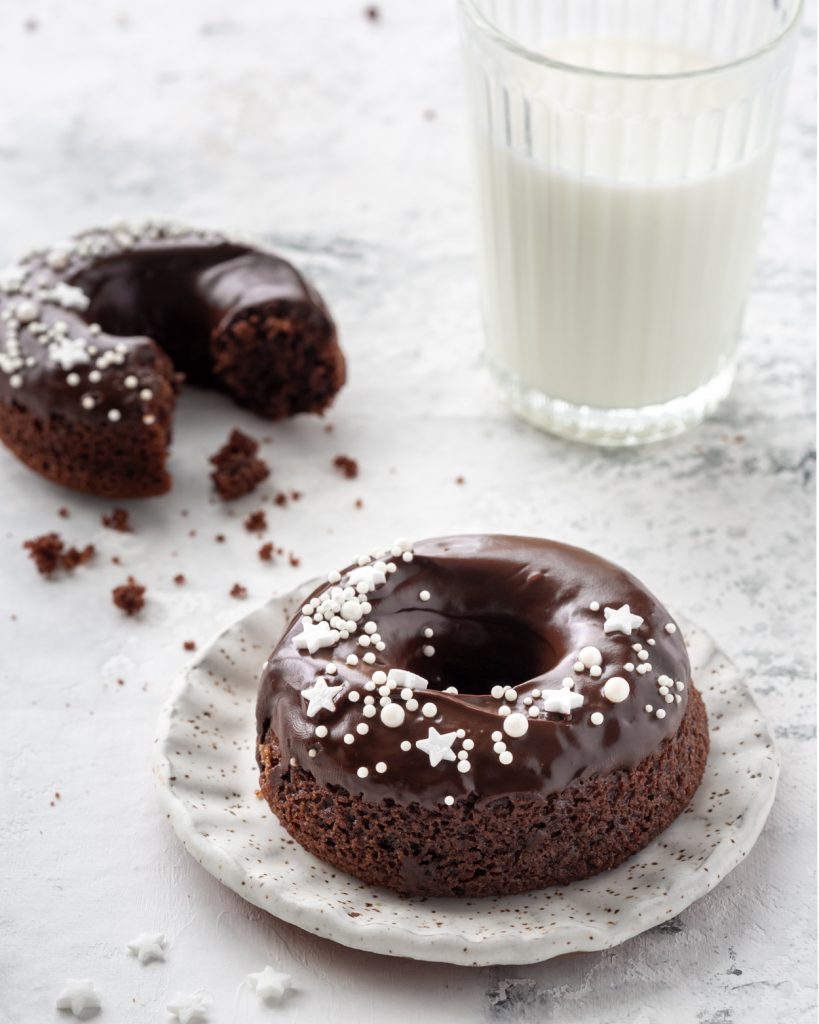
Granted, these doughnuts are not as pretty as my black and white ones from a few weeks ago, but OMG, the taste and texture of these is off-the-charts fantastic. I was inspired to bake these after seeing a recipe for Apple Cider Doughnut Cake from food writer Tara O’Brady. I subscribe to her newsletter and every week I get a charming, informative and beautifully crafted email.

Tara baked the batter in a loaf pan. Her description of this loaf is so lyrical. I want to write like this when I grow up.😉 “Out of the oven the texture is almost spongy; jaunty and open. As the cake sits, it settles, relaxing into a sturdiness that is exactly right and as it should be. The crust establishes itself with a gentle crunch as it meets the teeth, while the centre fluff gives way with a velvet weight.

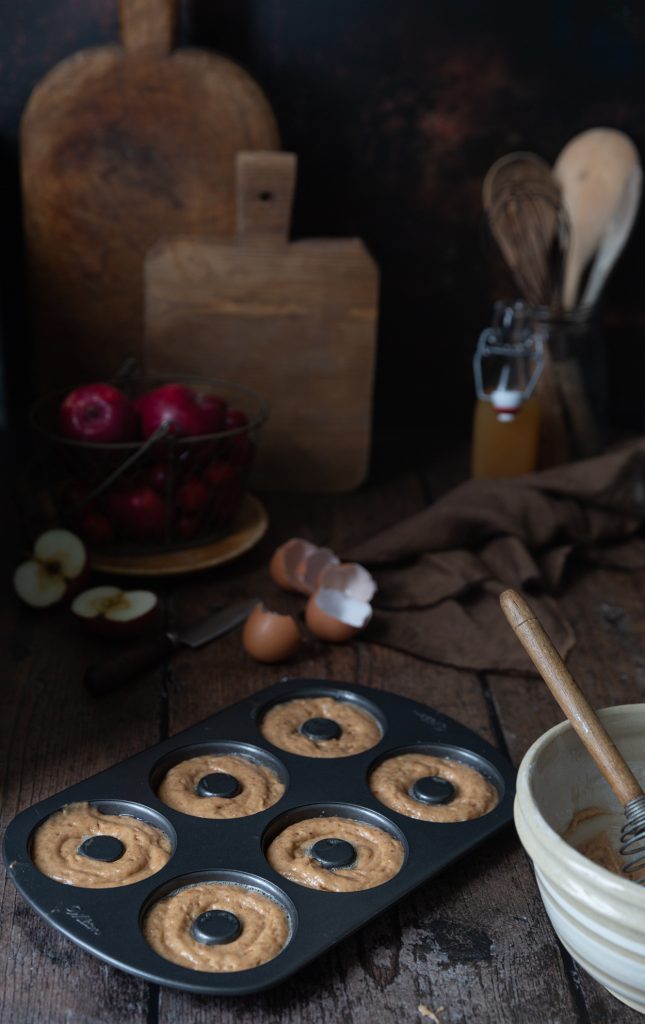
I made the loaves and fell in love with her recipe. Apples are featured prominently. The batter calls for reduced apple cider and applesauce. I wondered what would happen if I baked the batter in doughnut pans. You could also bake them in muffin tins, but they will take a few minutes longer to bake.

As I was assembling the ingredients, I realized I had run out of applesauce, but I had a jar of apple butter leftover from baking this.

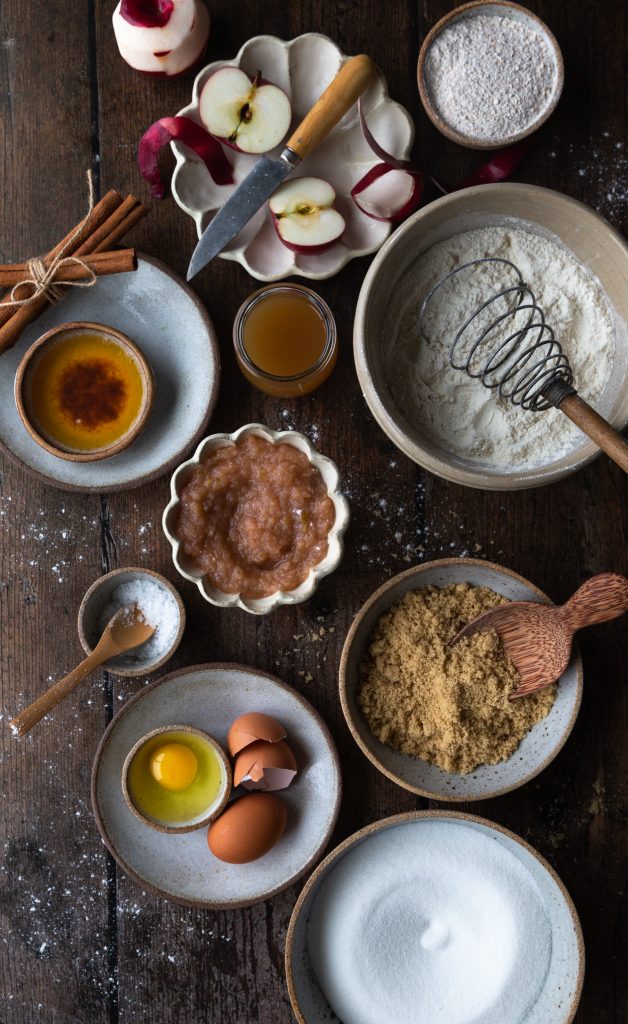
There is no actual butter in apple butter. Apple butter is basically concentrated applesauce, or as I like to describe it, “applesauce on steroids“. Alex Delaney wrote a brilliant article explaining the difference.

The doughnuts come together fairly quickly. You will need to reduce the apple cider and brown the butter in advance.

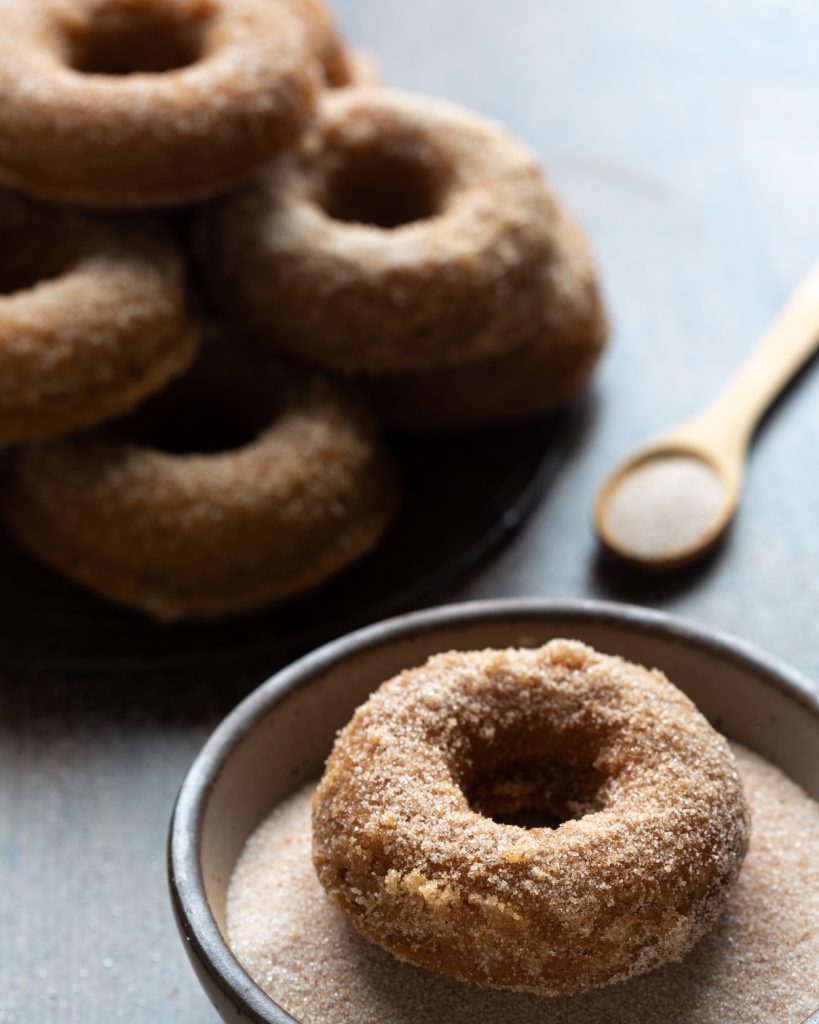
While the doughnuts are delicious plain, dipping them in browned butter and then rolling them in cinnamon-sugar takes them over the top, so don’t skip this step!

I baked these doughnuts several times, the first time to just test the recipe, the second time to shoot the photos and the third time to shoot the video. Luckily I live in a condo and have several neighbours who happily take the leftovers. I also discovered that they freeze beautifully. Wrap individual doughnuts in plastic wrap and place them all in a freezer bag. They will thaw at room temperature in about 45 minutes.

Blackberry and Lemon Stripe Cake and Happy Birthdays

Each year, my birthday gift to myself is to spend the day creating an elaborate, multi-step cake. In 2019 it was this showstopper, in 2018 I spent all day creating this stunner, in 2017 I baked this beauty and in 2016, this was my featured cake.

Baking is my happy place and I love to challenge myself with advanced techniques to create something I have never done before. This vertical stripe cake has been on my list of “must bake” for quite a while now. Cutting into a cake and revealing vertical layers of cake and icing, instead of the usual horizontal, is such an unexpected delight and surprise. There are so few good surprises left in life anymore.

This cake is inspired by the Lemon and Blackcurrant Stripe Cake in Sweet. I could not find black currants, so I used blackberries instead. The berries are used to make a sauce to flavour the buttercream. In the original recipe, they used some of the sauce to create a “drip cake”, but I have never been successful in getting the sauce to drip artistically down the sides. I always make a bloody mess. I decided to just top it with some berries and flowers and use the extra sauce to serve on the side.

The batter for the cake is a light lemon sponge. It’s baked in a jellyroll pan.

Once the cake is baked, let it cool for 5 minutes. Then dust with icing sugar, and cover with a clean towel. Flip the whole thing over, peel off the baking sheet and parchment paper and roll up the warm cake in the towel.

This step “trains” the cake to roll up later without cracking. Once cooled, unroll and cut into three long rectangles.

Spread each rectangle with some of the buttercream. The original recipe called for a French buttercream. This type of buttercream uses egg yolks. I find it a bit too rich for this cake, so I went with a Swiss Meringue Buttercream, which uses just the egg whites.

The three strips of cake are rolled up into one wide barrel. Stand it on its end and you have a vertical stripe cake. You can see in the photo below, where the strips have been joined. Then cover the entire cake in more buttercream.

I created a simple decoration of flowers and blackberries.

Black and White Malted Baked Donuts

I created these black and white donuts as a homework assignment for an online photography course I am taking. The essence of the course is to learn how to style, plan and compose your food shots like the professionals and magazines do.

If you are a food photographer or blogger, I highly recommend this class. The course creator, Rachel Korinek, is a supremely gifted photographer and teacher, not to mention a real sweetheart! I have purchased several online courses and Rachel is one of the few teachers that is constantly adding new material to the course, stays continually engaged with her students and is available for help and feedback. She has created an amazing Facebook community for her students.

This assignment was to create a monochromatic scene where the background, props, and food all fit within your colour palette. I decided to go all black and white. The challenge is to make sure that there is enough interest and texture so that the image does not look flat or boring.

The first choice I had to make was which background to shoot on. I had two options in mind. I shot on both to see which I preferred.

The first was a black, grey and white painted canvas.

The second was a graphic hexagon tile.

I put it out to our Facebook community and there was no clear winner. It was almost a 50/50 split. Some people felt the tile was too busy and took away from the donuts. Others really liked that graphic detail. I am a Libra, so I was undecided😉. The canvas backdrop is softer and more ethereal, while the tile is more punchy and graphic. What do you think?

To add interest and layers, I decorated the donuts in three different ways; some half black and half white, some black with white sprinkles and some black with a white piped design. I had a few of the donuts unglazed and a few donuts had bites taken out of them. I placed the donuts on parchment paper, and lay that on a black cooling rack, for additional layers. Donut crumbs were sprinkled around for more texture.

The most challenging part of the photo shoot, was arranging so many items in the scene, in an aesthetically pleasing arrangement. There are different compositional tools/guides that you can use to help you. The general idea is to place the main or important subjects along intersecting lines, or within the created squares or triangles of the guide, and let the eye be lead. Some of the tools/guides, like the rule of thirds or the golden triangle, are simpler to use.

Rachel challenged us to use a more complex tool called dynamic symmetry. This is my image, with the dynamic symmetry guide superimposed over it, so you can see how I used some of the lines to help me place all the items. This photo shoot took hours!

To be completely honest, the donuts, while quite beautiful, were way too sweet for me, because of all the glaze. If you have a big sweet tooth, here is the recipe.

Rigatoni with Spicy Sausage and Roasted Tomatoes

It’s only mid-October, and already I’m missing those sweet local farmer’s market tomatoes. It’s going to be a long winter!

When I’m craving that sweet summer tomato taste, roasting little grape or cherry tomatoes is the next best thing. Roasting caramelized the tomatoes and brings out their inherent sweetness and can mask any bitterness.

This pasta dish comes together in less than 30 minutes. Start with tossing halved little tomatoes with honey, olive oil, garlic salt and pepper and get them into a hot oven for about 15 minutes. While they’re roasting, remove the meat from the sausage casing and start browning it up in a skillet. To keep things vegetarian, I used Beyond Meat Spicy Italian Sausage. It is plant based, but so closely resembles the real thing, in both taste and texture, it’s amazing.

Put on a big pot of water to boil. Add a bit of tomato paste to the browned sausage and a few cups of jarred tomato sauce. I love Rao’s marinara sauce. They sell it at Loblaws now! Just be sure to pick a sauce with no added sugar. Simmer the sauce while the noodles cook. Save about 1/2 a cup of the starchy pasta water before draining.

Add drained pasta and roasted tomatoes to the sauce. Mix well and stir in some of the reserved pasta water to bring the sauce together. Transfer to a platter and add a few spoonfuls of ricotta. Sprinkle with parmesan and fresh basil. Close your eyes and imagine it’s still summer. You’re welcome.

Pear and Kale Salad

If we’re being completely honest here, I must confess that salads in the salt and serenity kitchen are usually served tossed, in a stainless steel mixing bowl and eaten while standing over the sink. Perhaps some of you loyal readers can relate.

I created this salad as a homework assignment for a course I am taking on food composition from the immensely talented Rachel Korinek. The objective was to focus on the macro-level of styling salad. Let the salad be the hero and fill the frame.

I went grocery shopping to get inspired. I ignored all the obvious orange fall produce like pumpkins and squash. I dislike pumpkins (well, more like detest pumpkin spice, but that’s a rant for another day) and I always cook with squash, so that didn’t present much of a challenge for me. When I saw these gorgeous Starkrimson red pears, I knew I had found my intended. The shape of pears is so graceful.

Once I had chosen my hero, I could figure out the rest. I added some pomegranates because they add shine and a beautiful jolt of red. If you have ever studied colour theory, you know that the complementary colour choice to red is green (opposites on the colour wheel). I went for a mix of greens, kale for a dark emerald shade and arugula for a a hit of brighter green.

I picked up some shallots. Their violet colour be a beautiful accent against the red and green. Pickling them would add a sour counterpoint to the sweet pears. For crunch, I candied some walnuts in maple syrup.

I decided to plate this on a cutting board (top photo), for a casual feeling. I saw Jamie Oliver do this on his show and you know how I feel about Jamie Oliver! I decided to roast the pears instead of using them raw in the salad. I sliced them two different ways for a variety of shapes.

Apple Rose Tart

Sometimes when I post things, I think, “who is actually going to make this?” This Apple Rose Tart is one of those things. It took a few hours to create this beauty. It is my take on Julie Jones’ incredible Apple Rose Tart. I have been obsessed with baking it for a while now. I finally decided to tackle it last week.

I was listening to Sprout podcast last week, on the subject of Creating a Space for Judaism in the Lifestyle World. Rebekah Lowin was being interviewed and something she said resonated strongly with me. “Things don’t have to be fast and easy. They can be a little bit challenging. Sometimes giving yourself a challenge is beautiful and a more interesting way to live your life.”

My girlfriend Sandy and I were chatting last week, about how we want to spend our time, at this point in our lives. We are both empty nesters. She said she is looking to pare down her time in the kitchen. She only wants fast, easy recipes. I had to laugh, because at this point in my life, I only want to create and photograph beautiful food. If it takes a bit longer, I’m ok with that. I have always had a very strong sense of aesthetics. It drives my husband crazy that I insist on labelling jars with my label maker, in a specific font and not just masking tape and a marker.

So, even f you don’t plan to create this tart, I hope that you can enjoy my journey and still appreciate the beauty. If you do plan to make it, I have included a very detailed recipe and a video showing how to create these beautiful apple roses.

Julie’s version of the tart uses a basic shortcrust pie dough. I decided to use a pâté sucrée instead, which uses more sugar and some eggs. It has the crumbly melt in the mouth texture of a shortbread cookie and I thought it would pair perfectly with tart apples.

I used a rectangular tart pan (11×7 inches) but a 9 inch round pan would work perfectly. The pan should have a removable bottom. The tart is first filled with an almond frangipane (ground almonds, eggs, butter and sugar).

The apples need to be sliced quite thin (1mm or 1/16 inch). A mandolin is best for this job. Core apples and cut in half, vertically. Once sliced, they go into a bowl of cool water with lemon juice to help prevent browning. Then, they are microwaved until pliable and don’t crack when you bend them. This takes about 5-8 minutes, depending on your microwave. Then the fun part begins. It’s not actually difficult, it just takes time. I found the process quite meditative.

Apple Caramel Cake

I’m passionate about apple cake, so when my Instagram friend Dee, boasted that her apple cake was the BEST ever, you can bet that got my attention. Of course, I had to go over to her blog and check it out. I had a sneaky feeling I knew exactly which recipe she used, and I was right. The recipe came from her mother-in-law, who got it from the Second Helpings Please! Cookbook. Every Jewish mother, worth her salt, cooked from this book in the 1970’s. I don’t recall my mom using this book though. We ate mostly frozen foods in the 70’s.

I first learned about this apple cake at one of my very first professional cooking jobs. I was working in an upscale take-out food shop in Toronto’s Yorkville area called Dinah’s Cupboard. I learned so much from Dinah Koo, the shop’s owner. She demanded perfection and precision. She cooked with big flavours and was a master at presentation. I am forever grateful to her for teaching me so much. It was my job to make 4 of these cakes every day. We baked them in 9×13 inch rectangular cake pans and cut the cakes into large squares to sell in the shop.

Dinah’s twist on the Second Helpings classic was to soak the just baked cake in a caramel sauce. How bad could that be? As soon as it comes out of the oven, poke holes all over the cake and pour on caramel sauce so it has an opportunity to soak in. This is a moist, dense, intensely flavourful cake. Because I’m fancy, I baked mine in a Bundt pan with 2 layers of apples sandwiched between 3 layers of batter. Watch how it all comes together.

Ombre Tomato Galette with Everything Seasoning

It’s impossible to leave the Farmers Market at this time of year with anything less than several kilos of tomatoes. The array of varieties in September is dizzying. Of course I always buy way more than I can possibly eat.

Whenever I buy too much of any fruit, the answer is always a galette. (free form tart). Why not a savoury galette with tomatoes? I start with my favourite galette dough. It has a bit of cornmeal in it for a touch of crunch and some sour cream to add richness and tenderness.

Feel free to use whatever tomatoes you have on hand. I made some larger galettes with regular sized tomatoes and a few smaller ones with cherry and grape tomatoes.

The galettes come together quite quickly. Basil pesto, grated pecorino romano cheese and some milky ricotta form the base. Tomatoes go next. The rim of the galette is brushed in egg wash and sprinkled with Everything Bagel Seasoning. (poppy seeds, sesame seeds, dehydrated onion, garlic and salt.)

I like to lightly salt the tomatoes after slicing them and lay them on some paper towels for a few minutes. This helps to release their juices so the galette isn’t too juicy. About 50 minutes in a hot oven and they are done. I love them best just warm or at room temperature, which makes them a great make ahead meal.

Homemade French Fries

When I was growing up, French fries at home meant the frozen kind, that you baked in the oven. I was raised on all kinds of frozen foods, Swanson TV dinners, chicken pot pies, and Sara Lee frozen banana cake (I never waited for it to thaw). It was the 70’s and we were a modern family.

My mom would never consider deep frying at home. She had an extremely acute sense of smell, (sadly, that has changed) and the scent of oil lingering in the air would drive her crazy. We joked that she could smell an odour 1 day before it occurred.

It wasn’t until I went to Culinary school, that I learned the correct way to make real French fries. You need to fry the potatoes twice. The first fry, at 320°F, cooks the inside. The exterior will still be quite pale andthe fries will be limp. Then, crank up the fryer to 375°F for a second round. Fry until crispy and golden brown. Salt them as soon as they come out of the fryer.  

Now, my friend Brigitte will tell you that you need to fry them three times. She’s Belgian. They also give three kisses. It does get them extra crispy, so give it a try and see what you think.

I have posted about French fries on this blog a few times, here, here and here. I realized the photos needed an update. Here’s an image I took in 2012. It’s fun to look back and see how my skills have developed.

Last week my daughter reminded me that it was almost September and we hadn’t made French fries even once all summer long. So we busted out the deep fryer (it gets used twice a year, once in the summer for fries and again at Chanukah for donuts).

There will undoubtedly be those that insist on ketchup, but mix up a batch of chipotle mayo as well and surprise those traditionalists. Chop up one chipotle chili in adobo sauce and mix it into a cup of Hellman’s mayo. Brigitte makes her own mayo, but she’s special that way!😉

Blueberry Maple Pie

There are many reasons to bake a pie.

  • To use up the extra fruit you so greedily bought at the farmer’s market.
  • To carry on family traditions.
  • To make your pie loving husband happy.
  • To fulfill your daily requirement of fruit. (And leftovers are perfect for breakfast)

But none of those reasons are why I baked this Blueberry Maple Pie. I’ll be honest, because we’re amongst friends here, right? I just wanted an excuse to buy a multi-wheel pastry cutter. They are the coolest kitchen tool ever!

The crust for this pie is buttery and supremely flaky. The recipe was created by Paul Arguin, winner of the 2017 National Pie Championship. Lots of butter, as you would expect, but just a small amount of shortening to aid in flakiness. There is also a minute amount of baking powder, contributing to the flaky texture. A few teaspoons of cider vinegar prevent excess gluten formation, assisting in preventing a tough crust. Finally, Paul added a hint of cinnamon and a spoonful of maple sugar to the crust for flavour. I can see why he was the 2017 champion.

The filling is sweetened entirely with maple syrup, no sugar. Lemon juice and zest add balance. If you can find wild blueberries, they would make an exceptional pie. I used frozen wild blueberries. No need to thaw them first.

I learned a great tip from blogger Rebecca Blackwell. She uses a combination of tapioca and cornstarch to thicken the filling. She says that, “Too much cornstarch can make fruit pie filling cloudy and give it a slightly chalky taste. Tapioca creates a berry filling that is bright and clear, but can sometimes result in a gluey consistency. Combining smaller amounts of both cornstarch and tapioca is a great solution, creating a glossy, luxuriously silky filling that holds its shape when sliced.”

If you don’t have the inclination or time to make a lattice crust and braided rim, just top the pie with a plain crust. It will still be delicious. If you want to get all fancy, you’ll need to make a double recipe of the pie crust. For the lattice, I did a combo of wide (2 inch) and narrow (3/4 inch) strips. The braid was made using 1/2 inch wide strips. For braiding, it’s important that your dough not be too cold or it will crack. I slice it while cold and then let it soften up a bit before braiding.

Here’s a video showing you how to form the lattice and beautiful braid.

Brush with egg and sprinkle with coarse sugar before baking. Start with a hot (400°F) oven for the first 30 minutes. Then cover the rim with foil and turn down the heat to 375°F for the last 30 minutes.

Do not slice the pie for at least 4-6 hours! It needs time to set up so that you will have slices that look picture perfect! Vanilla ice cream or whipped cream is always a good idea. Any leftovers will keep for several days in the fridge. You can also wrap individual slices in plastic wrap and freeze for later. It reheats perfectly.